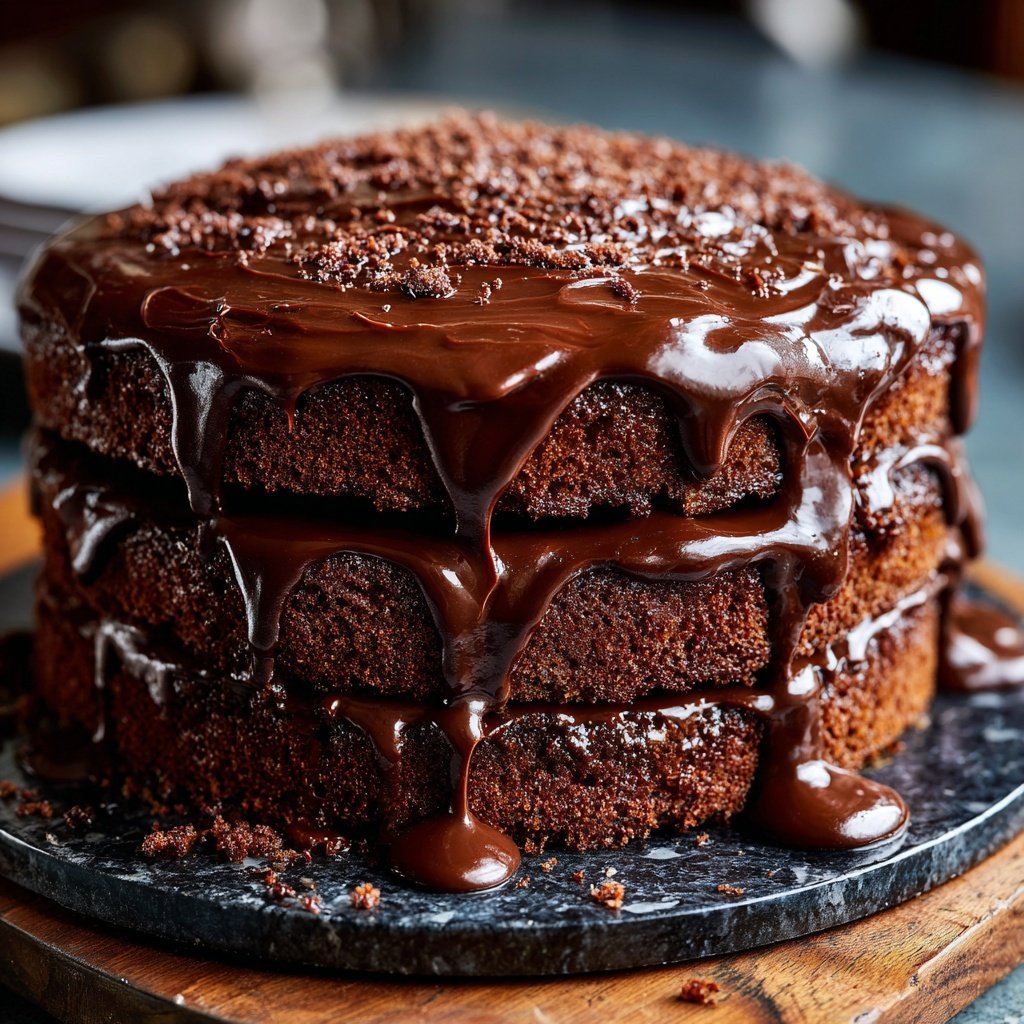
Chocolate Cake Made With Sour Cream
Highlighted under: Sugar & Spice
I absolutely love making this chocolate cake using sour cream; it yields a rich, moist texture that’s hard to resist. The deep chocolate flavor pairs beautifully with the tanginess of sour cream, making every bite a delightful experience. Whenever I bake this cake, the kitchen is filled with the sweet scent of chocolate, and it always invites eager taste testers. Plus, it’s straightforward to make, letting me spend more time enjoying delicious slices with family and friends.
When I first experimented with adding sour cream to a chocolate cake recipe, I was amazed at how it transformed the final product. The moisture from the sour cream created a luscious texture that kept the cake fresh for days. I recommend allowing the cake to cool completely before frosting to prevent the icing from melting. This small tip made a huge difference for me!
After sharing this cake at a family gathering, I was thrilled by the compliments and requests for the recipe. I realized that the combination of rich chocolate with the slight tanginess of sour cream is an unexpected but delightful pairing that always impresses my guests.
Why You'll Love This Recipe
- Rich chocolate flavor paired with a hint of tang from sour cream
- Incredibly moist texture that stays fresh longer
- Easily adaptable for any occasion, from birthdays to casual get-togethers
The Role of Sour Cream
Sour cream is a key ingredient in this chocolate cake, adding not just moisture but also an intriguing tang that cuts through the sweetness. The acidity of sour cream helps to activate baking soda, contributing to the cake’s rise and tenderness. If you find yourself out of sour cream, plain yogurt can be a perfect substitute, maintaining that essential moisture while adding a similar flavor profile. Just keep in mind that the yogurt might be a bit thinner, so adjust the batter consistency if necessary.
Another benefit of using sour cream is its ability to keep the cake fresh for days. Cakes made with sour cream tend to stay moist longer than those that don’t. This makes it a wonderful option for gatherings where the cake might sit out for a little while, as it resists drying out and maintains its rich texture. For best results, store any leftover cake covered in an airtight container at room temperature for up to three days.
Frosting Tips for Success
For the frosting, achieving the right consistency is crucial. You'll want it to be spreadable without being too runny, as it should hold its shape on the cake. Start by beating the softened butter until it’s creamy and pale; this usually takes about 2 to 3 minutes. Adding the cocoa powder gradually will help prevent lumps, so be patient and mix thoroughly until the frosting is smooth. If the mixture seems too thick, incorporating a teaspoon of milk at a time can help achieve that perfect creamy texture.
As you frost the cake, consider using a bench scraper or an offset spatula for a beautifully smooth finish. When layering, ensure that the first cake layer is level; if it has domed while baking, trim the top with a serrated knife for easier stacking. A simple technique is to place a dab of frosting on the plate under the first layer to prevent it from sliding. This small step can save you a lot of frustration when it comes to presentation.
Serving and Storage Suggestions
This chocolate cake is incredibly versatile; it can be served as-is for a simple dessert or dressed up for special occasions. For an extra touch, serve each slice with a dollop of whipped cream or a scoop of vanilla ice cream, enhancing the cake’s chocolate flavor while adding a creamy contrast. A sprinkle of chocolate shavings or fresh berries on top not only makes for an impressive presentation but also adds fresh notes to the rich cake.
When it comes to storing the cake, slice leftovers and store in an airtight container to lock in moisture. For longer storage, consider freezing the cake layers. Wrap each layer tightly in plastic wrap and then in aluminum foil, keeping them in the freezer for up to three months. When you’re ready to enjoy, simply thaw them overnight in the fridge and frost as desired for a fresh cake experience.
Ingredients
Gather these ingredients to create your delicious chocolate cake.
Cake Ingredients
- 1 3/4 cups all-purpose flour
- 1 1/2 cups granulated sugar
- 3/4 cup unsweetened cocoa powder
- 1 1/2 tsp baking powder
- 1 1/2 tsp baking soda
- 1 tsp salt
- 2 large eggs
- 1 cup sour cream
- 1/2 cup vegetable oil
- 2 tsp vanilla extract
- 1 cup hot water
Frosting Ingredients
- 1/2 cup unsalted butter, softened
- 2/3 cup unsweetened cocoa powder
- 3 cups powdered sugar
- 1/3 cup milk
- 1 tsp vanilla extract
Make sure you have all these ingredients ready before you start baking!
Instructions
Follow these steps to bake the perfect chocolate cake.
Prepare the Oven
Preheat your oven to 350°F (175°C) and grease two 9-inch round cake pans.
Mix Dry Ingredients
In a large bowl, whisk together flour, sugar, cocoa powder, baking powder, baking soda, and salt.
Combine Wet Ingredients
In another bowl, beat the eggs, then add sour cream, vegetable oil, and vanilla extract. Mix thoroughly.
Incorporate Mixtures
Gradually add the wet ingredients to the dry ingredients, mixing until just combined. Slowly stir in hot water.
Bake the Cake
Pour the batter evenly into the prepared pans and bake for 30 minutes, or until a toothpick comes out clean.
Cool the Cake
Remove the cakes from the oven and let them cool in the pans for 10 minutes before transferring to a wire rack to cool completely.
Prepare the Frosting
In a bowl, beat softened butter until creamy, then add cocoa powder, powdered sugar, milk, and vanilla. Mix until smooth.
Assemble the Cake
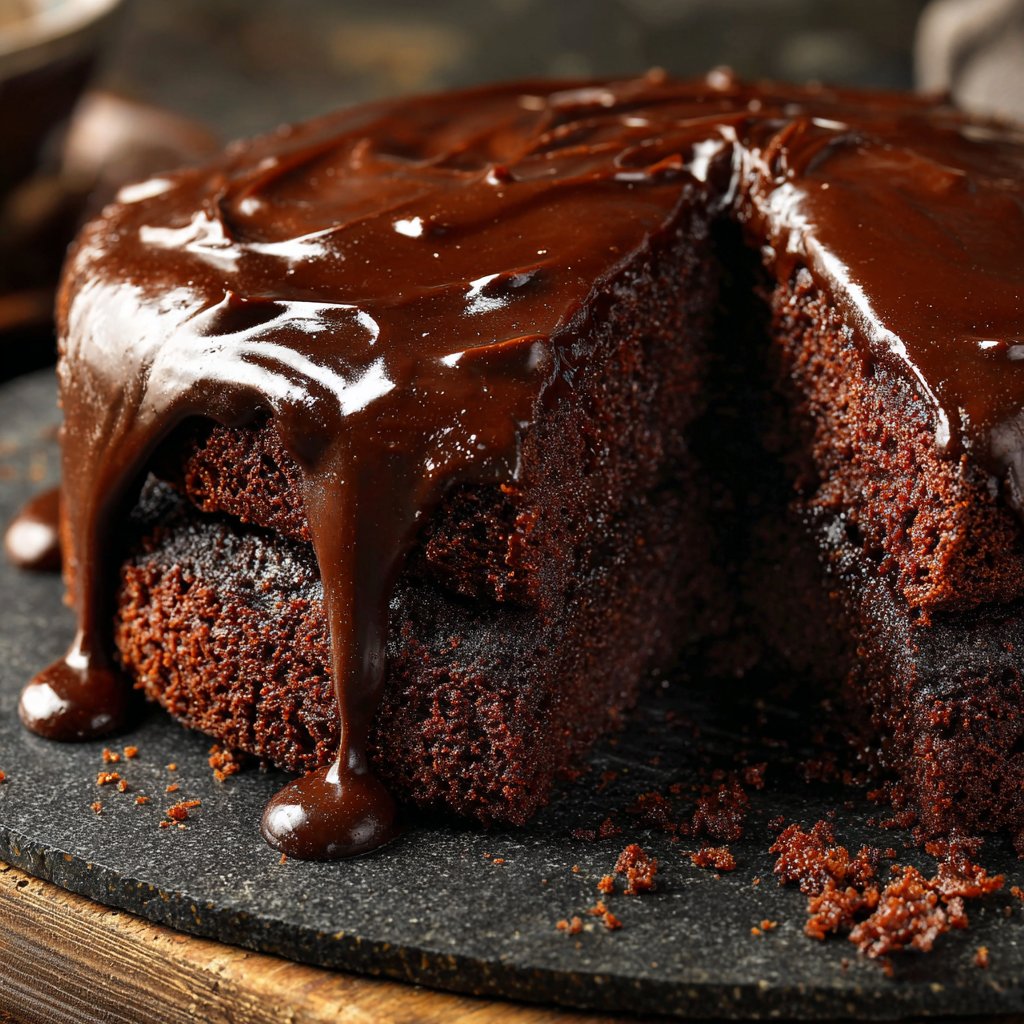
Once the cakes are completely cool, place one layer on a serving plate, spread frosting on top, and place the second layer. Frost the top and sides.
Your chocolate cake is now ready to be enjoyed!
Pro Tips
- For an extra touch, consider adding chocolate chips to the batter for bursts of chocolate in every slice.
Key Techniques for Baking Success
When baking the cake, ensure that your oven is fully preheated to 350°F (175°C). This temperature is crucial for even baking and achieving that perfect rise. To check if the cake is done, insert a toothpick in the center—it should come out clean or with just a few moist crumbs. If the cake is still wet, be cautious about overbaking, as this can lead to a dry texture. Use a timer and start checking at the 25-minute mark.
Once the cake is out of the oven, resist the urge to rush the cooling process. Allowing the cakes to cool in the pans for about 10 minutes helps them set, making it easier to remove them without breaking. After transferring to a wire rack, patience pays off—let them cool completely before frosting. This can take an additional 30 minutes to an hour but ensures the frosting won’t melt and slide off.
Ingredient Variations and Substitutions
If you desire a different flavor profile, consider adding a teaspoon of espresso powder to enhance the chocolate flavor without making the cake taste like coffee. This small addition provides depth and richness without altering the primary chocolate taste. For a lighter twist, substitute half of the vegetable oil with applesauce; this not only reduces fat but also adds moisture.
For a gluten-free option, you can replace the all-purpose flour with a gluten-free 1:1 baking flour. Be aware that gluten-free flours can vary in absorption; start with the recommended substitution but be prepared to adjust the wet ingredients slightly if the batter feels too thick or too thin.
Baking Utilities and Tools
Using the right tools can make a significant difference in your baking experience. Invest in high-quality measuring cups and spoons for accuracy—baking is a science, after all! A good set of mixing bowls and a whisk will help you incorporate ingredients thoroughly. When it comes to baking pans, aluminum pans provide even heating, while non-stick pans may help with easy release once the cakes are baked.
Additionally, a food scale can be incredibly helpful for precision, especially when measuring flour or sugar. For those who enjoy a bit of decor, a turntable can assist with frosting the cake evenly and finely. The right tool can elevate your cake-making game!
Questions About Recipes
→ Can I use a different type of frosting?
Absolutely! Cream cheese frosting or whipped cream would pair wonderfully with this chocolate cake.
→ How can I store the cake?
Store the cake in an airtight container at room temperature for up to 3 days or refrigerate to keep it fresh longer.
→ Can I make this cake ahead of time?
Yes, you can bake the cakes a day in advance and frost them right before serving for the best flavor.
→ Is it possible to make this cake gluten-free?
Yes, you can substitute all-purpose flour with a gluten-free flour blend to make it gluten-free.
Chocolate Cake Made With Sour Cream
Created by: Rowan Tate
Recipe Type: Sugar & Spice
Skill Level: Intermediate
Final Quantity: 8 servings
What You'll Need
Cake Ingredients
- 1 3/4 cups all-purpose flour
- 1 1/2 cups granulated sugar
- 3/4 cup unsweetened cocoa powder
- 1 1/2 tsp baking powder
- 1 1/2 tsp baking soda
- 1 tsp salt
- 2 large eggs
- 1 cup sour cream
- 1/2 cup vegetable oil
- 2 tsp vanilla extract
- 1 cup hot water
Frosting Ingredients
- 1/2 cup unsalted butter, softened
- 2/3 cup unsweetened cocoa powder
- 3 cups powdered sugar
- 1/3 cup milk
- 1 tsp vanilla extract
How-To Steps
Preheat your oven to 350°F (175°C) and grease two 9-inch round cake pans.
In a large bowl, whisk together flour, sugar, cocoa powder, baking powder, baking soda, and salt.
In another bowl, beat the eggs, then add sour cream, vegetable oil, and vanilla extract. Mix thoroughly.
Gradually add the wet ingredients to the dry ingredients, mixing until just combined. Slowly stir in hot water.
Pour the batter evenly into the prepared pans and bake for 30 minutes, or until a toothpick comes out clean.
Remove the cakes from the oven and let them cool in the pans for 10 minutes before transferring to a wire rack to cool completely.
In a bowl, beat softened butter until creamy, then add cocoa powder, powdered sugar, milk, and vanilla. Mix until smooth.
Once the cakes are completely cool, place one layer on a serving plate, spread frosting on top, and place the second layer. Frost the top and sides.
Extra Tips
- For an extra touch, consider adding chocolate chips to the batter for bursts of chocolate in every slice.
Nutritional Breakdown (Per Serving)
- Calories: 380 kcal
- Total Fat: 26g
- Saturated Fat: 15g
- Cholesterol: 195mg
- Sodium: 85mg
- Total Carbohydrates: 32g
- Dietary Fiber: 3g
- Sugars: 24g
- Protein: 6g