Free 7 Day Wholesome Meal Plan (Sept 16-22)

0


This post may contain affiliate links. Read my disclosure policy.

A free 7-day, flexible weight loss meal plan including breakfastlunch and dinner ideas and a shopping list. All recipes include macros and Weight Watchers points.

Free 7 Day Wholesome Meal Plan (Sept 16-22)
Skinnytaste Simple promo banner

Free 7 Day Healthy Meal Plan (Sept 16-22)

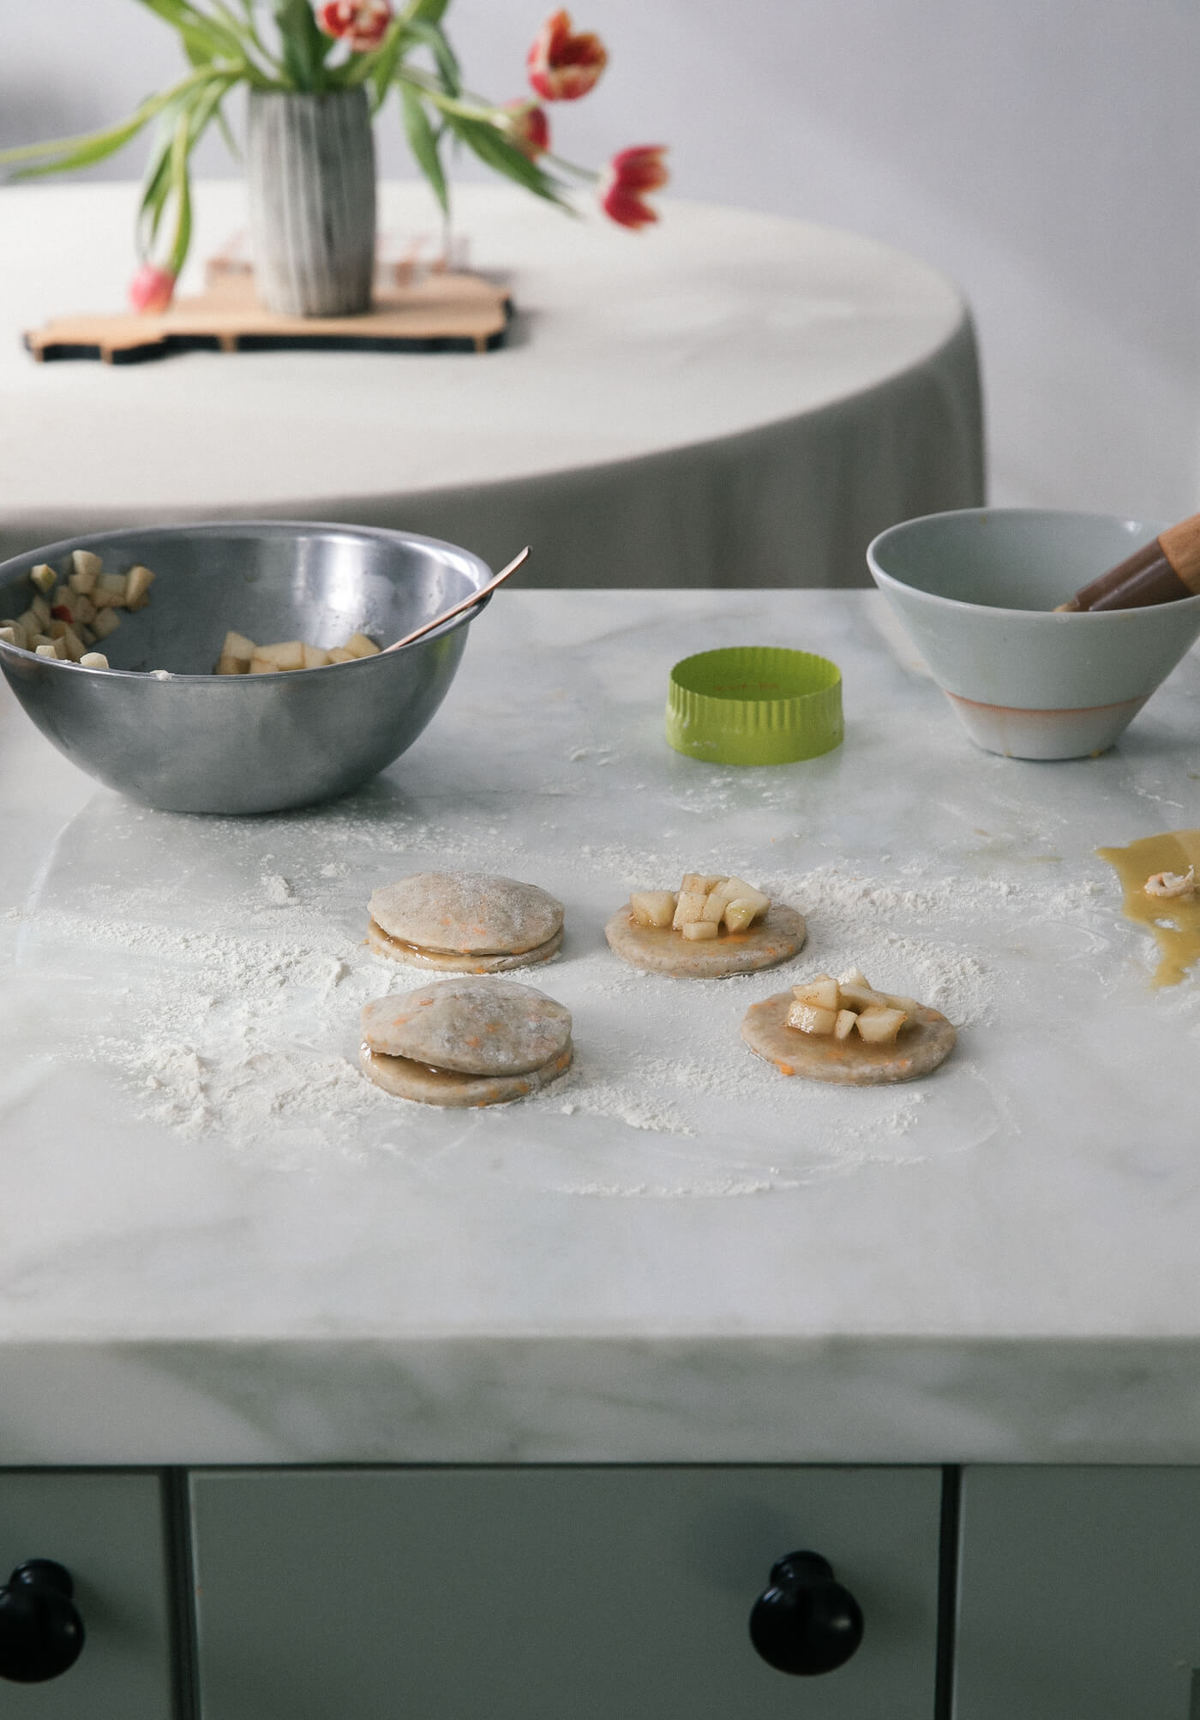
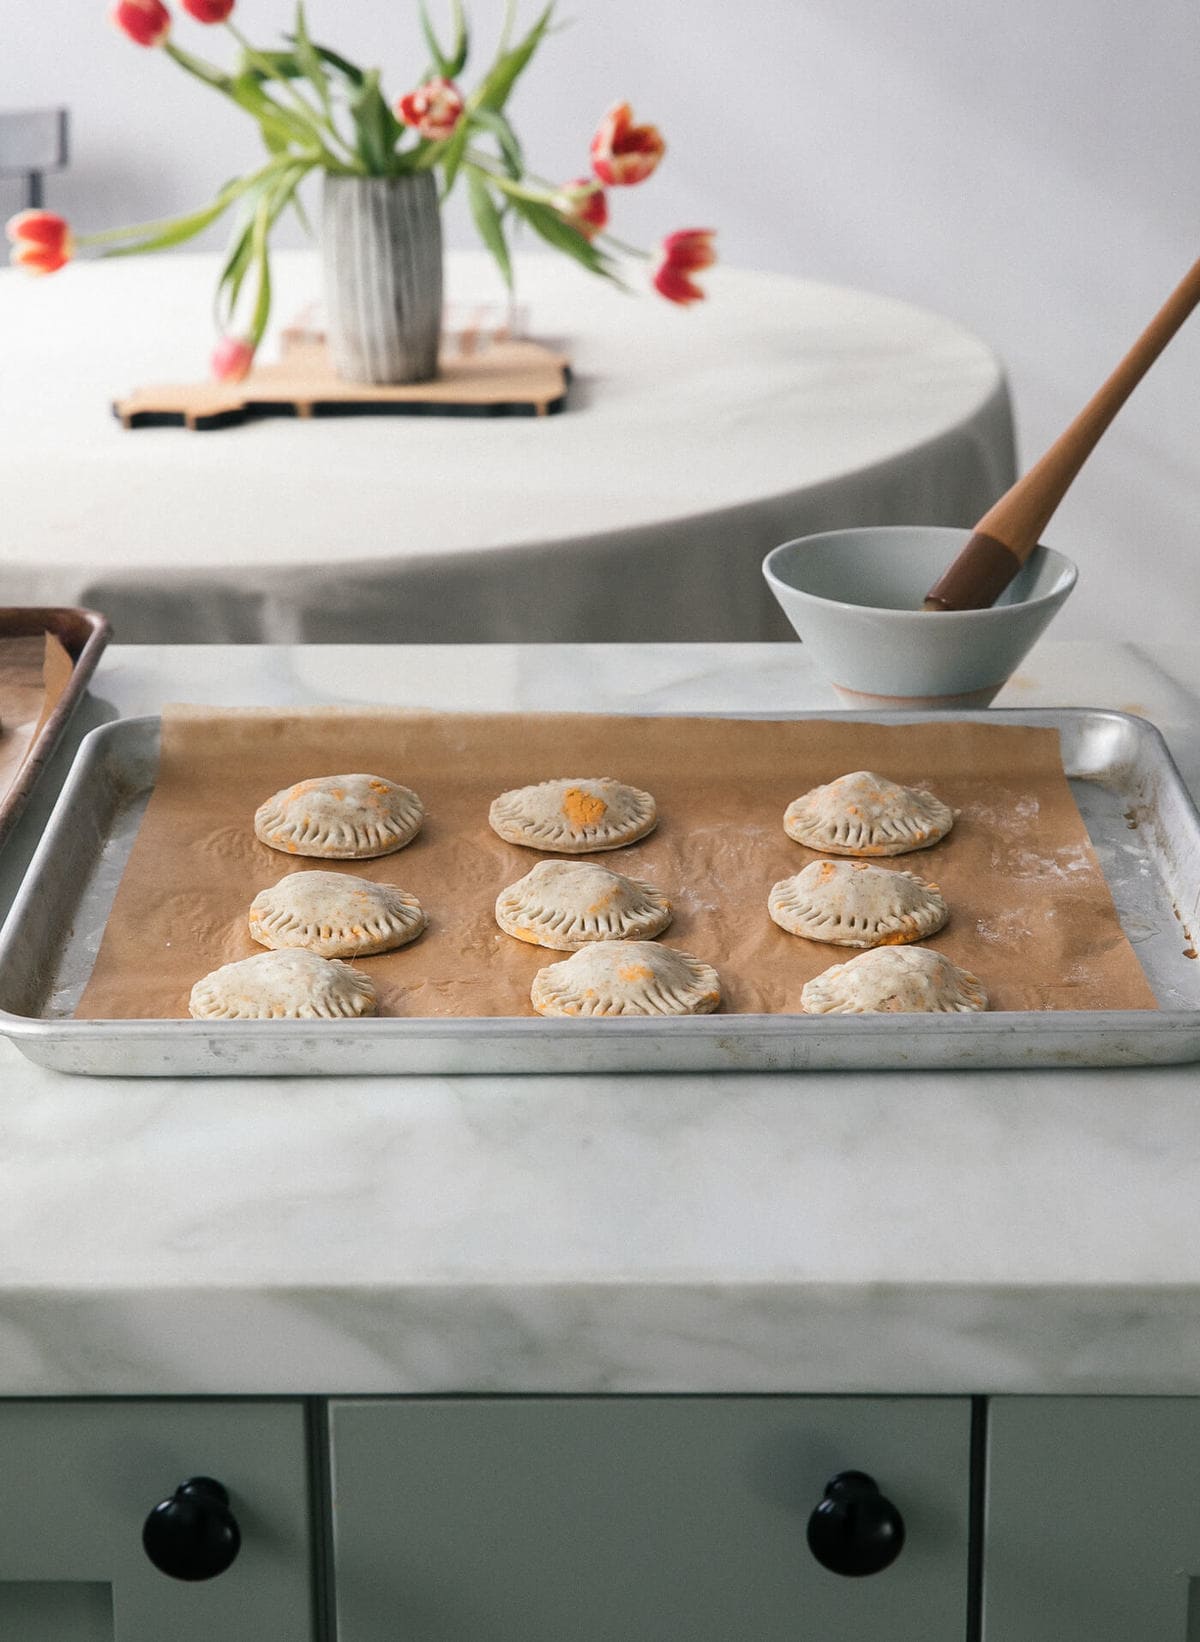
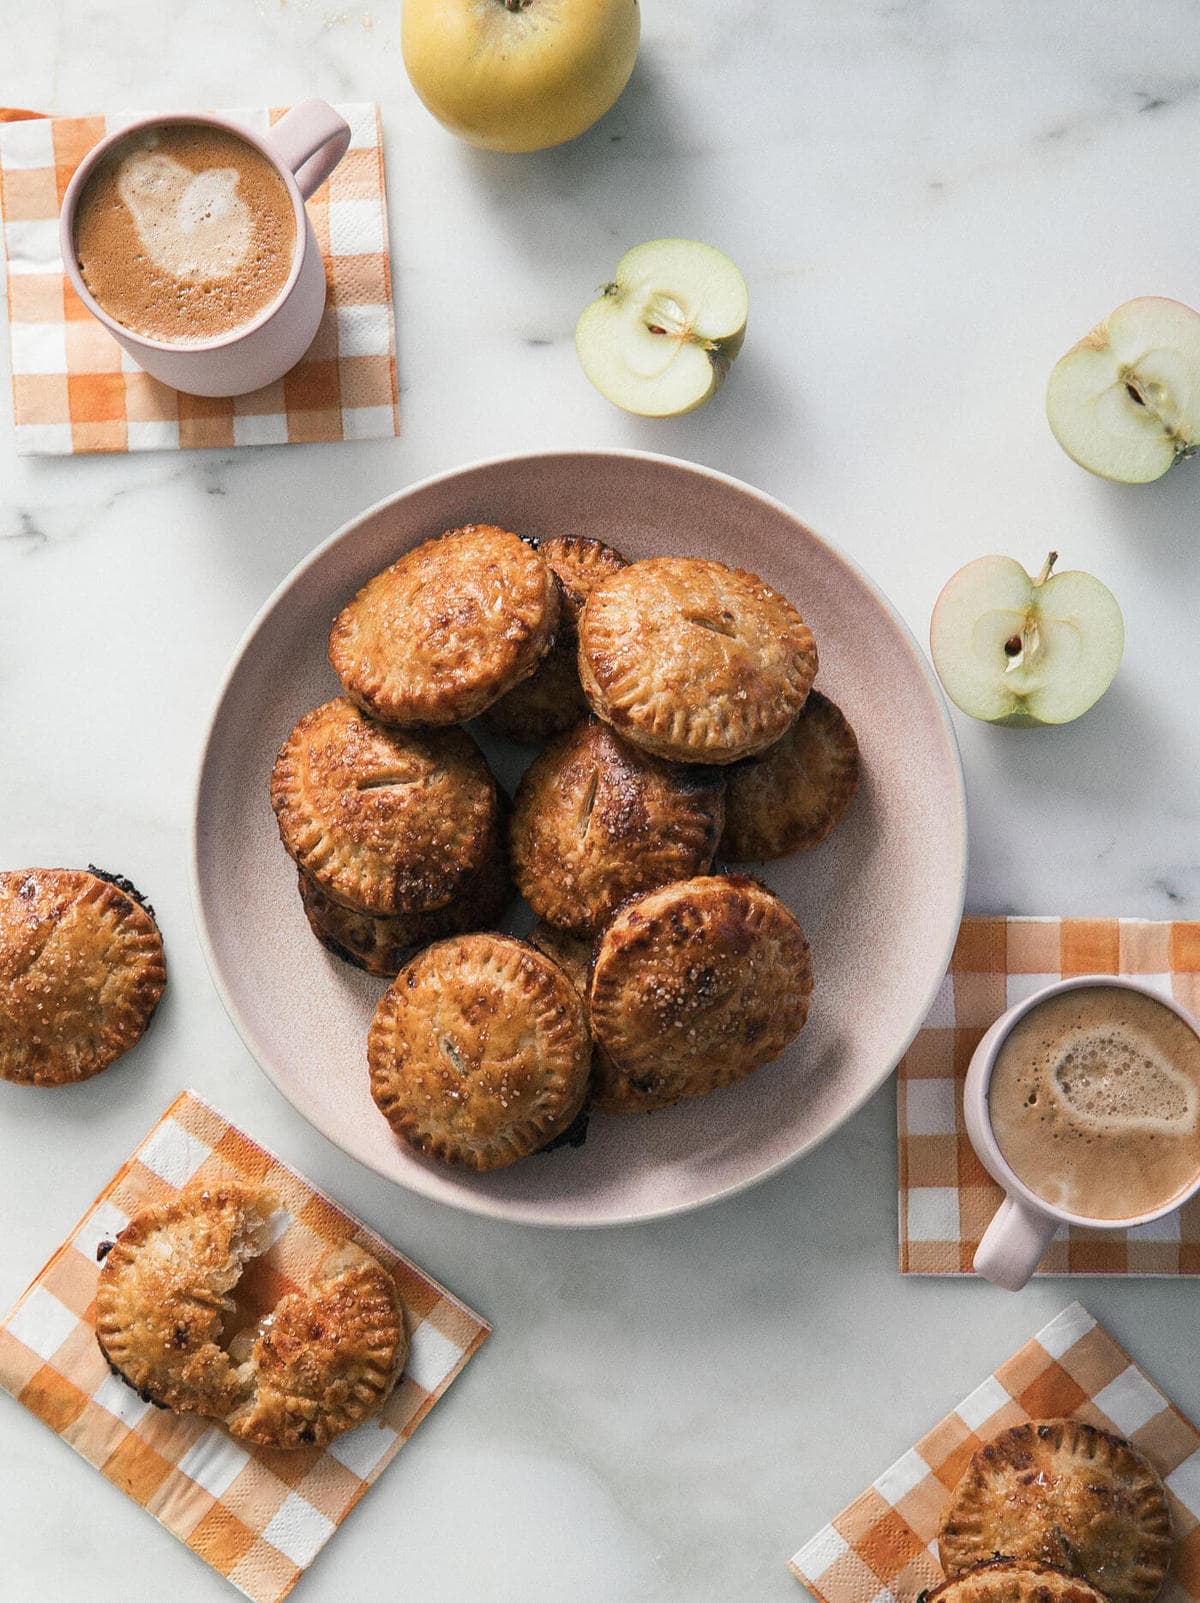
I love pears, they are so versatile and great in dessert or a fall salad! My Baked Pears with Walnuts and Honey are made with just 4 ingredients (you can even eat them for breakfast!) and I love Royal Riviera, Bosc and Anjou for baking for the best texture and taste. Check out this ripening chart to see what is in season near you!

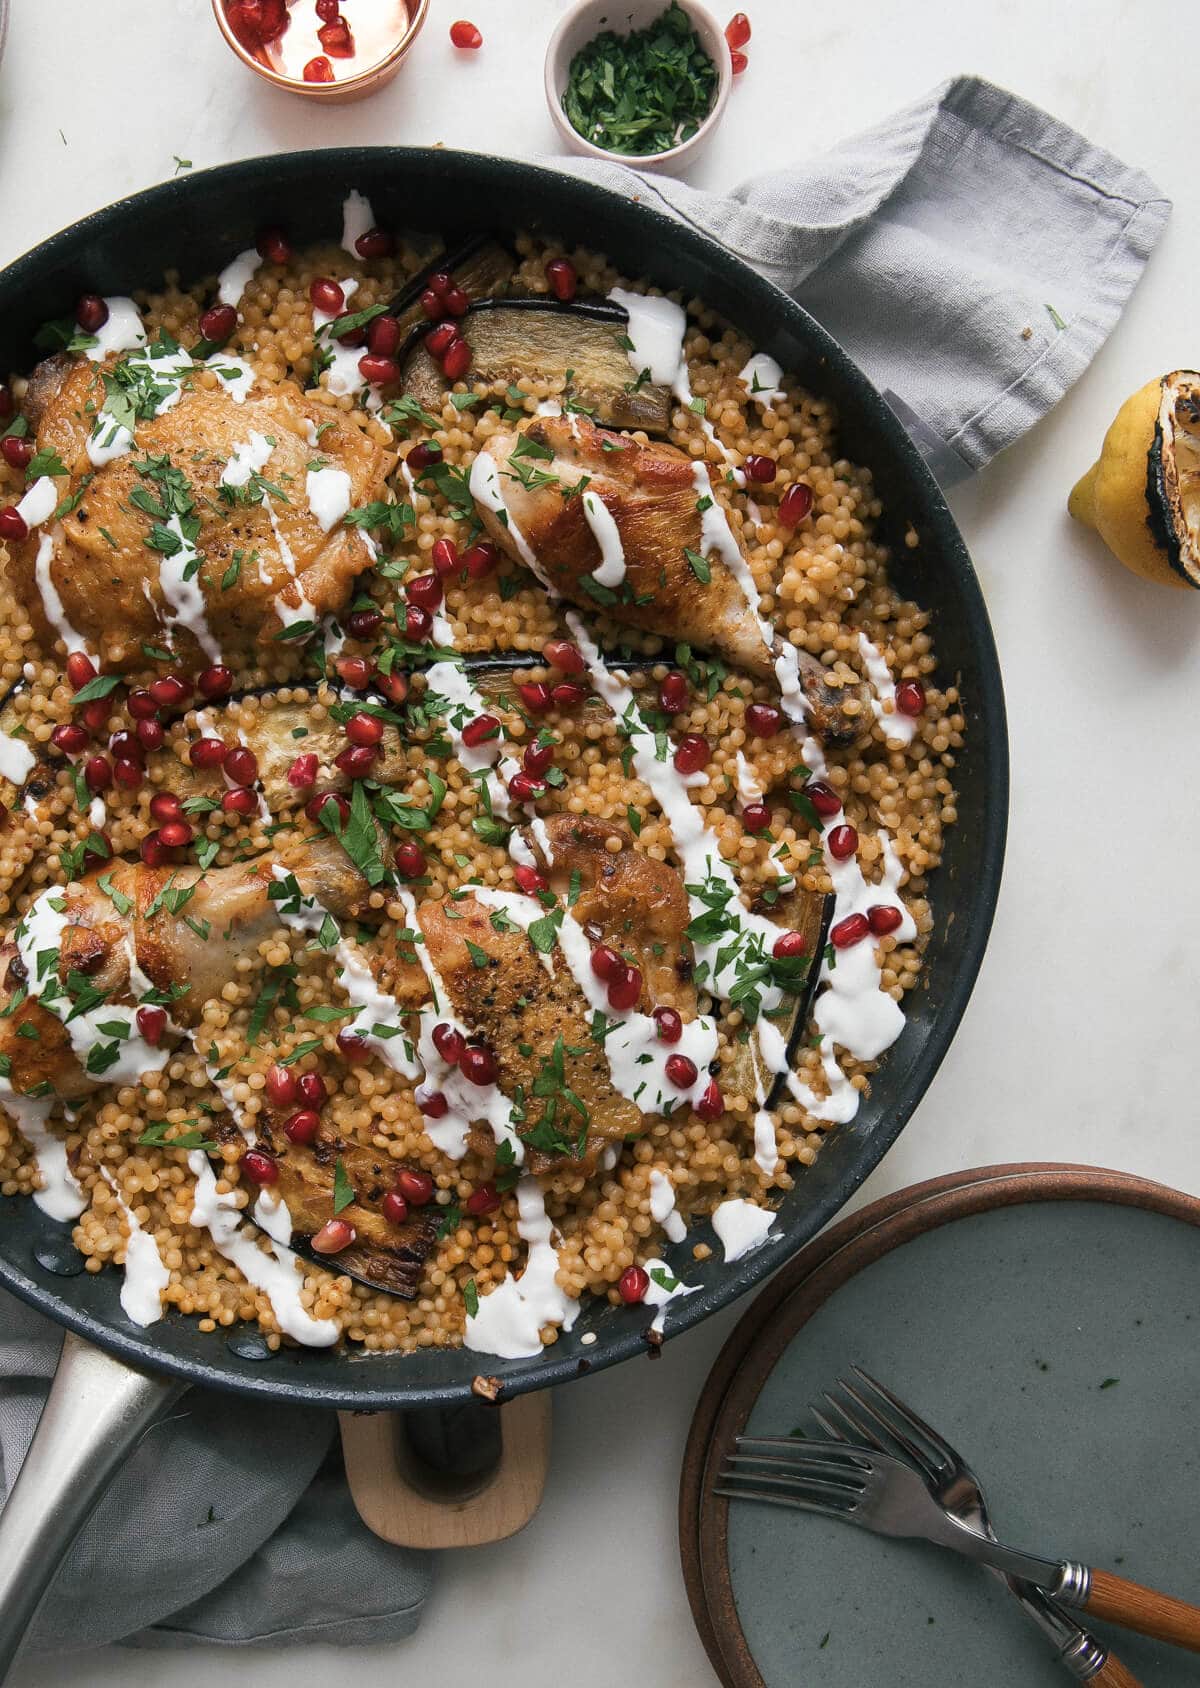
This Kale and Butternut Squash Salad with Pears and Almonds just screams fall, but if you are looking for something warm try my Pork Chops and Pears with Spicy Mustard Greens for a different twist!

If you’re new to my meal plans, I’ve been sharing these free, 7-day flexible healthy meal plans (you can see my previous meal plans here) that are meant as a guide, with plenty of wiggle room for you to add more food, coffee, beverages, fruits, snacks, dessert, wine, etc. or swap recipes out for meals you prefer, you can search for recipes by course in the index. Depending on your goals, you should aim for at least 1500 calories* per day. There’s no one size fits all, this will range by your goals, your age, weight, etc.

There’s also a precise, organized grocery list that will make grocery shopping so much easier and much less stressful. Save you money and time. You’ll dine out less often, waste less food and you’ll have everything you need on hand to help keep you on track.

Lastly, if you’re on Facebook join my Skinnytaste Facebook Community where everyone’s sharing photos of recipes they are making, you can join here. I’m loving all the ideas everyone’s sharing! If you wish to get on the email list, you can subscribe here so you never miss a meal plan!

Ultimate Skinnytaste Meal Planner

Skinnytaste Ultimate Meal Planner

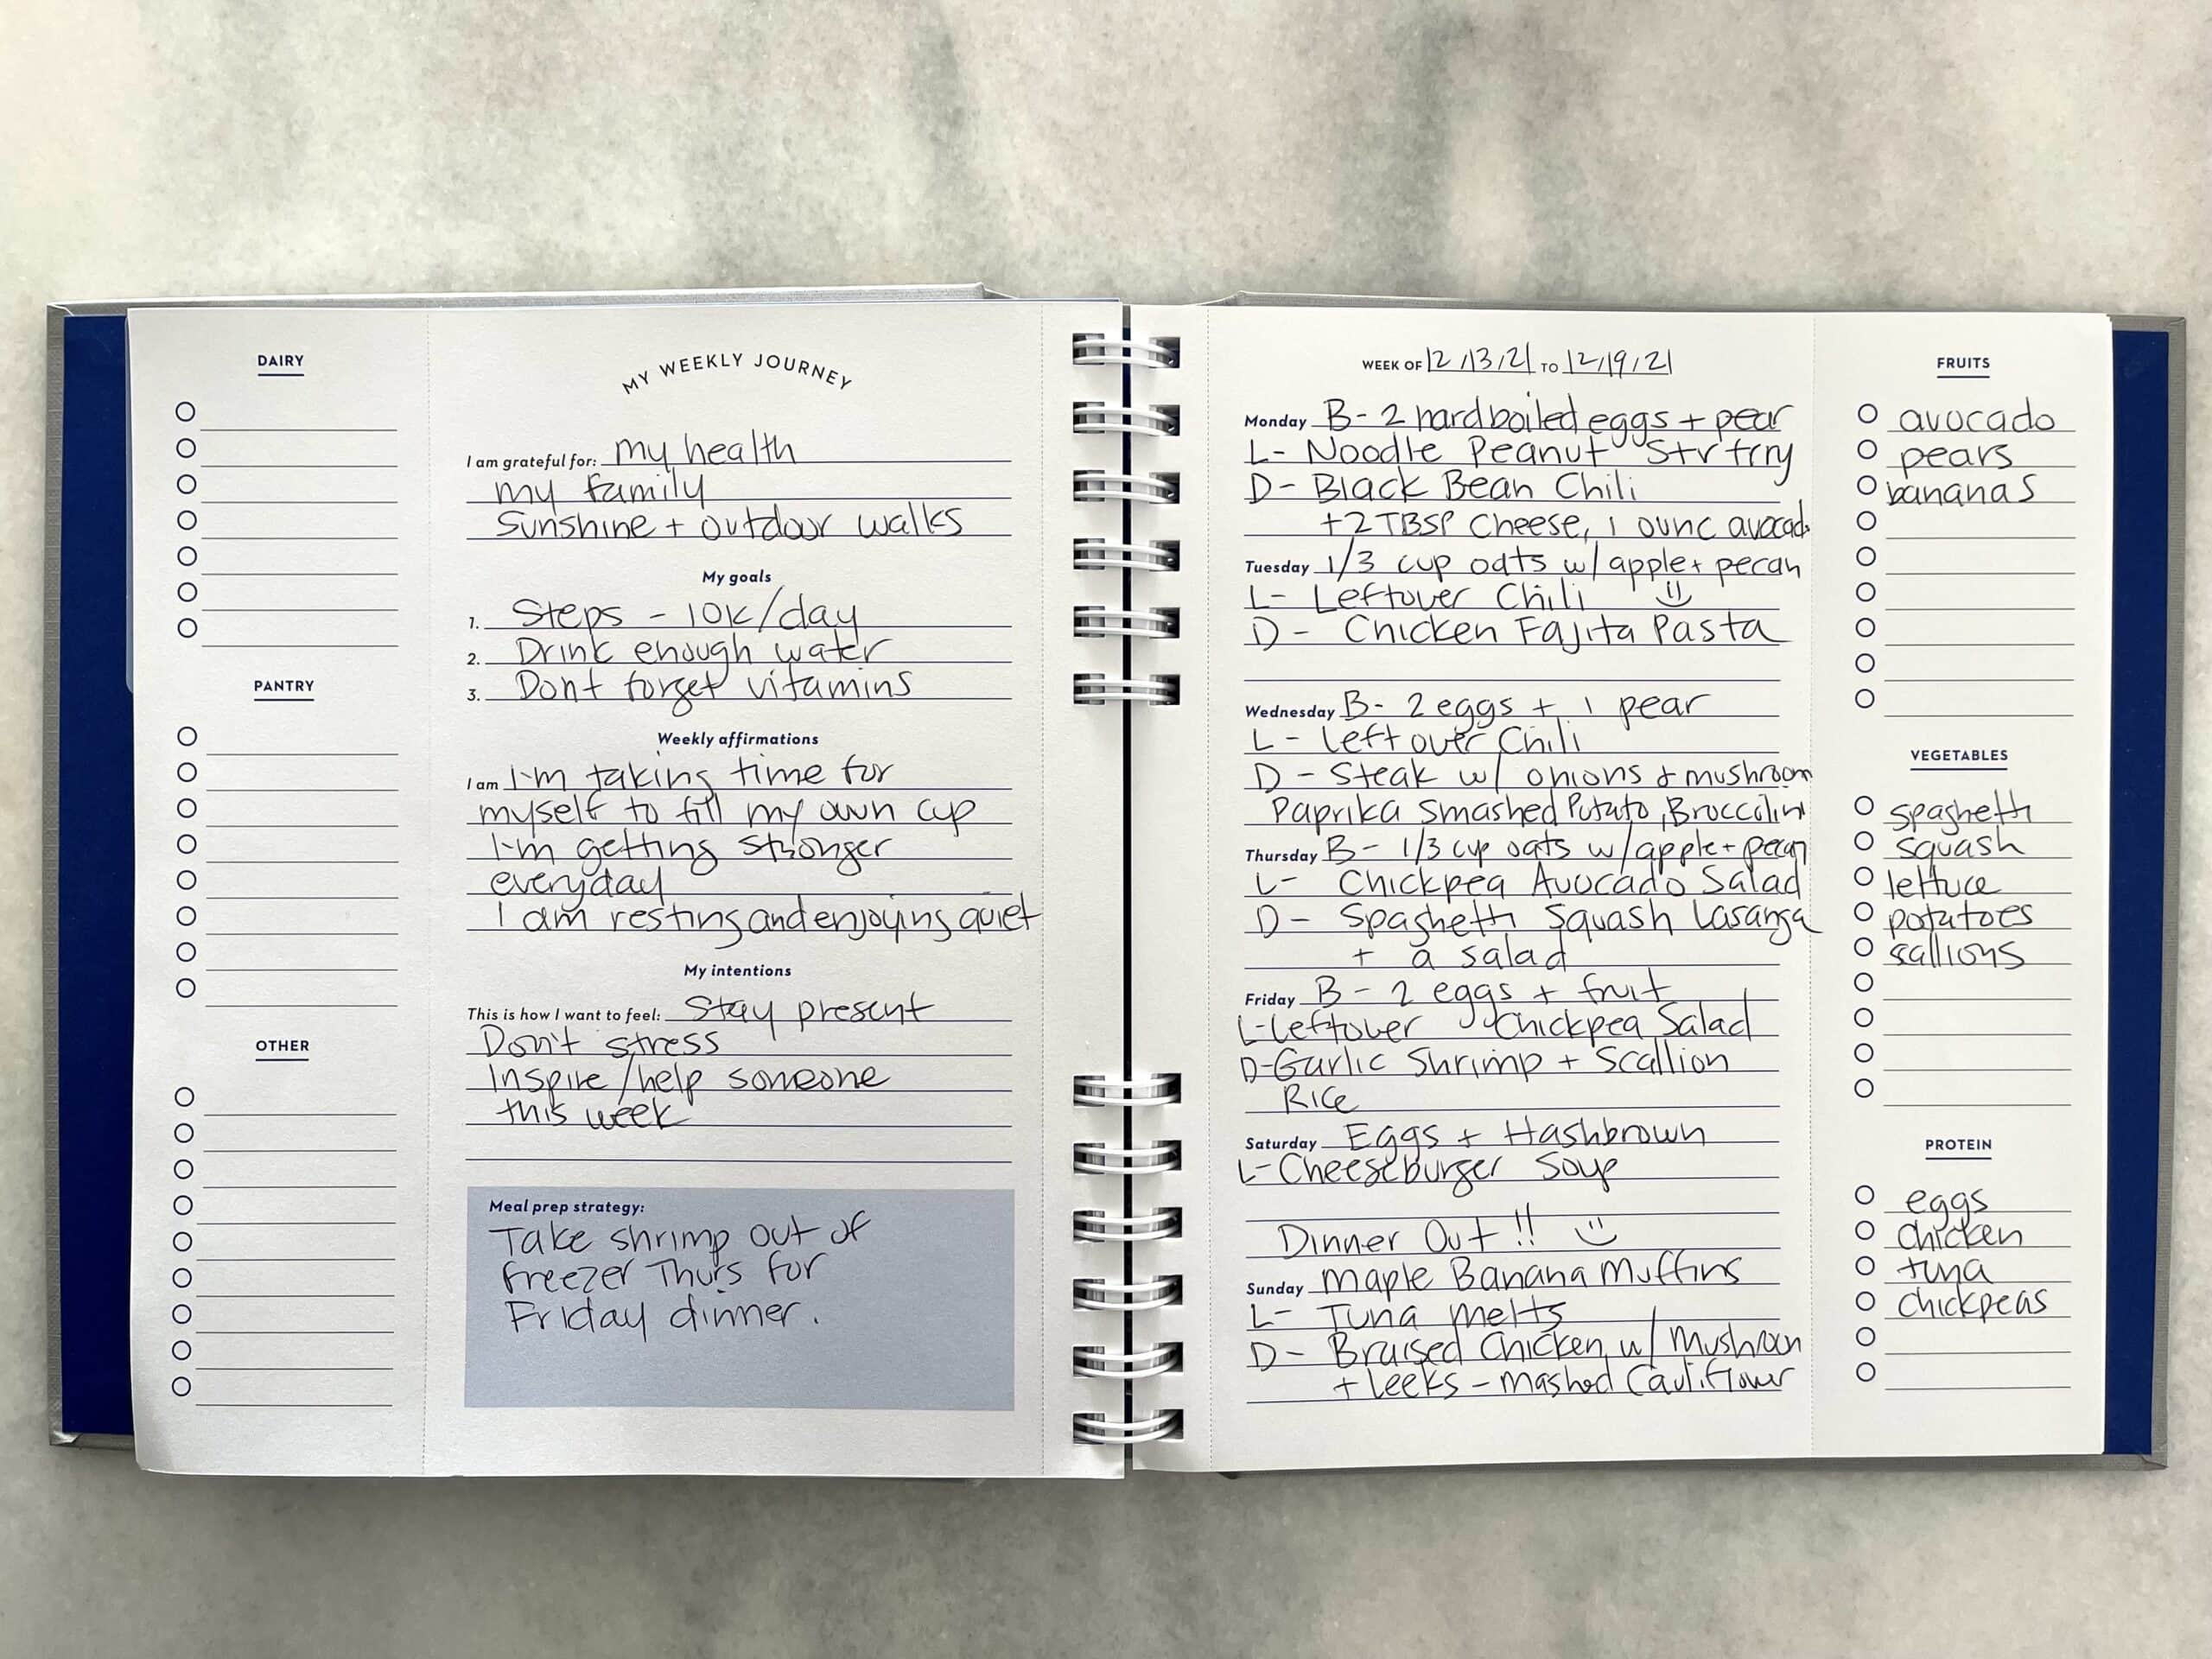
Get the Skinnytaste Ultimate Meal Planner! The 52 week spiral bound meal planner has weekly meal planning grids you can tear out and put on your fridge if you wish, a 12-week meal plan, 30 (15 new) recipes, and tear-out grocery lists. I love starting my week with gratitude, affirmations and intentions, so I included a space for that as well. I hope you will love this as much as I do!

Skinnytaste Ultimate Meal Planner

Buy the Skinnytaste meal planner here:

A note about WW Points

If you’re following Weight Watchers, all the recipes here have been updated to reflect the new Weight Watchers program, with points displayed under the recipe title. The ww button in the recipe card takes you to the Weight Watchers website where you can see the recipe builder used to determine those points and add it to your day (US only, you must be logged into your account). All cookbook recipes in the cookbook index are also updated!

With grocery prices soaring, many of us are having to adjust, scale back and/or get more creative with our meals. One of the absolute BEST ways to stay within a budget and maintain healthy eating habits is to MEAL PLAN. You can get more 5-day Budget Friendly Meal Plans by signing up for Relish+ (get a 14-day free trial here!)

My 5 Favorite Sales Happening Right Now

Check out my 5 favorite deals I found for this weekend.

Meal Plan:

Breakfast and lunch Monday-Friday, are designed to serve 1 while dinners and all meals on Saturday and Sunday are designed to serve a family of 4. Some recipes make enough leftovers for two nights or lunch the next day. The grocery list is comprehensive and includes everything you need to make all meals on the plan.

MONDAY (9/16)
B: Pumpkin Overnight Oats
L: Cranberry Chicken Salad on Apple Slices
D: Margherita Pizza with Autumn Salad with Pears and Gorgonzola
Total Calories: 1,119*

TUESDAY (9/17)
B: Pumpkin Overnight Oats
L: Cranberry Chicken Salad on Apple Slices
D: Pork Carnitas with 2 corn tortillas, 2 ounces avocado and Pico de Gallo
Total Calories: 1,110*

WEDNESDAY (9/18)
B: Eggs with Cottage Cheese (½ recipe), 1 slice whole wheat toast and 1 cup berries
L: Italian Sub Broccoli Salad (½ recipe)
D: LEFTOVER Pork Carnitas over Chipotle’s Cilantro Lime Rice with Corn Salsa and 2 tablespoons shredded cheese

Total Calories: 1,129*

THURSDAY (9/19)
B: Eggs with Cottage Cheese (½ recipe), 1 slice whole wheat toast and 1 cup berries
L: Italian Sub Broccoli Salad
D: Sesame Chicken with Wilted Baby Spinach with Garlic and Oil
Total Calories: 1,246*

FRIDAY (9/20)
B: Air Fryer Breakfast Banana Split
L: Italian Sub Broccoli Salad
D: Angel Hair Pasta with Shrimp and Tomato Cream Sauce with Arugula Salad
Total Calories: 1,132*

SATURDAY (9/21)
B: Apple Bread with ½ cup plain nonfat Greek yogurt with 1 cup mixed berries
L: BLT Salad with Avocado
D: DINNER OUT

Total Calories: 436*

SUNDAY (9/22)
B: Apple Bread with 2 scrambled eggs and 2 slices bacon
L: Open-Faced Tuna Melt Sandwich (recipe x 2) with 1 cup grapes
D: Carne Guisada with ¾ cup rice and Aji Picante

Total Calories: 1,051*

*This is just a guide, women should aim for around 1500 calories per day. Here’s a helpful calculator to estimate your calorie needs. I’ve left plenty of wiggle room for you to add more food such as coffee, beverages, fruits, snacks, dessert, wine, etc.

*Google doc

Weekly Meal Plan #18 | The Recipe Critic

0


This website may contain affiliate links and advertising so that we can provide recipes to you. Read my disclosure policy.

I love a meal plan with easy meals. This one has one of my kids all time favorites, the Taco Ring! These recipes are so delicious, you will love them!

Weekly Meal Plan #18 | The Recipe CriticWeekly Meal Plan #18 | The Recipe Critic

This week’s menu is full of variety and flavor, making it one you’ll love! Each meal is unique, with comforting dishes and bold flavors that the whole family will enjoy. You can mix things up with easy sides like fresh salads, roasted vegetables, or garlic bread to make your dinners complete. It’s all about keeping things delicious, simple, and fun—plus, there will be plenty of leftovers to save you time later in the week!

Creamy Chicken Marsala

Creamy Chicken Marsala is a classic Italian dish that is ready in under 30 minutes! Marsala wine is made into a creamy sauce paired with mushrooms for the ultimate savory bite. It’s simple and easy to whip up and sure to be a crowd-pleaser!

View Recipe

Taco Ring

This taco ring is the easiest, cheesiest dinner. I know your family will love it as much as mine does! All you need is a can of crescent rolls, shredded Colby Jack cheese, some taco seasoning, and your favorite fixings to bring it to life!

View Recipe

Nashville Hot Chicken Recipe

Nashville Hot Chicken is everything the name promises- it’s sticky, juicy, and the perfect amount of spice that lights up your taste buds. This delicious air-fried chicken is smothered in Nashville hot sauce that is spoon-licking good!

View Recipe

Orange Beef

Crispy on the outside, tender on the inside beef strips coated in a tangy orange glaze. This orange beef recipe is the perfect weeknight dinner and sure to become a new family favorite! It may even rival your favorite takeout spot.

View Recipe

Easy BBQ Chicken Pizza

Jam-packed with onions, cilantro, cheese, BBQ sauce, and chicken, this pizza will be a hit with your family! Using a pre-made crust makes this recipe easy and delicious! 

View Recipe

How Many Does it Feed?

This free weekly meal plan is just what you need to get your week started. It provides five meals that will feed 4-6 (depending on if you are feeding adults or kids), AND it includes a shopping list! With fresh new ideas and easy-to-make recipes, having a weekly menu plan will be a lifesaver.

Why Should I Meal Plan? 

If you haven’t tried planning your meals ahead of time, this is going to be a game-changer for you! Here’s why I swear by meal planning:

  • Time Saver: No more 4:00 PM panic about dinner. With a menu plan, you know exactly what’s on the menu, what you need, and how long it takes to cook.
  • Money Saver: Meal planning works wonders for your wallet. When you organize your shopping list for the week, then you’ll easily spot opportunities to buy in bulk and creatively repurpose leftovers for future meals. It’s a clever approach that keeps more money in your pocket.
  • Bye-Bye Takeout: When your dinners are planned ahead of time and groceries are stocked, you’re less likely to hit the drive-thru. Because you are cooking at home, that means more savings and healthier eating. Win-win!

Side Dishes for Dinner

My weekly meal plans always include a printable shopping list that is measured out and ready to go. It makes things so easy!

A pdf of a meal plan and shopping list. A pdf of a meal plan and shopping list.

Storing Leftovers for Meal Planning

I only meal plan Monday-Friday because we sometimes have plans over the weekend or I have leftovers that we can have to finish off the week! If you do have leftovers, make sure to store them properly in an airtight container in your fridge.


Pretzel Toffee Chocolate Chip Cookies

0


Quick Summary

Chocolate chip cookies loaded with pretzels, toffee, chocolate chips and finished with flaky sea salt. The sweet and salty combination is delightful! Everyone loves these cookies!

pretzel toffee chocolate chip cookies on cooling rack. Pretzel Toffee Chocolate Chip Cookies

Pin this now to find it later

Pin It

I LOVE cookies, they are my FAVORITE dessert. I love the classics like peanut butter cookies, sugar cookies, oatmeal cookies, and of course chocolate chip cookies.

I also love creating new cookie recipes. My brown butter salted caramel snickerdoodles are a forever favorite and these Pretzel Toffee Chocolate Chip Cookies are also VERY popular. Every time I make them, they disappear too quickly.

My friend told me they remind her of Crave’s Rockstar Cookie, but they are even better! I have never tried Crave’s famous cookie, but I will take that as a compliment.

The cookies combine the salty crunch of pretzels, the sweet richness of toffee, and milk AND semi-sweet chocolate chips. I love using two kinds of chocolate in these cookies. The cookies are finished with flaky sea salt to bring out the salty flavor even more.

The cookies are perfect for a party, a bake sale, or you can enjoy the cookies with a glass of milk for a delicious treat! They’re sure to be a hit with their sweet and salty flavor profile!

ingredients in bowls to make pretzel toffee chocolate chip cookies. ingredients in bowls to make pretzel toffee chocolate chip cookies.

Ingredients

  • All-purpose flour– spooned and leveled.
  • Baking soda & baking powder
  • Kosher salt
  • Unsalted butter– at cool room temperature.
  • Sugar– brown sugar and granulated sugar.
  • Eggs
  • Vanilla extract
  • Pretzels– chopped!
  • Heath toffee bits– look for these by the chocolate chips. If you can’t find them, you can chop up Heath candy bars or your favorite toffee.
  • Chocolate chips– semi-sweet and milk chocolate chips!
  • Flaky sea salt– for sprinkling on cookies!
dry ingredients being whisked together in bowl. dry ingredients being whisked together in bowl.

How to Make Pretzel Toffee Chocolate Chip Cookies

  • Preheat oven to 350 degrees F. Line a large baking sheet with parchment paper and set aside.
  • In a medium bowl, whisk together flour, baking soda, baking powder, and salt. Set aside.
eggs and vanilla extract being added to creamed butter and sugars in mixing bowl. eggs and vanilla extract being added to creamed butter and sugars in mixing bowl.
  • Using a stand mixer (or hand mixer), beat butter and sugars together until creamy and smooth. Add in the eggs and vanilla extract. Mix until combined.
cookie dough being mixed together with spatula in mixing bowl. cookie dough being mixed together with spatula in mixing bowl.
  • Turn the mixer off and add the dry ingredients. Mix until just combined. Don’t over mix.
toffee, milk chocolate chips, pretzels, and semisweet chocolate chips being added to cookie dough. toffee, milk chocolate chips, pretzels, and semisweet chocolate chips being added to cookie dough.
  • Stir in the chopped pretzels, toffee bits, milk chocolate chips, and semisweet chocolate chips.
pretzel toffee chocolate chip cookie dough balls on baking sheet with parchment paper. pretzel toffee chocolate chip cookie dough balls on baking sheet with parchment paper.
  • Roll about 2 tablespoons of the dough into a ball. Pull apart the dough ball with your fingertips and pull into 2 equal halves. Turn the halves so the broken edges are facing up and then press the halves back together, so the top is jagged. You don’t want the balls to be smooth. The jagged tops will give the cookies texture. Place dough balls on prepared baking sheet, about 2-inches apart.
pretzel toffee chocolate chip cookies on baking sheet with parchment paper. pretzel toffee chocolate chip cookies on baking sheet with parchment paper.
  • Bake cookies for 10 to 12 minutes or until the edges are slightly golden brown around the edges, but the centers are still soft. Don’t over bake.
  • Remove from oven and sprinkle with flaky sea salt. Let cookies cool on the baking sheet for 5 minutes. Transfer to a wire cooling rack and cool completely.
pretzel toffee chocolate chip cookies in container with parchment paper. pretzel toffee chocolate chip cookies in container with parchment paper.
  • Don’t pack flour when measuring. Fluff, spoon, and level!
  • Use unsalted butter that is at cool room temperature. If the butter is too warm or greasy, the cookies will spread too much in the oven.
  • Don’t over mix the cookie dough.
  • Use light colored baking sheets. I like Nordic Ware and Williams Sonoma’s Goldtouch baking sheets. Line the baking sheets with parchment paper.
  • Don’t over bake the cookies. Check them early!
  • When the cookies come out of the oven, I like to press chocolate chips and pretzel pieces on top to make the cookies extra pretty. You have to do this when the cookies are warm.
  • I always like to sprinkle flaky sea salt on top!

How to Store & Freeze

  • Store cooled cookies in an airtight container on the counter for up to 3 days.
  • You can also freeze baked cookies. Place cooled toffeedoodles in a freezer bag or container and freeze for up to 2 months.
  • If you want to freeze the cookie dough, roll into balls and place on a baking sheet. Freeze for 30 minutes or until hard. Place the balls in a freezer container or freezer bag and freeze for up to two months. When ready to bake, preheat the oven and roll the balls in the cinnamon sugar mixture. You don’t have to defrost, just add a few minutes to the baking time.
close up of pretzel toffee chocolate chip cookie. close up of pretzel toffee chocolate chip cookie.

Check out all of my COOKIE RECIPES!

Pretzel Toffee Chocolate Chip Cookies

Chocolate chip cookies loaded with pretzels, toffee, chocolate chips and finished with flaky sea salt. The sweet and salty combination is delightful! Everyone loves these cookies!

Prevent your screen from going dark

  • Preheat oven to 350 degrees F. Line a large baking sheet with parchment paper and set aside.

  • In a medium bowl, whisk together flour, baking soda, baking powder, and salt. Set aside.

  • Using a stand mixer (or hand mixer), beat butter and sugars together until creamy and smooth. Add in the eggs and vanilla extract. Mix until combined.

  • Turn the mixer off and add the dry ingredients. Mix until just combined. Don’t over mix.

  • Stir in the chopped pretzels, toffee bits, milk chocolate chips, and semisweet chocolate chips.

  • Roll about 2 tablespoons of the dough into a ball. Pull apart the dough ball with your fingertips and pull into 2 equal halves. Turn the halves so the broken edges are facing up and then press the halves back together, so the top is jagged. You don’t want the balls to be smooth. The jagged tops will give the cookies texture. Place dough balls on prepared baking sheet, about 2-inches apart.

  • Bake cookies for 10 to 12 minutes or until the edges are slightly golden brown around the edges, but the centers are still soft. Don’t over bake.

  • Remove from oven and sprinkle with flaky sea salt. Let cookies cool on the baking sheet for 5 minutes. Transfer to a wire cooling rack and cool completely.

Have you tried this recipe?

Leave a comment below and share a photo on Instagram. Tag @twopeasandpod and hashtag it with #twopeasandtheirpod


Glazed Honeycrisp Apple Fritter Cake.

0


This post may contain affiliate links, please see our privacy policy for details.

This easy Glazed Honeycrisp Apple Fritter Cake will become an autumn favorite. Made with melted butter, brown sugar, apple butter, yogurt, and lots of cinnamon, this cake is stuffed with cinnamon and vanilla-tossed apples and frosted with a quick, salted-vanilla glaze. Enjoy the warm smells of fall while this cake bakes away. It’s the ultimate fall treat; prepare to become obsessed!

Glazed Honeycrisp Apple Fritter Cake.

Desserts in the fall are just better, and this cake is the perfect example. I’ve been excited to share this for weeks, but I’ve been waiting for just the right Friday in September to share it. Today’s launch of our Apple Cider candle felt perfect!

If you haven’t yet done so, be sure to order your apple cider candle! They’re already almost sold out!

When I was younger, I didn’t eat apple fritters or apple cider doughnuts. My family did, however, do a lot of apple picking in upstate New York. We’d pick up buckets and buckets of New York apples, and my dad and I would eat them all.

Glazed Honeycrisp Apple Fritter Cake | halfbakedharvest.comGlazed Honeycrisp Apple Fritter Cake | halfbakedharvest.com

I remember them being so delicious. Heading to western New York in the fall to pick apples is something I miss about living in Ohio.

Every time we’d head out to the apple farms, their farm stands would be selling their sweet treats. From doughnuts to fritters to heavily glazed apple cakes. They had it all! And while we’d never pick up anything but apples, those memories inspired this cake! The best way to describe this is like an apple fritter but in cake form!

Glazed Honeycrisp Apple Fritter Cake | halfbakedharvest.comGlazed Honeycrisp Apple Fritter Cake | halfbakedharvest.com

These are the details

Step 1: make the cake batter

It’s a simple batter made with melted butter, brown sugar, apple butter, yogurt, vanilla, and eggs. Then, the usuals: flour, cinnamon, baking powder, baking soda, and salt.

Mix this all up in a bowl; nothing fancy is needed.

Glazed Honeycrisp Apple Fritter Cake | halfbakedharvest.comGlazed Honeycrisp Apple Fritter Cake | halfbakedharvest.com

Step 2: the apple filling

I used up Honeycrisp apples and chopped them up. Then mix the apple bites with brown sugar, cinnamon, and vanilla and toss them together in a bowl.

I love to leave the skin on my apples. The skin provides more flavor and fiber! If you prefer, you can remove the skin, but around here, there’s no time for that!

Glazed Honeycrisp Apple Fritter Cake | halfbakedharvest.comGlazed Honeycrisp Apple Fritter Cake | halfbakedharvest.com

Step 3: the layers

Now, layer the cake batter with the apples. Start with 1/2 batter on the bottom, then one layer of apples, the remaining batter, and then add the remaining apples on top to finish.

Glazed Honeycrisp Apple Fritter Cake | halfbakedharvest.comGlazed Honeycrisp Apple Fritter Cake | halfbakedharvest.com

Now bake into a sweet sheet cake. The smells from the oven will be the sweetest autumn scents, so wonderful and cozy.

Glazed Honeycrisp Apple Fritter Cake | halfbakedharvest.comGlazed Honeycrisp Apple Fritter Cake | halfbakedharvest.com

Step 4: the vanilla glaze

For the glaze, mix powdered sugar with warm milk, vanilla, and a pinch of sea salt.

Ice the cake while it’s still warm. This ensures the glaze melts into every inch of the cakes, seeping into all those crannies!

Glazed Honeycrisp Apple Fritter Cake | halfbakedharvest.comGlazed Honeycrisp Apple Fritter Cake | halfbakedharvest.com

If you’re heading out apple picking this fall, make this easy apple fritter cake.  Serve with coffee, hot cocoa, or even a steaming mug of cider. It’s a fall delight! And make sure the candles are burning. You’ll certainly have created the perfect autumn experience!

Glazed Honeycrisp Apple Fritter Cake | halfbakedharvest.comGlazed Honeycrisp Apple Fritter Cake | halfbakedharvest.com

Looking for apple recipes? Here are a few ideas: 

Brown Butter Apple Blondies with Cinnamon Maple Glaze

Haunted Pumpkin Patch Margarita

Cinnamon Crunch Apple Butter Soft Pretzel Knots

Salted Maple Apple Tarte Tatin with Cinnamon Pumpkin Seeds

Cinnamon Spiced Apple Fritters with Vanilla Coffee Glaze

Baked Cinnamon Sugar Apple Cider Doughnut Holes

Easy Cinnamon Sugar Apple Cake

Lastly, if you make this Glazed Honeycrisp Apple Fritter Cake, be sure to leave a comment and/or give this recipe a rating! Above all, I love to hear from you guys and always do my best to respond to each and every comment. And, of course, if you do make this recipe, don’t forget to tag me on Instagram! Looking through the photos of recipes you all have made is my favorite!

Glazed Honeycrisp Apple Fritter Cake

Prep Time 20 minutes

Cook Time 1 hour

Total Time 1 hour 20 minutes

Servings: 8

Calories Per Serving: 396 kcal

Nutritional information is only an estimate. The accuracy of the nutritional information for any recipe on this site is not guaranteed.

  • 1. Preheat oven to 350° F.  Line a 9×9 inch baking dish with parchment paper.2. In a large bowl, stir together the butter, brown sugar, apple butter, yogurt, eggs, and vanilla, until combined. Add the flour, cinnamon, baking powder, baking soda, and salt. Mix until just combined. 3. To make the apple mix. In a bowl, combine the chopped apples, brown sugar, cinnamon, and vanilla. 4. Spread half the batter evenly into the prepared dish. Spoon over about 1/2 of the apples, then cover the apples with the remaining batter. Top with the remaining apples and any juices left in the bowl. 5. Bake for 55-60 minutes, until just set. Let cool for 10 minutes.6. Meanwhile, make the glaze. Whisk all ingredients in a bowl, adding milk as needed to thin. Drizzle the glaze over the cake. Sprinkle with sea salt. Serve the cake warm or at room temperature. enjoyI

Glazed Honeycrisp Apple Fritter Cake | halfbakedharvest.comGlazed Honeycrisp Apple Fritter Cake | halfbakedharvest.com

Glazed White Chocolate Raspberry Loaf

0

This White Chocolate Raspberry Loaf is one of my favourite quick breads because it’s simple to make and rustically pretty! The raspberries add moisture that keeps it fresh for days, while the invisible white chocolate bits adds great little pops of sweet. A slice of this improves any day!

White chocolate raspberry loaf (quick bread)

White chocolate raspberry loaf

This is one of those recipes we confusingly call a “bread” or “loaf” but is not actually a proper bread made with yeast. It’s actually just cake baked in the form of a bread loaf, also called “quick bread” in reference to the speed with which they are made (ie no yeast = no rise = fast to make!).

I am a fan not only because of ease of making, but also because they are so much more transportable than tall layered cakes, easy to serve, and easy to eat with just a napkin and hands.

This White Chocolate Raspberry one is also rustically pretty to look at (as most things with raspberry are!), and I like that it’s not too sweet, with only 3/4 cup of sugar in the batter. But those with a sweet tooth don’t feel deprived thanks to the glaze and little pockets of sweetness you get from the white chocolate chips.

It’s a classic combination really, white chocolate and raspberry. It astounds me I don’t have more examples on my website!

White chocolate raspberry loaf (quick bread)

Ingredients in White Chocolate Raspberry Loaf

This recipe is similar to my classic Blueberry Loaf, but is adapted to be more suitable for raspberries which release more moisture than blueberries. If you’re interested in how and why it’s different, see the FAQ below!

1. RASPBERRIES AND WHITE CHOCOLATE

  • Raspberries – Fresh is better but frozen is still great. See below for fresh vs frozen difference on this recipe.

    Other berries – Blackberries would be a suitable substitute, or chopped strawberries though you won’t get nice red pops of colour in the loaf like you might expect! For blueberries, it’s better to use my Blueberry Loaf recipe (the skin holds the moisture in so the batter needs higher hydration than in this raspberry loaf).

  • White chocolate chips – I prefer using white chocolate chips for this loaf only because I feel chopping up the good stuff is a little wasted in a recipe like this. Also, convenience! But don’t let that stop you from using a good quality white chocolate block, if that’s what you prefer!

  • Flour – to coat the raspberries so they don’t sink as it bakes. It really does work (speaking from experience here!)

Fresh vs frozen raspberries

As with most baked goods, this loaf is marginally better made with fresh raspberries although I don’t hesitate to use frozen. Frozen raspberries chills the batter so it takes a little longer to start rising in the oven so the crumb is marginally less springy. However by no means compromised!

2. BATTER INGREDIENTS

WET INGREDIENTS:

  • Unsalted butter – I typically like to use a bit of oil in quick breads like this as it makes the crumb nice and moist as well as extending the shelf life. However, the raspberries add great moisture in to this loaf so I found oil actually made the crumb too damp. So butter it is! Plus, we get the added bonus of lovely butter flavour. 🙂

  • White sugar – Caster sugar / superfine sugar is better if you’ve got it as the grains are finer so it dissolves effortlessly. But regular white sugar (granulated sugar) is fine too. Brown sugar is not recommended, it will make the crumb too damp, I think.

  • Yogurt – Plain unsweetened yogurt, a proven bakers’ trick to make cakes with lovely moist crumbs, plus the acidity in yogurt is what activates the baking soda in this loaf. Substitute with sour cream (it too has acidity). You could as a last resort substitute with 3/4 cup of milk but you’d need to also add 1 teaspoon of white vinegar.

    ⚠️ Important to bring it to room temperature (ie take out of fridge around 30 minutes prior) so it’s not fridge-cold when you mix it into the batter. Why? Because this batter has butter in it and fridge-cold yogurt + melted butter = solidified butter bits in the batter = greasy cake that doesn’t rise!

  • Large eggs – Also at room temperature, for the same reason as the yogurt. Use large eggs which are ~55 – 60g / 2 oz each (they come in cartons labelled “large eggs”) at room temperature. See here for what this means, and a quick way to de-chill fridge cold eggs!

  • Vanilla extract – Better flavour than imitation vanilla essence. I personally don’t use vanilla bean or vanilla bean paste in cakes because I think it’s wasted. Save it for things like Crème Brûlée and Flan Pâtissier!

  • Lemon zest (optional) – Just a tiny touch adds a hint of freshness that I feel compliments the raspberry-vanilla flavour in this loaf. However, it is not essential and I’ve made this plenty of times without!

DRY INGREDIENTS:

  • Flour – Just plain white / all-purpose flour.

    Other flours – Self raising flour won’t work very well here as cakes typically don’t rise nearly as well as mixing flour + baking powder fresh. While it should work with wholemeal flour (wholewheat flour), I think the crumb will not be quite as soft. I haven’t tried this with gluten-free flour.

  • Baking powder AND baking soda (aka bicarbonate soda) – Wherever possible, I prefer to only use one or the other but sometimes for the best result, I can’t avoid using both. This is because they have different rising qualities in different batters. As a general rule, baking soda is 3x stronger than baking powder, it requires an acidity to activate it and it makes things colour better in the oven.

    For this loaf, I found that using just baking powder didn’t make it rise quite as well (it’s a thick batter) and the surface was as evenly coloured as pictured. However, I would not hesitate to just using baking powder in this recipe, if that’s all I had. Directions in the recipe notes.

  • Salt – Just a touch, to bring out the other flavours in the cake. Standard baking practice these days!

3. Vanilla glaze

Here’s all you need to make the glaze.

  • Icing sugar (confectioners’ sugar) – Be sure to sift it to remove lumps. They can’t be mixed out (you know I’ve tried!).

  • Milk – Any type of milk is fine here – low fat, full fat, cow or non-cow.

    When you first start mixing, it will seem like there’s not enough. But keep mixing and all of a sudden it will miraculously transform from a lumpy powdery mess into a silky drippy glaze!

  • Vanilla – For flavour.

Frozen raspberries
Toss the raspberries in a little flour so they don’t sink while in the oven.

How to make White Chocolate Raspberry Loaf

This is a very easy baking recipe, but the one tip I have to ensure success is to make sure your yogurt and eggs are at room temperature, not fridge cold. Otherwise it will make the melted butter solidify and you’ll end up with little butter lumps throughout the batter which results in a greasy loaf that doesn’t rise. I learnt this lesson the hard way in my early baking days!!

  1. Toss the raspberries with the flour then set aside. If using frozen raspberries, pop the bowl in the freezer so they stay frozen until you’re ready to mix them in. Why? Because frozen raspberries thaw quickly and will streak throughout the batter when you mix it in.

  2. Butter and sugar – Melt the butter in a heatproof mixing bowl (I use the microwave). Let it cool just for a few minutes (warm ok, hot not ok). Then whisk in the sugar.

  1. Remaining wet ingredients – Whisk in the remaining wet ingredients (yogurt, egg, vanilla).

  2. Dry ingredients – Scatter the flour, baking powder, baking soda and salt across the surface (easier to mix in compared to dumping it all in one place). Then mix just until the flour is fully incorporated, then stop mixing. Over-mixing = tough cake. Some lumps in the batter is fine, they will bake out in the oven.

  1. Raspberries & white chocolate – Add the white chocolate and raspberries. Stir only until the raspberries are dispersed throughout the batter, then stop mixing (see above about over-mixing).

    ⚠️ If using frozen raspberries, you want to work fast and minimise stirring because frozen raspberries chills and therefore thickens the batter if you leave it sitting around. This will affect how well the loaf rises in the oven, because it’s starting with a colder batter so it takes longer to start baking and rising properly.

  2. Extra raspberries – Smooth the surface (no need to be meticulously, it will smooth out properly in the oven). Then decorate the top with extra raspberries, if you want. (I want!).

  1. Bake 75 to 80 minutes – Bake for 40 minutes in a  190°C/375°F (170°C fan-forced) oven. Loosely cover with foil (to stop it from getting too brown). Then bake for a further 35 minutes if using fresh raspberries, or 40 minutes if using frozen. The loaf is ready when a skewer inserted into the centre comes out clean without a raw batter smear.

  2. Cool for 5 minutes in the loaf pan. Then use the paper overhang to lift it out onto a rack and fully cool before glazing.

    ⚠️ If you glaze before it’s fully cool, the glaze will just melt and disappear into the loaf.

Glazing White chocolate raspberry loaf (quick bread)
White chocolate raspberry loaf (quick bread)

To serve, cut thick slices and eat with your hands. (Cutlery for this is way above my pay grade.)

Don’t try to toast it, the glaze will melt and the raspberries will become hot little red bombs that scorch your tongue.

As for shelf life, it’s best to keep it in the fridge and it will stay fresh for 5 days. Though as with most cakes, I highly, highly recommend eating it at room temperature. It’s just not as nice when it’s fridge cold – the crumb is drier and you can’t taste the flavour as well.

I have visions of you cutting thick slices and enjoying this loaf with a cup of tea this weekend. Let’s make that come true!! 🙂 – Nagi x

White chocolate raspberry loaf FAQ


Watch how to make it

Hungry for more? Subscribe to my newsletter and follow along on Facebook, Pinterest and Instagram for all of the latest updates.

White chocolate raspberry loaf (quick bread)

White Chocolate Raspberry Loaf

Servings10 – 12

Tap or hover to scale

Recipe video above. White chocolate raspberry loaf is a quick bread recipe that is simple to make, rustically pretty and can be enjoyed anytime of the day. Tart raspberries plus sweet white chocolate is such a classic pairing! The raspberries add moisture and colour pops in a way that no other berry does. Use fresh or frozen, though it does rise a touch better using fresh.The glaze is the perfect finishing touch for a touch of extra sweetness without overwhelming this loaf (which is not very sweet at all). I’m a sucker for the thin crackly skin on the glaze.

Ingredients

Extra Raspberries – decoration

Instructions

  • Preheat the oven to 190°C/375°F (170°C fan-forced). Grease and line a 22 x 12 x 7 cm loaf pan with paper (8.7 x 4.7 x 2.75″, Note 6).

  • Toss the raspberries with the flour. If using frozen, put the bowl in the freezer (so they don’t thaw).

  • Wet ingredients – Put the butter in a heatproof bowl and microwave until melted. Cool for a minute then whisk in the sugar. Next, add the yogurt, eggs, vanilla and lemon. Whisk until combined.

  • Dry ingredients – Sprinkle the dry ingredients across the surface, then mix it in using a rubber spatula. Stop mixing as soon as the flour is incorporated – some lumps in the batter is fine. (Over mixing = tough loaf)

  • Raspberries – Working fast, add the white chocolate and the raspberries (including any residual flour in the bowl), then mix briefly just to disperse the raspberries. (Fresh raspberries – careful not to squish them. Frozen – work fast, else the batter chills and thickens = takes longer to bake). Batter is pretty thick.

  • Fill pan – Scrape batter into the prepared pan. Roughly level the surface (spreads and levels in the oven). Press Extra Raspberries into the surface, if using.

  • Bake 40 minutes. Cover loosely with foil then bake for a further 35 minutes for fresh raspberries, 40 minutes for frozen. A skewer inserted into the centre should come out without raw batter on it.

  • Cool 5 minutes in the pan, then transfer onto a rack. Full cool before glazing.

Glaze:

  • Mix Glaze ingredients in a bowl until smooth.

  • Glaze – Put the rack on a tray or plate to catch glaze drips. Drizzle glaze all over the cake. Scrape up glaze from the plate and glaze again.

  • Serve – Leave for 20 minutes to let a crust form on the glaze before cutting thick slices to serve.

Recipe Notes:

1. Butter sub – 1/2 cup plain oil (like canola, grapeseed) can be substituted but the loaf crumb will be a little damper.
Conversion – 1 US butter stick = 115g , not 125g. But also, US cups = 226 ml not 250 ml like cups in the rest of the world. So actually, the difference is relative across the key ingredients which is why it works is 1 US stick or 125g of butter. 🙂
2. Sugar – Regular white sugar is fine too. Brown sugar is not recommended, it makes the crumb a little too damp.
3. Sour cream can also be used. Low fat will work but the shelf life will be a day or two shorter.
4. Baking soda (bi-carb) – can be substituted with 1 1/2 tsp baking powder but baking soda works better, and particularly recommended if using frozen raspberries. See FAQ section above.
5. Frozen raspberries – Don’t let them thaw as they will streak in the batter. Toss in flour and pop it back into the freezer so they are frozen when mixing through the batter (they thaw quickly).
6. Loaf pan size – Other sizes can be used, the loaf shape will just differ. If using a larger loaf pan, it will cook faster so start checking for doneness earlier.
Storage – Stays fresh 5 days in the fridge. Always enjoy at room temperature!
Nutrition per slice, assuming 10 slices.

More quick bread loaf recipes


Life of Dozer

We are deep in the throes planning the book tour for my new book TONIGHT when it hits stores next month!! The Powers That Be have deemed it time to upgrade the Dozer cut-out which travels with me to events outside of Sydney*, which we made for the book tour of my first book, DINNER.

It’s life size. I insisted. See?

In case you are wondering why Dozer doesn’t travel with me outside Sydney, it’s because dogs are not allowed inside the cabin of planes here in Australia, and I can’t bring myself to put Dozer down in the cargo. He’s a valuable company asset, I need eyes on him at all times! 🤣

Cheddar Rye Apple Hand Pies Recipe- A Cozy Kitchen

0


Disclosure: This post may contain affiliate links, which means I may earn a commission if you click on the link and make a purchase.

These Cheddar Rye Apple Hand Pies are cozy pockets of delicious goodness! A flaky all-butter pie crust is mixed with aged cheddar cheese then stuffed with a warm, spiced apple filling. This must-have fall dessert is sweet and savory and easy to make ahead of time. They are delicious for breakfast with a cup of coffee or enjoyed as an after dinner treat served with Chicken Tortilla Soup.

Cheddar Rye Apple Hand Pies Recipe- A Cozy Kitchen

Hand pies are so fun and delicious. Similar to my Apple Hand Pies, Sour Cherry Hand Pies and Banana Hand Pies, these cheddar rye apple hand pies are not only adorable but super easy to make for parties or easy breakfasts.

Close up image of Cheddar Rye Apple Hand Pies on a plate.Close up image of Cheddar Rye Apple Hand Pies on a plate.

Ingredients You’ll Need for Cheddar Rye Apple Hand Pies

Pie ingredients on a counter.Pie ingredients on a counter.
  1. Flour – You can use a mix of rye flour and white flour or simply all-purpose flour.
  2. Butter – You’ll need 3 sticks or 1 1/2 cups of really cold butter. European-style butter has a higher fat content and a richer flavor but regular butter is perfectly fine!
  3. Cheddar cheese – White cheddar or regular yellow cheddar. If you want a sharp and nutty flavor in your crust make sure it’s “aged” so the flavor will come through after it’s baked.
  4. Apples – You only need 2 medium apples to make 24 hand pies, since each pie is only getting 1 teaspoon of apple filling. Any sweet and tart apple will do here, Honey crisp, Northern Spy, or Golden Delicious.

For the rest of the ingredients, please refer to the recipe index card below!

How To Make Cheddar Rye Apple Hand Pies

  1. Make the cheddar pie crust – In a large stainless steel bowl combine flour, sugar, and salt. Grate the butter into the flour mixture. Transfer the mixture to the freezer for 5 minutes, then mix the butter into the flour mixture, breaking it into small bits using your hands until it’s the size of peas. Finally mix in the grated cheddar cheese.
  2. Pour the water-vinegar mixture to the flour mixture stirring with a spoon until there isn’t any visible pools of liquid. Use the tips of your hands to squeeze and fold the dough in the bowl, quarter turn the bowl then repeat. Work quickly to create a cohesive mass of dough.
  3. Transfer dough to a lightly floured counter, divide into 2 pieces then gently pat into 1-inch thick squares, wrap tightly in plastic wrap then refrigerate for at least 2 hours.
  4. Make the apple filling – To a large bowl combine, cubed apples with lemon juice, both sugars, tapioca starch, ground cinnamon, nutmeg and salt. Toss to combine.
  5. Assemble – Roll out the dough on a lightly floured counter until it’s 1/2-inch thick. Use a 3-inch or 4-inch round cookie cutter to stamp out the pie crust then transfer the rounds to a baking sheet. Place into the freezer to firm up for 10 minutes. Brush rounds with beaten egg then add a heaping teaspoon of diced apple to the center leaving a 1-inch border. Place the top crust over the apples then press the edges together using the tines of a fork. Transfer the hand pies to the freezer once again for another 10 minutes.
  6. Bake – Preheat the oven to 425 degrees Fahrenheit. Brush the tops with more egg and a sprinkle of turbinado sugar then bake in a preheated oven for 15 – 20 minutes or until the tops are golden brown.

Tips and Tricks

  • Grate the butter – I find that this method works better than using a pastry cutter and you don’t need to buy any special tools. Just use a regular cheese grater to grate the butter.
  • Keep the pie crust as cold as possible – Throughout the rolling and assembly process I will pop the pie crust into the freezer multiple times to ensure that the butter doesn’t become too warm which will lead to a tough dough. Keeping the crust as cold as possible will lead to a light and flaky crust.
  • Ice cold water and vinegar – The water should be very cold so it doesn’t warm up the butter making the crust tough and chewy. Vinegar(I used apple cider vinegar but white vinegar is fine too) slows the gluten development when folding the dough, keeping the crust tender, light and flaky when it bakes.
  • Prep the pie dough ahead of time – It’s best to make the cheddar pie crust at least 2 hours (but ideally overnight) before you are ready to bake them. The dough can last in the fridge for 2 – 3 days or in the freezer for up to 1 year. Thaw from the freezer by placing the dough in the refrigerator 1 day before you are ready to use it.
  • Assemble hand pies then bake later – Transfer assembled hand pies to a baking sheet and place in the freezer. When frozen, place in a freezer storage bag and freeze for up to 3 months. Transfer from the freezer directly to the oven to bake.
Overhead image of mini pies on a plate.Overhead image of mini pies on a plate.

Recipe FAQs

Why does my filling keep seeping out?

You probably added too much filling to your hand pies or didn’t crimp the edges tight enough. Hand pies are really small so you’ll need less filling than you might think. A heaping teaspoon of filling is more than enough. For the edges, I like to crimp them with a fork then use a cookie cutter to seal/ clean up the edges.

Why put cheddar cheese in pie dough?

Aged cheddar has such a bold and strong flavor that it adds an amazing savory note to pie crust. It works so well in both savory and sweet recipes giving it an extra pop of flavor!

Close up image of a Cheddar Rye Apple Hand Pie broken in half on a napkin.Close up image of a Cheddar Rye Apple Hand Pie broken in half on a napkin.

More Fall Recipes

If you tried this Cheddar Rye Apple Hand Pies Recipe or any other recipe on my website, please leave a 🌟 star rating and let me know how it went in the 📝 comments below. Thanks for visiting!

  • 1 large stainless steel bowl

  • 1 cheese grater used for the butter and the cheese

  • 1 Rolling Pin

  • 1(3-inch or 4-inch) round cookie cutter

  • 2 Baking Sheets

  • 1 pastry brush

To Make the Cheddar Pie Crust:

  • In a large stainless steel bowl, combine the all-purpose flour, sugar, and salt and stir to mix well. I am a firm follower of the grating butter method. They recommend a pastry cutter, but I don’t own one, so I recommend grating the butter, using a cheese grater, into the dry ingredient mixture. Transfer to the freezer to chill for about 5 minutes. Mix the butter into the flour mixture, until throughly combined, breaking up the butter bits until they resemble the size of peas. The rest of the pie dough should look like canned Parmesan cheese. Speaking of cheese, now is the time to add the Cheddar and mix in quickly until evenly distributed.

  • At this point, add the water-vinegar mixture all at once, and give it a good mix. I like to use a spoon for this part. Scrape as much of the mixture as you can from one side of the bowl to the other, until you can’t see visible pools of liquid anymore. Now it’s hand time. Scoop up as much of the mixture as you can, and use the tips of your fingers (and a whole lot of pressure) to press it back down onto the rest of the ingredients. Rotate the bowl a quarter-turn and repeat. Scoop, press and turn. With each fold, your intentions is to be quickly forming the mixture into one cohesive mass.

  • Remove the dough from the bowl, place it on a lightly-floured counter, and use your bench scraper to divide into two equal pieces. Gently pat each into a 1-inch thick square, working quickly to seal any broken edges before wrapping them tightly in a double layer of plastic wrap. Refrigerate the dough for at least 2 hours, or, ideally, overnight.

  • You can keep the pie dough in the fridge for a few days or in the freezer for up to 1 year. If frozen, remove the dough and place tin the refrigerator to thaw one full day before you intend to use it.

To Make the Apple Filling:

  • Place the cubed apples in a large bowl and toss with a the lemon juice. Add the granulated sugar, brown sugar, tapioca or corn starch, cinnamon, nutmeg, and salt. Toss until evenly distributed.

  • Remove the first disk of dough from the fridge. Lightly flour your work surface and roll the dough out to a 1/2-inch thick round. Using a 3-inch or 4-inch round cookie cutter, stamp out rounds of pie crust and transfer them to a baking sheet or tray. You should be able to re roll the scraps and end up with about 40 rounds.

  • I stuck them in the freezer for about 10 minutes just to firm up a bit. Remove the rolled-out pie crust from the fridge or freezer and lay half of them out onto a lightly floured surface. Brush each round entirely with beaten egg. Add a heaping teaspoon of the diced apples to the center of each round, leaving at least a 1-inch border.

  • Using the tines of a fork (dipped in flour), press the edges together and do this around the edge of the entire round, making a decorative edge. Take the 3-inch or 4-inch cutter (whichever one you used) and cut the hand pie once more to clean and define the edges. Repeat with the remaining hand pies.

  • Transfer them to the freezer to chill for about 10 minutes. Meanwhile preheat the oven to 450 degrees F.

  • When the hand pies are done chilling and the oven is preheated, brush the tops with the remaining egg wash and sprinkle with turbinado sugar. Transfer to the oven (I did this in batches) for about 15 to 20 minutes, until the tops are golden brown.

Tips and Tricks

  • Grate the butter – I find that this method works better than using a pastry cutter and you don’t need to buy any special tools. Just use a regular cheese grater to grate the butter.
  • Keep the pie crust as cold as possible – Throughout the rolling and assembly process I will pop the pie crust into the freezer multiple times to ensure that the butter doesn’t become too warm which will lead to a tough dough. Keeping the crust as cold as possible will lead to a light and flaky crust.
  • Ice cold water and vinegar – The water should be very cold so it doesn’t warm up the butter making the crust tough and chewy. Vinegar(I used apple cider vinegar but white vinegar is fine too) slows the gluten development when folding the dough, keeping the crust tender, light and flaky when it bakes.
  • Prep the pie dough ahead of time – It’s best to make the cheddar pie crust at least 2 hours (but ideally overnight) before you are ready to bake them. The dough can last in the fridge for 2 – 3 days or in the freezer for up to 1 year. Thaw from the freezer by placing the dough in the refrigerator 1 day before you are ready to use it.
  • Assemble hand pies then bake later – Transfer assembled hand pies to a baking sheet and place in the freezer. When frozen, place in a freezer storage bag and freeze for up to 3 months. Transfer from the freezer directly to the oven to bake.

Calories: 203kcal | Carbohydrates: 20g | Protein: 3g | Fat: 13g | Saturated Fat: 8g | Polyunsaturated Fat: 1g | Monounsaturated Fat: 3g | Trans Fat: 0.5g | Cholesterol: 33mg | Sodium: 253mg | Potassium: 53mg | Fiber: 1g | Sugar: 5g | Vitamin A: 386IU | Vitamin C: 1mg | Calcium: 25mg | Iron: 1mg

Nutrition information is automatically calculated, so should only be used as an approximation.

Harissa Hen Couscous – A Cozy Kitchen

0


Disclosure: This post may contain affiliate links, which means I may earn a commission if you click on the link and make a purchase.

Harissa Chicken Couscous is so good. It features juicy pan-seared chicken thighs cooked with eggplant and harissa-flavored pearly couscous. It’s served with grilled lemon, a tangy yogurt sauce and sweet and tart pomegranate arils. This easy dinner is spicy and flavorful and everything comes together easily in one-skillet. Serve with this Moroccan Carrot Noodle Salad with Golden Raisins, Goat Cheese and Harissa for the perfect Moroccan-inspired meal!

Harissa Hen Couscous – A Cozy Kitchen

I can’t get enough of harissa. This spicy chile paste adds sooo much flavor to anything you put it on. Everything from these Harissa Meatballs(Whole 30), Sheet Pan Harissa Chicken with Chickpeas and Eggplant to these Mini Shakshukas are loaded with flavor and are so simple to throw together for easy weeknight meals.

Close up image of Harissa Chicken Couscous in a skillet. Close up image of Harissa Chicken Couscous in a skillet.

Ingredients You’ll Need for Harissa Chicken with Couscous

  1. Chicken – I used bone-in chicken drumsticks and thighs with the skin on. Bone-in meat is juicy and it’s hard to overcook. Use all thighs or all drumsticks if you like!
  2. Harissa – This is a spicy and flavorful paste originating from North Africa. It’s made with blended chiles, cumin and coriander seeds, garlic and plenty of olive oil. I have a recipe that shows you how to make harissa from scratch or you can purchase it in the ethnic/international sections of most major grocery stores.
  3. Couscous – Couscous is type of pasta made from semolina flour. You can usually find two different types of couscous in stores – pearl couscous and regular couscous which is similar to rice in size. For this recipe you want use to pearly couscous. It takes longer to cook but it adds nice texture to this recipe.

For the rest of the ingredients, please refer to the recipe index card below!

How To Make Harissa Chicken with Couscous

  1. Cook the chicken – Sprinkle both sides of the chicken thighs and drumsticks with salt and freshly ground black pepper. Heat a large skillet over medium-high heat with olive oil. Once hot, add the chicken skin-side down. Cook for 15 minutes or until the skin is golden brown, flip and repeat. Remove chicken from the pan and set aside.
  2. Cook the eggplant – To the same skillet, cook the eggplant for 2 – 3 minutes per side, then transfer to the plate with the par-cooked chicken.
  3. Make the couscous – Reduce the heat down to medium-low then cook the shallot, garlic, spices and salt for 2 – 3 minutes or until the shallot is translucent. Add in harissa and a splash of water, stir then add the couscous. Stir until couscous is coated in the spices.
  4. Cook couscous and chicken – Nestle the chicken and eggplant into the couscous, pour in water, bring the heat up to medium-high to simmer for 10 – 12 minutes or until the couscous is tender. Cook it partially covered.
  5. Prep garnishes – Grill lemon halves over a gas stove or using a hot grill pan. Whisk in lemon juice and a splash of water into yogurt and chop up Italian parsley.
  6. Assemble and serve – Remove harissa chicken from the heat then squeeze over grilled lemon, drizzle with yogurt sauce, then sprinkle over pomegranate seeds and Italian parsley. Serve immediately.

Tips and Tricks

  • Prep the eggplant and garnishes while the chicken is cooking. Browning the chicken takes 30 minutes, so I used this time to prep the rest of the dish, that way everything came together much quicker.
  • Other vegetables – Add in canned chickpeas for added texture. Green or Kalamata olives, freshly chopped mint or cilantro.
  • Couscous – Substitute it for brown rice or quinoa. Refer to the package’s instructions for the water amounts. If you are using couscous make sure to use pearly couscous, it’s larger than regular couscous which resembles rice.
  • Storage instructions – Store leftovers in an air-tight container in the fridge for up to 3 days. Reheat in the microwave until hot.
Overhead view of a chicken dinner in a skillet.Overhead view of a chicken dinner in a skillet.

Recipe FAQs

What is harissa?

Harissa is a traditional North African paste made with dried chiles, ground cumin and coriander, smoked paprika, lemon juice, garlic and olive oil. It’s spicy, smoky and a flavorful addition to anything you put it on.

What can I use instead of harissa?

If you can’t find harissa in stores or don’t want to use it, substitute it for chile paste mixed with tomato paste for a similar flavor profile.

Straight on view of Harissa Chicken Couscous on a plate with fork and in a skillet.Straight on view of Harissa Chicken Couscous on a plate with fork and in a skillet.

More Dinner Recipes

If you tried this Harissa Chicken with Couscous Recipe or any other recipe on my website, please leave a 🌟 star rating and let me know how it went in the 📝 comments below. Thanks for visiting!

  • This first step of cooking the chicken takes a bit of time (around 30 minutes) so I used this time to prep the rest of the dish. It worked out splendidly! 

  • Sprinkle both sides of the chicken thighs and drumsticks with a few pinches of salt and a few turns of freshly ground pepper. To a large skillet, set over medium-high heat, add the oil. When the oil is hot, swirl it around a bit and then add the chicken, skin-side down, and cook for about 15 minutes, until the skin is golden brown. Flip and cook on the opposite side for an additional 15 minutes. Remove the chicken from the pan and set aside.

  • Add the pieces of eggplant and cook for 2 to 3 minutes on each side. Add the eggplant to the plate with the par-cooked chicken.

  • Turn the flame down to medium-low and add the shallot, garlic, spices and salt. Cook for 2 to 3 minutes, until the shallot is translucent. Add the harissa, splash of water and mix until the harissa is combined with the water and spices. Add the couscous and mix until the couscous is covered and coated in the spice mixture, about 2 to 3 minutes. 

  • Nestle the chicken into the couscous and add the eggplant around the chicken. Pour the water or chicken broth (for the record, I used water and it was delicious!) in different spots hitting the couscous. Bring the flame to medium-high heat and simmer the couscous mixture for about 10 to 12 minutes. You’ll notice that the water should be mostly evaporated. Give the couscous a try and if it needs a bit more time, keep it on the stove for an additional 2 to 3 more minutes. 

  • While it’s cooking, prepare the garnishes. I grilled some lemon over my gas stove. I squeezed a bit of lemon juice and stirred in a splash of water to the yogurt and whisked it together to thin it out. And I chopped up some Italian parsley. 

  • Remove the harissa chicken dish from the heat and squeeze the grilled lemon over the chicken and couscous. Drizzle with the yogurt, sprinkle with the pomegranate seeds and Italian parsley. Serve immediately. 

  • This dish is delicious as leftovers and is good for up to 3 days when stored in an airtight container in the fridge. 

Tips and Tricks

  • Prep the eggplant and garnishes while the chicken is cooking. Browning the chicken takes 30 minutes, so I used this time to prep the rest of the dish, that way everything came together much quicker.
  • Other vegetables – Add in canned chickpeas for added texture. Green or Kalamata olives, freshly chopped mint or cilantro.
  • Couscous – Substitute it for brown rice or quinoa. Refer to the package’s instructions for the water amounts. If you are using couscous make sure to use pearly couscous, it’s larger than regular couscous which resembles rice.
  • Storage instructions – Store leftovers in an air-tight container in the fridge for up to 3 days. Reheat in the microwave until hot.

Serving: 4g | Calories: 628kcal | Carbohydrates: 80g | Protein: 33g | Fat: 19g | Saturated Fat: 5g | Polyunsaturated Fat: 4g | Monounsaturated Fat: 8g | Trans Fat: 0.1g | Cholesterol: 110mg | Sodium: 1790mg | Potassium: 704mg | Fiber: 8g | Sugar: 7g | Vitamin A: 358IU | Vitamin C: 22mg | Calcium: 81mg | Iron: 3mg

Nutrition information is automatically calculated, so should only be used as an approximation.

Pumpkin Pasta – A Cozy Kitchen

0


Disclosure: This post may contain affiliate links, which means I may earn a commission if you click on the link and make a purchase.

This Pumpkin Pasta is Chorizo-spiced and oh so comforting. Tender spaghetti is tossed in a simple sauce made with ground cumin and coriander, pumpkin puree and crème fraîche for creaminess. It’s completely vegetarian, incredibly quick and easy to make in 20 minutes and it makes the perfect fall dinner served with this Fall Harvest Salad and Profiteroles.

Pumpkin Pasta – A Cozy Kitchen

It’s fall so we’re making all things pumpkin around here! Pumpkin and pasta is one of my favorite dinners to make. Everything from this Pumpkin Pasta alla Vodka, Pumpkin Sage Alfredo Pappardelle with Brown Butter and Pumpkin Macaroni and Cheese just screams fall and cozy deliciousness.

Straight on view of Pumpkin Pasta on a plate with fork. Straight on view of Pumpkin Pasta on a plate with fork.

Ingredients You’ll Need For Pumpkin Pasta

Ingredients for pasta. Ingredients for pasta.
  1. Pumpkin – Make sure to use 100% pure pumpkin puree. It’s sold right next to cans of pumpkin pie filling which is combined with sugar and spices.
  2. Spices – Ancho chile powder, ground cumin, dried oregano, coriander and a pinch of ground cloves. These spices give this pumpkin sauce a Chorizo-like flavor.
  3. Pasta – I used spaghetti but any type or shape of pasta will work here.

For the rest of the ingredients, please refer to the recipe index card below!

How To Make Pumpkin Pasta

  1. Make the pumpkin sauce – Heat butter in a medium saucepan set over medium heat. Add in shallots and garlic then cook for 2 – 3 minutes or until soft. Stir in spices and cook for an additional 1 – 2 minutes or until the spices are fragrant. Add pumpkin puree and yogurt cooking until warmed through. Taste and adjust for salt – it’s ok if it’s a little salty the pasta will need it!
  2. Boil the pasta – Bring a large pot of salted water to a boil. Cook the pasta until al dente then reserve 3/4 cup of pasta water. Drain the pasta then transfer it back into the pot.
  3. Assemble and serve – Pour the pumpkin sauce over the cooked pasta in the pot. Stir to evenly coat in the sauce, add a little of the reserved pasta water to thin out the sauce as needed. Divide among bowls then serve garnished with pumpkin seeds.

Tips and Tricks

  • Pasta water – Save at least 3/4 cup of the pasta water to add back into the sauce. This starchy water will thin out the sauce so that it will coat the pasta better without making it runny.
  • Pumpkin sauce – Since the sauce comes together so quickly you can easily make it ahead of time. Double it and store it in the fridge for up to 3 days. Allow it to cool then portion the sauce into a freezer-safe storage container to freeze for up 3 months. Reheat over the stove with a bit of pasta water until it reaches your desired consistency.
  • Uses for leftover pumpkin: This recipe calls for 3/4 cup of canned pumpkin puree so you’ll probably have 1 1/4 cups leftover. Freeze it or use it to make Butterscotch Pumpkin Pie, Pumpkin Tres Leches Cake, or Pumpkin Macaroni and Cheese.
Pasta being mixed with sauce. Pasta being mixed with sauce.

Recipe FAQs

Can I use different types of pasta for this recipe?

Absolutely! I used spaghetti but feel free to use your favorite pasta shape.

How can I make this dish vegetarian?

This dish is vegetarian! The spices make the sauce taste like chorizo but there isn’t any meat in this dish.

What type of pumpkin is best for the sauce?

Canned pumpkin puree is convenient and consistent, but you can also roast and puree fresh pumpkin for a deeper flavor.

How spicy is this dish?

I would say this dish has a mild level of spice.

Pumpkin Pasta – A Cozy Kitchen

More Fall Recipes

If you tried this Pumpkin Pasta Recipe or any other recipe on my website, please leave a 🌟 star rating and let me know how it went in the 📝 comments below. Thanks for visiting!

  • In a medium saucepan, set over medium heat, add the butter. When melted, add the shallot and garlic. Cook until the shallot has softened, about 2 to 3 minutes. Mix in the chile powder, cumin, salt, oregano, coriander, cayenne and cloves. Cook for 1 to 2 minutes, until the spices are fragrant. Add the pumpkin puree, yogurt or crème fraîche and mix until warmed, about 2 to 3 minutes. Give it a taste and adjust the salt to your liking. It might be a bit salty but it’s ok because the pasta will need it! Set aside. 

  • Meanwhile, bring a cast iron oven filled with salted water to a boil. Add the pasta and cook until al dente (mine took about 8 to 9 minutes). Scoop out about 3/4 cup of pasta water and set it aside. Drain the pasta and add it back to the cast iron oven. 

  • Add the pumpkin mixture to the pasta and pour in about 1/2 cup of pasta water. Toss until the pasta is evenly coated in the sauce. If needed, add an extra 1/4 cup of pasta water. Divide amongst plates or bowls and garnish with pepitas. 

Tips and Tricks

  • Pasta water – Save at least 3/4 cup of the pasta water to add back into the sauce. This starchy water will thin out the sauce so that it will coat the pasta better without making it runny.
  • Pumpkin sauce – Since the sauce comes together so quickly you can easily make it ahead of time. Double it and store it in the fridge for up to 3 days. Allow it to cool then portion the sauce into a freezer-safe storage container to freeze for up 3 months. Reheat over the stove with a bit of pasta water until it reaches your desired consistency.
  • Uses for leftover pumpkin: This recipe calls for 3/4 cup of canned pumpkin puree so you’ll probably have 1 1/4 cups leftover. Freeze it or use it to make Butterscotch Pumpkin PiePumpkin Tres Leches Cake, or Pumpkin Macaroni and Cheese.

Serving: 4g | Calories: 504kcal | Carbohydrates: 91g | Protein: 17g | Fat: 8g | Saturated Fat: 4g | Polyunsaturated Fat: 1g | Monounsaturated Fat: 2g | Trans Fat: 0.2g | Cholesterol: 16mg | Sodium: 650mg | Potassium: 414mg | Fiber: 6g | Sugar: 5g | Vitamin A: 7482IU | Vitamin C: 3mg | Calcium: 65mg | Iron: 3mg

Nutrition information is automatically calculated, so should only be used as an approximation.

Mini Apple Pies – A Cozy Kitchen

0


Disclosure: This post may contain affiliate links, which means I may earn a commission if you click on the link and make a purchase.

These Mini Apple Pies are Chai-spiced! Baked into mini pie pans the warm apple filling is topped with a homemade caramel sauce mixed with warm spices like ground cinnamon, cloves, and allspice. You can make mini pies or use the apple filling to create a large pie. It takes some time to prep but this cozy fall dessert is always worth the effort! Serve with Garlic Braised Short Ribs for the ideal dinner.

Mini Apple Pies – A Cozy KitchenMini Apple Pies – A Cozy Kitchen

It’s no surprise that I adore anything chai-spiced. In this recipe, it takes your classic Homemade Apple Pie and turns it into the most cozy, comforting dessert ever. During the fall months I’m making a Chai Apple Skillet Cake whenever I don’t feel like making a pie crust, these Chai Snickerdoodles, or these adorable Corgi Chai Cookies.

3/4 image of Mini Apple Pies topped with scoops of ice cream.3/4 image of Mini Apple Pies topped with scoops of ice cream.

Ingredients You’ll Need for Mini Apple Pies

  1. Chai-spiced caramel – This really takes these apples pies to the next level. The base of the homemade caramel sauce is heavy cream, butter and granulated sugar. From here, it’s spiced with ground cinnamon, ginger, and allspice to give it all the flavors of a cup of chai.
  2. Apples – A sweet and tart apple like Honey Crisp will work perfectly here. The tartness in the apple plus plenty of fresh lemon juice will help to balance out the sweetness from the caramel sauce.
  3. Pie crust – 2 pie crusts, store-bought or homemade. If you’re making mini pies roll out the dough then cut it to fit your mini pie pans or simply place the crust in a 9-inch pie pan if you want one full pie.

For the rest of the ingredients, please refer to the recipe index card below!

How To Make Mini Apple Pies

  1. Make the chai-spiced caramel – Warm heavy cream in the microwave or in a sauce pan over the stove, then set aside.
  2. In a medium saucepan set over medium heat, add sugar in an even layer. Cook sugar until the edges start to dissolve and turn lightly golden brown. Stir until it becomes an even light brown color.
  3. Turn off the heat then pour in the warmed heavy cream, stir until smooth.
  4. Whisk in the spices and butter until melted. The caramel is done when it’s a light/medium brown color. Set aside.
  5. Roll out the pie crust – In a medium bowl toss together diced apples and lemon juice. Roll out your pie dough using a lightly floured rolling pin. Use your mini pie pan as a stencil to cut out the dough – make sure to leave 2 – 3 inches of extra border all around. Line your pie pan with the dough.
  6. Assemble apple pies – Next, divide the apple filling amongst all the pie pans, then drizzle each one with 2 tablespoons of caramel sauce. Place the second crust over top, then transfer pies to a baking sheet then place into the freezer to chill for 1 hour.
  7. Bake – Preheat the oven to 350 degrees Fahrenheit, brush the top of each pie with an egg wash then bake for 25 – 35 minutes or until the tops are golden brown.
  8. Serve – Allow your pies to cool before serving with a scoop of vanilla ice cream.

Tips and Tricks

  • Freeze pies before baking to ensure that the crust doesn’t shrink in the oven.
  • Add a bit of orange zest in the apple mix for a different flavor.
  • For mini pies, muffin tins are your friend – they make for perfect single servings.
  • Let your pies cool before serving to let that chai caramel set a bit – patience pays off.
  • Serve with a dollop of chai-spiced whipped cream for an extra delicious and comforting dessert.
  • Reheat caramel sauce from the refrigerator in the microwave or on the stove until its warmed and pourable again.
  • Make ahead – Keep the pies in the freezer for 1 – 2 days. When you are ready to enjoy, bake them straight from the freezer.
Close up image of unbaked pies on a counter.Close up image of unbaked pies on a counter.

Recipe FAQs

How do I make sure the apples are tender but not mushy?

Slice your apples thin, so they’ll soften up nicely in the oven, make sure not to overcook them otherwise they’ll turn mushy.

Can the chai caramel be used in other recipes?

Absolutely, it’s very versatile – drizzle it over ice cream, pancakes, or even into your morning coffee.

What if my caramel hardens before I use it?

No stress! Gently reheat it, stirring constantly until it’s back to drizzling consistency.

Can I make these pies as one large pie instead of individuals?

This amount can easily be converted to a 9-inch pie pan. Or you can simply make my homemade apple pie recipe.

Overhead image of baked Mini Apple Pies on a counter with flowers and cups of coffee arranged all around.Overhead image of baked Mini Apple Pies on a counter with flowers and cups of coffee arranged all around.

More Fall Recipes

If you tried this Mini Apple Pies Recipe or any other recipe on my website, please leave a 🌟 star rating and let me know how it went in the 📝 comments below. Thanks for visiting!

Chai-Spiced Caramel:

  • To make the chai-spiced caramel: In a small saucepan, set over medium heat (or you can use a microwave to do this), warm the heavy cream and then set aside.

  • In a medium saucepan, set over medium heat, add the sugar. Shake it around a bit until there’s an even layer of sugar on the bottom of the saucepan. Cook the sugar, staying close by so you can keep an eye on it, until the edges of the sugar begin to dissolve and turn a light golden brown. At this point, give it a stir until it becomes an even light brown color. Turn off the heat. Pour in the warmed heavy cream (it may bubble up a bit but that’s ok) and keep stirring until smooth. Whisk in the spices and the butter, until melted. If at any time you need to, feel free to turn the heat back on. The color should be a light to medium brown. Set the caramel aside. *Note: Right before you use it, you may need to reheat it over medium-low heat. It may seem like it turned into a big caramel candy, but reheating it and whisking it will make it super smooth and pourable again.

Apple Pie Assembly:

  • In a medium bowl, add the diced apple and lemon juice and toss until evenly coated.

  • Flour your rolling pin and work surface lightly. Roll out the first disk of pie dough, being sure to rotate it every so often, as to avoid it from sticking. If you’re using mini pie tins or pie dishes, flip them over and place them on the pie dough; using a knife, stencil a circle, leaving about a 2 to 3-inch border around the pie dishes (we’ll need that extra room for the trim). Cut out the stencils and line your mini pie dishes with the pie crust.

  • Divide the diced apple mixture amongst the mini pies. Add about two tablespoons of caramel to each mini pie.

  • Add any top you like. I went for a variety. I used a mini heart cookie cutter to add a heart top. I did a lattice. I did a braid. Get creative!

  • Transfer the pies to a baking sheet and stick ‘em in the freezer to chill for 1 hour.

  • (Fun fact: You can also keep the pies in the freezer for up to 1 day to 2 days. Bake straight from the freezer!)

To Bake:

  • When you’re ready to bake the pies, preheat the oven to 350 degrees F. Brush the tops of the pies with egg wash. Transfer to the oven to bake for 25 to 35 minutes, or until the tops are golden brown. You may need to rotate the pies at the 15 minute mark (this is if your oven bakes unevenly (mine does!)).

  • Remove from the oven and serve with vanilla ice cream.

Tips and Tricks

  • Freeze pies before baking to ensure that the crust doesn’t shrink in the oven.
  • Add a bit of orange zest in the apple mix for a different flavor.
  • For mini pies, muffin tins are your friend – they make for perfect single servings.
  • Let your pies cool before serving to let that chai caramel set a bit – patience pays off.
  • Serve with a dollop of chai-spiced whipped cream for an extra delicious and comforting dessert.
  • Reheat caramel sauce from the refrigerator in the microwave or on the stove until its warmed and pourable again.
  • Make ahead – Keep the pies in the freezer for 1 – 2 days. When you are ready to enjoy, bake them straight from the freezer.

Calories: 477kcal | Carbohydrates: 71g | Protein: 5g | Fat: 21g | Saturated Fat: 9g | Polyunsaturated Fat: 2g | Monounsaturated Fat: 8g | Trans Fat: 0.2g | Cholesterol: 64mg | Sodium: 204mg | Potassium: 263mg | Fiber: 5g | Sugar: 44g | Vitamin A: 444IU | Vitamin C: 8mg | Calcium: 33mg | Iron: 2mg

Nutrition information is automatically calculated, so should only be used as an approximation.

Chai Carrot Cupcakes with Spiced Maple Frosting

0

Disclosure: This post may contain affiliate links, which means I may earn a commission if you click on the link and make a purchase.

Chai Carrot Cupcakes with Spiced Maple Frosting are flavored with the spices of a cup of chai! Moist carrot cupcakes are loaded with warm spices, grated carrots, pumpkin seeds and walnuts. The frosting is delicious and buttery, filled with maple syrup and topped with cinnamon. These cupcakes are super easy to make and are perfect for Easter or served with Brown Butter Scallops with Butternut Squash Risotto.

Chai Carrot Cupcakes with Spiced Maple Frosting

I ADORE carrot cake and chai. Carrot Cake Cupcakes with Cream Cheese Frosting, this Mini Carrot Cake with Brown Butter Cream Cheese Frosting, or Chai Tiramisu are simply perfect for any holiday gathering or whenever you are craving a cozy treat.

Overhead view of Chai Carrot Cupcakes with Spiced Maple Frosting on a counter with cups of coffee.Overhead view of Chai Carrot Cupcakes with Spiced Maple Frosting on a counter with cups of coffee.

Ingredients You’ll Need for Chai Carrot Cupcakes with Spiced Maple Frosting

Side view of cupcake ingredients on a counter. Side view of cupcake ingredients on a counter.
  1. Dry ingredients – Aside from the usual flour, baking soda and salt, the dry mix is combined with warm spices like ground cinnamon, ginger, cloves and black pepper to really make these cupcakes taste like carrot cake and chai spice.
  2. Butter and vegetable oil – You really want to use a combination of butter and vegetable oil. Using all butter(although delicious) will make the cupcakes denser than we’d like and they won’t be as moist.
  3. Carrots – Use freshly grated carrots not the pre-shredded kind. You’ll get a stronger carrot flavor and the extra moisture will keep the cupcakes moist and light.

For the rest of the ingredients, please refer to the recipe index card below!

How To Make Chai Carrot Cupcakes with Spiced Maple Frosting

  1. Make the cupcakes – Whisk together the dry ingredients in a medium bowl then set aside. In the bowl of a stand up mixer beat together butter and sugar until fluffy, then pour in oil and eggs. Alternate adding buttermilk and the dry ingredients to the butter mixture until combined. Fold in the carrots, pumpkin seeds and walnuts.
  2. Bake – Divide batter between a prepared muffin pan. Bake for 20 – 25 minutes or until a skewer inserted in the middle comes out clean. Allow cupcakes to cool for 5 minutes then transfer to a wire rack to cool completely.
  3. Make the frosting – In the bowl of a stand-up mixer beat powdered sugar, vanilla extract, salt and heavy cream together until light and fluffy.
  4. Decorate – Grab a cake knife to spread the frosting on each cupcake or transfer it to a piping bag. Finish with a dusting of ground cinnamon then serve.

Tips and Tricks

  • Use a cookie scoop to fill the muffin tins with cupcake batter. It’s makes filling each one easier with less mess.
  • Work in batches – Baking both batches cupcakes at the same time results in the cupcakes steaming in the oven and having a weird texture.
  • Turn it into a cake – Divide the batter between 2(8-inch) cake pans. Bake for 25 – 35 minutes or until a skewer inserted into the center comes out clean.
  • It freezes really well! Keep cupcakes tightly wrapped in plastic wrap stored in a freezer safe bag. When you are ready to eat, allow to thaw in the fridge.
Cupcakes on a wire rack topped with frosting.Cupcakes on a wire rack topped with frosting.

Recipe FAQs

How do you keep carrot cupcakes moist?

Using a combination of butter and oil really helps to keep your carrot cupcakes moist. Butter alone will make your cupcakes dense but when mixed with oil keeps them moist and light.

Can I make it into a cake instead?

Absolutely! Divide the batter between two 8-inch cake pans then bake for 25 – 35 minutes or until a toothpick comes out clean in the middle.

Can I leave out the pumpkin seeds and walnuts?

Yes, I like to include them for a little bit of crunch and texture but it’s fine to leave them out. You can even swap them out for golden raisins or chopped pecans.

Frosted Chai Carrot Cupcakes with Spiced Maple Frosting on the counter and on a cake stand.Frosted Chai Carrot Cupcakes with Spiced Maple Frosting on the counter and on a cake stand.

More Fall Recipes

If you tried this Chai Carrot Cupcakes with Spiced Maple Frosting Recipe or any other recipe on my website, please leave a 🌟 star rating and let me know how it went in the 📝 comments below. Thanks for visiting!

  • 2(12-cavity) cupcake tins

  • 1 medium bowl

  • 1 Stand-up Mixer fitted with the paddle attachment and the whisk attachment

  • Piping bag fitted with a star tip for frosting

To Make the Cake:

  • Preheat oven to 350 degrees F. Grease two (12-cavity) cupcake tins. I used cooking spray. You can also line them with cupcake liners.

  • In a medium bowl, whisk together the flour, baking soda, cinnamon, ginger, black pepper, cloves and salt. Set the dry mixture aside.

  • In the bowl of a stand-up mixer, with the paddle attachment, add the butter, white sugar and brown sugar; beat until nice and fluffy, about 2 to 3 minutes. Pour in the oil and eggs. Beat until combined.

  • Alternating between the buttermilk and the dry mix, add them to the butter mixture, until just combined. Lastly, add the carrots and walnuts and mix until thoroughly distributed throughout the batter.

  • To fill up the cupcake tin, I used a cookie scoop to make it easy on myself. Fill each cupcake tin about half way. I baked these in batches because doing two at the same time didn’t end well for me. Transfer the first cupcake tin to the oven and bake for 20 to 25 minutes, until a skewer inserted into the center comes out clean. Repeat with the second batch of batter.

  • Allow them to cool in the pan for about 5 minutes and then transfer them to a cooling rack to cool before adding the frosting.

To Make the Frosting:

  • To the bowl of a stand-up mixer, sift in the powdered sugar, add the vanilla extract, salt and heavy cream. Beat the frosting for about 3 minutes. The fluffiness from the heavy cream really lightens up this frosting so be sure to beat it for the full 3 minutes. If the frosting is too loose, feel free to transfer it to the fridge to chill for about 10 minutes. Then beat it one last time.

  • Decorate the cupcakes however you like! Garnish with sifted cinnamon.

Tips and Tricks

  • Use a cookie scoop to fill the muffin tins with cupcake batter. It’s makes filling each one easier with less mess.
  • Work in batches – Baking both batches cupcakes at the same time results in the cupcakes steaming in the oven and having a weird texture.
  • Turn it into a cake – Divide the batter between 2(8-inch) cake pans. Bake for 25 – 35 minutes or until a skewer inserted into the center comes out clean.
  • It freezes really well! Keep cupcakes tightly wrapped in plastic wrap stored in a freezer safe bag. When you are ready to eat, allow to thaw in the fridge.

Calories: 389kcal | Carbohydrates: 51g | Protein: 4g | Fat: 20g | Saturated Fat: 11g | Polyunsaturated Fat: 3g | Monounsaturated Fat: 5g | Trans Fat: 1g | Cholesterol: 63mg | Sodium: 219mg | Potassium: 133mg | Fiber: 1g | Sugar: 39g | Vitamin A: 2754IU | Vitamin C: 1mg | Calcium: 40mg | Iron: 1mg

Nutrition information is automatically calculated, so should only be used as an approximation.