

This easy fruit salad recipe is a perfect summer side dish! Kids and adults love this one—it’s made with colorful fruit and a bright honey-lime dressing.

This classic fruit salad recipe has become one of our go-to summer side dishes. It’s fresh, it’s colorful, and—best of all—it’s kid-friendly. Our kiddo has always loved fresh fruit, so when I want to bring a dish to a gathering that I know he’ll go for, fruit salad wins every time.
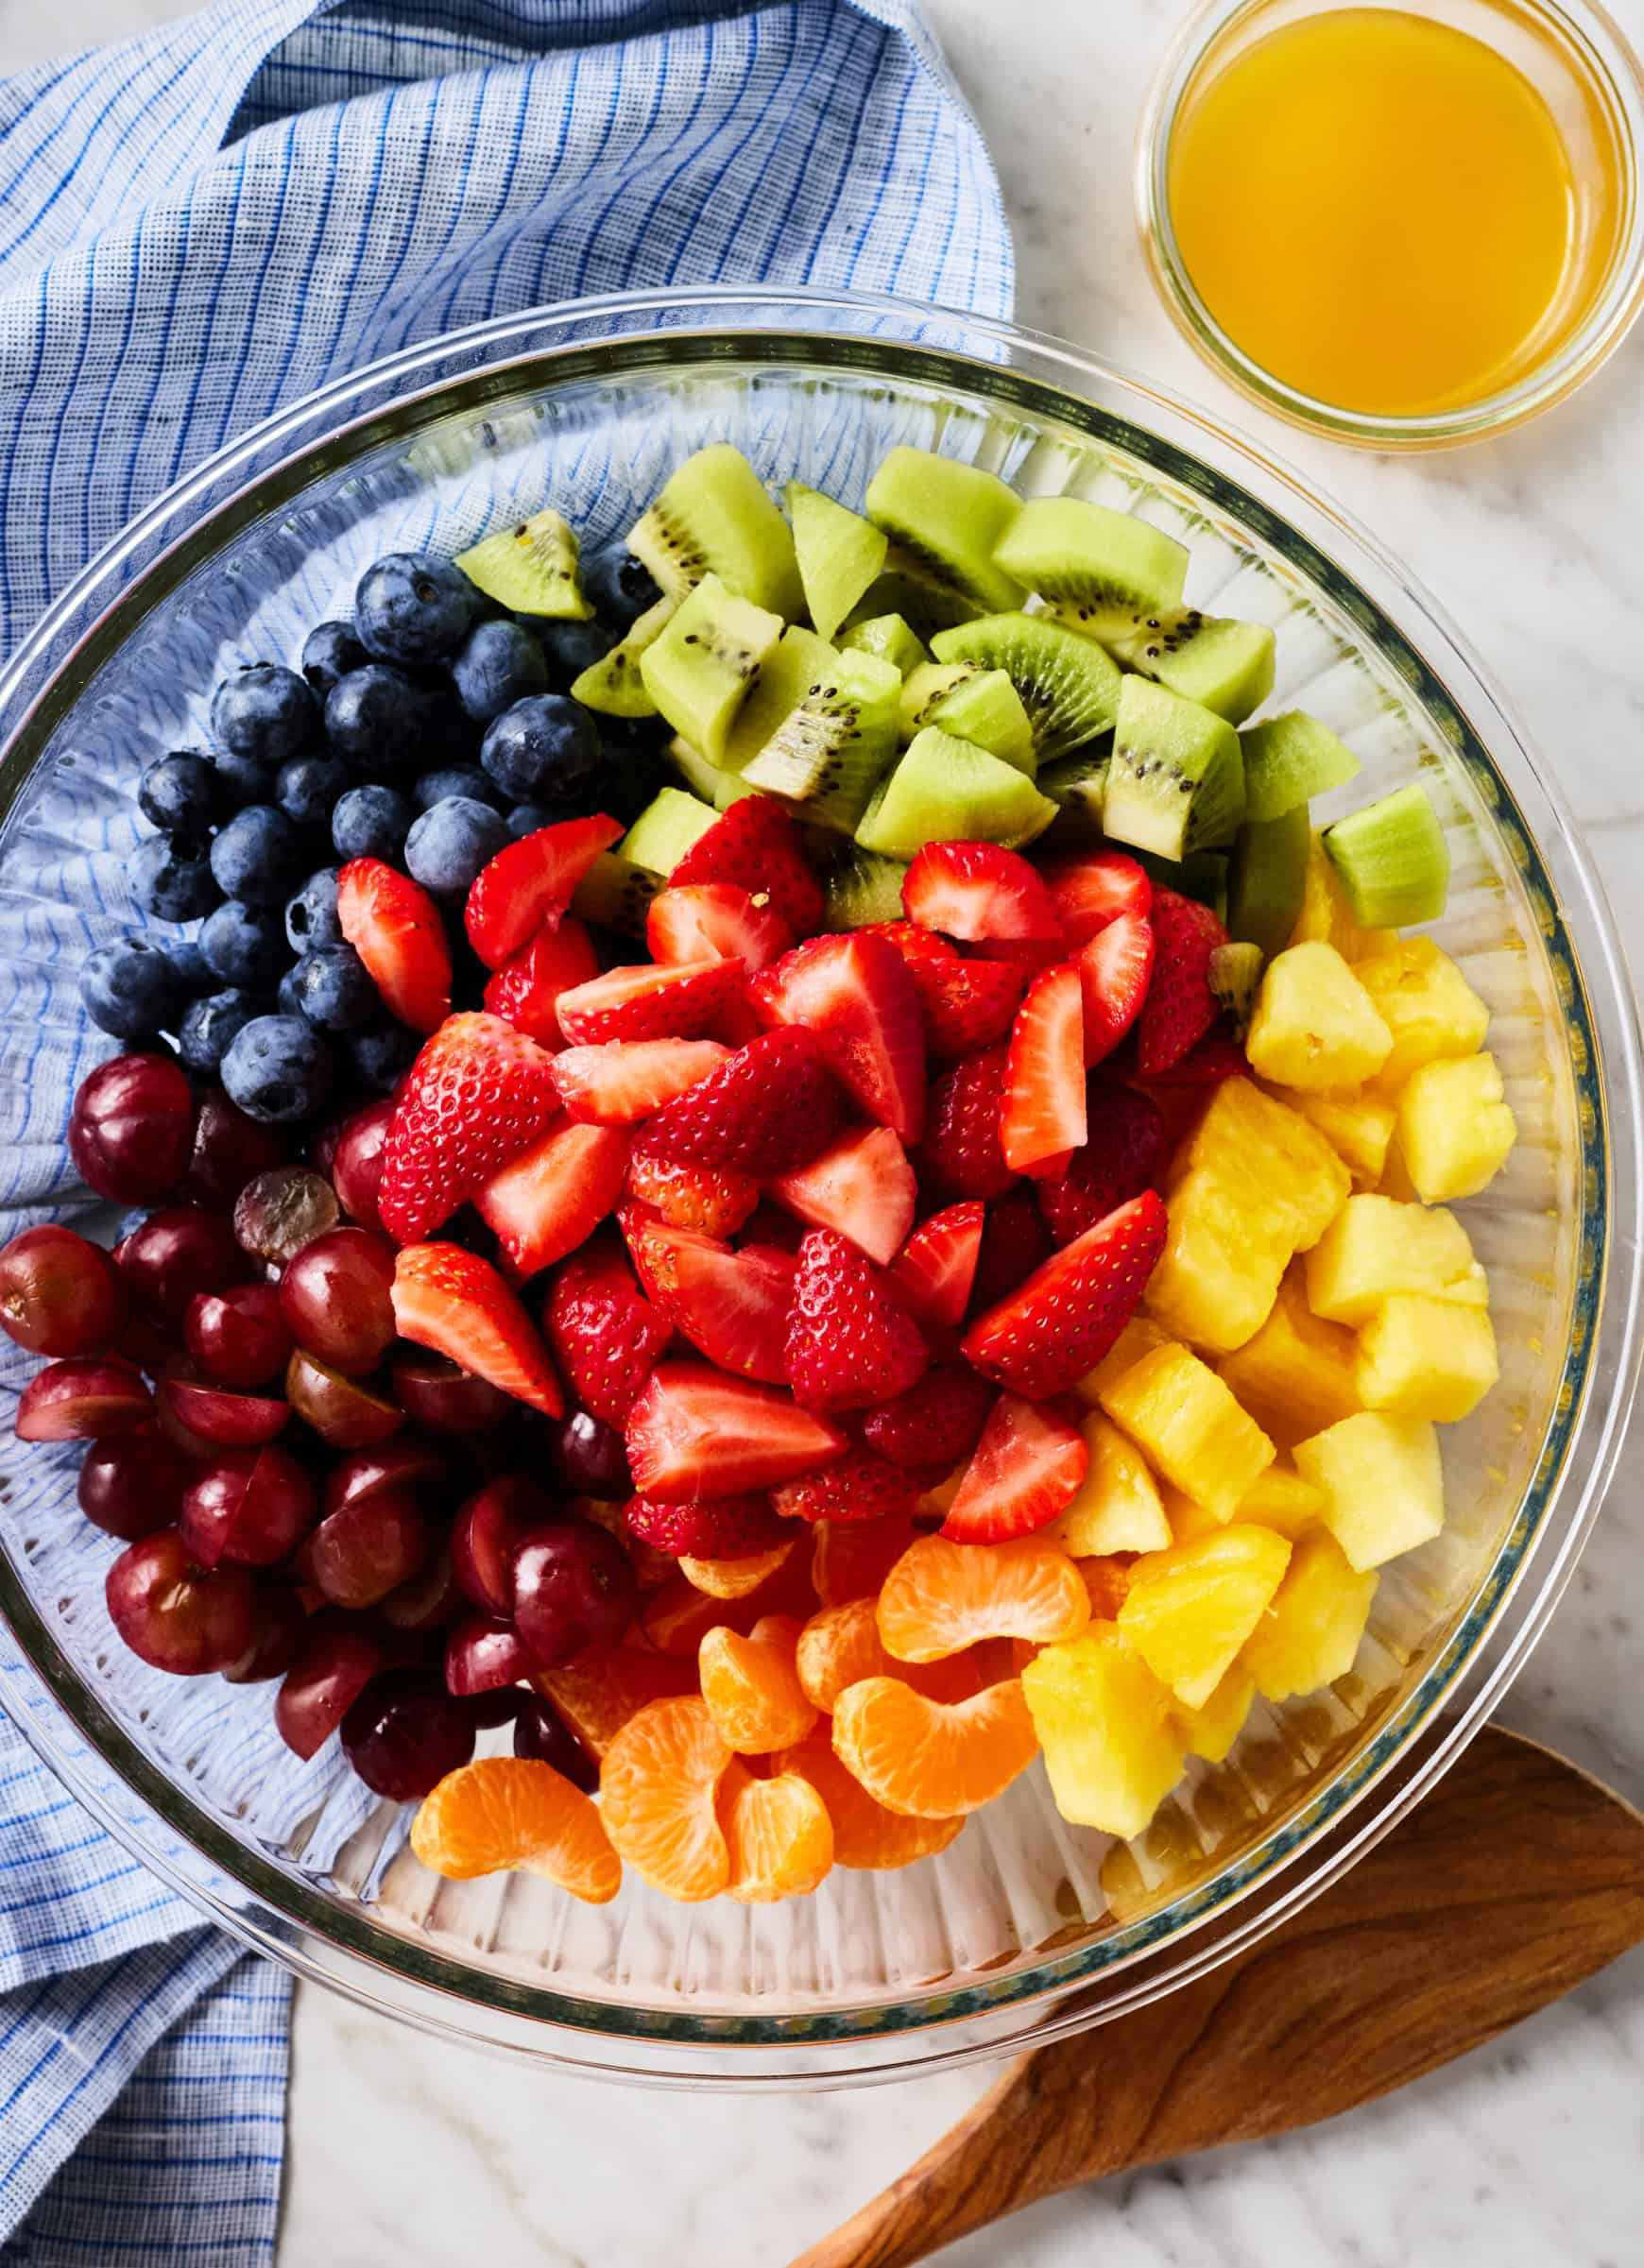
I call for a vibrant blend of pineapple, mandarin oranges, blueberries, strawberries, grapes, and kiwi in this recipe, but I want to say up front that this fruit salad is super flexible. I’m sharing some of my go-to subs and swaps below, but honestly, almost any fruit tastes delicious with this salad’s simple honey-lime dressing. Feel free to toss in your seasonal favorites!

Fruit Salad Ingredients
Here’s what you’ll need to make this recipe:
- Fresh pineapple – I call for 1 medium pineapple in this recipe, but if you don’t feel like breaking down a whole one, pre-cut pineapple will work here too. You’ll need about 5 cups chopped, though this recipe is flexible, so no need to be 100% exact.
- Kiwi – For tangy flavor and a fun pop of green.
- Grapes – Any kind you like! I love their bursty, juicy texture in this recipe.
- Strawberries and blueberries – If you ask me, berries are the best part of any fruit salad. I especially love the blueberries here because you can toss them in whole—no chopping required!
- Mandarin oranges – For sweet, juicy, citrusy flavor. You’ll use mandarin juice in the fruit salad dressing too!
Find the complete recipe with measurements below.
The Easiest Fruit Salad Dressing
My fruit salad dressing couldn’t be simpler. I use the juice of 1 lime + the juice of 1 mandarin orange + 1 tablespoon honey.
This combination is tangy, citrusy, and lightly sweet. It brightens up the salad and encourages the cut fruit to release its own juices, helping the fruity flavors meld. I don’t worry too much about the exact measurements for this dressing—a little more or a little less lime or orange juice won’t make or break it.
Possible add-ins: Add extra depth of flavor to this dressing by whisking in some lime zest, mandarin orange zest, and/or grated fresh ginger.
How to Make Fruit Salad
This fruit salad recipe is super easy to make—most of the work is chopping the fruit. Try to cut each type into similar-sized pieces so that you can get a variety of fruits in each bite!
- Tip: The pineapple will take the longest to chop. For a shortcut, use pre-cut pineapple.
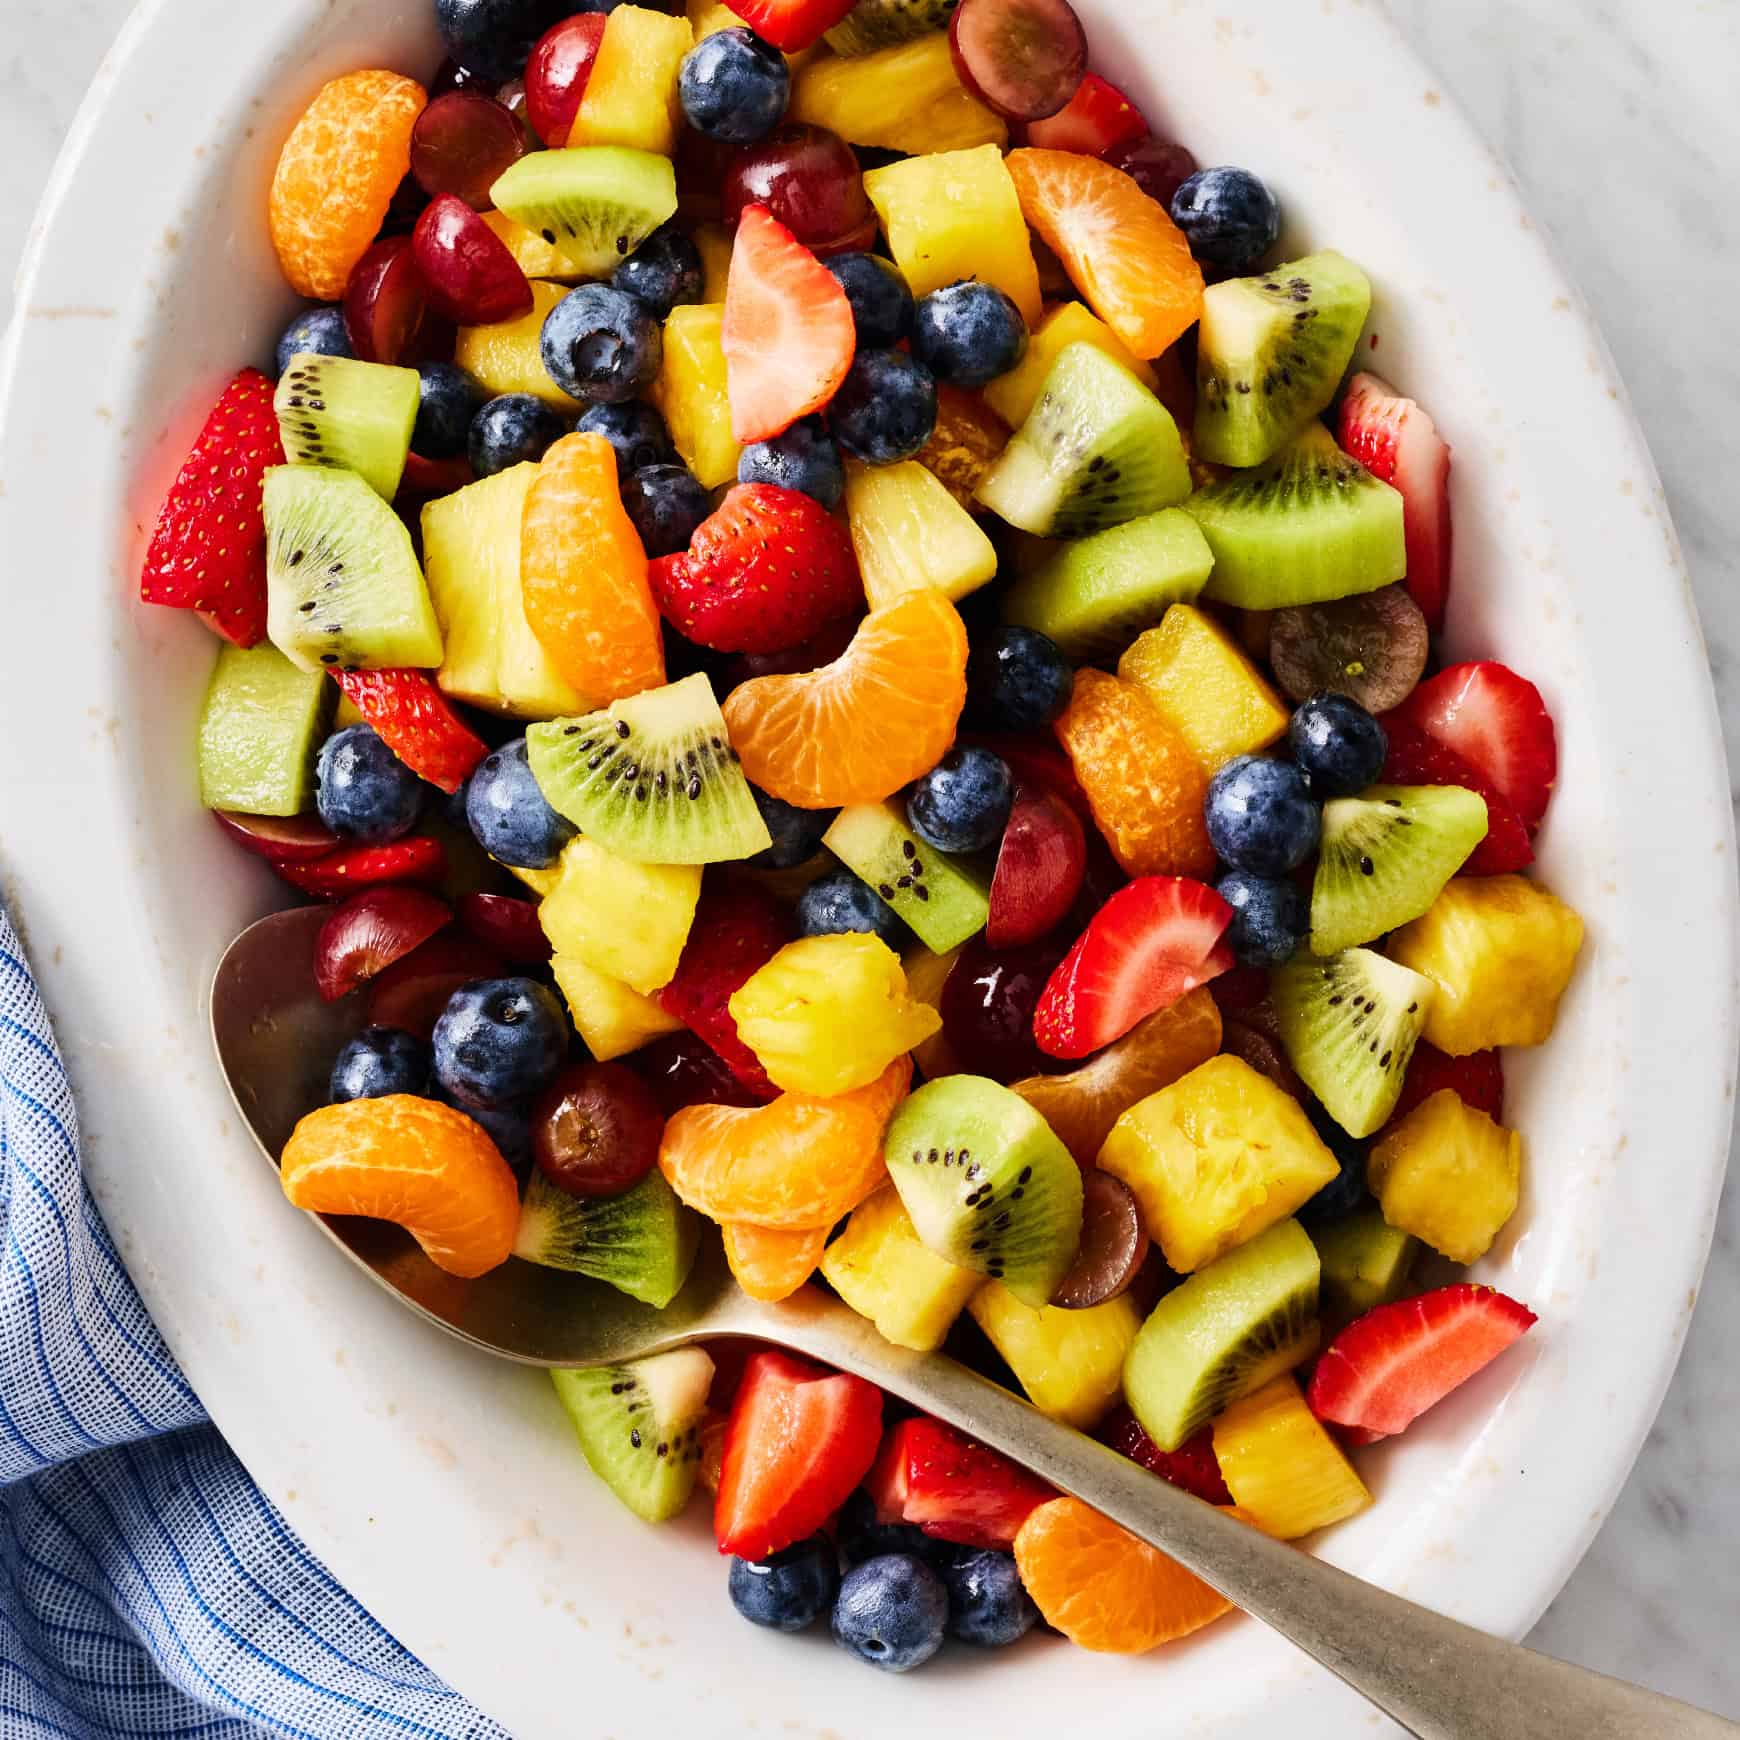
Combine the fruit in a large mixing bowl. Whisk together the dressing in a small bowl or liquid measuring cup, and then pour it over the fruit.
Mix to combine…and that’s it!
Make-Ahead and Storage Tips
You can serve this salad immediately, but I like it best after it chills for a few hours in the fridge.
The fruit softens slightly, and the flavors in the salad start to meld. When you’re ready to serve, give the salad a good stir to make sure the fruit is well coated in the dressing (it tends to sink to the bottom of the bowl).
Leftover fruit salad keeps well in an airtight container in the refrigerator for up to 2 days. I love when we have some on hand. It’s a perfect side dish, snack, or even dessert!
Recipe Tips and Variations
Fresh fruit is best. I don’t recommend substituting thawed frozen fruit or canned fruit for the fresh fruits in this recipe. Fresh fruit will have the best texture (read: not mushy!) and balanced flavor.
Make it your own. The best fruit for a fruit salad is whatever’s in season! Here are a few subs and swaps that are great in this recipe:
- Instead of mandarins… Use 1 peeled and diced mango, 2 chopped peaches, or nectarines.
- Instead of strawberries… Use blackberries or raspberries. These berries are delicate, so I would fold them into the salad at the very end, after you add the dressing.
- Instead of blueberries or grapes… Use halved pitted cherries or chopped plums.
- Instead of pineapple… Use chopped cantaloupe or honeydew melon, mango, peaches, or nectarines.
- Instead of kiwi… Use mango or green grapes.
Fruits to avoid: Apples, pears, and bananas all oxidize (aka turn brown) after they’re cut. Unless you’re serving this fruit salad right away, I’d skip them!
Enjoy with other classic sides like pasta salad, potato salad, and broccoli salad at your next summer picnic!

Easy Fruit Salad
Serves 12
Made with a bright honey-lime dressing and colorful fresh fruit, this easy fruit salad recipe is a perfect summer side dish! It’s super flexible—feel free to toss in your favorite in-season fruit. Find some of my favorite variations in the blog post above.
- 1 medium pineapple, peeled, cored, and chopped into ½-inch pieces (about 5 cups)
- 1 pound strawberries, hulled and chopped
- 3 kiwis, peeled, quartered lengthwise, and sliced
- 2 cups seedless grapes, halved
- 1 pint blueberries
- 3 mandarin oranges, peeled and segmented, or 1 peeled and diced mango or 2 chopped peaches
Dressing
- Juice of 1 lime
- Juice of 1 mandarin orange
- 1 tablespoon honey or maple syrup
Prevent your screen from going dark
-
In a large bowl, mix together the pineapple, strawberries, kiwi, grapes, blueberries, and mandarins.
-
Make the dressing: In a small bowl, whisk together the lime juice, mandarin juice, and honey.
-
Pour the dressing over the fruit and toss to coat. Serve immediately or cover and chill until ready to serve.
-
Fruit salad keeps well in an airtight container in the refrigerator for up to 2 days.
Recipe adapted from The Kitchn


")
")


")


