Completely Easy Potato Gnocchi Recipe

0

Frequently Asked Questions About Potato Gnocchi Recipe

1. What is potato gnocchi, and how is it different from other types of pasta?

Gnocchi is an Italian dish that is often classified as pasta, but it’s technically a type of dumpling. Unlike traditional pasta made from wheat flour, potato gnocchi is typically made from a mixture of potatoes, flour, and sometimes eggs. The word β€œgnocchi” comes from the Italian word β€œnocca,” which means knuckle, reflecting its small, knuckle-like shape.

The primary difference between gnocchi and other types of pasta lies in its ingredients and texture. Traditional pasta, such as spaghetti or fettuccine, is made from wheat flour and water (or eggs) and has a firmer, chewy texture. Gnocchi, on the other hand, is softer and fluffier due to the use of potatoes. When cooked properly, gnocchi should be light and tender, almost pillow-like, making it a comforting and satisfying dish that pairs beautifully with a variety of sauces.

2. What is the best type of potato to use for making potato gnocchi?

For the best results when making gnocchi, it’s recommended to use Russet potatoes. Russet potatoes are high in starch and low in moisture, which makes them ideal for creating a light and fluffy texture. The starchy content of Russet potatoes helps bind the dough without requiring too much flour, which can lead to dense and heavy gnocchi.

When preparing your potatoes, it’s important to either bake or boil them with the skin on. Baking is often preferred because it allows the potatoes to lose some of their moisture, which is beneficial for making gnocchi. If you choose to boil the potatoes, be sure to leave the skin on to prevent them from absorbing too much water. After cooking, the potatoes should be riced while still warm to ensure a smooth, lump-free dough.

3. How do you make potato gnocchi from scratch?

Making potato gnocchi from scratch involves just a few simple ingredients: potatoes, flour, and egg. The process begins with cooking the potatoes until they are tender. Once cooked, the potatoes are mashed or put through a potato ricer to achieve a smooth consistency. It’s important to work quickly while the potatoes are still warm to prevent the dough from becoming too sticky.

After ricing the potatoes, they are mixed with flour and an egg to form a dough. The dough should be kneaded just enough to combine the ingredients, as overworking it can result in tough gnocchi. Once the dough is ready, it’s rolled into ropes, cut into small pieces, and shaped using a fork or gnocchi board. The final step is to boil the gnocchi until they float to the surface, indicating they are done.

4. Why did my potato gnocchi turn out tough and chewy instead of soft and fluffy?

If your gnocchi turned out tough and chewy, it’s likely due to overworking the dough or adding too much flour. Gnocchi dough should be handled gently to avoid developing too much gluten, which can make the dumplings dense and chewy. It’s essential to knead the dough just enough to bring the ingredients together and then stop.

Another common mistake is adding too much flour to the dough. While it’s necessary to use some flour to achieve the right consistency, adding too much can make the gnocchi heavy. To achieve light and fluffy gnocchi, aim to use the minimum amount of flour needed to keep the dough from sticking to your hands and work surface. Remember, less is more when it comes to flour in gnocchi dough.

5. How do you cook potato gnocchi, and how do you know when it’s done?

Cooking gnocchi is straightforward and quick. To cook gnocchi, bring a large pot of salted water to a rolling boil. Gently drop the gnocchi into the boiling water, being careful not to overcrowd the pot. Stir the gnocchi gently to prevent them from sticking together or to the bottom of the pot.

You’ll know the gnocchi are done when they float to the surface of the water. This usually takes just a few minutes. Once they float, use a slotted spoon to remove the gnocchi from the pot and transfer them to a serving dish or directly into the sauce. Cooking gnocchi for too long can cause them to become mushy, so it’s important to watch them closely and remove them as soon as they float.

6. Can you freeze potato gnocchi, and what is the best way to do it?

Yes, gnocchi can be frozen, making it a convenient option for meal prep. To freeze gnocchi, arrange the freshly made gnocchi on a baking sheet in a single layer, making sure they aren’t touching each other. Place the baking sheet in the freezer and freeze the gnocchi until they are solid, usually about two hours.

Once frozen, transfer the gnocchi to a freezer-safe bag or container for long-term storage. Frozen gnocchi can be cooked directly from the freezer; there’s no need to thaw them first. Just drop the frozen gnocchi into boiling water and cook until they float to the surface. Freezing gnocchi this way ensures that they maintain their shape and texture, so they taste just as good as freshly made.

7. What sauces pair well with potato gnocchi?

Gnocchi is incredibly versatile and pairs well with a variety of sauces. A simple tomato sauce is a classic choice, as the acidity of the tomatoes complements the soft, pillowy texture of the gnocchi. For a richer dish, you might try a brown butter and sage sauce, which adds a nutty, aromatic flavor that enhances the gnocchi’s delicate taste.

Another popular option is a creamy mushroom sauce, where the earthiness of the mushrooms pairs beautifully with the gnocchi. You can also experiment with pesto, which adds a fresh, herbal note, or a cheese-based sauce like a Parmesan cream sauce. The key is to choose a sauce that enhances the gnocchi without overwhelming its subtle flavor.

8. How do you keep potato gnocchi from becoming sticky while preparing and cooking?

To prevent gnocchi from becoming sticky during preparation, it’s important to dust them with flour as you work with them. This includes dusting the dough, the work surface, and the cut gnocchi pieces. Keeping the gnocchi well-floured ensures they don’t stick together or to the surface as you roll and cut them.

When cooking gnocchi, stir them gently after adding them to the boiling water to prevent them from sticking to each other or the pot. It’s also crucial not to overcrowd the pot; cooking gnocchi in batches can help avoid this problem. Additionally, ensuring the water is at a rolling boil before adding the gnocchi will help them cook evenly and prevent them from clumping together.

9. Can you bake potato gnocchi instead of boiling it?

Yes, gnocchi can be baked, which results in a crispy exterior while maintaining a soft interior. To bake gnocchi, you can first boil them as usual, then toss them in a sauce or with some oil and seasoning. Place them in a baking dish, sprinkle with cheese, and bake in the oven until golden and crispy on top.

Alternatively, you can bake gnocchi directly in a sauce without boiling them first. In this method, the gnocchi absorbs the sauce as it bakes, resulting in a rich, flavorful dish. Baking is a great option for creating a more substantial meal and is especially popular for dishes like gnocchi gratin or gnocchi bake.

10. Is potato gnocchi gluten-free, and can it be made gluten-free?

Traditional gnocchi is not gluten-free because it contains flour, which typically includes gluten. However, gnocchi can be made gluten-free by using gluten-free flour in place of regular flour. There are many gluten-free flours available that work well in gnocchi, such as rice flour, potato flour, or a gluten-free all-purpose flour blend.

When making gluten-free gnocchi, it’s important to use the right type of flour and to adjust the dough’s consistency as needed. Gluten-free flours can behave differently from wheat flour, so you may need to experiment with the amount used. The result should still be a light and fluffy gnocchi that holds together well when cooked.

11. What is the difference between potato gnocchi and ricotta gnocchi?

Potato gnocchi is made primarily from potatoes, flour, and sometimes egg, resulting in a soft, pillowy dumpling that is slightly chewy in texture. The key to good potato gnocchi is using starchy potatoes and handling the dough gently to avoid overworking it, which can make the gnocchi dense.

Ricotta gnocchi, on the other hand, is made with ricotta cheese instead of potatoes. This variation results in a lighter, fluffier gnocchi with a more delicate texture. Ricotta gnocchi tends to be softer and less chewy than potato gnocchi, and it absorbs sauces beautifully. Both types of gnocchi are delicious, but they offer different textures and flavors.

12. How do you store leftover potato gnocchi, and how long does it last?

Cooked gnocchi can be stored in the refrigerator for up to three days. To store, place the gnocchi in an airtight container and refrigerate. When reheating, sautΓ© the gnocchi in a pan with a bit of butter or olive oil until they are warmed through. This method not only heats them but also gives the gnocchi a crispy exterior, adding a delightful texture contrast to the soft interior.

If you want to store uncooked gnocchi, freezing is your best option. Arrange the gnocchi on a baking sheet in a single layer, ensuring they don’t touch each other, and freeze them until solid. Once frozen, transfer the gnocchi to a freezer-safe bag or container. Frozen gnocchi can be stored for up to two months and can be cooked directly from the freezerβ€”there’s no need to thaw them first. Just drop the frozen gnocchi into boiling water and cook until they float to the surface.

13. What is the best way to reheat potato gnocchi?

The best way to reheat gnocchi is to sautΓ© them in a skillet with some butter or olive oil over medium heat. This method not only warms the gnocchi but also adds a slightly crispy texture to the outside while keeping the inside soft and fluffy. To reheat, add a bit of butter or oil to a hot skillet, add the gnocchi, and cook until they are heated through and slightly golden.

Alternatively, you can reheat gnocchi in the microwave, but this method can make them a bit soggy. To microwave, place the gnocchi in a microwave-safe dish, cover with a damp paper towel, and heat in short bursts, stirring in between, until they are heated through. If you’re reheating gnocchi that has already been mixed with sauce, using the stovetop method will help the sauce thicken and adhere better to the gnocchi.

14. What is the role of eggs in potato gnocchi dough?

Eggs play a crucial role in gnocchi dough as a binding agent. They help hold the ingredients together, giving the dough structure and making it easier to handle. The egg yolk also adds a bit of richness to the dough, enhancing the flavor and texture of the gnocchi. Without eggs, the dough may be more difficult to work with and could fall apart during cooking.

However, not all gnocchi recipes require eggs. Some traditional Italian recipes omit the egg for a lighter, more delicate gnocchi. This eggless version requires more careful handling, as the dough is more fragile. The key to making successful eggless gnocchi is to use starchy potatoes and handle the dough as little as possible to prevent it from becoming too dense.

15. How can I make gluten-free potato gnocchi?

Making gluten-free gnocchi is relatively simple and involves substituting regular flour with a gluten-free alternative. The most common gluten-free flours used for gnocchi include rice flour, potato flour, or a gluten-free all-purpose flour blend. When using gluten-free flour, you may need to adjust the amount slightly to achieve the right dough consistency, as gluten-free flours can behave differently than wheat flour.

To make gluten-free gnocchi, follow the same process as traditional gnocchi: cook and rice the potatoes, mix with the gluten-free flour, and knead gently until the dough comes together. The resulting gnocchi should be light and fluffy, similar to the traditional version. Gluten-free gnocchi can also be frozen and cooked directly from the freezer, just like regular gnocchi.

16. What are some common mistakes to avoid when making potato gnocchi?

One of the most common mistakes when making gnocchi is overworking the dough. Kneading the dough too much can develop gluten, which makes the gnocchi tough and chewy rather than light and fluffy. To avoid this, knead the dough just until the ingredients are combined and then stop.

Another common mistake is using too much flour. While flour is necessary to bring the dough together, adding too much can make the gnocchi dense and heavy. The goal is to use just enough flour to keep the dough from sticking to your hands and work surface. Additionally, it’s important not to overcook the gnocchi. Boil them just until they float to the surface; any longer, and they can become mushy.

17. Can you use sweet potatoes to make potato gnocchi?

Yes, sweet potatoes can be used to make gnocchi, resulting in a sweeter, more colorful version of the dish. The process is similar to making traditional potato gnocchi, but the sweet potatoes add a unique flavor and a slight nutritional boost. Sweet potato gnocchi pairs well with a variety of sauces, including brown butter and sage or a light cream sauce.

To make sweet potato gnocchi, cook the sweet potatoes until tender, then mash or rice them as you would with regular potatoes. Mix with flour and egg to form a dough, then roll and shape the gnocchi. The result is a slightly denser gnocchi with a sweet, earthy flavor that is perfect for fall or winter meals.

18. How do you shape potato gnocchi, and why does it matter?

Shaping gnocchi is an important step that affects both the texture and the sauce-holding capacity of the dumplings. After cutting the dough into small pieces, each piece is traditionally rolled along the tines of a fork or a gnocchi board to create ridges on one side and a small indentation on the other. These ridges and indentations help the gnocchi hold onto sauce, ensuring each bite is flavorful.

While shaping gnocchi may seem like a tedious task, it’s actually quite simple once you get the hang of it. If you prefer a more rustic approach, you can simply press your thumb into the center of each piece to create a small dent. This method is quicker and still helps the gnocchi grip the sauce. Whether you choose to use a fork, a gnocchi board, or just your thumb, shaping is an essential step in making gnocchi that are both visually appealing and delicious.

19. What are the best side dishes to serve with potato gnocchi?

Gnocchi is a versatile dish that pairs well with a variety of side dishes. For a lighter meal, consider serving gnocchi with a fresh arugula salad dressed with lemon vinaigrette. The peppery arugula and zesty dressing provide a refreshing contrast to the rich, soft gnocchi. Roasted vegetables, such as zucchini, bell peppers, or carrots, also make an excellent side, adding both flavor and color to your plate.

For a heartier meal, serve gnocchi with a soup or a more substantial vegetable dish. Butternut squash soup is a great choice, especially in the cooler months. Its creamy texture and sweet flavor complement the gnocchi beautifully. You could also consider a side of sautΓ©ed spinach or kale, which adds a bit of bitterness that pairs well with gnocchi’s softness and richness.

20. How can I make potato gnocchi ahead of time?

Gnocchi is a great dish to prepare ahead of time, making it perfect for entertaining or meal prep. After you shape the gnocchi, you can freeze them on a baking sheet in a single layer. Once the gnocchi are frozen solid, transfer them to a freezer-safe bag or container for long-term storage. This method allows you to have homemade gnocchi on hand whenever you want them, without the need for last-minute preparation.

When you’re ready to cook your potato gnocchi, simply boil them directly from the freezerβ€”no need to thaw. The gnocchi will cook in just a few minutes, rising to the surface of the water when they’re done. This method ensures that your gnocchi maintain their shape and texture, making them just as delicious as if they were freshly made. If you prefer, you can also prepare the gnocchi dough ahead of time and store it in the refrigerator for a day or two before shaping and cooking.

AI Ginger Ale BBQ sauce – Connoisseur Dad, Don’t Let The Title Idiot You

0

Maria came up last month to pick up most of her stuff we had been storing for her after she moved back to Maryland. she loved ginger ale and we loved watching her drink it. Odd ya but she would take a sip and it would take her breath away, I mean really take her breath away. I’m not sure if it that sensation or the taste of it that she loved so much but either way it was fun for us. We had all this ginger ale left over from her last visit and with the 4th coming up I’m planning of gas BBQ smoke ribs, along with steaks , hot dogs and whatever anyone wants. So I asked Chat GPT for recipe and it came up with this.

Here’s a simple and delicious BBQ sauce recipe using ginger ale:

Ginger Ale BBQ Sauce Recipe

Ingredients:

  • 1 can (12 oz) ginger ale
  • 1 cup ketchup
  • 1/2 cup brown sugar
  • 1/4 cup apple cider vinegar
  • 2 tablespoons Worcestershire sauce
  • 2 tablespoons soy sauce
  • 1 tablespoon mustard (Dijon or yellow)
  • 1 teaspoon garlic powder
  • 1 teaspoon onion powder
  • 1/2 teaspoon smoked paprika
  • 1/4 teaspoon black pepper
  • 1/4 teaspoon cayenne pepper (optional, for heat)

Instructions:

  1. Combine Ingredients:
    • In a medium saucepan, combine the ginger ale, ketchup, brown sugar, apple cider vinegar, Worcestershire sauce, soy sauce, and mustard. Stir well to combine.
  2. Add Spices:
    • Add the garlic powder, onion powder, smoked paprika, black pepper, and cayenne pepper (if using). Mix thoroughly.
  3. Simmer:
    • Place the saucepan over medium heat. Bring the mixture to a boil, then reduce the heat to low and let it simmer. Stir occasionally to prevent sticking.
  4. Reduce and Thicken:
    • Allow the sauce to simmer for about 30-40 minutes, or until it has thickened to your desired consistency. Keep an eye on it and stir regularly.
  5. Cool and Store:
    • Once the sauce has thickened, remove it from the heat and let it cool. Transfer the sauce to a jar or airtight container. It can be stored in the refrigerator for up to two weeks.
  6. Use:
    • Use your ginger ale BBQ sauce to baste grilled meats, as a dipping sauce, or in any recipe that calls for BBQ sauce.

Enjoy your homemade ginger ale BBQ sauce!

Here’s a link to my prize winning root beer BBQ sauce and the glaze I used for chicken thighs and Texas style BBQ sauce


This entry was posted in Sauces and Gravy and Rubs and tagged chicken, cooking, Food, Ginger Ale, Recipe, recipes, ribs, smoked paprika. Bookmark the permalink.

Ratatouille – Recipesedge

0

Ratatouille is the perfect summer side dish for your favorite roasted chicken, grilled meats, or fish! It adds a burst of color and flavor to every meal.

Ratatouille – Recipesedge

Ratatouille

This meal reminds me of the Disney-Pixar movieΒ Ratatouille, where a tiny rat named Remy follows his culinary dreams, making this dish the star of the show. It’s one of my favorite Disney movies–I’m sure that’s no surprise! Traditional ratatouille is a rustic vegetable dish from the Provence region of France made with simple, wholesome ingredients like eggplant, zucchini, tomatoes, and bell peppers. Many of you probably already have an abundance of these in your garden, but if not, you can find them now at any farmers market. I also have this Ratatouille with Farro and Ratatouille Baked Chicken if you want a high-protein version.


Why I Love This Dish

I was channeling my inner Remy from Ratatouille today! This meal might be made by a tiny chef in the movie, but it’s BIG on flavor. The beauty of ratatouille lies in its simplicity and the quality of its ingredients. Using in-season vegetables will always give you the best flavors. Here, the key players are eggplant, zucchini, bell peppers, tomatoes, onions, and garlic, all seasoned with herbs like thyme and basil.

What Is Ratatouille?

Ratatouille’s roots can be traced back to the humble kitchens of Provence, where it began as a way for farmers to use up the summer’s surplus of vegetables. The name comes from the French word β€œtouiller,” which means to stir, reflecting the simplicity of its preparation. Traditionally, it was cooked as a rustic stew, with each vegetable slowly simmered to perfection.

Ratatouille Ingredients

This veggie-packed meal uses fresh summer produce for the best ratatouille. Find the exact measurements in the recipe card below.

Ratatouille ingredients
  • Olive Oil to sautΓ© the vegetables in
  • Salt and Black Pepper to season everything
  • Aromatics: Garlic and onion infuse the ratatouille dish with an amazing flavor.
  • Vegetables: Dice eggplant, zucchini, bell pepper, and vine-ripened tomatoes into small pieces.
  • Tomato Paste for an extra flavor boost
  • Herbs: Fresh thyme for simmering and basil for garnishing

How to Cook Ratatouille

The vegetables cook in just 20 minutes in this easy ratatouille recipe. The complete instructions are in the recipe card below.

  1. Onion and Garlic: Heat a large skillet on medium, and sautΓ© the onion, garlic, and salt in oil.
  2. Eggplant: Add the eggplant and more salt and cook until it begins to soften. Stir in the tomato paste and thyme.
  3. Remaining Vegetables: Add the zucchini, bell pepper, tomatoes, salt, and pepper, and cook until everything is tender.
  4. Garnish: Stir in the remaining olive oil and top with basil.

Variations

  • Tomatoes: Any kind of tomato, like Roma, cherry, or grape, will work.
  • Zucchini: Swap yellow squash.
  • Bell Pepper: Use red, green, or orange bell peppers.
  • Onion:Β Replace yellow onion with red onion or shallots.
  • Herbs: Substitute rosemary, parsley, or oregano.
Ratatouille

Serving Suggestions

Ratatouille is perfect for prepping ahead. It’s flavorful and healthy and only gets better as it sits. Pair it with your favorite grain or pasta, or enjoy it solo.

Storage

  • Store ratatouille for 5 days in the refrigerator or 3 months in the freezer.
  • Reheat: If frozen, thaw it first in the fridge. Then, warm it in the microwave or on the stove.
Ratatouille

More Summer Vegetable Recipes You’ll Love

Prep: 15 minutes

Cook: 20 minutes

Total: 35 minutes

Yield: 4 servings

Serving Size: 1 cup

  • 1 1/2 tablespoons extra-virgin olive oil, divided
  • Kosher salt, and freshly ground black pepper
  • 1/2 small yellow onion, roughly chopped
  • 3 garlic cloves, minced
  • 1/2 medium eggplant, peeled and cut into 1/4-inch cubes
  • 1 tablespoon tomato paste
  • 1/2 tablespoon finely chopped fresh thyme
  • 1 medium zucchini, cut into 1/4-inch dice
  • 1 yellow bell pepper, cut into 1/4-inch squares
  • 2 large vine-ripened tomatoes, or 3 small, cut into 1/4-inch dice
  • 1/2 cup fresh basil leaves, finely chopped
  • Set a large skillet oven over medium heat. Add 1 tablespoon olive oil, onion, garlic, and a 1/4 teaspoon of salt. Cook, stirring occasionally, until the vegetables begin to soften, about 3 minutes.
  • Add the eggplant and another 1/4 teaspoon of salt and cook, stirring occasionally, until the eggplant begins to soften, about 4 to 5 minutes.
  • Add the tomato paste and thyme and cook, stirring constantly, for 1 minute.
  • Add the zucchini, bell pepper, tomatoes, another pinch of salt, and a twist of black pepper and cook, stirring occasionally, until all of the vegetables are tender, about 10 minutes.
  • Stir in the remaining 1/2 tablespoon olive oil and basil and serve.

Last Step:

Please leave a rating and comment letting us know how you liked this recipe! This helps our business to thrive and continue offering free, high-quality recipes for you.

You can easily double this recipe.

Serving: 1 cup, Calories: 115 kcal, Carbohydrates: 15.5 g, Protein: 3 g, Fat: 5.5 g, Saturated Fat: 1 g, Sodium: 45.5 mg, Fiber: 4.5 g, Sugar: 9 g

Iced Sesame Noodles – Recipesedge

0

These iced sesame noodles have become my summertime bestie. Is it hot out? If so, there’s a good chance this is going to be on the table. I’m here to share the details before we run out of summer. Imagine a rotating cast of long, slurp-able noodles (soba, pici, somen, spaghetti, etc.) tangling with a creamy sesame sauce, topped with 4-5 easy toppings. That’s the basic formula. The noodles are served family-style in a large bowl of ice water. Everyone mixes up their own individual, custom portions. So good, so fun. Definitely a Japanese-inspired concept, dovetailing, in our house, with whatever is popping up at California farmers’ markets. I encourage you to incorporate whatever your family loves and the ingredients shining at your local markets.
sesame noodles in a bowl with ginger, zest, and chile oil toppings

Building an Iced Sesame Noodle Bowl

Aside from boiling the noodles, nearly everything else here can be prepared ahead of time. It’s part of what’s great about this and what makes it a weeknight-friendly meal. I like to toss some chopped veggies (whatever is on hand – broccoli, asparagus, etc.) in the pasta water after the noodles come out, keeping the cooking to a single pot. To summarize, here are the main components of the meal:

  • Noodles: Keep a selection of favorites on hand.
    noodles floating in ice water surrounded by toppings and sesame sauce on a table
  • Homemade sesame sauce: make ahead and refrigerate for up to a week. Recipe below. Also, consider experimenting with almond butter and/or peanut butter in place of the tahini or sesame paste for another variation.
  • Toppings: I’ll list off twenty-plus favorites. Choose 4-5 for your meal.
  • Side veggies: And easy boost! As mentioned above, grab something that can do a quick boil in your pasta water after you remove the noodles. More ideas below.

five different noodles to make sesame noodles with

Let’s Talk about Noodle Options

I’ve done fantastic versions of this meal with all of the following. Think long and slurp-able on the noodle front. I also check my noodle labels to make sure they’re not wildly salted, to be honest, I’ve been caught off guardΒ  on a number of occasions.

  • Soba: I love the combination of buckwheat soba noodles and sesame and soba traditionally works well with sesame sauces similar to this one. Soba is a frequent go-to when I make this recipe and cold soba, in general, is summertime wonderful.
  • Somen: These thin Japanese wheat noodles are a crowd-pleasing favorite. Especially if you have picky eaters that aren’t as receptive to brown noodles.
  • Homemade pici: A hand-rolled Italian pasta, if you’re up for more of a project, cold pici really makes this whole situation something extra special.
  • Spaghetti: Give whatever spaghetti you love a try. I love the Monograno Felicetti Farro Spaghetti for its texture and boosted nutrition profile (not sponsored, just a fan), and the farro plays beautiful with the creamy sesame sauce. Pictured here.

sesame noodles in a bowl surrounded by a variety of toppings

Sesame Noodle Toppings

Choose 4-5 different toppings. I feel like grated ginger is a non-negotiable here. So good. And I leave any spicy component out of the base sesame sauce so that each person can light up their bowls with whatever level of spicy they can handle.

  • grated ginger: peel ginger with a spoon and grate with a microplane grater into a small bowl. Key topping!
  • something spicy: favorites for this recipe include Calabrian chile oil, chile crisp, tobanjan
  • toasted seeds and/or nuts: za’atar, traditional gomasio, I also make a red gomasio-ish (pictured above) that I’ll post the recipe for soon, toasted peanuts, etc.
  • tomatoes: specifically, these roasted cherry tomatoes
    eating sesame noodles with chopsticks from a bowl
  • crunchy bits: for example,Β  fried shallots or crispy jalapeΓ±o pieces (WB brought these home from TJ’s a few weeks ago)
  • pesto: a little dollop of pesto in your bowl along with the sesame sauce is pretty great.
  • lemon zest or chopped, preserved lemons
  • makrut lime leaves: thinly slivered
  • kale chips
  • chives
  • chopped scallions
  • grated carrots
  • hard boiled eggs, quartered

And as we move into later summer and early fall, and the weather is still hot enough for cold noodles, but the seasonal ingredients are shifting, here are a few other ideas:

  • thinly sliced, crisp apple
  • toasted pumpkin seeds
  • simple cauliflower
  • roasted cauliflower: This variation is next on my list, iced sesame noodles plus roasted cauliflower and some of the other ingredients in this recipe as toppings – mint, arugula, chopped dates, red onion, and a spice blend of toasted pine nuts, sesame, cumin, coriander, and red pepper flakes. It’s gonna be good.
    noodles in ice water with ice cubes and citrus slices
  • Also! For the iced noodle bowl (above), play around. Add thin citrus slices – Meyer lemon, rangpur lime, kishu mandarin, orange, key lime are all recent favorites. You can also add fresh herbs or lime leaves or use a cold broth. I have a cold mushroom broth that works really well. The recipe for that one is in Super Natural Simple, in the back.

While You’re At It: Add a Side Veggie!

Broccoli florets, asparagus tops, green beans, yellow beans, corn – these are just a few of the vegetables I’ve cooked in a flash after cooking the noodles for the bowls. Boil for a mint or so, strain under cold water and serve on the side. Everyone loves to work the vegetables into their noodle bowls as well.

Air Fryer Salmon – Funds Bytes

0

Salmon on a budget may sound like an oxymoron, but I’m here to tell you it can be done! This Air Fryer Salmon is quick, easy, and super flavorful. I seasoned Atlantic salmon filets with soy sauce, brown sugar, and spices and tossed them in the air fryer for a super easy weeknight meal. Ready in just 20 minutes, this salmon recipe is sure to be in regular rotation at your house!

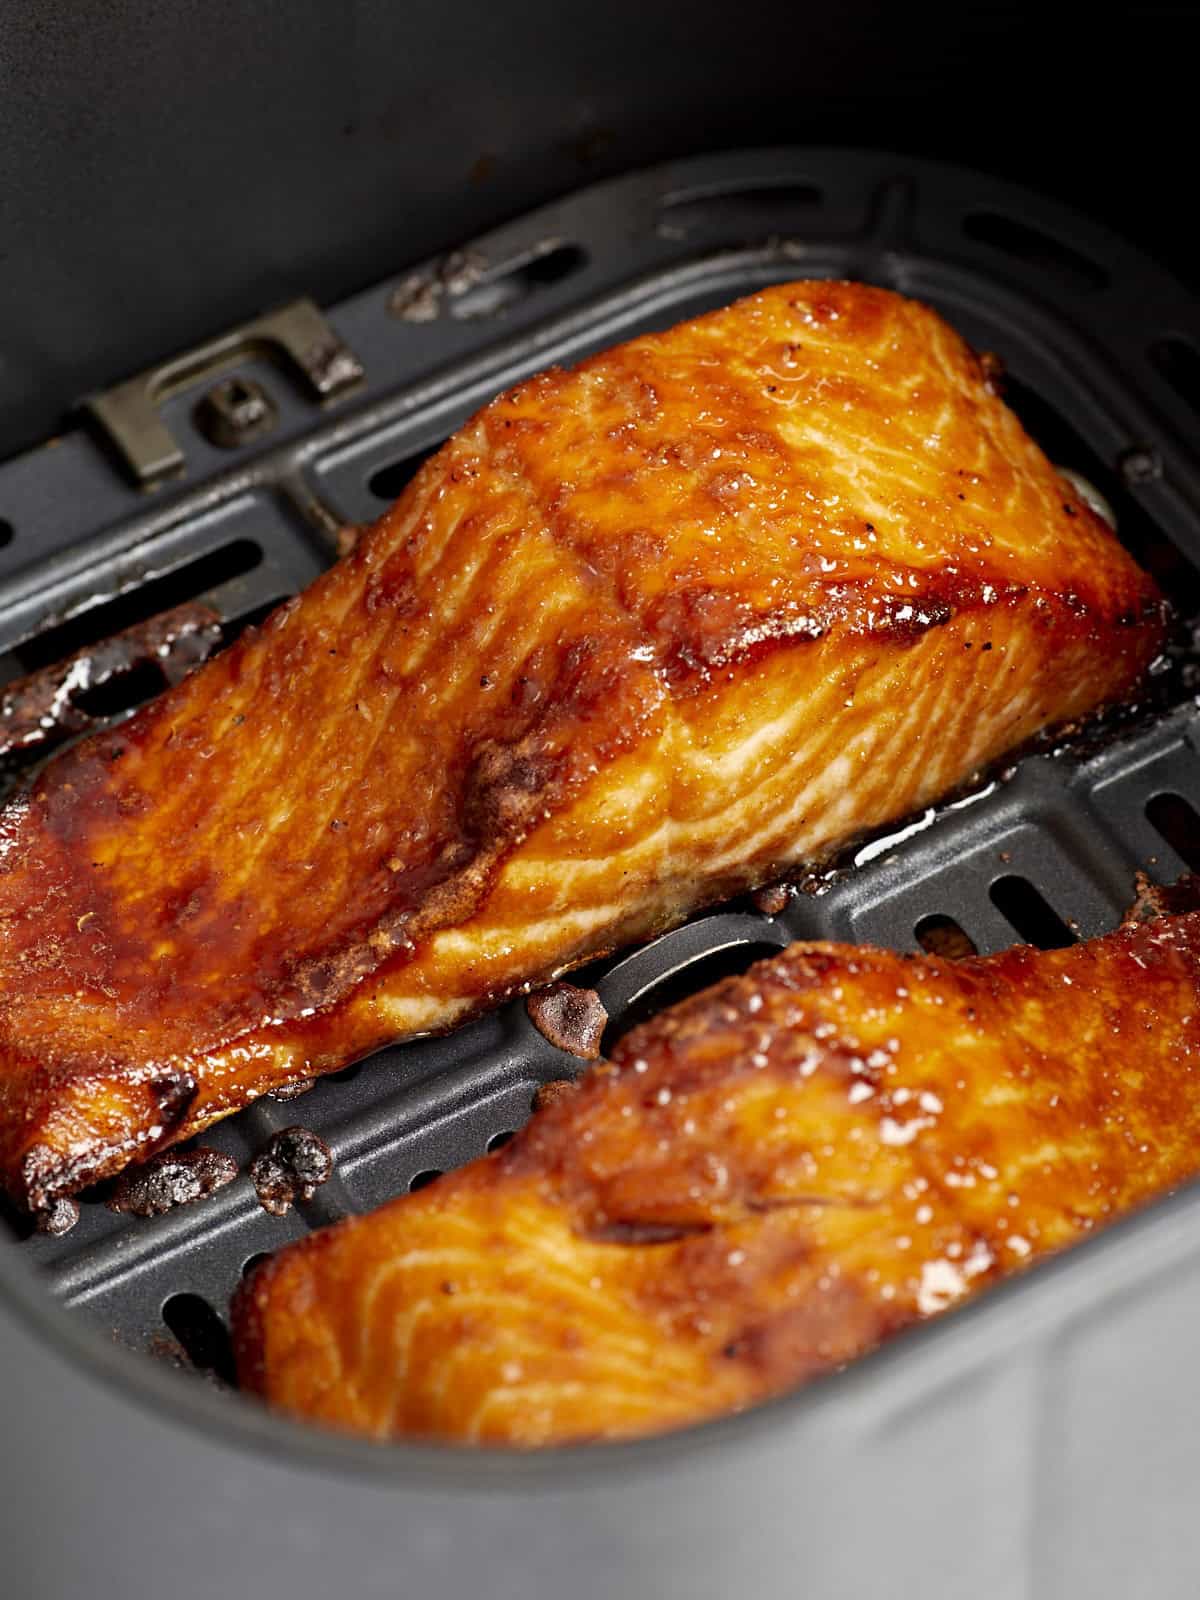
close up of air fryer salmon filets in an air fryer basket.close up of air fryer salmon filets in an air fryer basket.

My favorite people to cook for are my daughter (almost 3 years old) and my stepdaughter (15). They are both a little picky; they know what they like and don’t like and they aren’t afraid to tell me! If anyone reading this has toddlers or teenagers, I know you understand! If you want to win culinary praise from the most opinionated members of your family, this sweet and savory Air Fryer Salmon is the recipe for you! With its milder flavor and meaty texture, this salmon can turn any fish hater into a seafood enthusiast.

Here’s what you’ll need to make air fryer salmon:

  • Salmon: I found fresh Atlantic salmon on a good sale, so that’s what I used. I often find frozen salmon to be cheaper– just thaw before using.
  • Cooking Spray: Helps the salmon brown and crisp in the air fryer.
  • Soy Sauce: Adds salty umami flavor to the salmon.
  • Brown Sugar: Adds rich sweetness to the salmon.
  • Spices: Freshly cracked black pepper and garlic powder enhance the salty-sweet flavor of this salmon.

What’s the Best Way To Thaw Frozen Salmon?

There are three ways to safely defrost salmon: in the refrigerator, in cold water, and in the microwave. I recommend thawing salmon in a single day in the refrigerator whenever possible since it gives you a few extra days of storage before you need to cook the meat.

Day of, I recommend thawing in cold water. Leave the tap streaming just enough to keep the water moving, or change out the water every 15 minutes or so, until the fish is fully thawed. Fish thawed this way must be cooked immediately. I do not generally recommend thawing anything in the microwave, as it can negatively impact the texture of the food, although it is technically safe.

Serving Suggestions

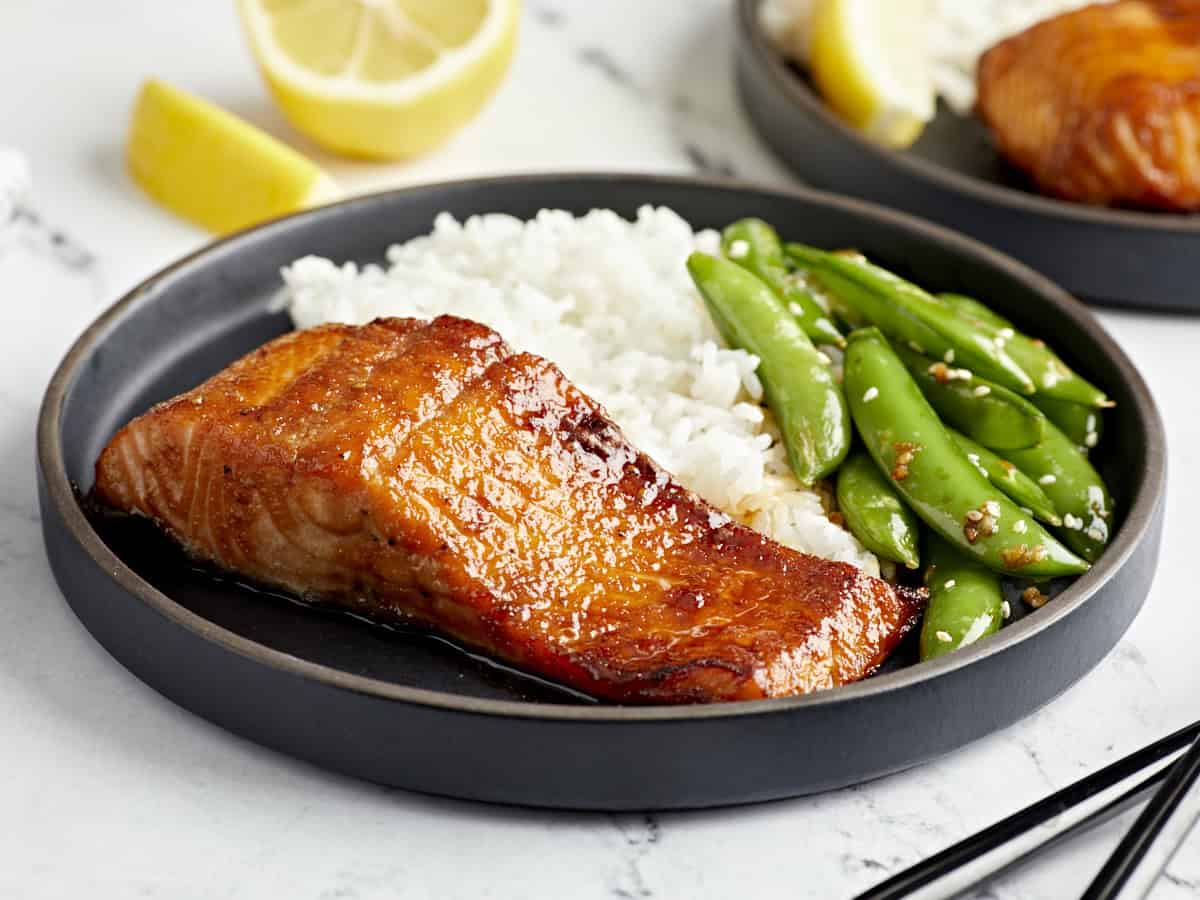
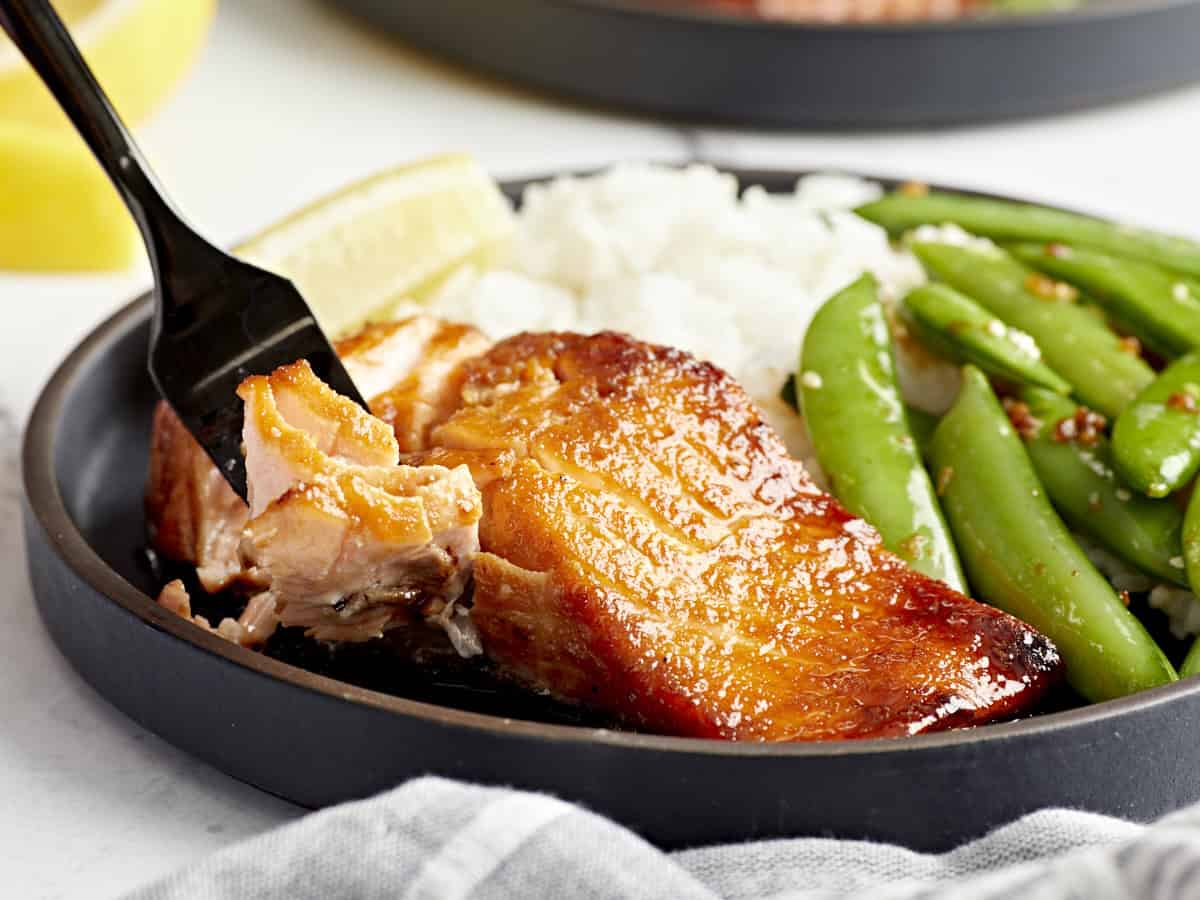
I love to serve salmon with a side of fluffy steamed rice and simple sauteed snow peas. It’s also excellent paired with sautΓ©ed asparagus and goes great with our lemony cucumber couscous salad or strawberry spinach salad. Salmon also elevates an already decadent NiΓ§oise Salad from β€œoh, yum” to β€œwoah, fancy!”

side view of a serving of air fryer salmon on a black plate with rice and peas.side view of a serving of air fryer salmon on a black plate with rice and peas.


Air Fryer Salmon


This Air Fryer Salmon is quick, easy, and super flavorful! Ready in just 20 minutes, this sweet and savory salmon is sure to be a hit.

close up of air fryer salmon filets in an air fryer basket.close up of air fryer salmon filets in an air fryer basket.

Prevent your screen from going dark

  • 2 7-oz. pieces Atlantic salmon, skin on; thawed if frozen ($8.41)
  • Cooking Spray ($0.05)
  • 1 Tbsp soy sauce ($0.06)
  • ΒΌ cup brown sugar ($0.17)
  • Β½ tsp freshly cracked black pepper ($0.03)
  • Β½ tsp garlic powder ($0.07)
  • Preheat your air fryer to 400Β°F. If using frozen salmon, allow it to thaw in the refrigerator before cooking. We are cooking salmon from a fresh or fully thawed state in this recipe.
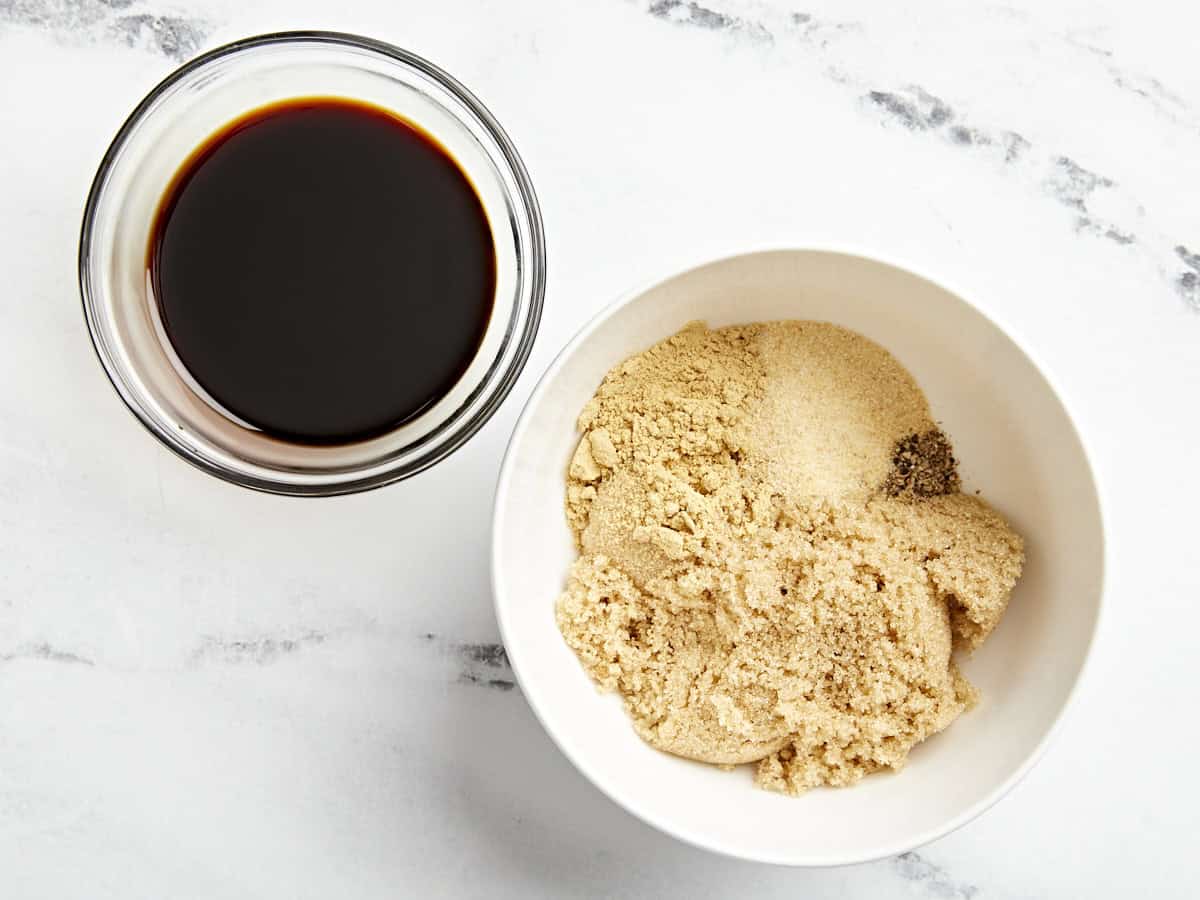
  • Gather marinade ingredients: soy sauce, brown sugar, pepper, and garlic powder.
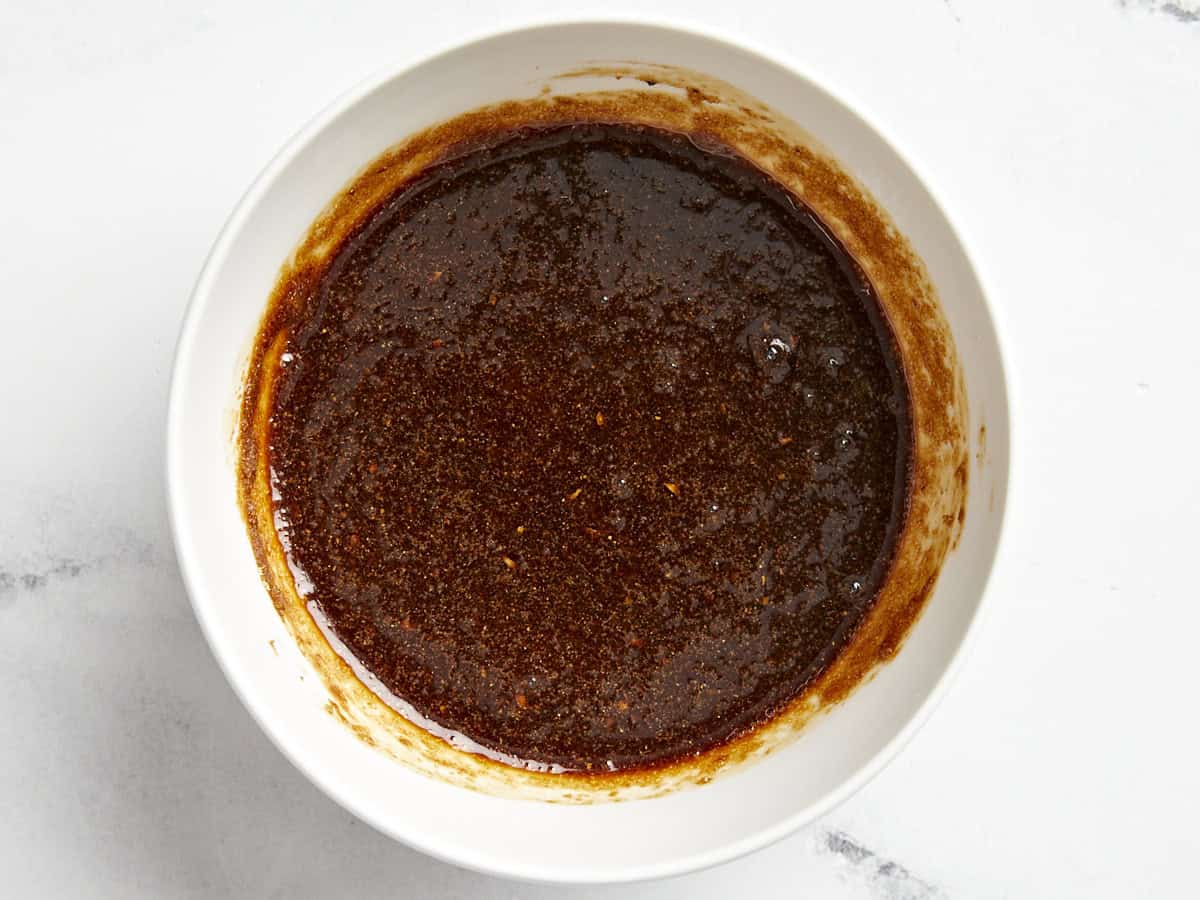
  • Whisk together soy sauce, brown sugar, pepper, and garlic powder.
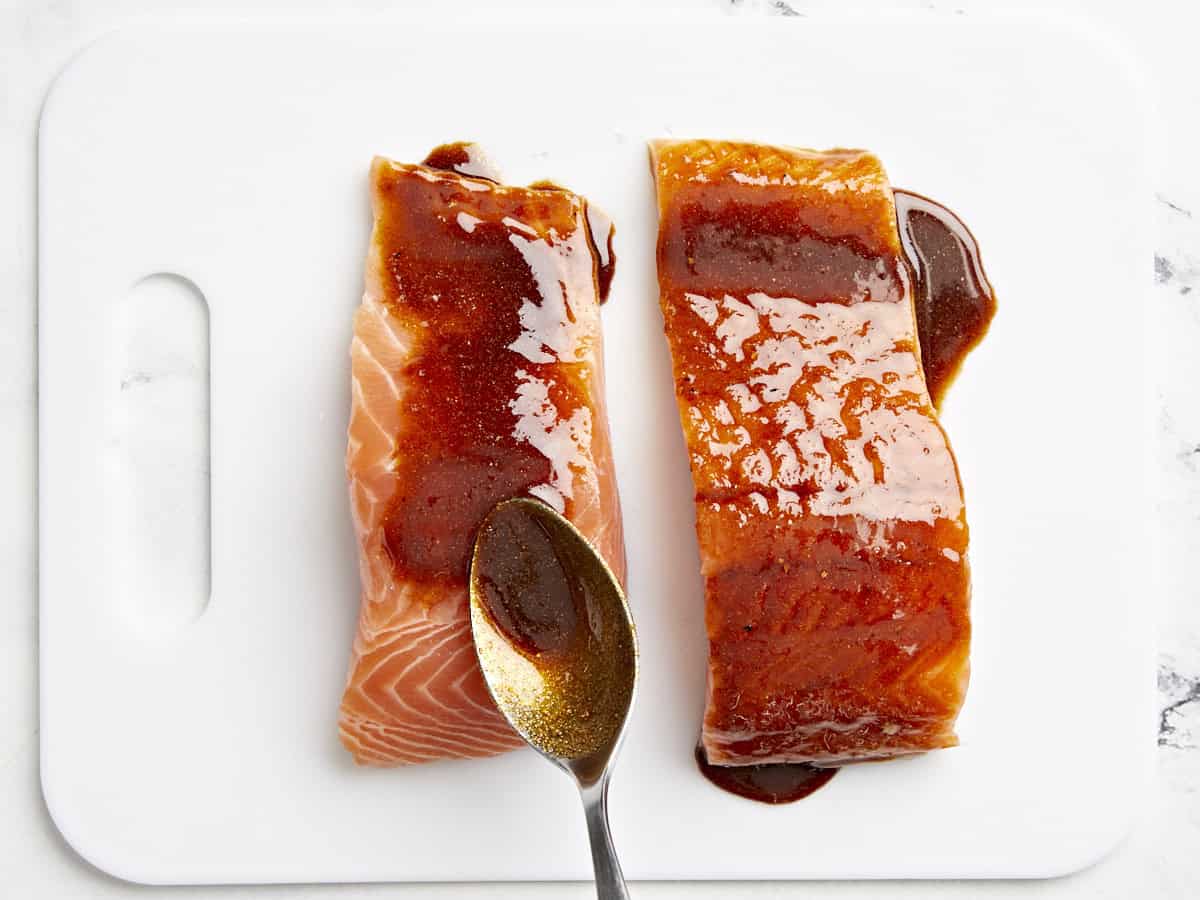
  • Spoon the marinade mixture over the salmon filets, gently rubbing it onto the salmon until it’s fully coated. A little extra on top is great! The brown sugar will melt during cooking and caramelize, giving your salmon a beautiful color and sweetness.
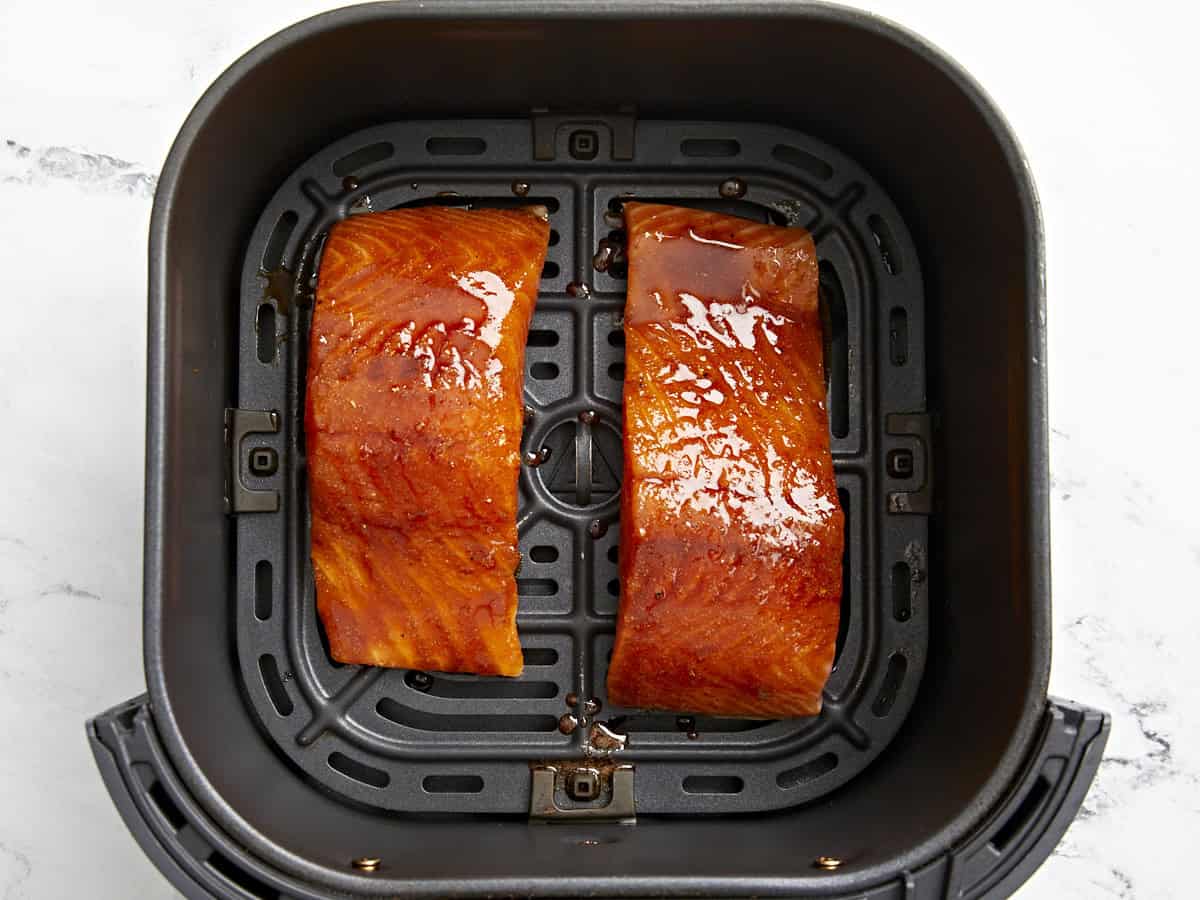
  • Spray your salmon and your air fryer crisper plate with your cooking oil of choice and position the salmon skin side down in your air fryer. Depending on the size of your air fryer, you may have to do this in batches. If you are dividing bigger salmon filets into smaller portions, it’s easiest to do so once it’s fully cooked unless you have a sharp knife that can get through the skin with ease when they are raw.
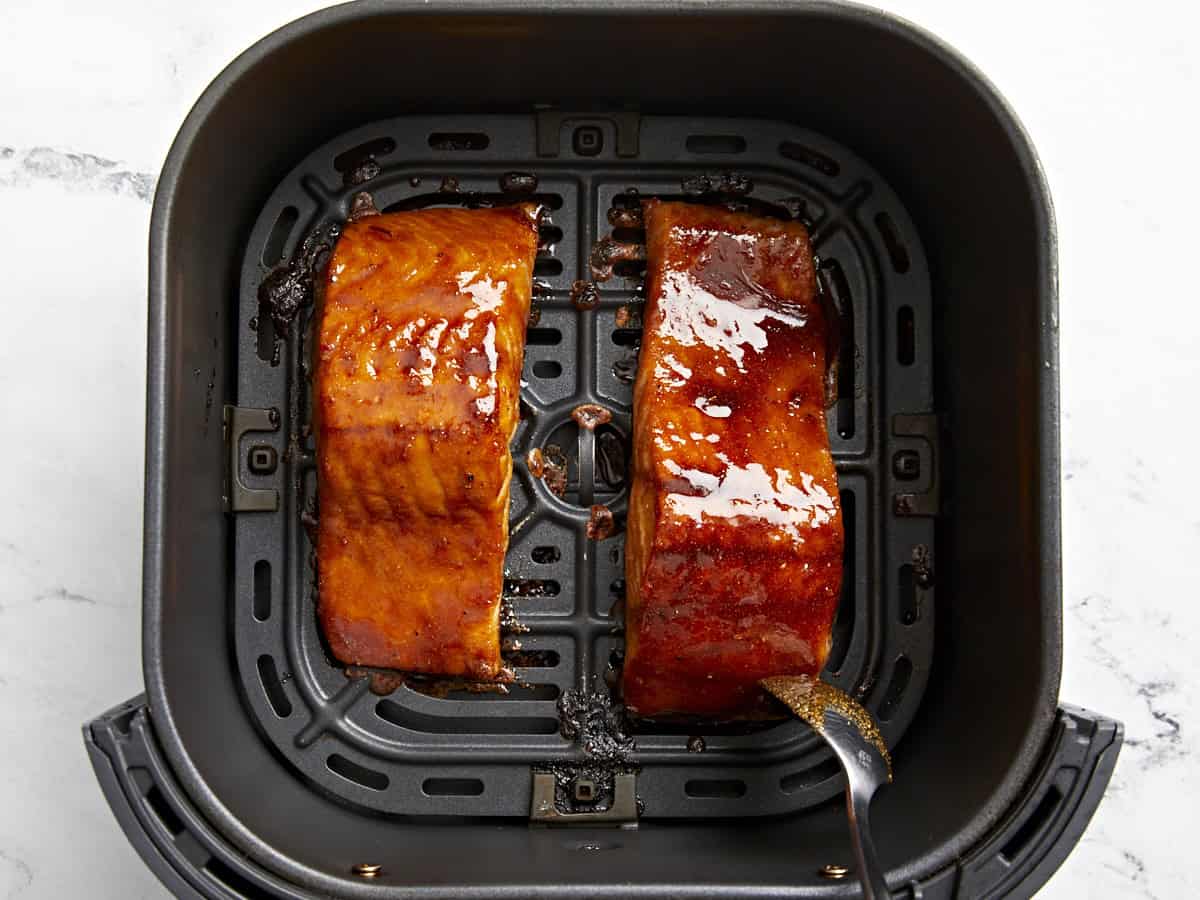
  • Air fry for 7-8 minutes to start. At the halfway mark, baste your salmon with more marinade and then continue cooking.
*The cook time for your salmon will vary depending on the thickness of each piece. For a thinner piece of salmon, plan on 7-8 minutes. For a thicker piece of fish, you will probably need to air fry for 9-10 minutes. Fork test your salmon to make sure it’s done to your liking (flaky and delicious!) If it needs more time, you can put it back in for 1-2 minutes.
When I chose the salmon for this recipe, I knew I wanted between a 3 oz.serving size and 4 oz.serving size per person, so when I found this cut and weight I bought it knowing I could portion it out easily amongst 4 people after cooking.Β 

Serving: 3.5ouncesCalories: 199kcalCarbohydrates: 14gProtein: 20gFat: 6gSodium: 299mgFiber: 0.2g

overhead view of a serving of air fryer salmon on a black plate with rice and peas.overhead view of a serving of air fryer salmon on a black plate with rice and peas.

how to make Air Fryer Salmon – step by step photos

brown sugar and seasonings in a white bowl next to a glass dish of soy sauce.brown sugar and seasonings in a white bowl next to a glass dish of soy sauce.

Preheat your air fryer to 400Β°F. If using frozen salmon (2 7-oz. pieces), allow it to thaw in the refrigerator before cooking. We are cooking salmon from a fresh or fully thawed state in this recipe. Gather marinade ingredients: 1 Tbsp soy sauce, 1/4 cup brown sugar, 1/2 tsp pepper, and 1/2 tsp garlic powder.
soy and brown sugar marinade in a white bowl.soy and brown sugar marinade in a white bowl.

Whisk together soy sauce, brown sugar, pepper, and garlic powder.

spooning marinade over salmon filets.spooning marinade over salmon filets.

Spoon the marinade mixture over the salmon filets, gently rubbing it onto the salmon until it’s fully coated. A little extra on top is great! The brown sugar will melt during cooking and caramelize, giving your salmon a beautiful color and sweetness.

marinated salmon filets in an air fryer basket.marinated salmon filets in an air fryer basket.

Spray your salmon and your air fryer crisper plate with your cooking oil of choice and position the salmon skin side down in your air fryer. Depending on the size of your air fryer, you may have to do this in batches. If you are dividing bigger salmon filets into smaller portions, it’s easiest to do so once it’s fully cooked unless you have a sharp knife that can get through the skin with ease when they are raw.

spooning marinade over partially cooked salmon filets in an air fryer basket.spooning marinade over partially cooked salmon filets in an air fryer basket.

Air fry for 7-8 minutes to start. At the halfway mark, baste your salmon with more marinade and then continue cooking.*

a forkful of air fryer salmon in front of a serving on a plate with rice and peas.a forkful of air fryer salmon in front of a serving on a plate with rice and peas.

This Air Fryer Salmon is quick, easy, and so delicious!

Nagi’s Huge, Straightforward Pasta Salad

0

The big-batch easy pasta salad I make when I’m short on time. People always ask why it tastes so good. I’ll let you in on my secrets! (No bottled dressing involved.)

Nagi’s Huge, Straightforward Pasta Salad

My big, easy pasta salad

Newsflash! You don’t need a gazillion add-ins to make a great pasta salad. You don’t need pricey ingredients like baby bocconcini, you don’t need to buy multiple bunches of herbs (and just use a teeny amount of each) and you don’t need much time.

All you need to do is toss hot, freshly cooked pasta in a simple, tangy, Dijon cider vinegar dressing then set it aside while the pasta cools. You will be shocked how much flavour the pasta soaks up! Which means, before we’ve even added anything, your pasta salad is already great. So whatever you toss in will make it even better!

Soaking hot pasta Big, easy pasta salad
Toss the hot pasta with the dressing. You will be shocked how much flavour it soaks up!

Pasta salad tips galore!

Also today – more pasta salad tips. I feel it says a lot about me that I have so many thoughts about a simple pasta salad! πŸ˜‚

  1. Overly soft pasta – Cook the pasta until it’s well beyond al dente and is overly-soft. Because pasta goes hard when it cools down, and even harder when fridge cold. Nobody likes rock hard pasta salad!
  2. Smidge of honey – To take the edge off the sharpness of the vinegar so we can get away with using less oil in the dressing. I just don’t think pasta salads should be excessively oily. Even with my macaroni salad, I lighten the mayo dressing with a good amount of yogurt.
  3. Streamlined ingredient combination – A selection of add-ins chosen to get all the flavour and texture I seek in a pasta salad using the minimum number of ingredients I can get away with. Keeping well overnight also essential! My picks: juicy pops (tomato), subtle crunch from finely sliced cucumber, briney spark (olives), a treat (feta) and a finishing touch (basil, or any of the numerous suggestions in the recipe notes).

Of course, feel free to wing-it, use what you’ve got and what you love. Such is the beauty of pasta salads – the versatility!

Bowls of Big, easy pasta salad

Here’s what you need for this pasta salad

1. the pasta

Any shortish and medium pasta will work here, though pasta shapes with nooks and crannies for the little chopped up bits of olives and feta to get caught in are especially ideal. Think – shells, orecchiette, twirls and bow ties (farfalle). I chose bow ties because – fun!

Bow tie pasta - farfalle

2. PASTA SALAD ADD-INS

And here’s what I put into the pasta salad (see above for the why).

Ingredients in My Big, Easy Pasta Salad
  • Cherry tomatoes or grape tomatoes – Or chop large tomatoes
  • Kalamata olives roughly chopped. Brings pops of briny goodness into this pasta salad. Excellent shortcut as it adds salt, tang and sharp freshness which means I don’t feel the need to add anything onion-y in this recipe ie. one less ingredient to chop. For this salad I like to roughly chop the olives so it disperses better all throughout the pasta salad. Higher impact using less olives!

    πŸ’‘ TIP: Kalamata olives really are so much tastier and have a more pleasant soft tender than black olives which are cheaper for a reason!

  • Cucumbers – I like to finely slice them so they flop a bit and meld to become one with the pasta, rather than using larger chunks that release bursts of water and dilutes the flavour in your mouth when you bite into them. Yes, these are the sort of things that I care about -> Cooking Nerd Alert! 🫣
  • Feta – It’s a general rule in my life that every salad (other than basic plain side salads) should have some sort of β€œtreat” in it, whether it be nuts or croutons, a mountain of crisped panko or finely grated parmesan. Feta plays that role in today’s pasta salad.

    πŸ’‘ TIP: Not all feta is created equal! Feta made in Greece and labelled β€œPDO” (β€œProtected Designation of Origin”) are a step up from the more economic options offered at grocery stores. Try it once and forever be converted.

  • Basil or another finishing touch – I like to finish off this pasta salad with a finishing touch which puts it in β€œtake to gatherings” territory. Here in Australia, we’re pretty lucky, basil is available and reasonably priced most of the year around. However, if I can’t get it (or won’t pay the price for it), here are other things I use instead which plays the same role:

    – Another fresh herb: dill (first choice), or parsley or parsley + mint (second choice);
    – Toasted pine nuts: I like to roughly chop half to really get the bits well dispersed throughout;
    – Dried oregano: I add this into my dressing to give it an extra hit of flavour to compensate. This is my last resort fall-back, because dried oregano is a pantry staple. Then I tell people it’s a Greek Pasta Salad, and totally get away with it!

Dressing for Big, easy pasta salad
Dijon-cider vinegar pasta salad dressing

3. THE dijon-cider vinegar DRESSING

I specifically make this dressing using pantry staples so I can make this pasta salad anytime without going to the store. It gets a great hit of flavour from Italian herbs (customisable), two plump garlic cloves and a smidge of Dijon mustard.

Heads up: the dressing is quite sharp and intense by itself. But it has to be because it gets tossed through a LOT of stuff so it gets really diluted and we end up with the perfect amount of flavour in every bite!

Ingredients in My Big, Easy Pasta Salad
  • Extra virgin olive oil – You don’t need to use a really high quality one for this pasta salad, like I sometimes recommend for salad dressings. But just be sure to use extra virgin olive oil which has more flavour than regular olive oil.
  • Apple cider vinegar – My go-to vinegar for dressings. Not too sharp, mild flavour and very economical.
  • Dijon mustard – This thickens the dressing a touch so it coats the pasta and vegetables better as well as adding a little flavour. It’s not a dominant flavour, it’s a background flavour.
  • Honey – Just 2 teaspoons takes the edge off the sharpness of the vinegar so we can make a far less oily dressing. This recipe uses 1/3 cup vinegar with 1/2 cup oil (2: 3 ratio), which has the right amount of oil for my taste. However, it was a little sharp and an easy way to dial that down without adding more oil is to add a touch of something sweet (honey, in this case).

    In contrast, for typical western salad dressings, 1/3 cup vinegar would usually call for 1 cup of oil (1 : 3 ratio) which makes this pasta salad far too oily for my taste.

  • Italian herb mix – A standard spice mix at grocery stores, a pre made mix of herbs and spices that saves me reaching for 7 different jars. You could easily switch to another herb mix like Herbs de Provence, or use just dried oregano or finely chopped fresh herbs (dill immediately comes to mind).
  • 2 garlic cloves – You’ll love the smell of the garlic when it gets tossed through the hot pasta!
  • Salt and pepper – We don’t need much salt, just 3/4 teaspoon for this entire big batch because we get salt from the feta and olives too.

How to make this Big, Easy Pasta Salad

If you’ve got decent chopping skills, you’ll be able to get the add-ins chopped while the pasta is cooking. Which basically means your active cooking / prep time is barely 15 minutes which is highly efficient for this amount of food! (It will easily serve 5 to 6 as a meal, many more as part of a buffet spread at a gathering).
How to make my Big, Easy Pasta Salad
  1. Dressing – Shake the Dressing ingredients in a jar.
  2. Overcook the pasta – There’s a reason for this strange sounding instruction!!! We want to cook the pasta until it’s beyond al dente so it is very soft because pasta gets firmer when it cools down, and even harder when refrigerated. Nobody wants rock-hard pasta in their pasta salad!!

    So cook the pasta until it is very soft, about 2 to 3 minutes beyond the time directed on the packet, which would be unpleasantly soft for a pasta dish served hot. But once your pasta salad is dressed and cooled to room temperature or refrigerated overnight, the pasta that was overly soft when hot is the perfect texture when cold!

How to make my Big, Easy Pasta Salad
  1. Flavour absorption – Pour the hot pasta into a big bowl (big enough to toss the pasta salad with all the vegetables added). Pour over half the Dressing then toss well.

    Then leave the pasta to soak up the flavour of the Dressing until it cools down to room temperature, around 40 minutes. Toss once or twice, it you remember.

  2. Toss – Add the tomato, cucumber, feta and olives. Pour over remaining Dressing and toss well. Expect some feta crumbling – some chunks, some crumbled is good!
How to make my Big, Easy Pasta Salad
  1. Basil last – Tear the basil leaves roughly with your hands then toss through.
  2. Serve! Pour the pasta salad into a large serving bowl. Then dig in!
Big, easy pasta salad photo

Matters of storage and make ahead

As all good pasta salads should be, this is excellent served freshly made, just as good (some say even better) the next day, and still very, very good for another 2 days.

If I’m making ahead intentionally to take to a gathering, I will keep the basil leaves separate and throw them in at the least minute so they are nice and green. But for leftovers, it really doesn’t bother me in the slightest that the basil becomes discoloured.

Whether you serve it freshly made or tomorrow, I recommend serving it at room temperature! As with most foods, you just can’t taste the flavours as well when it’s fridge cold. Though when I need to eat right now, it certainly doesn’t deter me from eating it straight from the fridge! – Nagi x


Watch how to make it

Big, easy pasta salad close up photo

Nagi’s Big, Easy Pasta Salad


Servings6 – 12

Tap or hover to scale

Recipe video above. This is the big-batch pasta salad I make when I’m short on time. The trick that puts this into guest-serving territory is to toss the hot, freshly cooked pasta in the dressing. You will be shocked how much flavour it absorbs!Do this, and it’s delicious no matter what you add in. My combination is the bare minimum that delivers everything I seek in a pasta salad. There’s no need to add a gazillion ingredients!Workflow – Chop the veg and make the dressing while the pasta is cooking. This will cut down active cook/prep time to 15 minutes.

Ingredients

Add-ins (7 cups “anything” – Note 2)

Instructions

Summary directions

  • Cook pasta until soft, toss with 2/3 Dressing, cool. Toss with everything else except basil, then add basil. Serve!

Full directions

  • Dressing – Shake the Dressing ingredients in a large jar. It should be sharp, the flavour mellows once tossed.
  • Cook pasta until soft – Bring a large pot of salted water to the boil. Cook the pasta until it is very soft, about 2 – 3 minutes longer than the time on the packet but taste to check because packet directions have been known to lie! Pasta firms up when it’s cold (nobody likes hard, cold pasta!), so cook the pasta until extra soft.
  • Flavour soak – Drain the pasta very well, shaking off excess water. Transfer into a large bowl. Give the Dressing a good shake then pour over about two-thirds. Toss well, then leave the pasta to soak up the dressing as it cools (~40 minutes).
  • Toss – Add the tomato, cucumber, feta and olives. Pour over the remaining Dressing. Toss well. Add basil, toss again.
  • Serve – Tumble into big serving bowl. Dig in!

Recipe Notes:

Servings – Makes enough for 5 to 6 as a meal, or 12+ as part of a buffet table at a gathering.


1. Pasta shape – Shells, twirls, orecchiette are ideal. See in post for thoughts. I encourage you to use a shape that has nooks and crannies for little bits of olives and feta to get caught in!
2.Β Alternative add-ins: Feel free to use your favourites! Other fresh veg, antipasto-ey things. Here are specific β€œbest sub” suggestions to keep the flavour profile similar to my recipe:

  • Cucumber – celery
  • Tomato – Grilled or baked red capsicum/red peppers and zucchini hunks
  • Olives – capers, finely sliced red onion
  • BasilΒ alternatives I use:
    • Equal first choice: 1/2 cup roughly chopped dill or 1/3 cup toasted pine nuts (half roughly chopped)
    • Second choice: 1/3 cup finely chopped parsley leaves or 1/4 cup each parsley and mint leaves (finely chopped)
    • Fall back: Add 1 teaspoon dried oregano into the Dressing.

3. Other vinegars – white or red wine vinegar, sherry vinegar, champagne vinegar.
4. Smidge of honey – Takes edge off sharpness of vinegar so we can get away with using way less oil than the typical 1:3 vinegar to oil ratio. Good trick for cutting down on oil in dressings! πŸ™‚
5. Italian herb mix – Just the regular mix from any grocery store. Sub with another mix like Herbs de Provence, or dried oregano.
Storage – Keeps well for 3 days! At its prime on the day of making and next day, still every good on day for 2 more days. If intentionally making ahead to take somewhere, take the basil separately and add it in just before serving. Best served at room temp rather than fridge cold, toss well just before serving.
Nutrition per serving assuming 6 servings.

Nutrition Information:

Calories: 617cal (31%)Carbohydrates: 72g (24%)Protein: 17g (34%)Fat: 29g (45%)Saturated Fat: 7g (44%)Polyunsaturated Fat: 3gMonounsaturated Fat: 16gCholesterol: 30mg (10%)Sodium: 915mg (40%)Potassium: 555mg (16%)Fiber: 5g (21%)Sugar: 8g (9%)Vitamin A: 692IU (14%)Vitamin C: 23mg (28%)Calcium: 225mg (23%)Iron: 3mg (17%)

Life of Dozer

When you hear a pathetic wail from the front of the house and open the door to see this:

The door closed on him when he waddled outside without my knowledge to do something extraordinary (no doubt), and he was fretting.

At least I know I don’t have to worry about him running away these days!!! Too old, too slow, too much of a home boy. πŸ₯°

And later that day, back at our old stomping ground Bayview dog beach in the Northern Beaches, saying hi to Jeff the friendly local who lives at the dog park. Jeff is well! Still regaling everyone with terrible jokes (he takes sooo long to get to the punchline! πŸ˜‚) and looking after the park like it’s his own backyard. We are so lucky to have him as part of our community. πŸ™‚