This seaweed salad is colorful, delicious, and boldly flavored with sesame dressing. If you enjoy seaweed salads at Japanese restaurants, try this fun twist on the concept. Many prepared seaweed salads are colored with food dyes, but this one obtains its lively color from veggies.
If you’re relatively new to seaweed, like I am, this salad offers a great introduction. It calls for arame, which has a more mild and sweet flavor compared to other seaweed varieties. The crisp textures of cabbage and bell pepper, combined with soy sauce and ginger, contrast beautifully with the seaweed.
This salad is the perfect way to incorporate nutritious seaweed into your diet.Seaweed’s nutritional benefits vary depending on the specific variety, but they are often a good source of fiber, iodine, potassium and magnesium, among others. I try to consume a wide variety of whole foods, so seaweed is a welcome addition.
Seaweed Salad Ingredients
Arame
Arame seaweed, or sea vegetable, is a brown algae. It grows off the shores of the Ise-Shima National Park in Japan, and has been part of Japenese cuisine for centuries. I ordered EDEN brand arame online through Amazon, which seems to be sold out at the moment. Look for it in well-stocked grocery stores or Asian supermarkets.
Cabbage
Crisp strands of cabbage offer lots of colorful texture. I used green and purple varieties to make this recipe as bright as possible for photos, but either option will work well at home.
Bell Pepper
Sweet bell pepper is the perfect addition to this seaweed salad. Choose red, orange or yellow for this salad.
Cilantro and Green Onion
These herbs offer more fresh flavor. If you don’t like cilantro, you can skip it.
Avocado
Creamy avocado is the perfect counterpoint to the crisp textures. Wait to add avocado until you’re ready to serve each bowl.
Sesame Dressing
This homemade sesame dressing brings it all together! It’s made with tamari (soy sauce), toasted sesame oil, and fresh lime juice.
How to Make Seaweed Salad
Seaweed salad is surprisingly easy to make, and you’ll find the full recipe below. Arame requires a 5-to-10-minute soak in cool water. During that time, you can whisk together the dressing and chop the vegetables.
Drain the arame, then squeeze out any excess water. Return it to the bowl, add the prepared vegetables, pour in the full batch of dressing, and stir it all together. How’s that for easy?
Reserve the avocado until just before serving since it browns over time. The recipe keeps well in the refrigerator for up to four days.
Watch How to Make Seaweed Salad
How to Serve Seaweed Salad
This seaweed salad is a fun and nutritious side salad. Serve it with Japanese cuisine and beyond at any time of year.
You can turn this salad into a complete meal by topping it with Crispy Baked Tofu or prepared fish or shrimp, perhaps on a bed of brown rice. You could even skip the sesame dressing and serve it in place of the kale in my Build-Your-Own Buddha Bowls.
Here are a few more complementary serving options:
Leftover cabbage?
This recipe calls for 1 1/2 cups of cabbage, less than one full head. Leftover cabbage will keep well in the refrigerator, wrapped, for up to one week.
This seaweed salad recipe is colorful, delicious and boldly flavored with sesame dressing. The arame needs to soak for 5 to 10 minutes before using, so you can prepare the vegetables and dressing during that time. Recipe yields 4 servings (1 ½ cups per serving for 6 cups total).
Scale
Ingredients
1 ounce arame sea vegetables (about 1 ½ cups dried)
1 ½ cups thinly sliced purple or green cabbage, roughly chopped into pieces no longer than 3 inches
1 red or orange bell pepper, chopped
½ cup thinly sliced green onion, sliced on the diagonal
Rinse the arame well in a fine sieve, then place it in a generously sized bowl. Fill the bowl with cool water and let it soak for 5 to 10 minutes, until nicely pliable. Drain the arame in the sieve, and gently squeeze out any excess water. Transfer the arame back to your empty bowl, which we will use as a mixing bowl.
Add the cabbage, bell pepper, green onion and cilantro. Whisk the dressing once more, and pour it all over the salad. Gently toss until the salad is evenly coated in the dressing.
When it’s time to serve, divide the seaweed into bowls and top with diced avocado. The salad will keep well in the refrigerator, covered, for up to 4 days (add the avocado just before serving).
▸ Nutrition Information
The information shown is an estimate provided by an online nutrition calculator. It should not be considered a substitute for a professional nutritionist’s advice. See our full nutrition disclosure here.
This post may contain affiliate links, please see our privacy policy for details.
Sage Brown Butter Corn Pasta Alfredo is a scrumptious late summer pasta that transitions wonderfully into fall. I took a classic pasta recipe and updated it with a rich and creamy sauce, golden brown butter, corn, and fried sage leaves. The result is delicious late summer and early fall flavors that melt in your mouth. It’s the coziest, creamiest Alfredo pasta and great for busy nights.
It’s crazy that this is the last week of August. Sunday marks the 1st of September! I’m so excited and looking forward to a busy fall ahead!
Between fall game nights with friends, busy work/school schedules, back-to-school activities, and holiday planning, it’s that crazy time of year when we’re transitioning from laid-back summer days to active fall schedules.
I love it. Though it can sometimes be overwhelming, I mostly thrive on having too many things to do! This is the time of year when my recipes really start to get cozier. They also get simpler with one-pan dishes and slow cooker recipes. And I think they become even more delish!
September is a great month to start making my dad’s creamy alfredo pasta. His alfredo is luscious, and he makes it perfectly every time with little effort.
His secret? A block of Philadelphia cream and more parmesan than you might usually use. It’s creamy and truly delicious. My addition to his recipe today is brown butter, end-of-summer corn, and fresh sage. It’s the perfect Alfredo for this time of year!
These are the details
Step 1: brown the butter with the corn and sage
For this pasta alfredo, I start with the butter sauce. Melt a stick of butter in a skillet with fresh sage, then add the corn and garlic. Next, season the corn to taste with salt, black pepper, and chili flakes.
Allow the butter to brown around the corn. This takes around 10 minutes. The butter will smell nutty, the corn will be golden, and the sage should get crispy.
Pull the skillet off the heat and set aside.
Step 2: cook the pasta
Boil your favorite pasta cut. For this Alfredo sauce, I switched it up from the usual fettuccine and used a short-cut pasta. Either long or short is great, but I do love the short-cut with the corn!
Once you drain the pasta, let it hang in the colander while you make the sauce. Add the cream cheese to the same hot pot and let it melt. Whisk in the milk, then add the Parmesan cheese. And if you enjoy blue cheese like we do, add some blue cheese, too! YUM!
Finish the sauce with salt and black pepper, then mix in the pasta, the corn, brown butter, and sage. It’s going to smell so delicious and look even yummier!
Step 4: finish
I like to top this dish with freshly grated parmesan and a few of those flavorful, crispy sage leaves.
The sauce is creamy with warming notes of sage, sweetness from the corn, and nuttiness from the golden brown butter. It’s my favorite combo.
Perfect for chillier nights or when you need to throw together a quick dinner.
Looking for other quick pasta recipes? Here are a few ideas:
Lastly, if you make this Sage Brown Butter Corn Pasta Alfredo be sure to leave a comment and/or give this recipe a rating! Above all, I love to hear from you guys and always do my best to respond to each and every comment. And, of course, if you do make this recipe, don’t forget to tag me on Instagram! Looking through the photos of recipes you all have made is my favorite!
Brown Butter Corn Pasta Alfredo
Prep Time 10 minutesminutes
Cook Time 15 minutesminutes
Total Time 25 minutesminutes
Servings: 6
Calories Per Serving: 726kcal
Nutritional information is only an estimate. The accuracy of the nutritional information for any recipe on this site is not guaranteed.
1. Melt the butter with the sage leaves in a large skillet set over medium heat. Cook for 2 minutes, then add the corn, garlic, salt, pepper, and chili flakes. Cook for 5 minutes, until the butter is browned. Remove from the heat. 2. Bring a large pot of salted water to a boil. Cook the pasta according to package directions until al dente. Drain.3. To the hot pot, add the cream cheese, stirring until melted. Slowly whisk in the milk until smooth. Set over medium heat and bring the sauce to a simmer. Cook 5 minutes, until thickened slightly. Stir in the parmesan and blue cheese (if using) and season with salt and lots of pepper.4. Toss in the pasta, stir in the corn and brown butter, then remove from the heat. Divide the pasta between plates. Serve with extra parmesan. Eat and enjoy immediately.
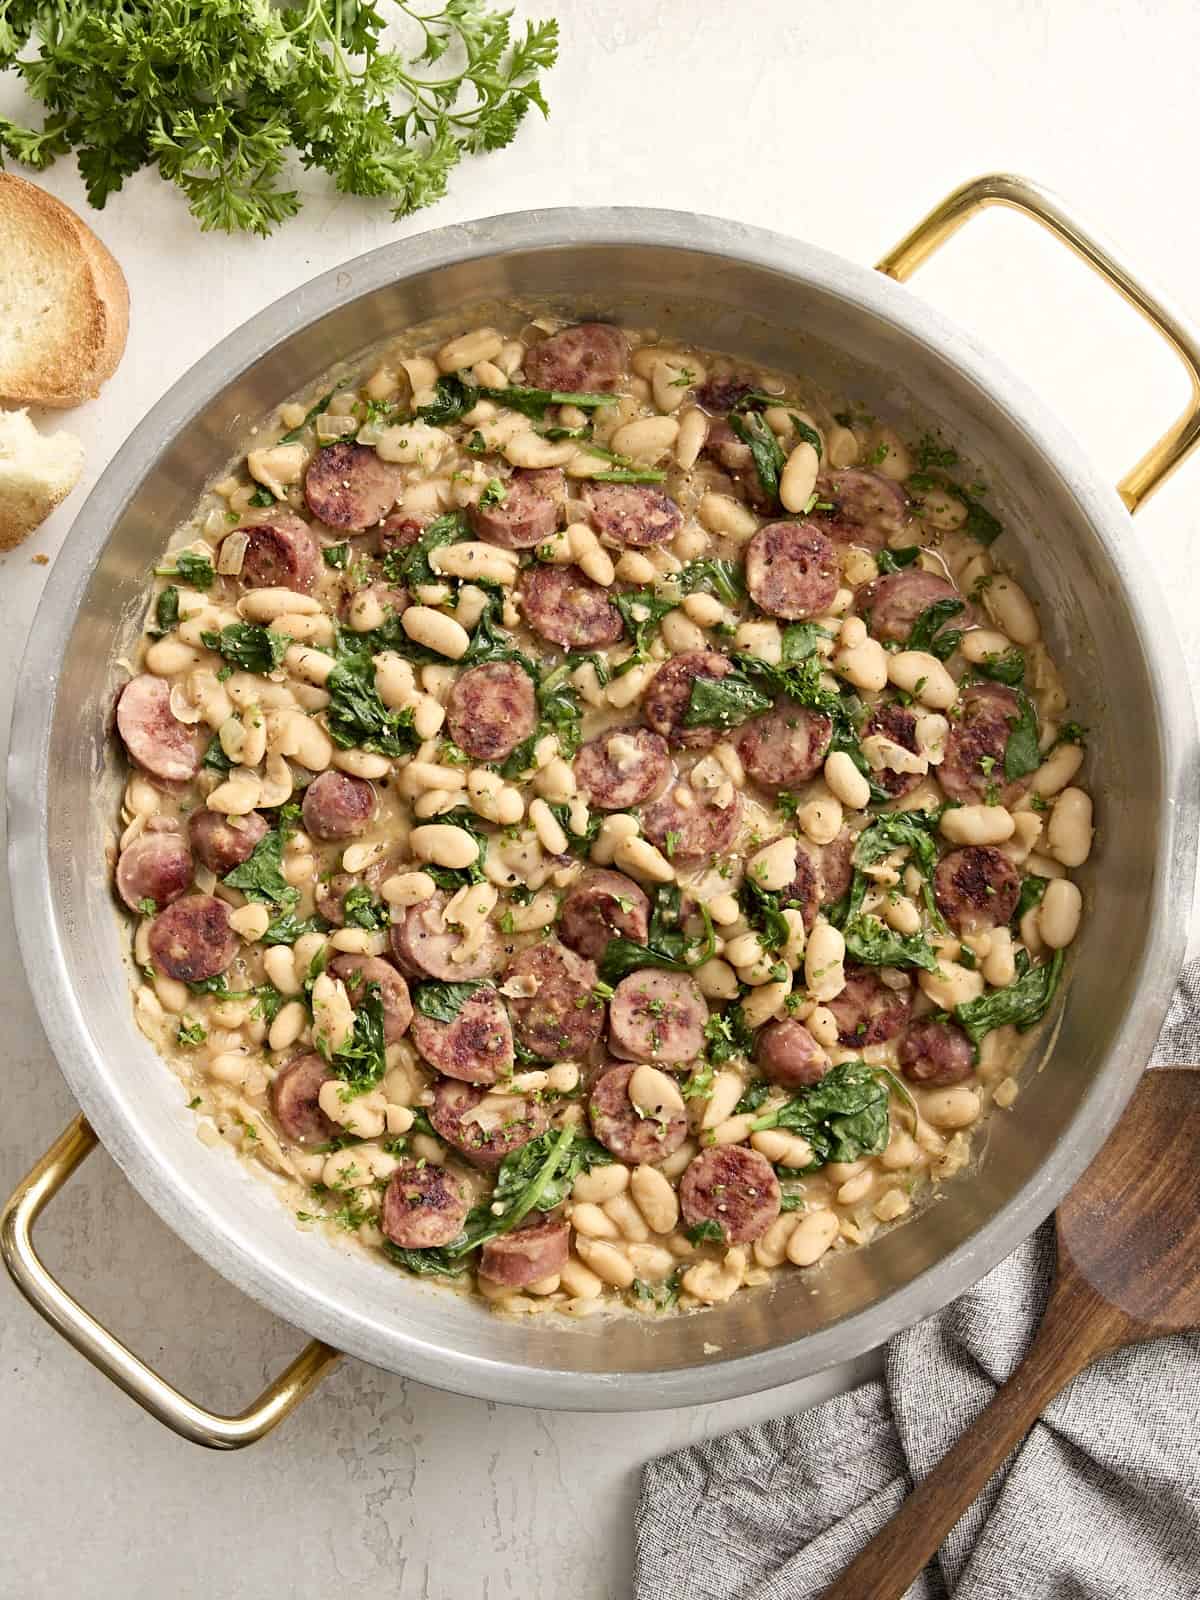
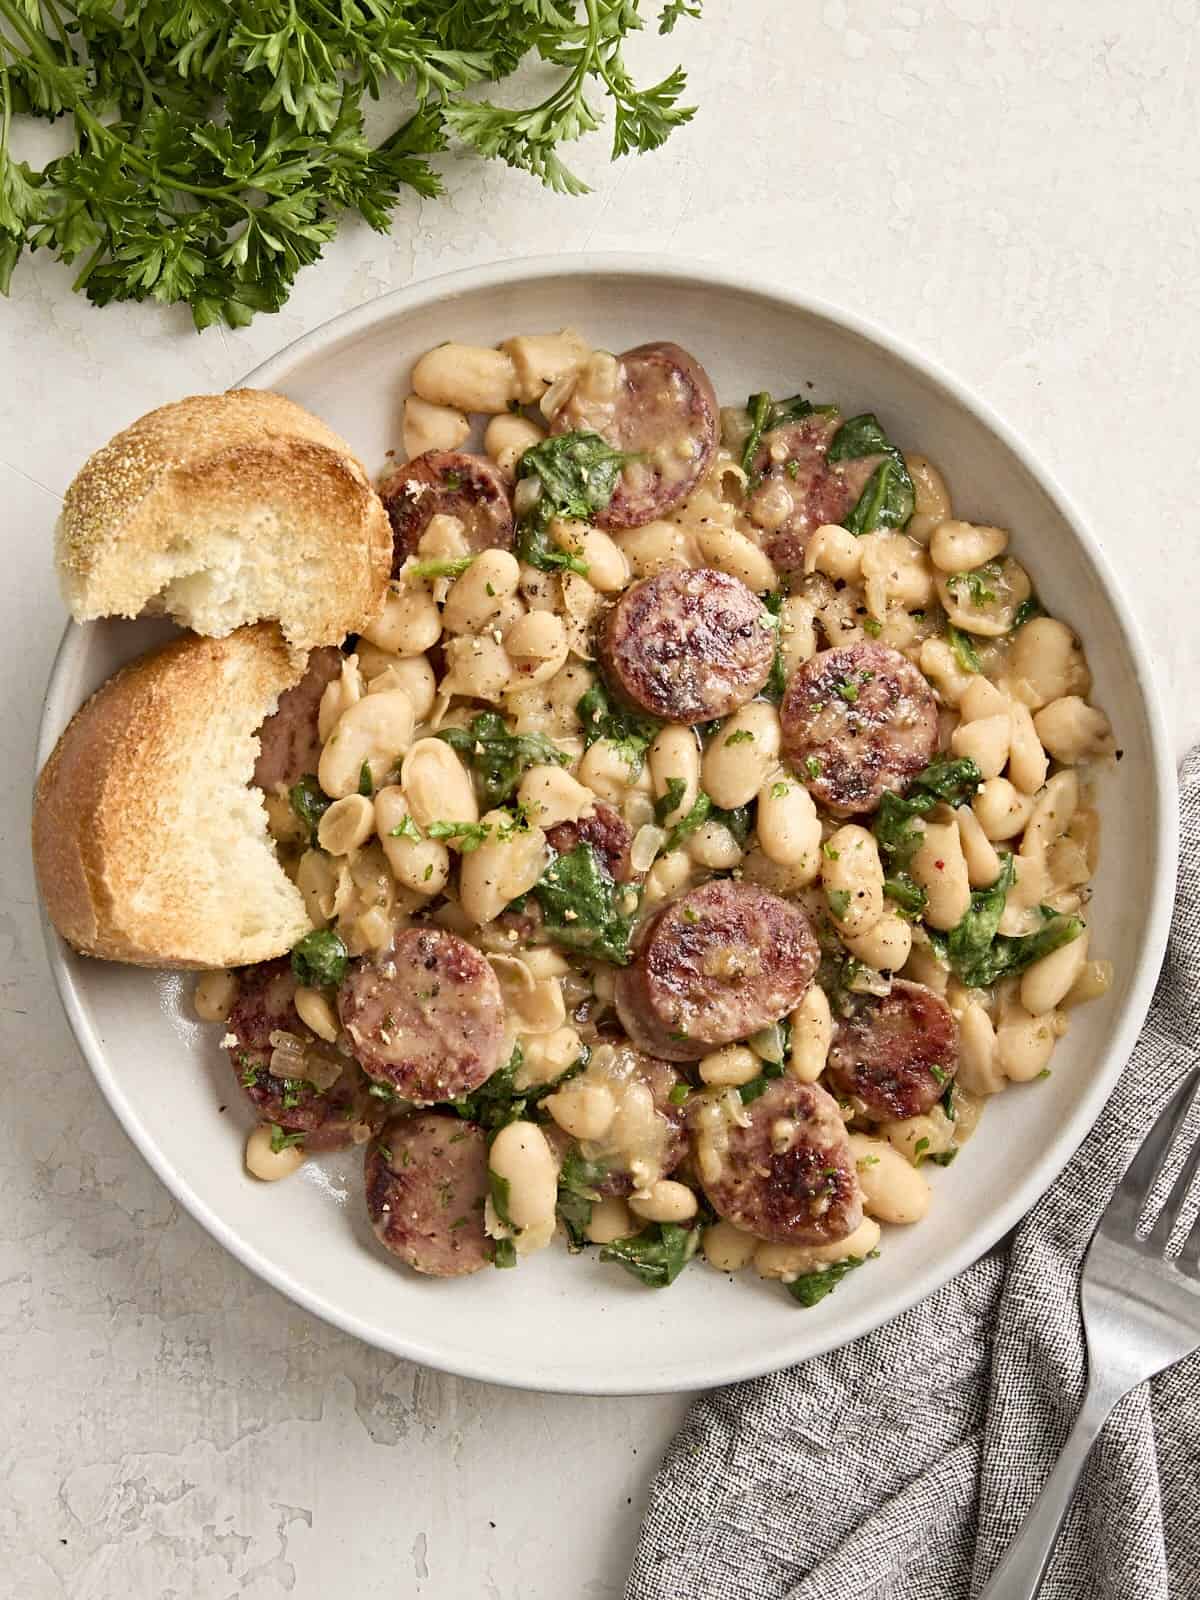
I think it’s time I told you about my love for chicken sausage. I don’t know when it started, but it definitely runs deep. This Chicken Sausage White Bean Skillet is made with pre-cooked smoky chicken sausage to save you time and creamy white canned beans to save you money!! And I’m always excited to share a one-pan dinner meal with you, so this is one you’ll want to keep in your back pocket!
Ingredients for Chicken Sausage White Bean Skillet
My goal was to create a quick skillet meal that reminded me of slow-cooked beans and ham. You know the beans that cook for hours in a big pot and soaks up all that delicious flavor from a smoky ham hock bone? Yes, that was the goal. And I think I got pretty close! 😉 Here’s what you’ll need:
Chicken Sausage: You’ll need 4-5 fully cooked chicken sausage links. Currently my favorite brand is Aidells smoked chicken sausage, but you can use whichever brand you like. I’ve heard great things about Trader Joe’s chicken sausage too!
Onion and Garlic: Diced onion and garlic cooks in the residual fat from the chicken sausage and adds lots of aromatics and flavor to the dish.
White Beans: I love creamy cannellini beans which is what I used, but you can certainly use a different canned white bean like great northern beans or navy beans.
Chicken Broth: A little chicken broth helps warm the beans through and creates a light sauce.
Spinach: I had a half bag of baby spinach leftover from my cheese tortellini and sausage skillet so I decided to add it here to reduce food waste and it gives the dish more color.
Seasoning: Smoked paprika to help achieve that smoky bean flavor, a little bit of salt, black pepper, and dried oregano. That’s all you’ll need!
Keep an eye on the chicken sausage as it browns in the skillet. It only takes 1-2 minutes on each side. So make sure to remove it promptly after it browns to keep it from burning.
I like to use a very large 12-inch skillet when making this recipe so I can quickly brown all of the chicken sausage at one time in an even layer.
Drain the canned beans but DON’T rinse them. The extra starchy liquid that’s stuck to the beans will help create a light sauce.
You can replace the spinach with chopped kale if that’s what you have on hand.
Top this easy one-skillet meal with some freshly grated parmesan cheese or a pinch of red pepper flakes for extra flavor!
CAN I USE A DIFFERENT TYPE OF SAUSAGE?
Yes! You can use any type of smoked sausage for this recipe. I just so happen to love chicken sausage, but beef, pork, turkey, or even kielbasa sausage would work just fine. Just make sure you are getting fully-cooked sausage links.
Storing Leftovers
Although the beans will thicken quite a bit after storing in the refrigerator, it will still taste great the next day. So feel free to store any leftovers in an airtight container in the fridge for 3 to 4 days. Reheat easily in the microwave until warmed through.
Chicken Sausage White Bean Skillet
This Chicken Sausage White Bean Skillet is a quick & easy one-skillet meal that’s filling, budget-friendly and delicious!
Slice the chicken sausage into round medallions about ¼ – ½ inch thick.
Heat a large skillet over medium heat and add 1 Tbsp of oil. Add the sliced chicken sausage to the skillet and brown on both sides. It will only take about 1-2 minutes on each side. So be careful not to burn the sausage. Once the chicken sausage is browned, remove it from the skillet onto a separate plate and set aside.
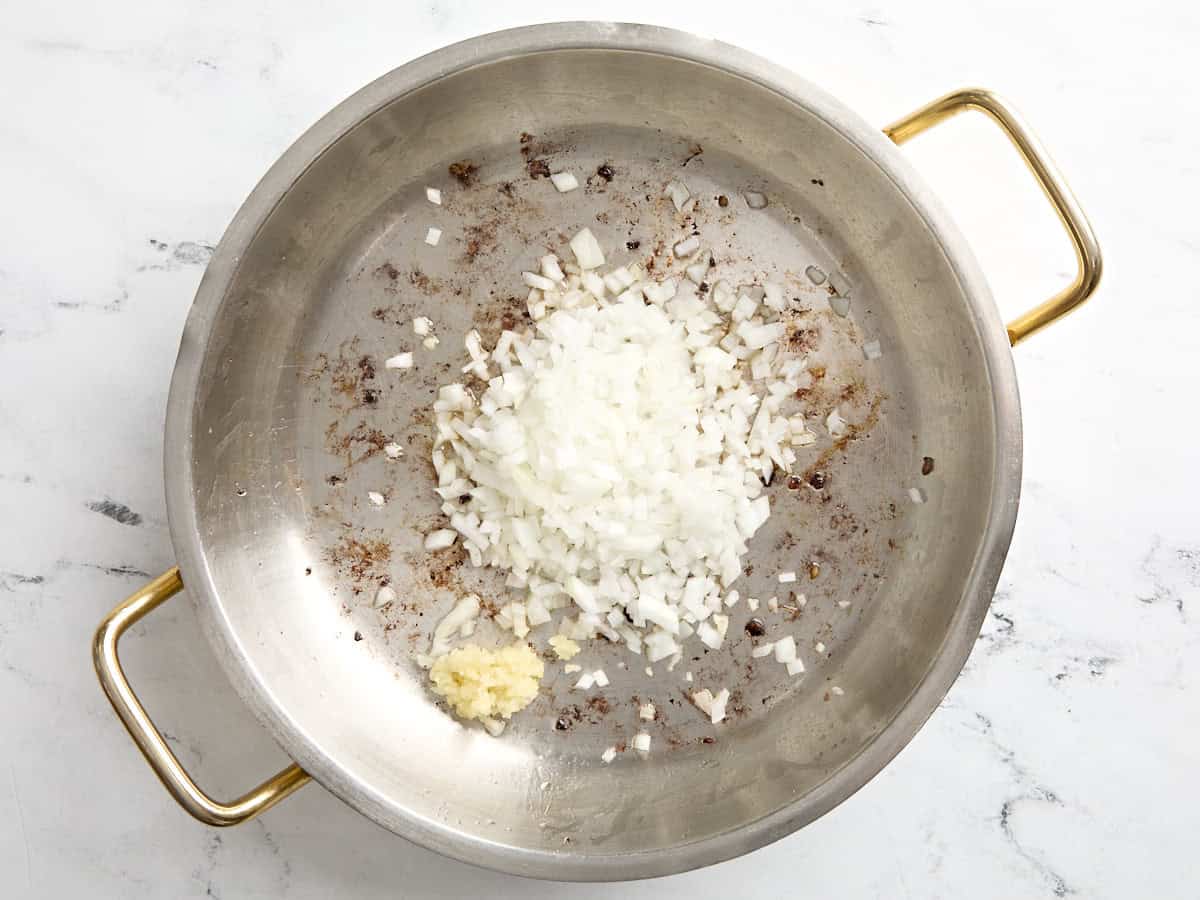
In the same skillet, add the remaining 1 Tbsp of oil along with the diced onion and minced garlic. Sauté for about 3 minutes or until the onion is translucent and the garlic is fragrant.
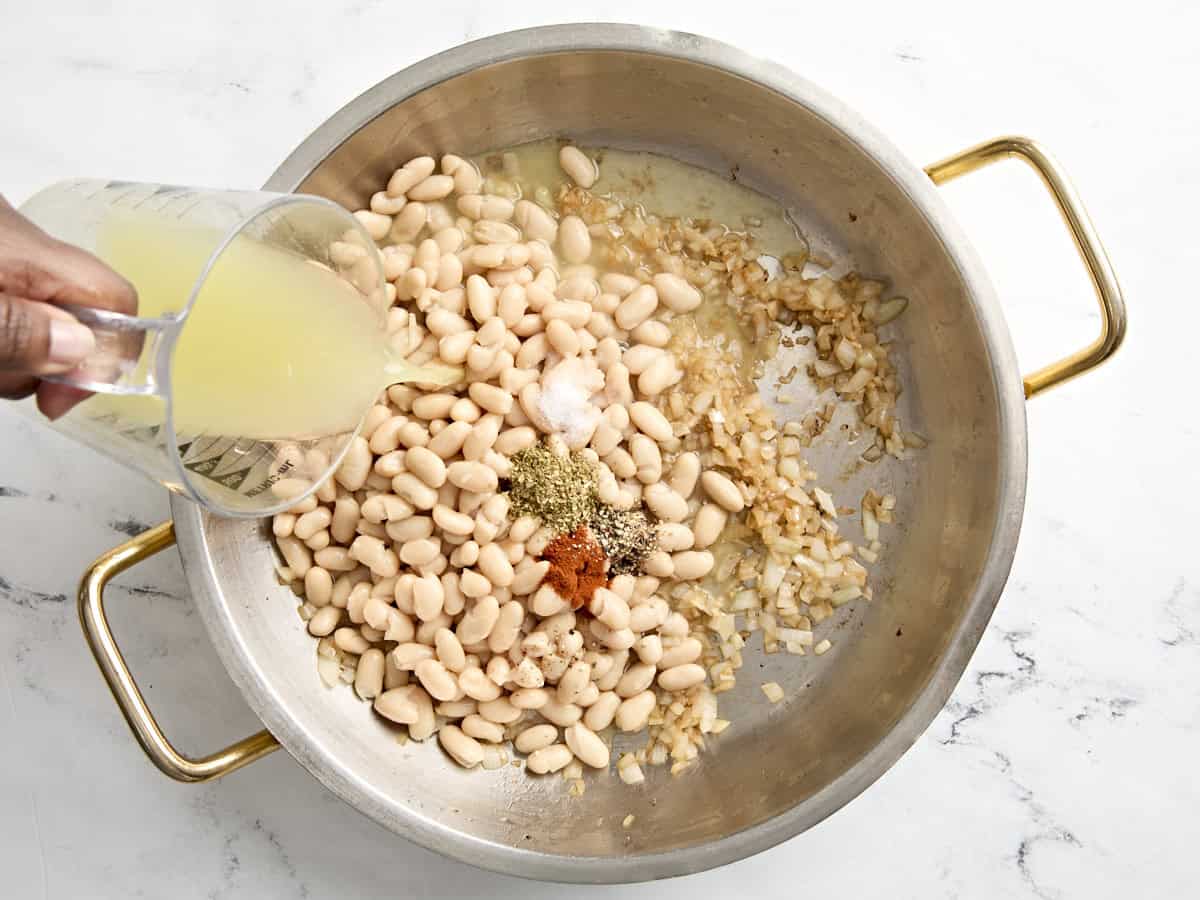
Add the drained canned beans to the skillet (do not rinse the beans, the residual starchy liquid helps create the sauce), along with the salt, dried oregano, smoked paprika, and cracked black pepper. Then pour in the chicken broth.
Gently stir everything together and bring the skillet up to a simmer. Simmer for 4-5 minutes.
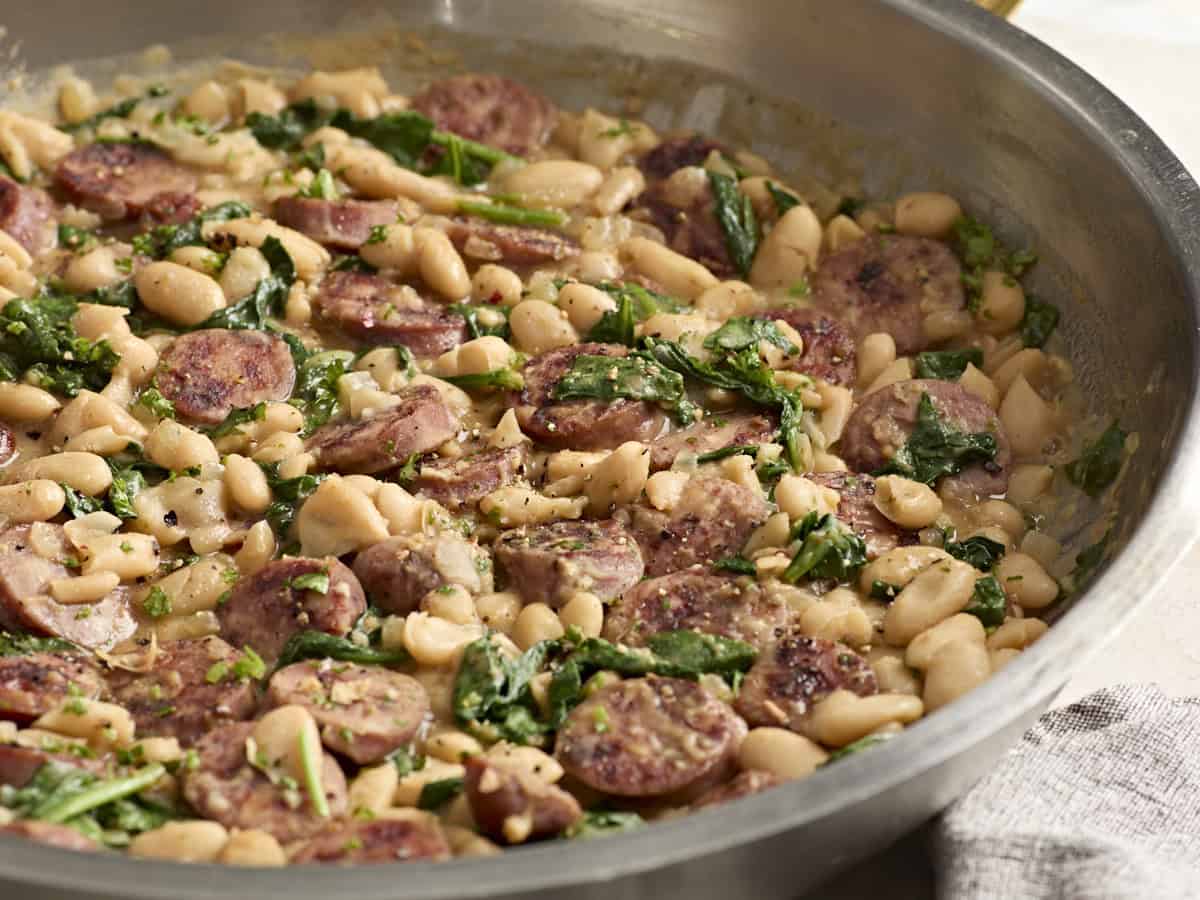
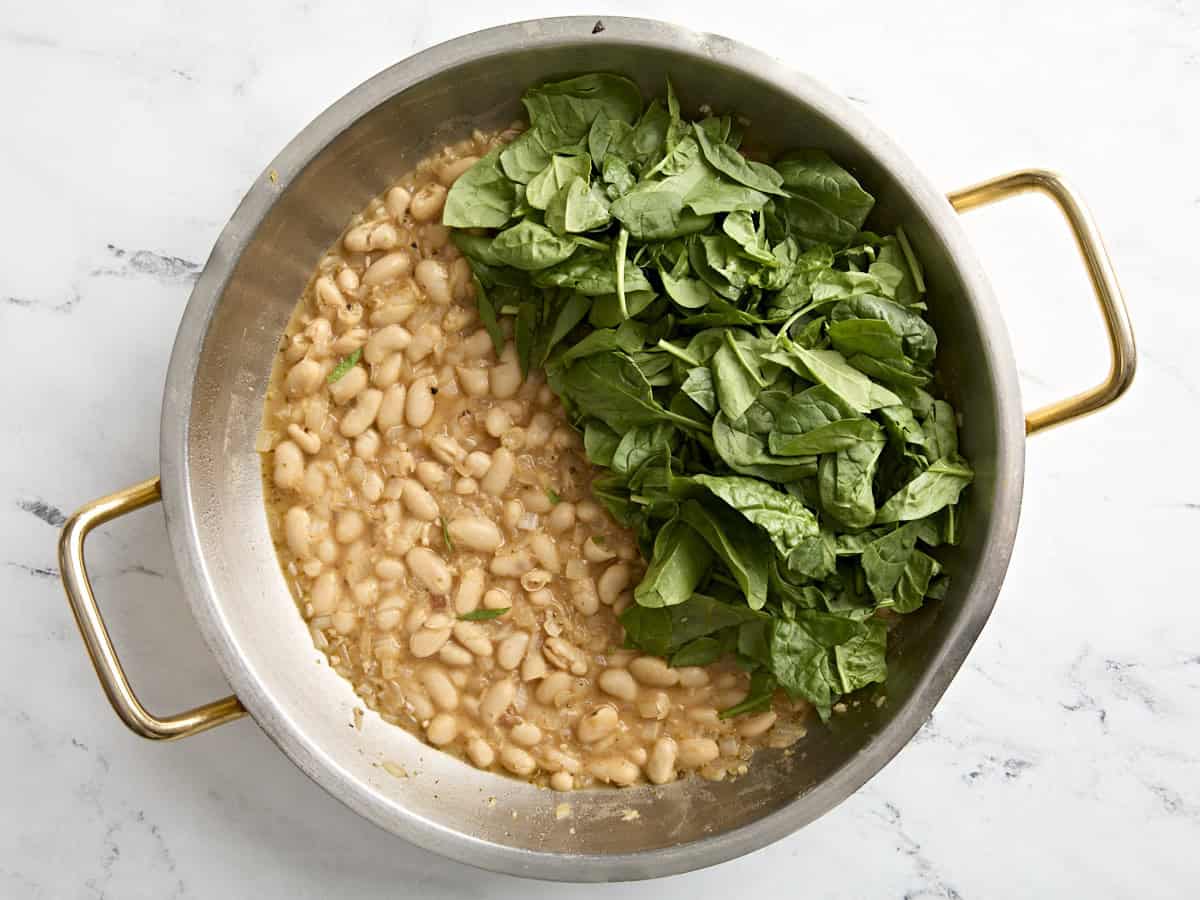
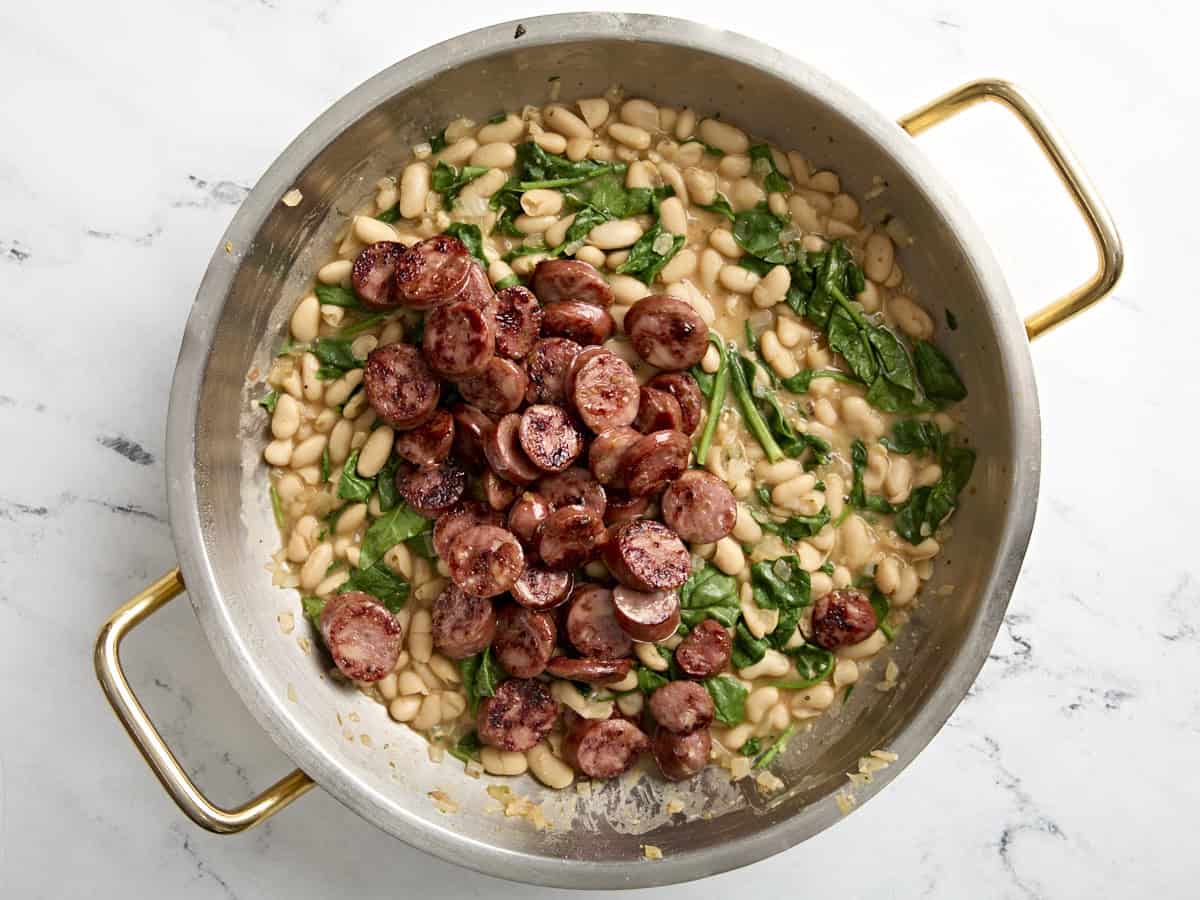
Add the chopped spinach to the skillet, allowing the heat to wilt the spinach, then add the browned chicken sausage. Gently stir with the beans to combine.
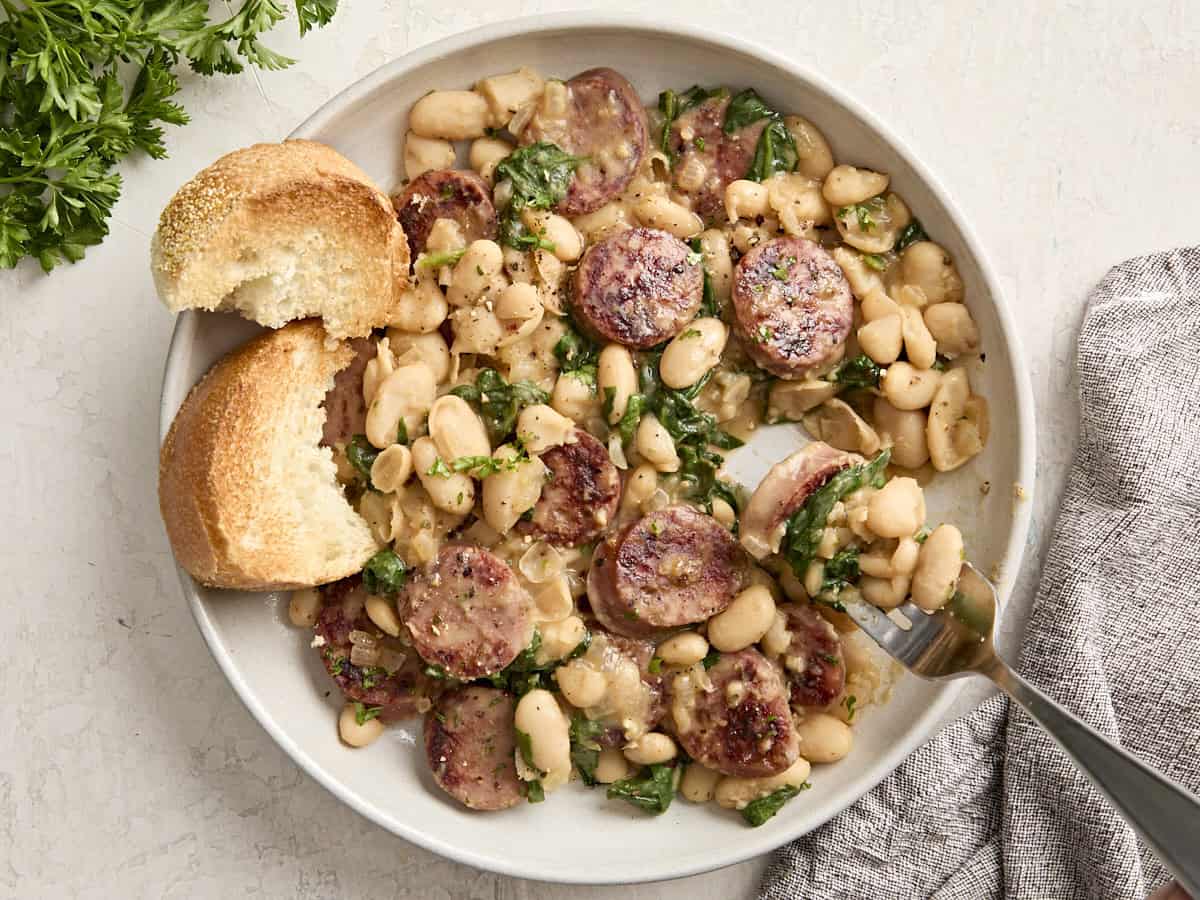
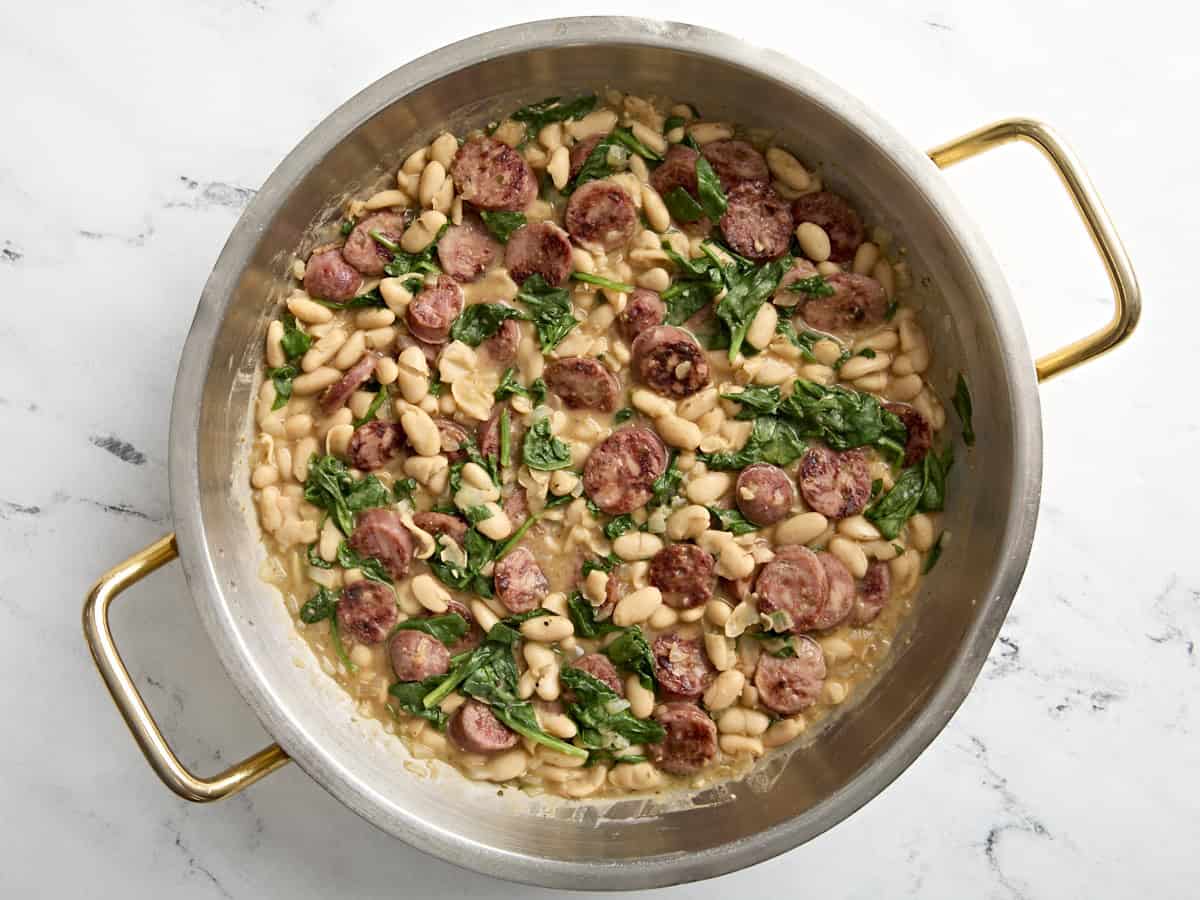
Serve hot with crusty bread and some freshly cracked black pepper or red pepper flakes on top. Enjoy!
How to Make Chicken Sausage White Bean Skillet – Step by Step Photos
Currently this is my favorite brand of smoked chicken sausage, but you can use whichever brand you like.
Slice 4 fully-cooked chicken sausage links into round medallions about ¼ – ½ inch thick.
Heat a large skillet over medium heat and add 1 Tbsp of oil. Add the sliced chicken sausage to the skillet and brown on both sides. It will only take about 1-2 minutes on each side. So be careful not to burn the sausage. Once the chicken sausage is browned, remove it from the skillet onto a separate plate and set aside.
In the same skillet, add the remaining 1 Tbsp of oil along with 1 small diced yellow onion and 2 minced garlic cloves. Sauté for about 3 minutes or until the onion is translucent and the garlic is fragrant.
Add 2 15oz. cans of drained cannellini beans to the skillet (do not rinse the beans, the residual starchy liquid helps create the sauce), along with 1/2 tsp salt, 1/2 tsp dried oregano, 1/4 tsp smoked paprika, and 1/4 tsp freshly cracked black pepper. Then pour in 1 cup chicken broth. Gently stir everything together and bring the skillet up to a simmer. Simmer for 4-5 minutes.
Add 2 cups chopped spinach to the skillet, allowing the heat to wilt the spinach. If your bean mixture has gotten a little too thick feel free to add 2 Tbsp of water at this point.
Now add the browned chicken sausage to the skillet. Gently stir with the beans to combine.
Now all that’s left to do is enjoy with some crusty bread and maybe a quick side salad. A simple one-skillet meal for the win!!🙌
It’s summer! Whether you’re in or outdoors, hopefully for all of you there are beautiful summer fruits and berries to be had, and I hope that you’re able to get your hands on as many of them as you can. I am loading (actually, overloading…) myself up at the market. While a good portion on the fresh fruit gets eaten just as-is, some of it goes into the following dessert recipes that I continue to make year after year. Others go into jam, which is a great way to preserve all those summer fruits and berries, and make them last through fall and winter.
Cherry season is behind most of us (sniff…sniff…), but if they are still lingering where you live, you can type “cherry” or “cherries” into the search engine at the top right corner of the page to find cherry recipes. (And we don’t get a bountiful array of fresh raspberries and blackberries here, so I don’t have many recipes that use them on the blog.) But for nectarines, strawberries, peaches, plums and other summer fruits, here are some of my favorite recipes on the blog…
I’ve seen so many galettes this year on social media, that it’s tempting to already call galettes The Dessert of the Year. (Okay, there were plenty of Banana Breads as well. And it’s hard to knock Banana Bread, even my low(er) fat one.) But for the bang-for-the-buck, it’s hard to beat the silly-easy galette, made with a fail-safe dough that gets rolled out, topped with fresh fruit, and baked until ripe ‘n ready. Mine has a layer of frangipane under the fruit to keep some of those juices away from the bottom crust, so it stays crisp. It also tastes good, too! Apricots work especially well in this one but you can use nectarines, plums, peaches, or…
…rhubarb and strawberries! Yes, the classic combo works well as a galette, too. But don’t let tradition stand in the way of deliciousness and you can swap out cherries, raspberries, or blackberries for the strawberries.
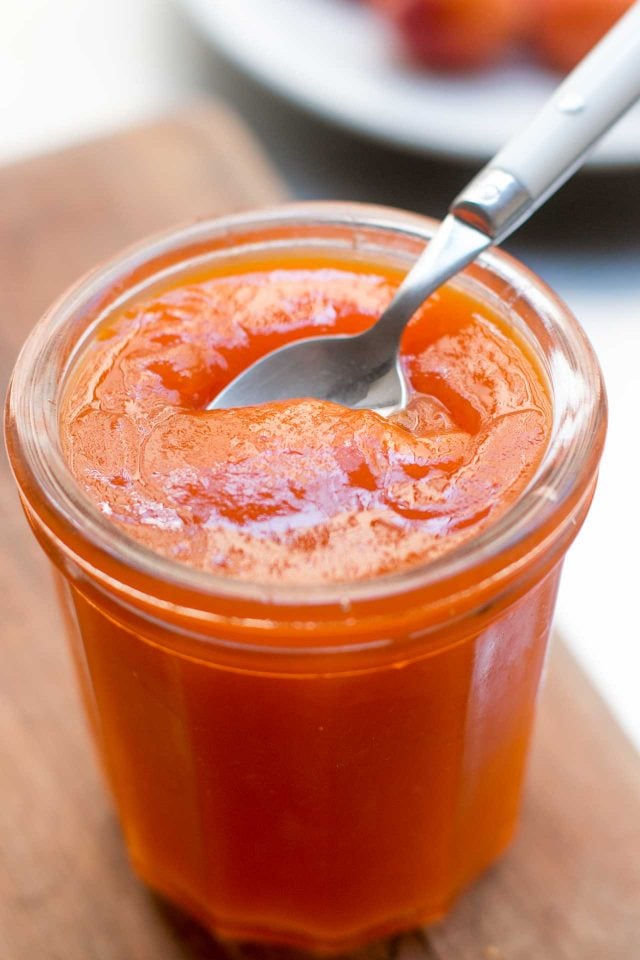
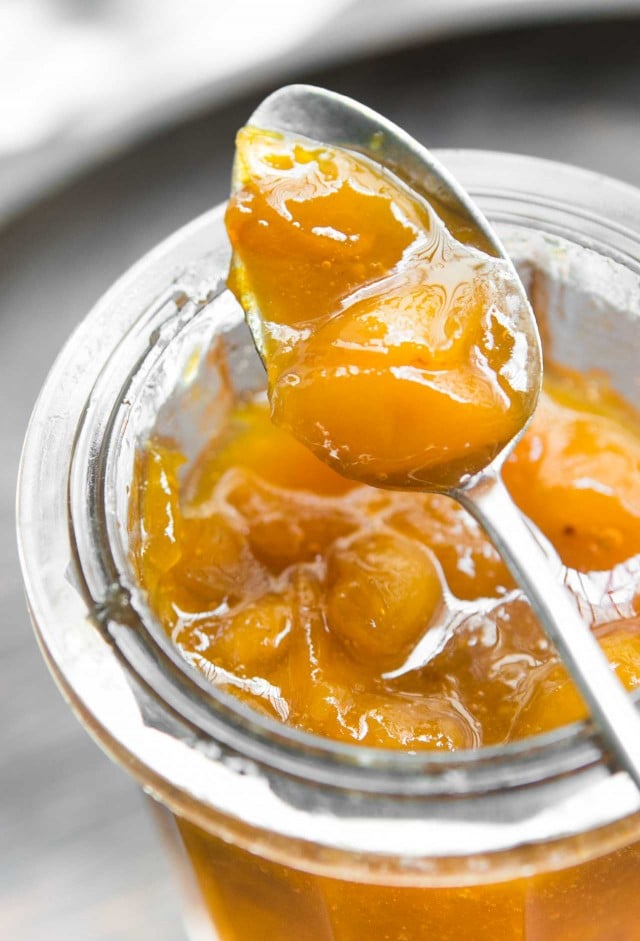
When I was a cook in upstate New York back in the 1980s (!) I remember someone brought us a (as in 1) basket of fresh apricots from California, which I’d never seen before. I made a simple tart with them and only eight lucky customers could get a taste of it. (Or maybe I cut it into ten?) Fast-forward to today, summer brings a cavalcade of fresh apricots to the markets and toward the end of the season, I don’t have time to shed any tears as I’m piling apricot jam into pots, to save them for the coming months. It’s Romain’s favorite jam so I make sure there’s enough to keep him happy, because I’ve learned what happens when I don’t : 0
Another summer fruit favorite, yes, with more almond cream than the galettes above, this is that classic French tart that you’ll find in many pastry shops all year round, using everything from pears to pineapple. Don’t love almonds, or want to take it in a different direction? Replace the almonds with hazelnuts for a special treat.
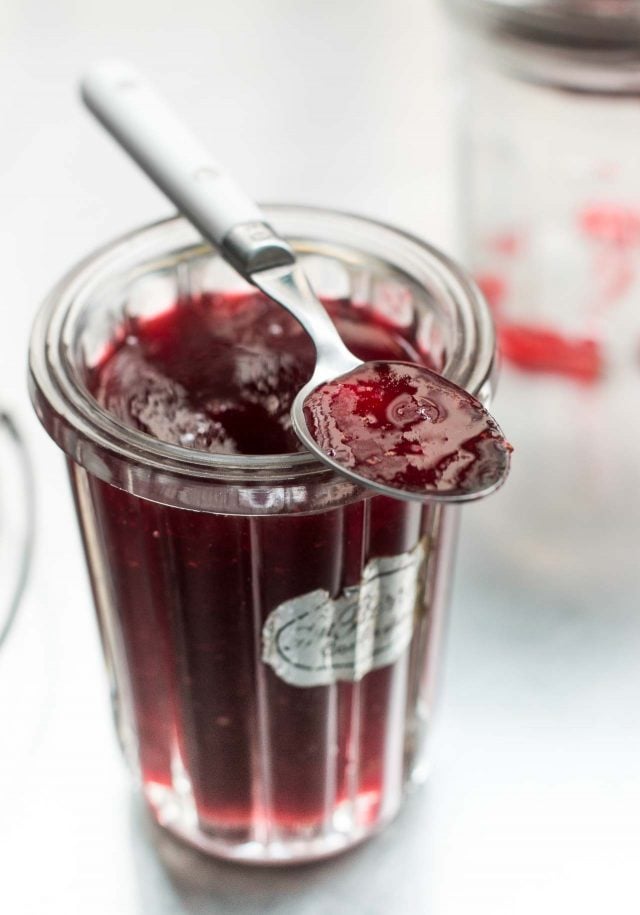
While apricots are Romain’s favorite for jam, I am 100% on team plum. The luscious tang of juicy plum, and the high natural pectin content, makes this one of the easiest jams to make. And it’s not too difficult to eat, either.
While I miss the purple Santa Rose and Elephant Heart plums we got in California, France has its own special selection of delectable plums, including Mirabelles, quetsches, and even wild plums. While the wild plum trees that we used to pick/glean from have been pruned by the absentee owners (phooey!) we found another source last summer. And the only thing better than free plums is free wild plums, which come in an array of snazzy colors and are extra tangy, perfect for those of us that like some pucker in our pastries.
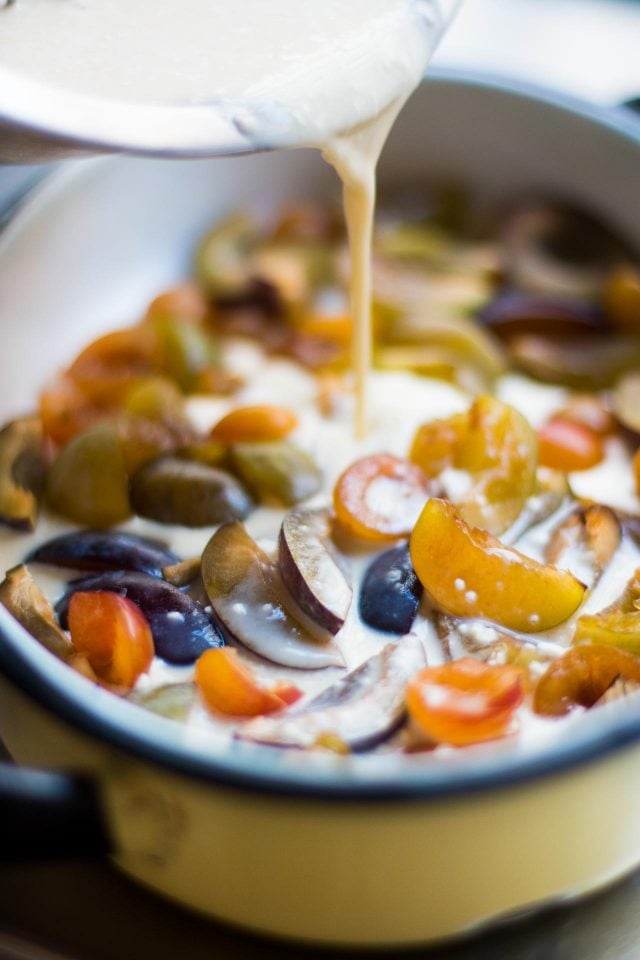
The cousin of clafoutis, this flaugnarde features a jumble of plums baked in a silky custard. They’re so pretty I almost hate to bake them. But then, when I pull it out of the oven, I’m happy to have a beautiful baked gratin dish of custardy plums for dessert on a warm summer night.
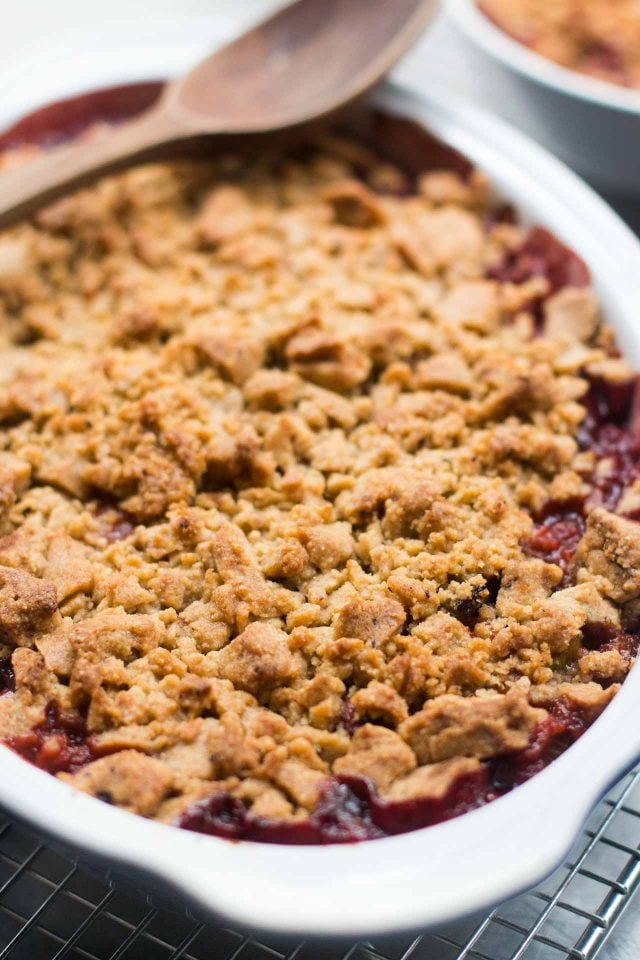
Two tart fruits come together, baked under a buttery blanket of streusel. If these two bedfellows are available at the same time where you live, you’re doubly lucky!
The elusive Mirabelle plums have a cult-like following and while some mistakenly think they aren’t available in the U.S. (they were briefly banned a few years ago), if you’re lucky, you can indeed find them. They’re intensely flavored and sweeter than other plums, and make a wonderful confiture with jewel-like fruits suspended in a shimmering jelly, which are lovely heaped on toast in the morning. (If you want to get a taste of Mirabelles but can’t find them, Bonne Maman makes a golden plum Mirabelle jam that’s exported from France.)
While I wasn’t a fan of Angel Food Cake growing up, which my mother usually made to accompany strawberries, I became a convert as a grown-up. Perhaps it had to do with writing an ice cream book and having an overload of egg whites to use up. (And Angel Food Cake is an express route to doing that.) Nevertheless it’s a treat along with summer fruits and berries, either baked as a compote or fresh, tossed in a little sugar and perhaps a dash of crème de cassis. The spongy cake is an ideal way to make sure you get every drop of the fruit syrup that’s surrounding the airy slab. It’s French cousin, Gâteau de savoie, is equally enjoyable, and doesn’t require an Angel Food Cake pan.
Roasting strawberries is lesser-known way of coaxing out their flavor, but works well when making ice cream as it concentrates them and reduced the water, so the ice cream stays creamier. Adding a touch of salty miso provides a curious contrast to the berries juicy sweetness, and a little umami to boot.
Once you make the (very) easy base for this Strawberry Spritz, you can use it to make Strawberry Margaritas, too. (And if you’ve got a hankering for a classic Spritz, I’ve got you covered there, too.) But this Spritz is a great, light apéritif to enjoy all season long. I was drinking lots of these a few weeks ago when strawberries were at their peak. If they available where you live, go infuse some in vermouth blanc for a great spring/summer sipper.
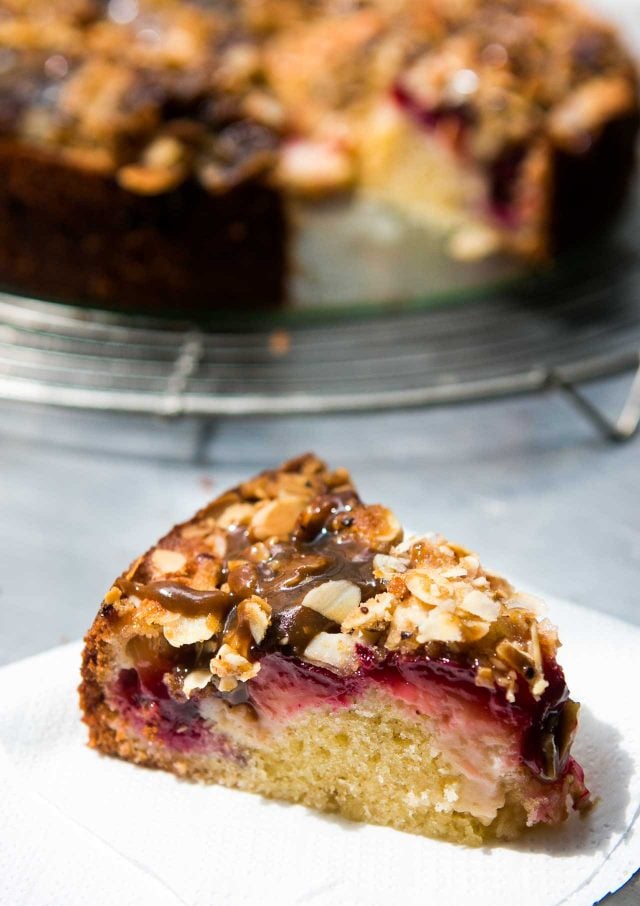
Toffee glaze is one of those things you could put on an old sneaker, and it would make those dilapidated Reeboks taste great. Even better (and more recommended) is this spiced plum cake, which isn’t too rich or too sweet. Crunchy toasted almonds on top are a nice contrast to the buttery glaze.
Speaking of buttery sauces, butterscotch with peaches is a natural. Grammar-correct keeps asking me: A natural what? But I think you can figure that out. If not, give them a try together and you’ll see what I’m talking about.
If you’re fortunate enough to have a peach tree or can get some of the leaves, they lend a delicate almond-like flavor to this intriguing apéritif wine. I try to make a few bottles every year and serve chilled glasses as the season’s change, reminding me of summer, and reminding me that the light almond flavor of peach leaves in wine is something to put on my calendar for the following year.
Peaches and bourbon are natural partners, and they don’t mind sharing space in a tumbler with the classic French apéritif, Bonal. But not to worry if you don’t have it; I offer some substitutes that you might already have on your liquor shelf. This cocktail isn’t just pretty, it’s also a pretty effective way to beat the heat. (Yup, nectarines or plums could replace the peaches, if you’re so inclined.)
A vintage metal popsicle mold that was a find at a flea market prompted these summer ‘sicles. You can load ’em up with berries and since I used white nectarines, the popsicles were extra-pretty in pink. But anyone would say “yes” to them in yellow, if you go with standard nectarines.
Mixed berry anything automatically makes something my favorite dessert. I love, love, love the juicy tumble of strawberries, blueberries, blackberries, red currants, or whatever else you’ve got. Bring the berries on!
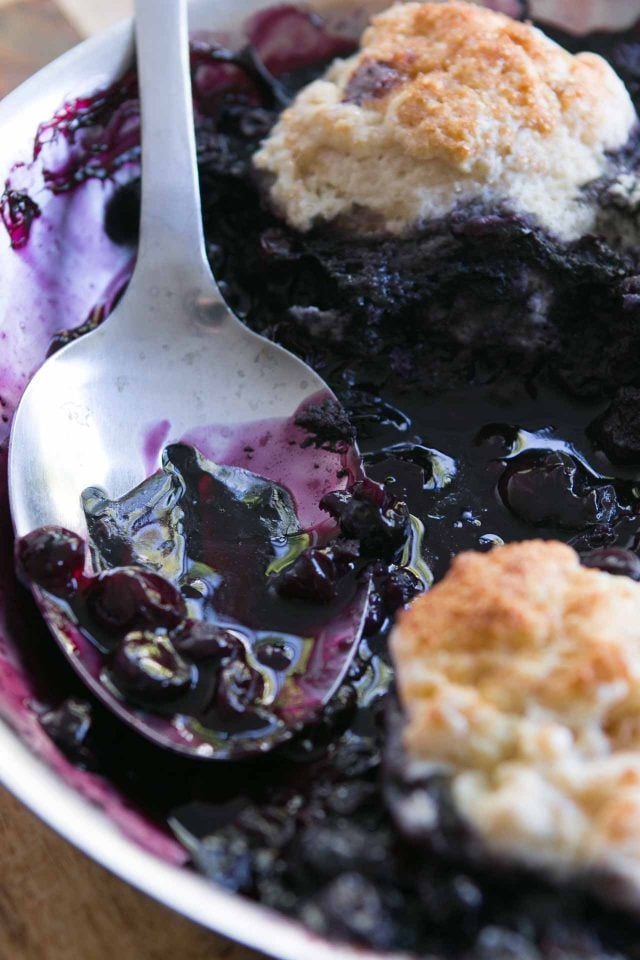
While I am nostalgic for the overload of blueberries that I grew up with New England, when I do find myrtilles, I try to keep them as close to their pure state as possible. Topped with crumbly drop biscuits, all that’s needed is a scoop of vanilla ice cream to complete the picture, but white chocolate-fresh ginger ice cream would also be welcome…and appreciated, on this cobbler.
While everyone’s mind is on peaches and nectarines, don’t forget mangoes, their tropical counterpart, which go just as well with summer berries. Blueberries particularly come to mind but raspberries and strawberries could fill in for them.
With pretty swirls of crispy meringue, this tangy frozen yogurt can be part of a composed dessert, which I like to serve in the summer, being generous with the fresh fruit…and filling in the blanks with frozen yogurt and meringues.
I don’t know if blueberries get any better than in this buckle, which do indeed “buckle” under the weight of almost too many blueberries…if that’s even possible. A dousing with tart lemon syrup keeps things moist and tangy. You can skip the cream with this one. It’s great on its own.
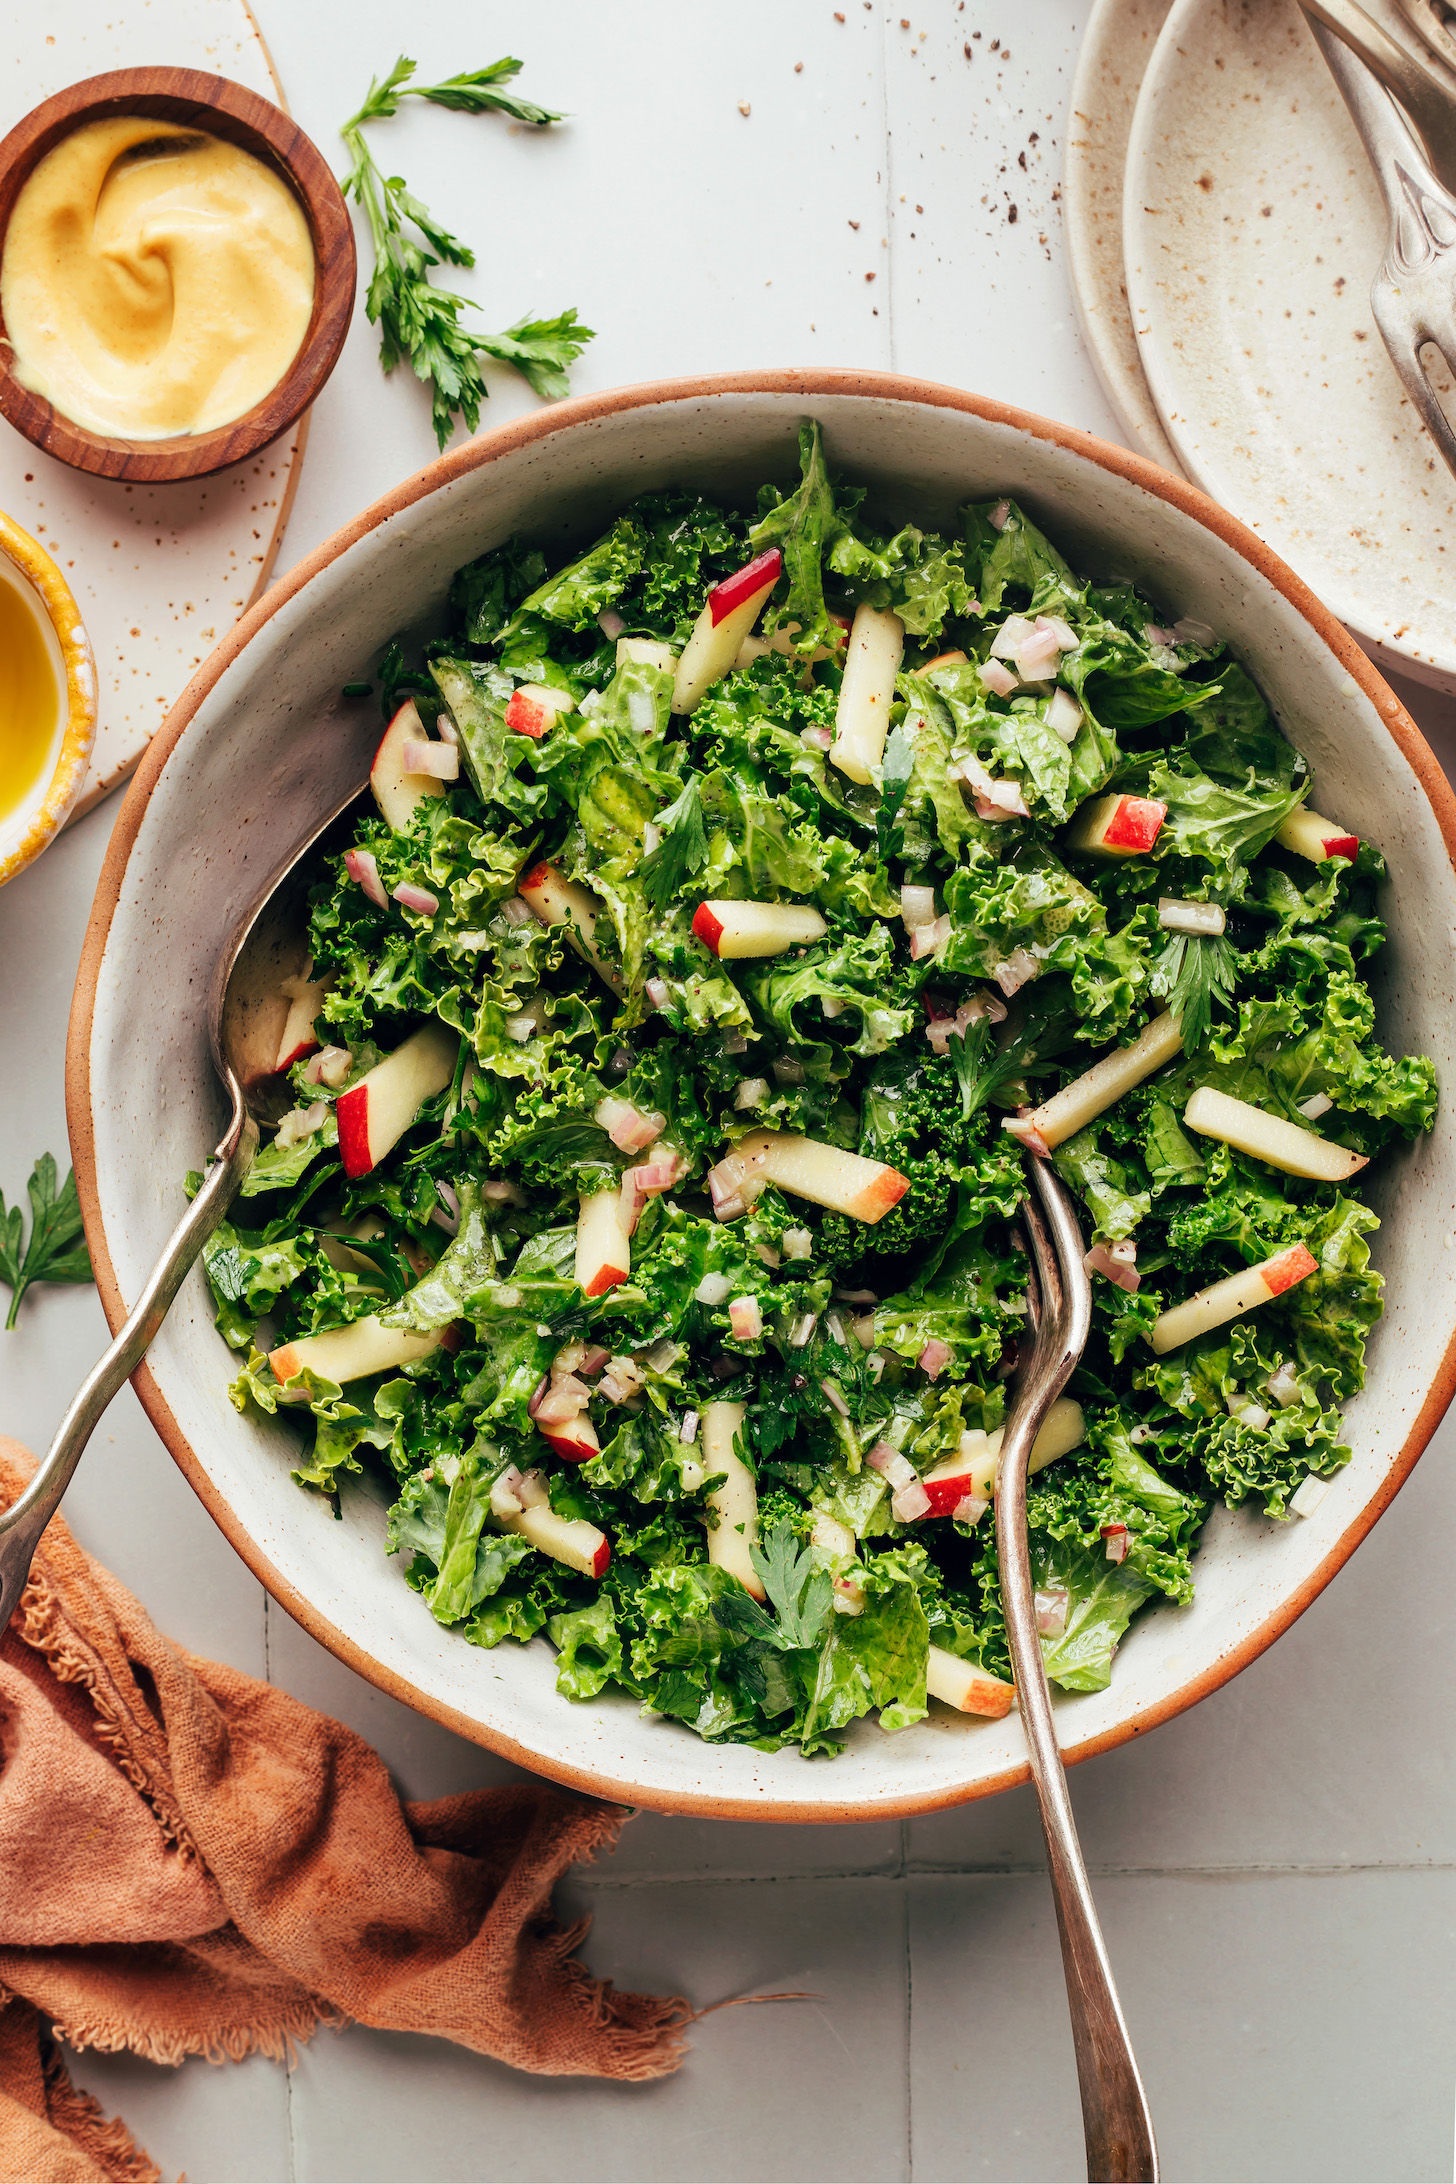
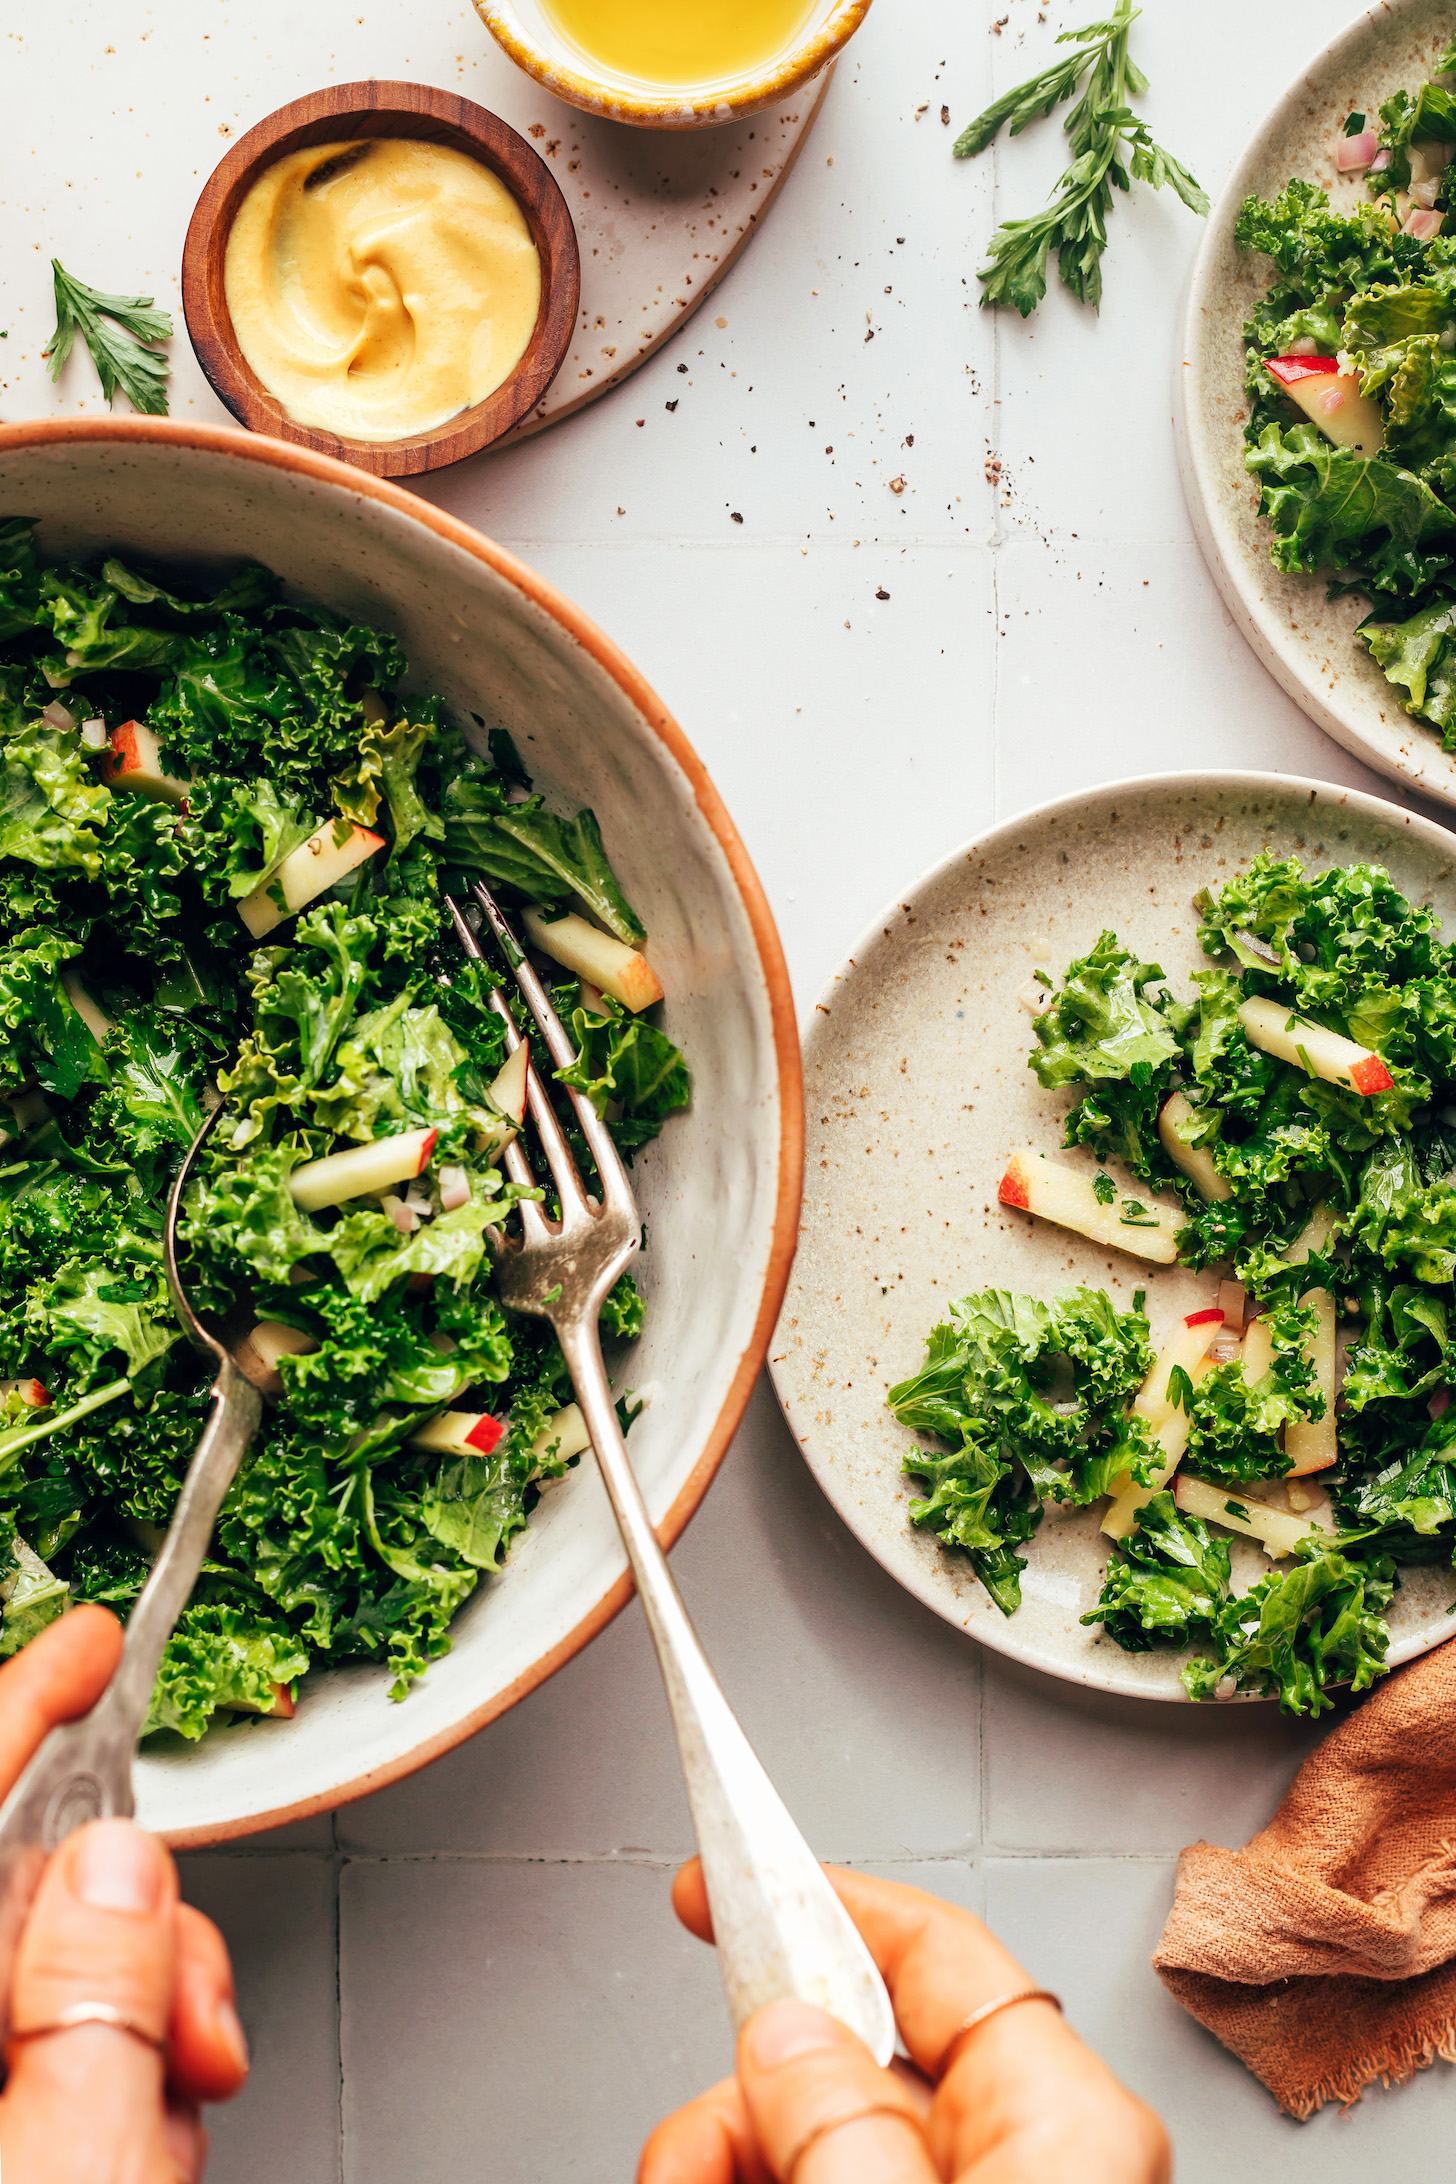
When salad season and apple season collide, make this QUICK kale apple slaw! It’s sweet, crunchy, zippy, versatile, and comes together in just 10 minutes.
It’s the perfect simple side to pair with your favorite protein + roasted veggies…or for brightening up heavier meals. Let us show you how it’s done!
How to Make Kale Apple Slaw
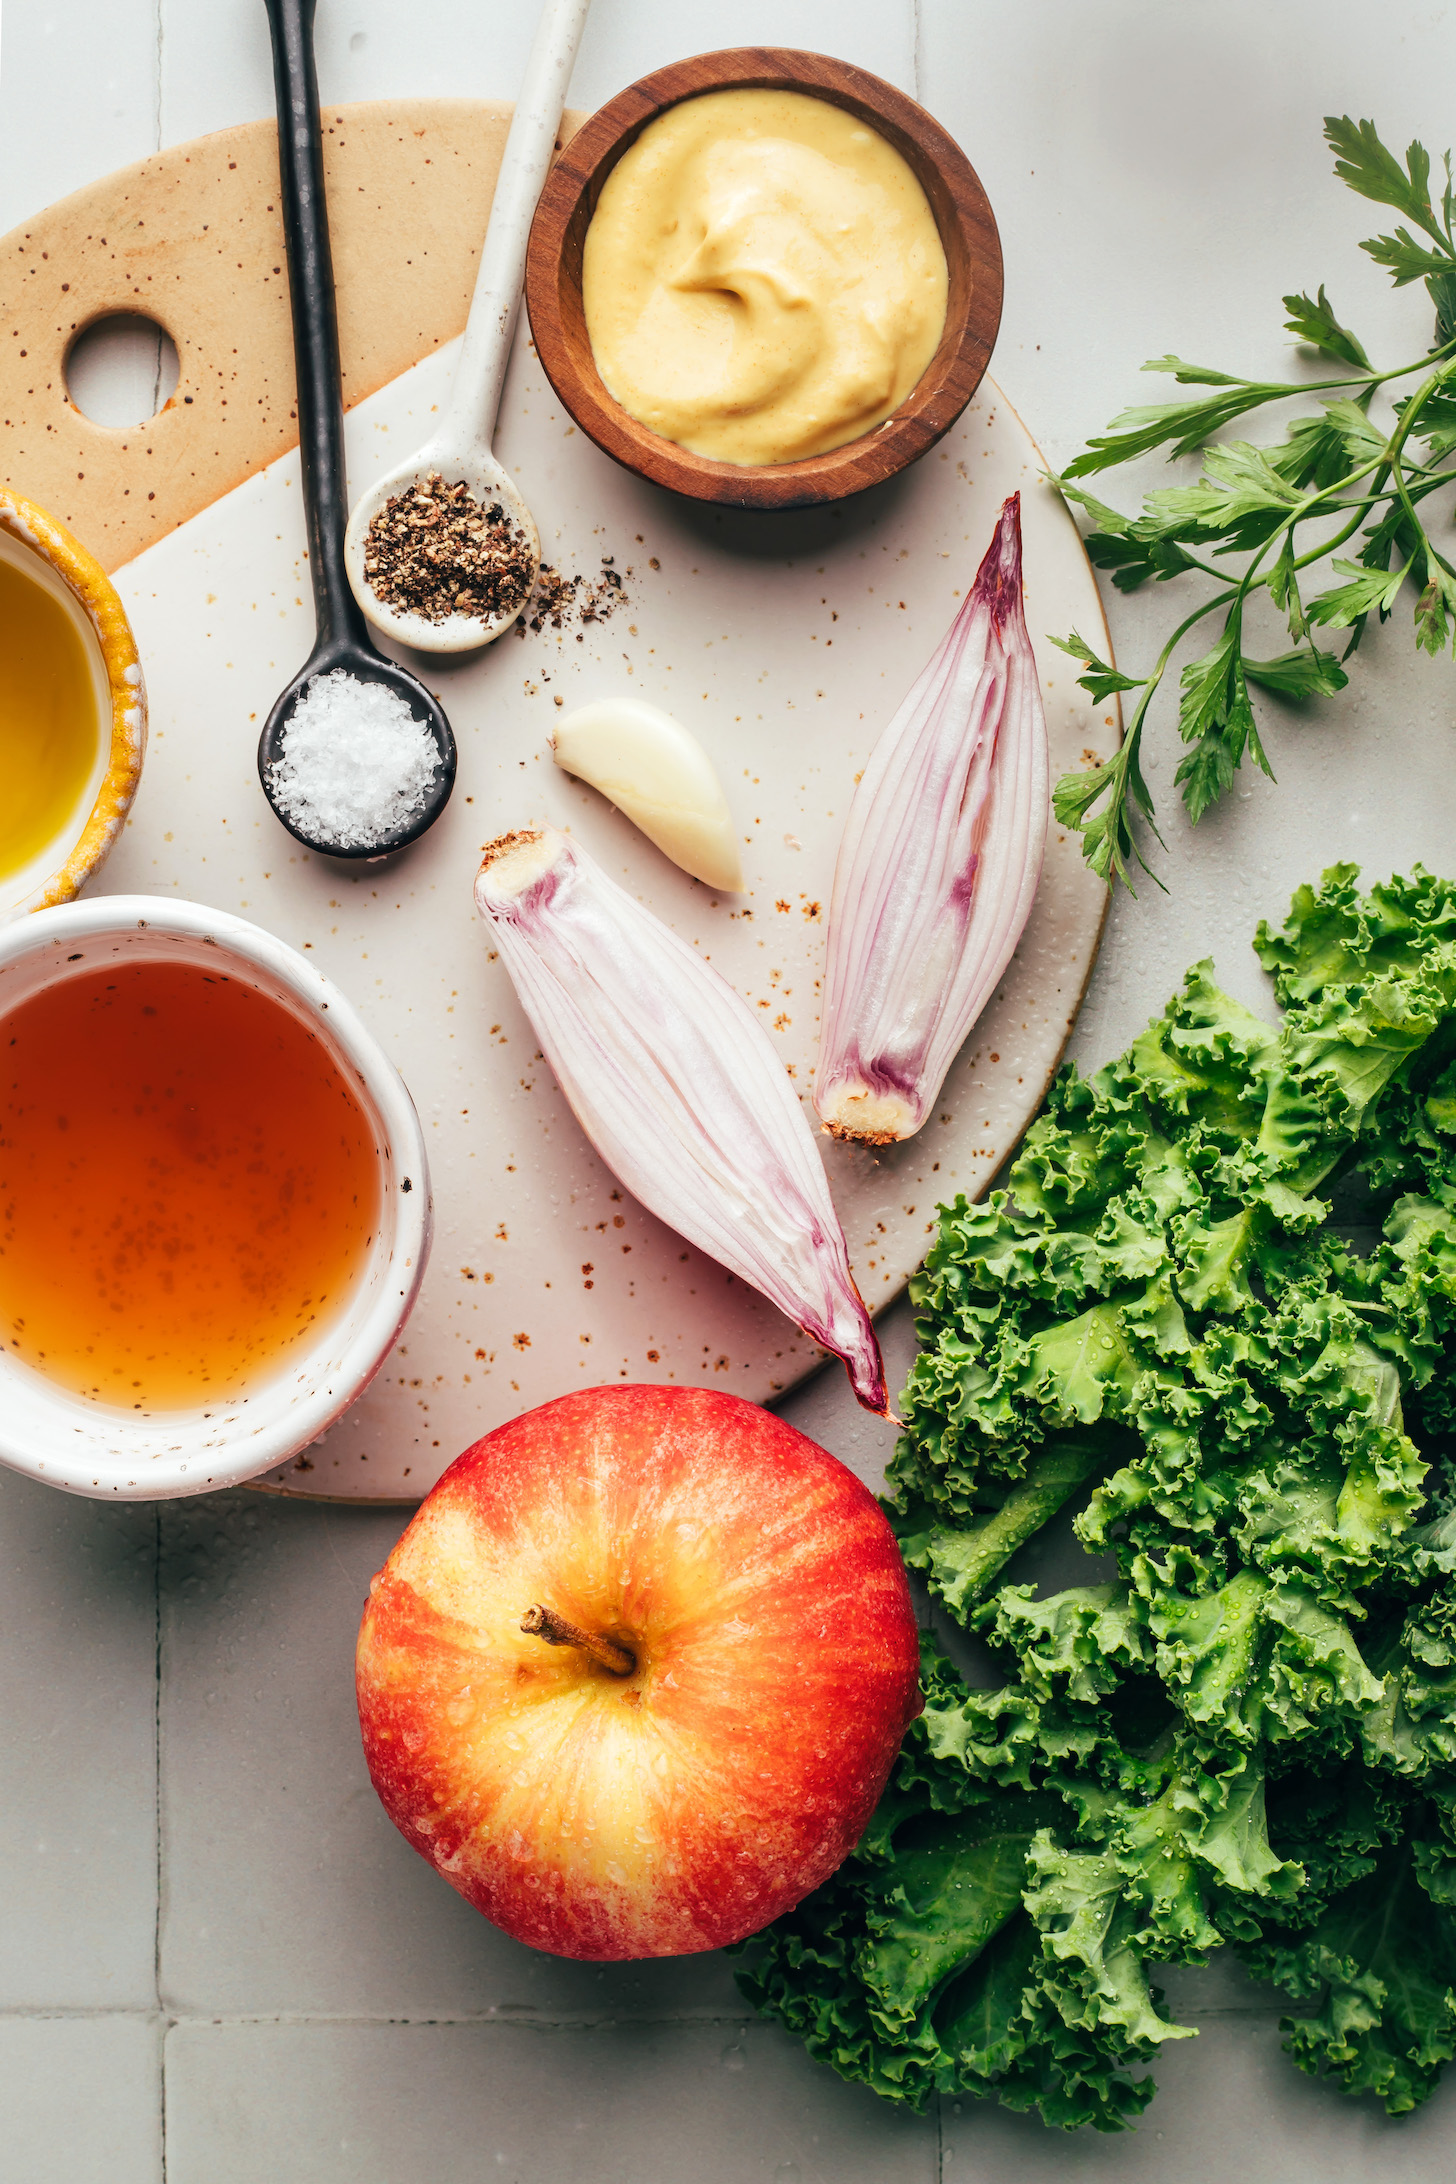
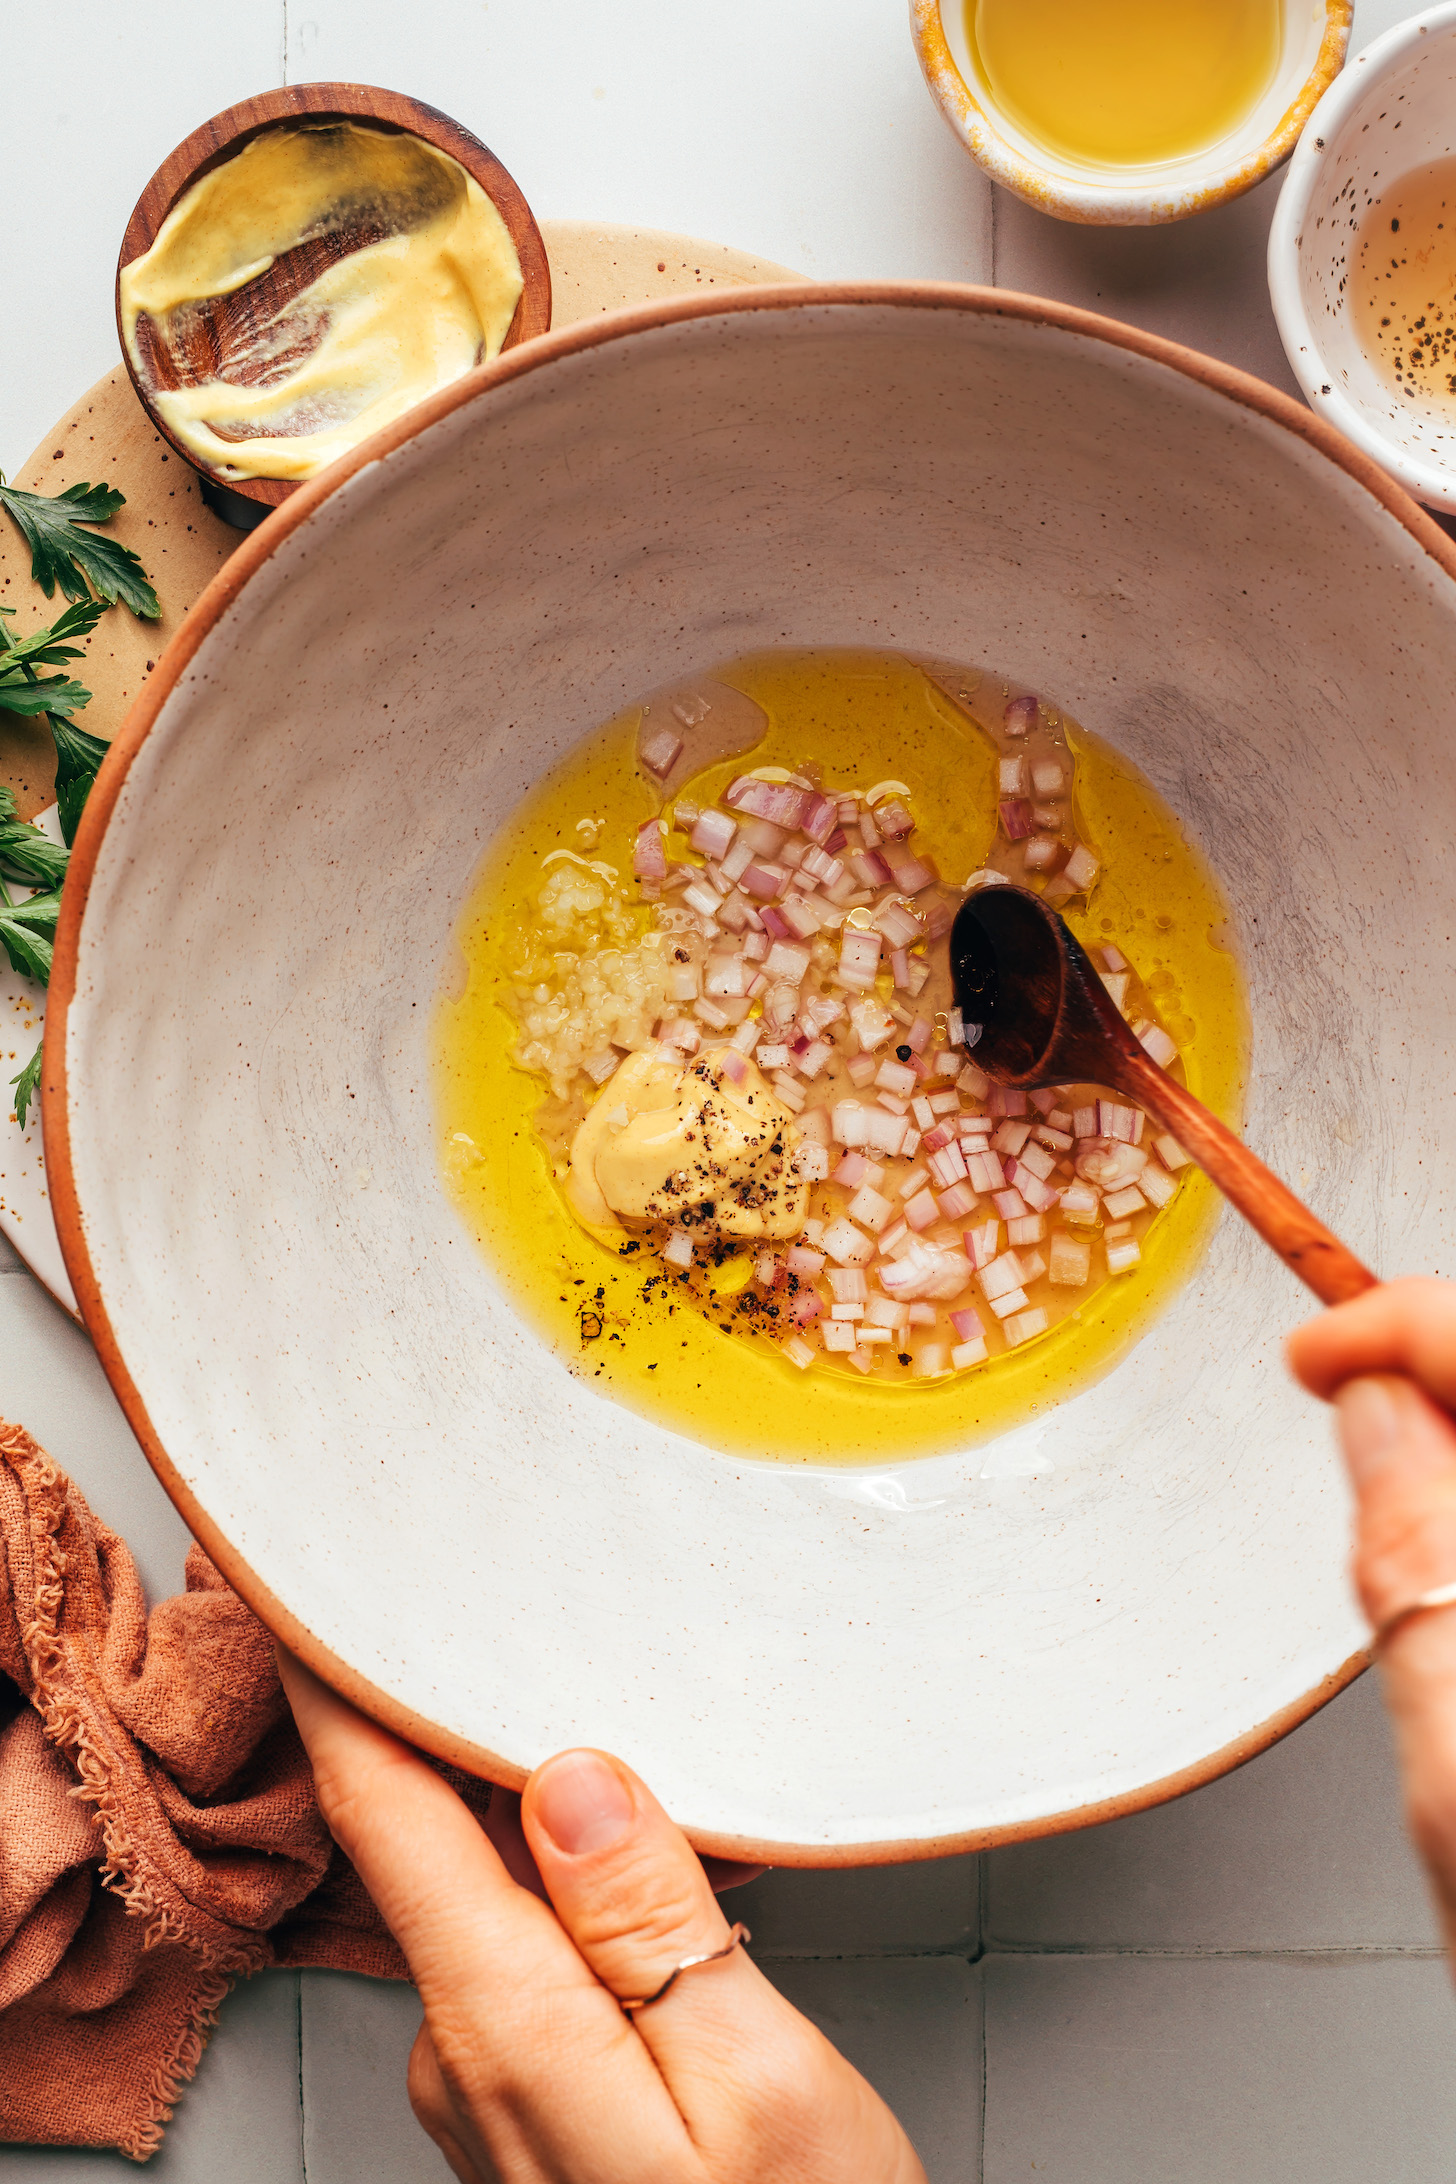
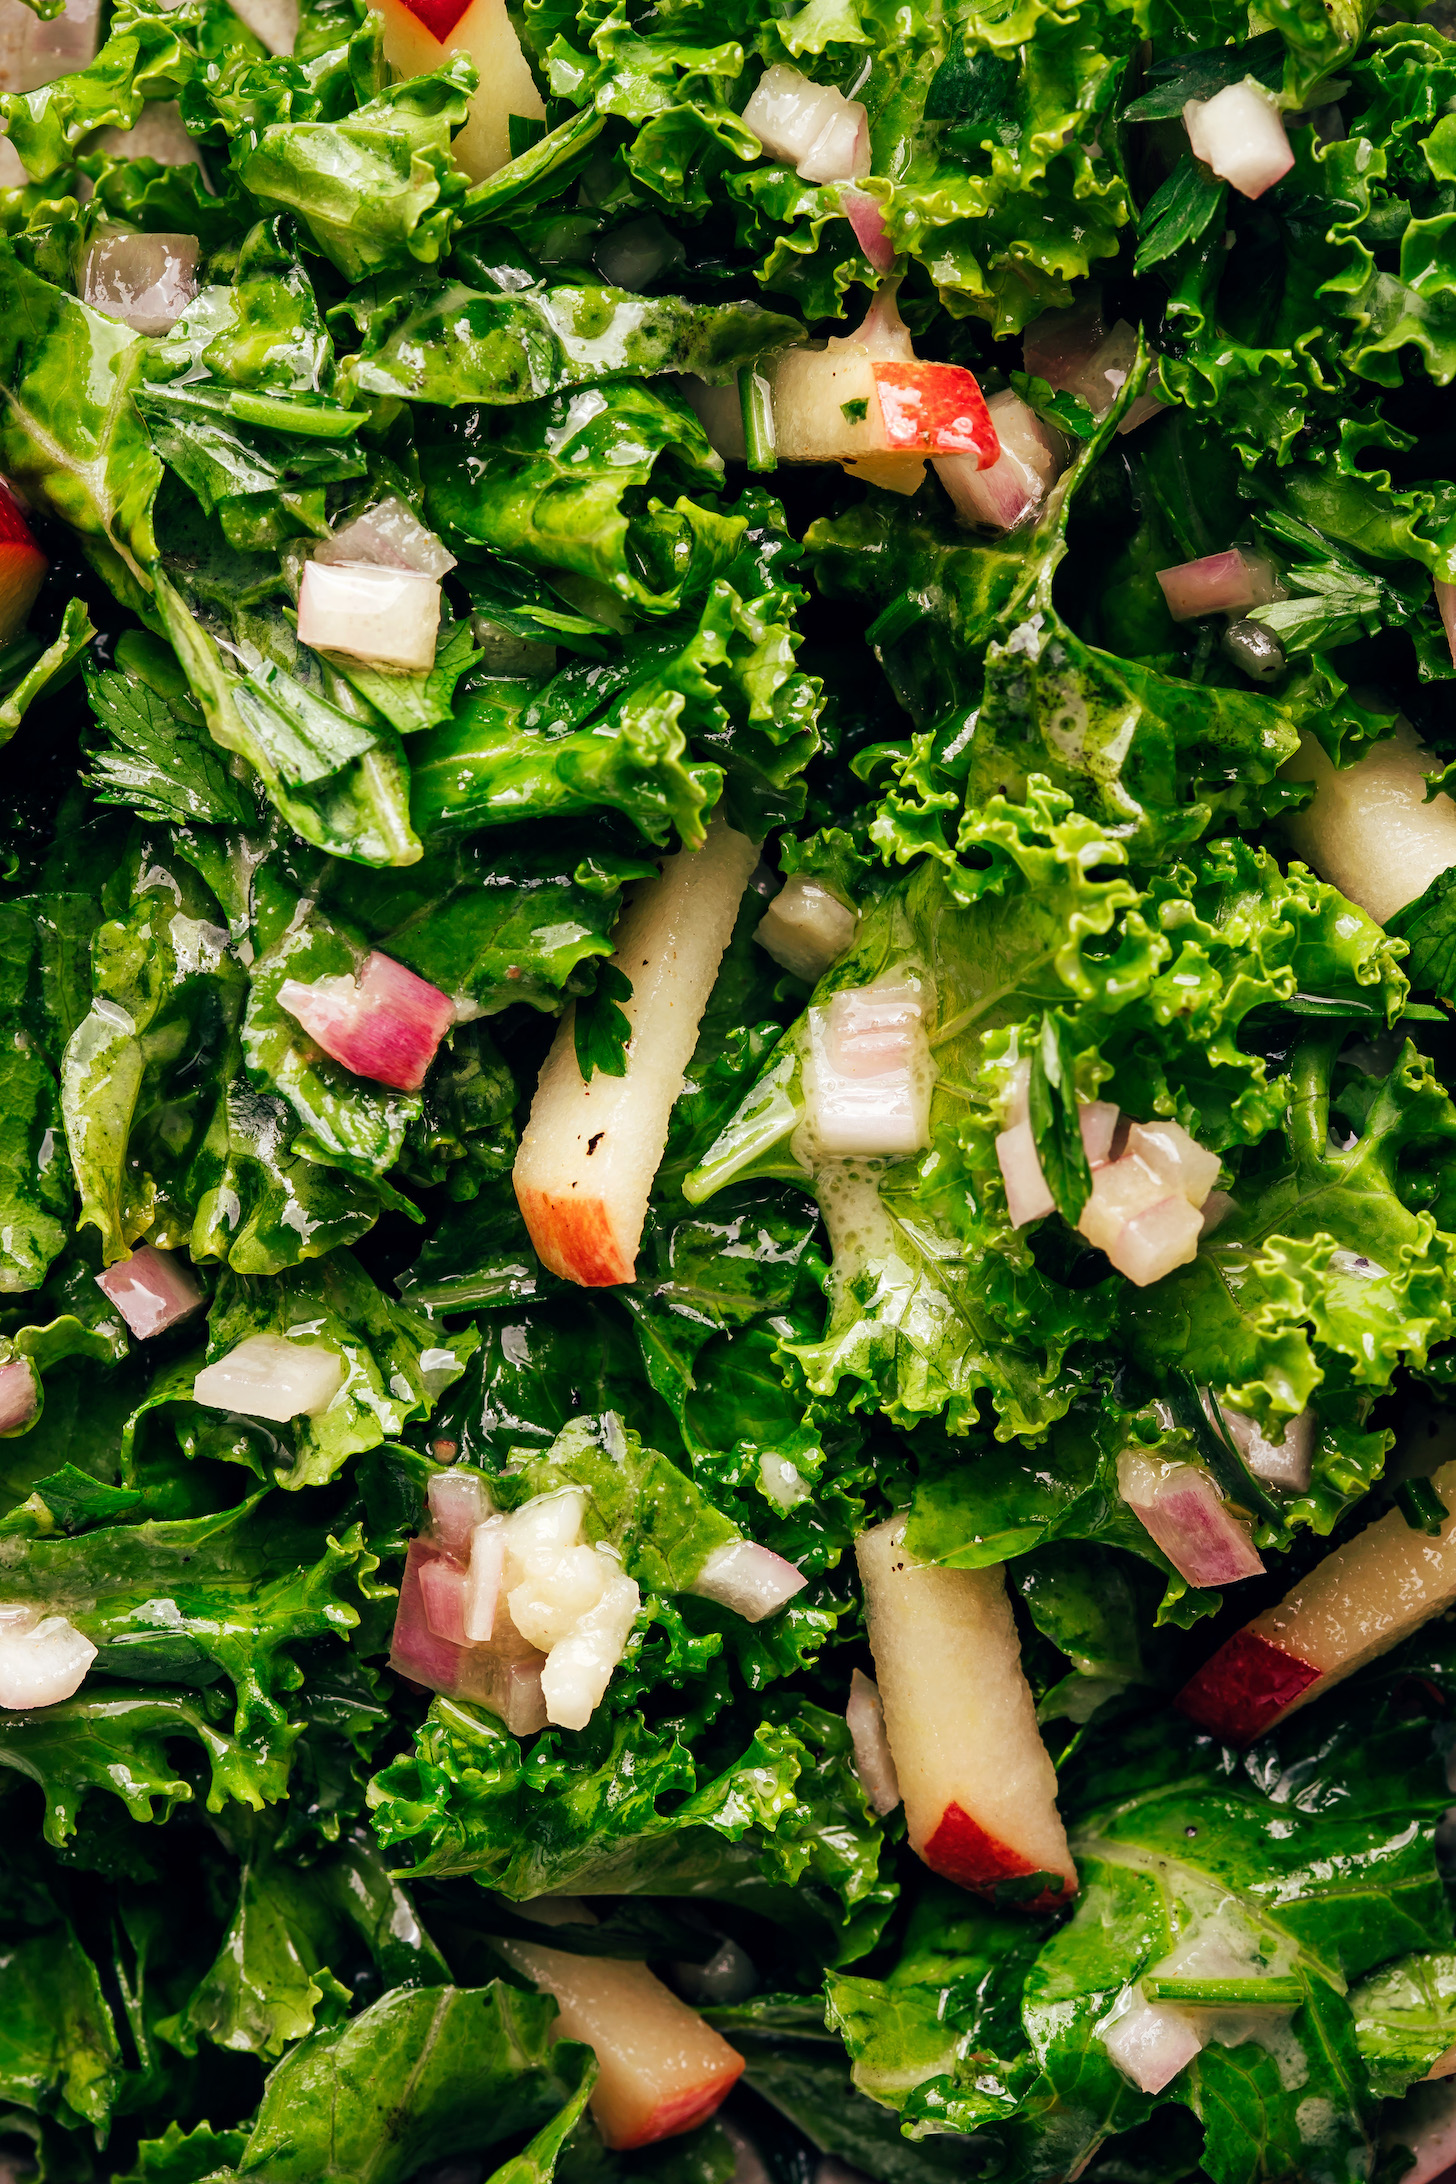
This simple kale apple slaw is made in just 1 bowl! It starts with the zippy Dijon vinaigrette made by whisking together olive oil, apple cider vinegar, shallot, mustard, garlic, salt, and pepper.
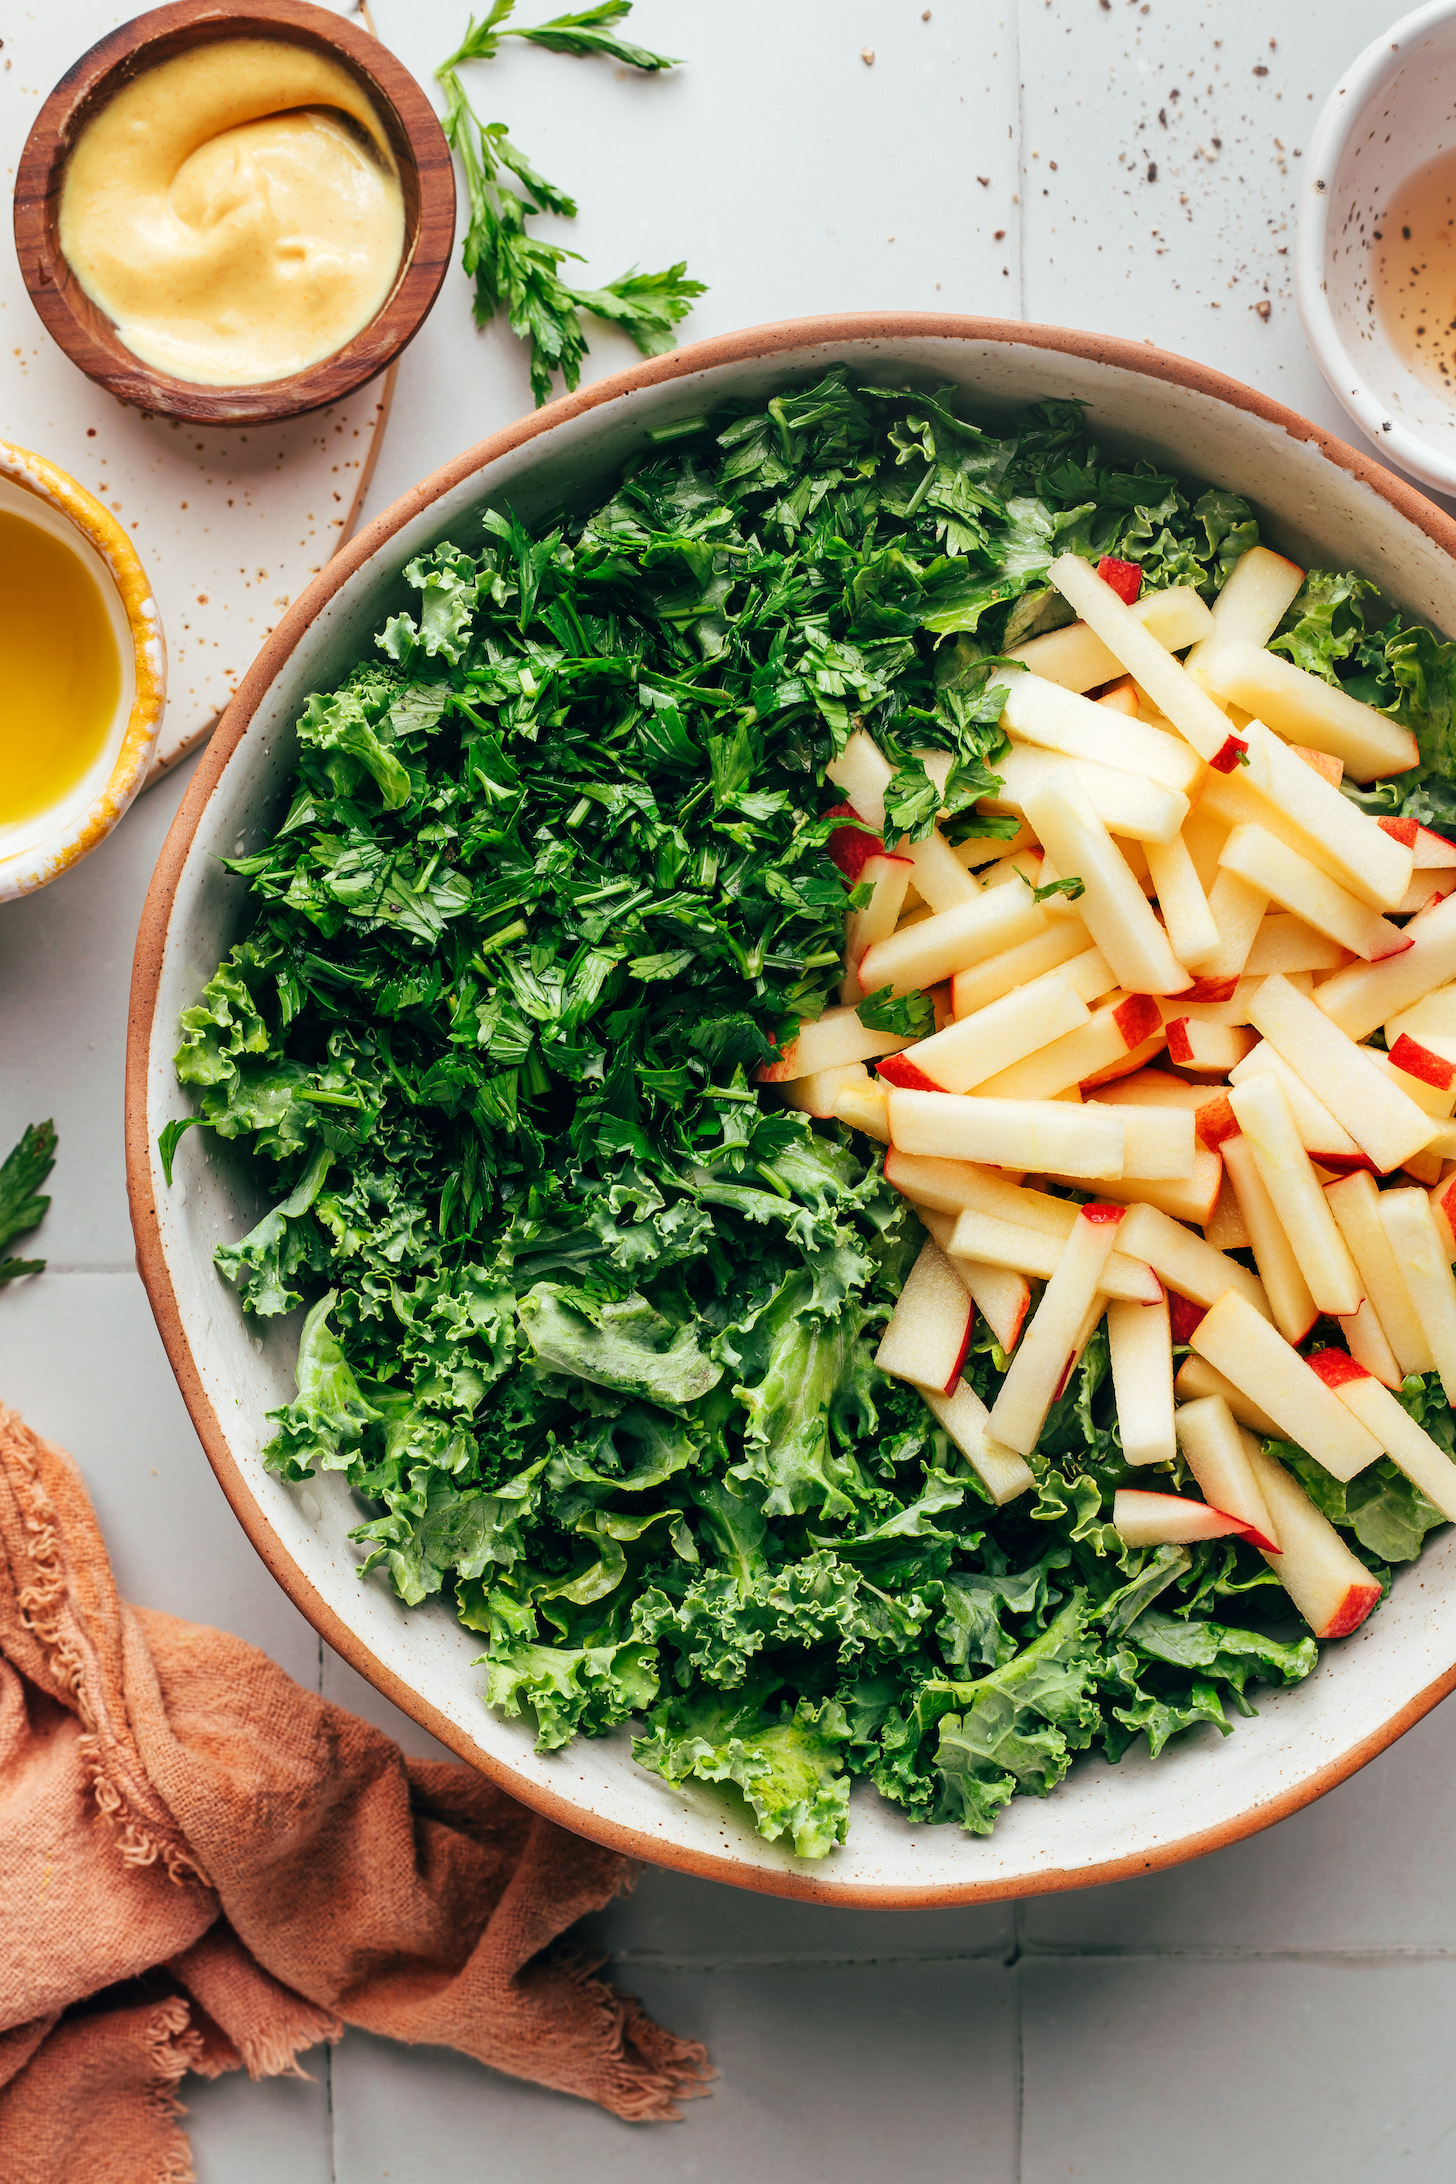
To that same bowl, we add thinly sliced kale and apples and toss them with the dressing. The apples add a lovely crunch + sweetness, and optional fresh parsley adds extra freshness to the dish!
And that’s it! Kale apple slaw awaits. We kept this recipe very simple, but feel free to get creative and add your own twists! Got some kohlrabi? Slice it like the apples and add it in. Another type of vinegar? It would likely work if adding a sweetener (though, FWIW, we love the natural sweetness and subtle apple flavor that apple cider vinegar adds in this recipe!).
We hope you LOVE this kale apple slaw! It’s:
Bright Tangy Crunchy Zippy Quick & easy & SO fresh!
4loosely packed cupsshredded kale(we like curly kale // 1 bunch yields ~4 cups or 100 g)
1mediumsweet, crisp apple (such as Fuji or Honeycrisp), sliced into thin matchsticks(1 apple yields ~170 g or 2 cups)
1/2cupchopped fresh parsley leaves (optional but recommended)
In a medium bowl, whisk together the oil, vinegar, shallot, mustard, garlic, salt (starting with the lesser amount), and pepper.
Add the kale, apple, and parsley (optional) and toss to coat with the dressing. Taste and adjust, adding more salt to taste, olive oil for richness, or parsley for herbiness and to balance the vinegar.
Best when fresh, but leftovers will keep in a sealed container in the refrigerator for 1-2 days. Not freezer friendly.
*Nutrition information is a rough estimate calculated with the lesser amount of salt and without optional ingredients.
Chicken green chili with summer zucchini and corn!
Summer is the season of zucchini and this zucchini and corn green chicken chili is a great way to enjoy some! This is a pretty basic chicken chili recipe starting with onions, jalapeno, garlic, cumin, oregano, broth, salsa verde, chicken and beans, before adding summer’s bounty, zucchini and corn! You can easily change things up with the veggies, use already cooked chicken to cut done on cook time, or even add cream to make a creamy/chowder version! No matter how you make it, it’s super easy, it takes very little time and it tastes great!
1 pound boneless and skinless chicken breasts or thighs
2 (15.5 ounce) cans white beans, rinsed and drained
1 teaspoon oregano
1 medium zucchini, sliced (optional)
1 cup corn (fresh or frozen) (optional)
salt and pepper to taste
1 tablespoon cilantro, chopped (optional)
directions
Heat the oil in a large saucepan over medium-high heat, add the onion and jalapeno, and cook until tender, about 5 minutes.
Add the garlic and cumin and cook until fragrant, about a minute.
Add the broth, salsa verde, chicken, beans, and oregano, bring to a boil, reduce the heat and simmer until the chicken is cooked through, about 20 minutes, before removing the chicken and slicing or shredding it and returning it to the pan.
Add the zucchini and simmer until tender, about 10 minutes.
Add the corn and let it warm, about 5 minutes.
Season with salt and pepper to taste, mix in the cilantro and enjoy!
Option: Omit the chicken for a vegetarian version. Option: Add (or replace the jalapeno with) 1 poblano pepper, diced. Option: Add (or replace the jalapeno with) 1 green bell pepper, diced. Option: Add (or replace the jalapeno with) 1 4 ounce can of diced green chilies. Option: Use already cooked chicken, such as shredded rotisserie chicken, to reduce simmer time; skip the simmer time in step 3. Option: Add 1 pound potatoes, peeled and diced. Option: Add 1/2 cup sour cream or heavy/whipping cream or 4 ounces cream cheese to make it creamy! Option: Serve garnished with your favourites, such as: bacon, avocado, onion, green onion, cheese, sour cream, tortilla chips, radish, etc.
Disclosure: This post may contain affiliate links, which means I may earn a commission if you click on the link and make a purchase.
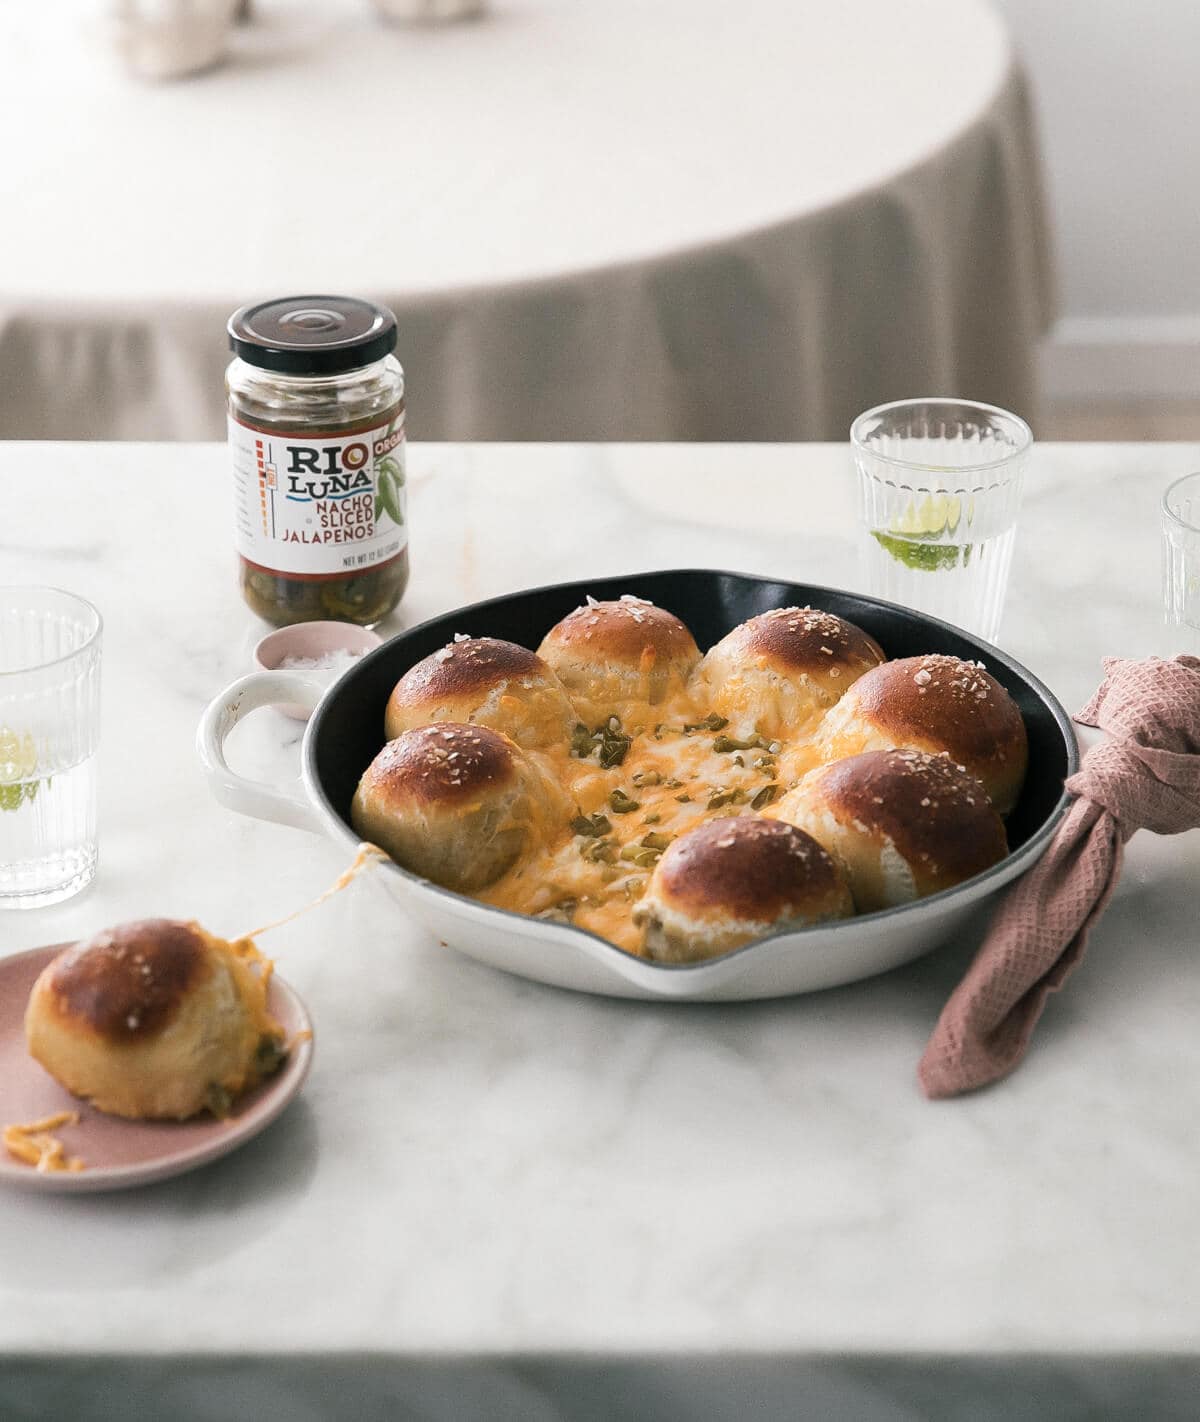
Pretzel Tot Queso Fundido is a glorious combination of delicious soft pretzels and spicy cheesy goodness. Chewy homemade soft pretzels are baked in a cast iron skillet with the center filled with melty cheese and pickled jalapeños. This recipe takes some time to make but it’s sure to be a hit at your next tailgating or game day party served with Baked Nashville Hot Chicken Sandwiches and a Strawberry Lemonade Sangria.
Ingredients You’ll Need for Pretzel Tot Queso Fundido
Dry ingredients – All-purpose flour, yeast, and salt are combined with melted butter and warm water to make the soft pretzel dough. You don’t have to use a stand mixer because we will knead the dough by hand either way!
Cheese – Shredded Monterey Jack, Cheddar and Mozzarella cheeses are mixed with spicy pickled jalapeños to create the cheesy queso fundido center.
Baking soda – This is a must in order to make pretzels! It gets added to the water bath that will be used to boil the pretzels before baking. It gives a chewy exterior and a nice pretzel flavor to the dough.
For the rest of the ingredients, please refer to the recipe index card below!
How to Make Pretzel Tot Queso Fundido
Make the pretzel dough – Mix together instant yeast with the dry ingredients. Add the water, melted butter and mix it all together, kneading until you have a smooth dough. Let it rise for 1 hour.
Make the queso fundido cheese dip – During that 1 hour rise, mix together the shredded cheese with the Rio Luna pickled jalapeños, then set it aside.
Shape the pretzels – Divide the dough into 8 equal pieces. Form a ball by rolling and tucking the edges of the dough underneath.
Boil the pretzels – Boiling the dough in baking soda will give them that delicious chewy crust and classic pretzel flavor. Drop a couple of the balls into a hot baking soda bath for only 30 seconds then immediately transfer to a clean kitchen towel to drain.
Assemble. Line a cast iron skillet with the boiled pretzel tots in a circle leaving room in the center for the cheese mixture. Brush the pretzel tots with an egg wash and a sprinkle of salt.
Bake for 12 minutes, or until the cheese is melted and bubbly and the tots are nicely golden brown.
Tips and Tricks
Boiling pretzels – Only boil the pretzels tots for 30 seconds MAX. Otherwise the baking soda will give them a weird unpleasant metallic taste.
Don’t have a stand-up mixer? You can make the pretzel dough in a large bowl with a spatula.
Yeast – There is a difference in method depending on if you are using Instant Yeast or Active Dry Yeast. Instant yeast can be added to the dry flour ingredients, but active dry yeast needs to be activated in warm water until it’s foamy, which usually takes 5- 10 minutes. From here, you can stir in the melted butter and the rest of the dry ingredients.
Hot peppers – If you don’t like spicy foods you can leave them out or add sweet peppers for a different flavor.
Recipe FAQs
What are pretzel bites made of?
Pretzel bites or pretzel tots are basically mini soft pretzels. They are made with flour, warm water, melted butter, salt and yeast. They are then boiled in a baking soda bath to give them that classic pretzel flavor.
What is queso fundido?
This is a cheesy Mexican appetizer traditionally made with sausage or ground meat, shredded cheese and chile peppers. It’s baked until melty and gooey then eaten with chips. My version is made without meat but you can certainly add some if you like!
More Appetizer Recipes
If you tried this Pretzel Tot Queso Fundido Recipe or any other recipe on my website, please leave a 🌟 star rating and let me know how it went in the 📝 comments below. Thanks for visiting!
Queso Fundido Cheese Dip:
To Make the Pretzel Tots:
In the bowl of a stand-up mixer with the paddle attachment, add the flour, sugar, instant yeast and kosher salt. Give it a mix until combined.
***NOTE: if you don’t own a mixer, you can do this in a large bowl with a spatula. If you’re using active dry yeast (instead of instant yeast), you’ll need to activate it in the warm water until it’s nice and foamy. If doing so, begin the recipe with the warm water in the stand-up mixer and then mix the yeast into the water and allow it to activate. AND then, add the melted butter and dry ingredients.***
In a small sauce pan, add the butter and cook until melted. When melted, remove it from the heat and pour in the water. Give it a mix and then pour it in the stand-up mixer and mix on low speed until well combined. Change to medium speed and knead until the dough is smooth and pulls away from the side of the bowl, approximately 4 to 5 minutes. Remove the dough from the bowl, clean the bowl and then oil it well with neutral oil. Return the dough to the bowl, cover with a clean kitchen towel and sit in a warm place for approximately 50 to 55 minutes or until the dough has doubled in size.
When the dough is done rising, divide it into 8 equal pieces and roll those pieces into balls, tucking the dough underneath.
To Make the Queso Fundido Cheese Dip:
To Boil the Tots:
Place a clean kitchen towel on a plate or baking sheet. Fill up a medium saucepan up with the 4 cups of water and baking soda. Bring it up to a gentle simmer. Drop each of the balls of dough into the water and cook for about 30 seconds. Immediately transfer to the clean kitchen towel to drain.
Preheat the oven to 450 degrees F. Grease a 9-inch cast iron skillet or oven-proof baking dish. Place the boiled pretzel tots all along the outside of the skillet or baking dish. In the center, pour in the cheese mixture and press it into an even layer.
Brush the tops of the pretzel tots with the egg wash mixture and a sprinkling of sea salt. Transfer to the oven to bake for 12-13 minutes, until the cheese has melted and the tops of the tots are golden brown.
Tips and Tricks
Boiling pretzels – Only boil the pretzels tots for 30 seconds MAX. Otherwise the baking soda will give them a weird unpleasant metallic taste.
Don’t have a stand-up mixer? You can make the pretzel dough in a large bowl with a spatula.
Yeast – There is a difference in method depending on if you are using Instant Yeast or Active Dry Yeast. Instant yeast can be added to the dry flour ingredients, but active dry yeast needs to be activated in warm water until it’s foamy, which usually takes 5 – 10 minutes. From here, you can stir in the melted butter and the rest of the dry ingredients.
Hot peppers – If you don’t like spicy foods you can leave them out or add sweet peppers for a different flavor.
There’s one element of the Mountain House brand’s website that might inspire a double-take from new customers: “30-Year Taste Guarantee.”
“Personally, I’ve eaten (Mountain House) products that are 44, 45 years old,” said Drew Huebsch, the brand’s director of R&D.
“It’s a weird thing to consume a product that’s older than you are and enjoy it.”
Yes, you can safely eat Mountain House spaghetti that’s as old as your grandma’s Datsun. That’s because the Albany, Oregon-based brand specializes in freeze-dried products.
“We’ve worked with an outside agency, a university, to run sensory testing and evaluate the product quality, as well as various aspects of food safety and stability,” Huebsch said. “We’re a 60-year-old company that has been doing this for a long time.”
While Mountain House works with various branches of the military – sometimes spending three to five years on the product R&D process – the brand’s typical customer is the outdoor adventurer.
“We have (customers) who do extreme mountaineering,” Huebsch noted. “Anything outdoors, from kayaking to fishing or hunting – any outdoors activity. Basically, everybody that enjoys the outdoors tends to be a customer of ours.”
The brand takes into account customer feedback when it develops its predominantly rehydrated products. Mountain House aims to provide lightweight, convenient comfort food.
The freeze-drying process involves removing water from cooked meals, preserving freshness while extending shelf life. And Mountain House’s freeze-dried products aren’t as heavily processed as one might expect; a $10.99 pouch of Beef Stroganoff features ingredients like beef, corn starch, nonfat dry milk, onion, mushroom, durum, and noodles.
Huebsch has seen interest in freeze-dried products increase over the past decade.
“Whether it be the outdoor food market, or adventure meals in food storage, (freeze-dried products have) become a lot more normalized,” the R&D director said. “What we’ve also found is that it’s becoming a lot more popular in day-to-day usage. People take it on airplanes and eat it, or take it to hotels when they travel on vacations, as a way to allow them to have the freedom to explore.”
Multiple Mountain House employees have a military background, so they’re no stranger to the concept of “meal, ready-to-eat.” And those employees are confident that Mountain House produces A-plus MREs.
“It’s funny,” Huebsch noted. “The way that (military members) negotiate and trade products within different units, different products have different values. And we produce a granola for an MRE item, and (the) joke is that has equal value to some of the candies that are MREs.”
“One of the legacies of this company – that we’re extremely proud of – is that it’s a very cool thing to provide … for military customers,” Huebsch added.
The Food Institute Podcast
In the fast-paced and highly regulated world of manufacturing, especially within the food and beverage industry, maintaining stringent hygiene standards is not just a best practice—it’s a necessity. Steve Voelzke, president of Robroy Industries’ electrical products division, explored why it’s essential to adopt a holistic approach and how this approach can significantly lower the risks of product recalls.
Wondering what to make for dinner? You’re in the right place! Below, you’ll find easy dinner ideas to satisfy any craving. Think tacos, pasta, and more!
Do you ever have nights when you just don’t know what to make for dinner? When you run through a mental list of easy dinner ideas, but nothing sounds good? If you do, you’re in the right place. Below, you’ll find 60 healthy dinner recipes that are perfect for busy weeknights. Each one is quick and easy to make, but it still packs a punch of flavor.
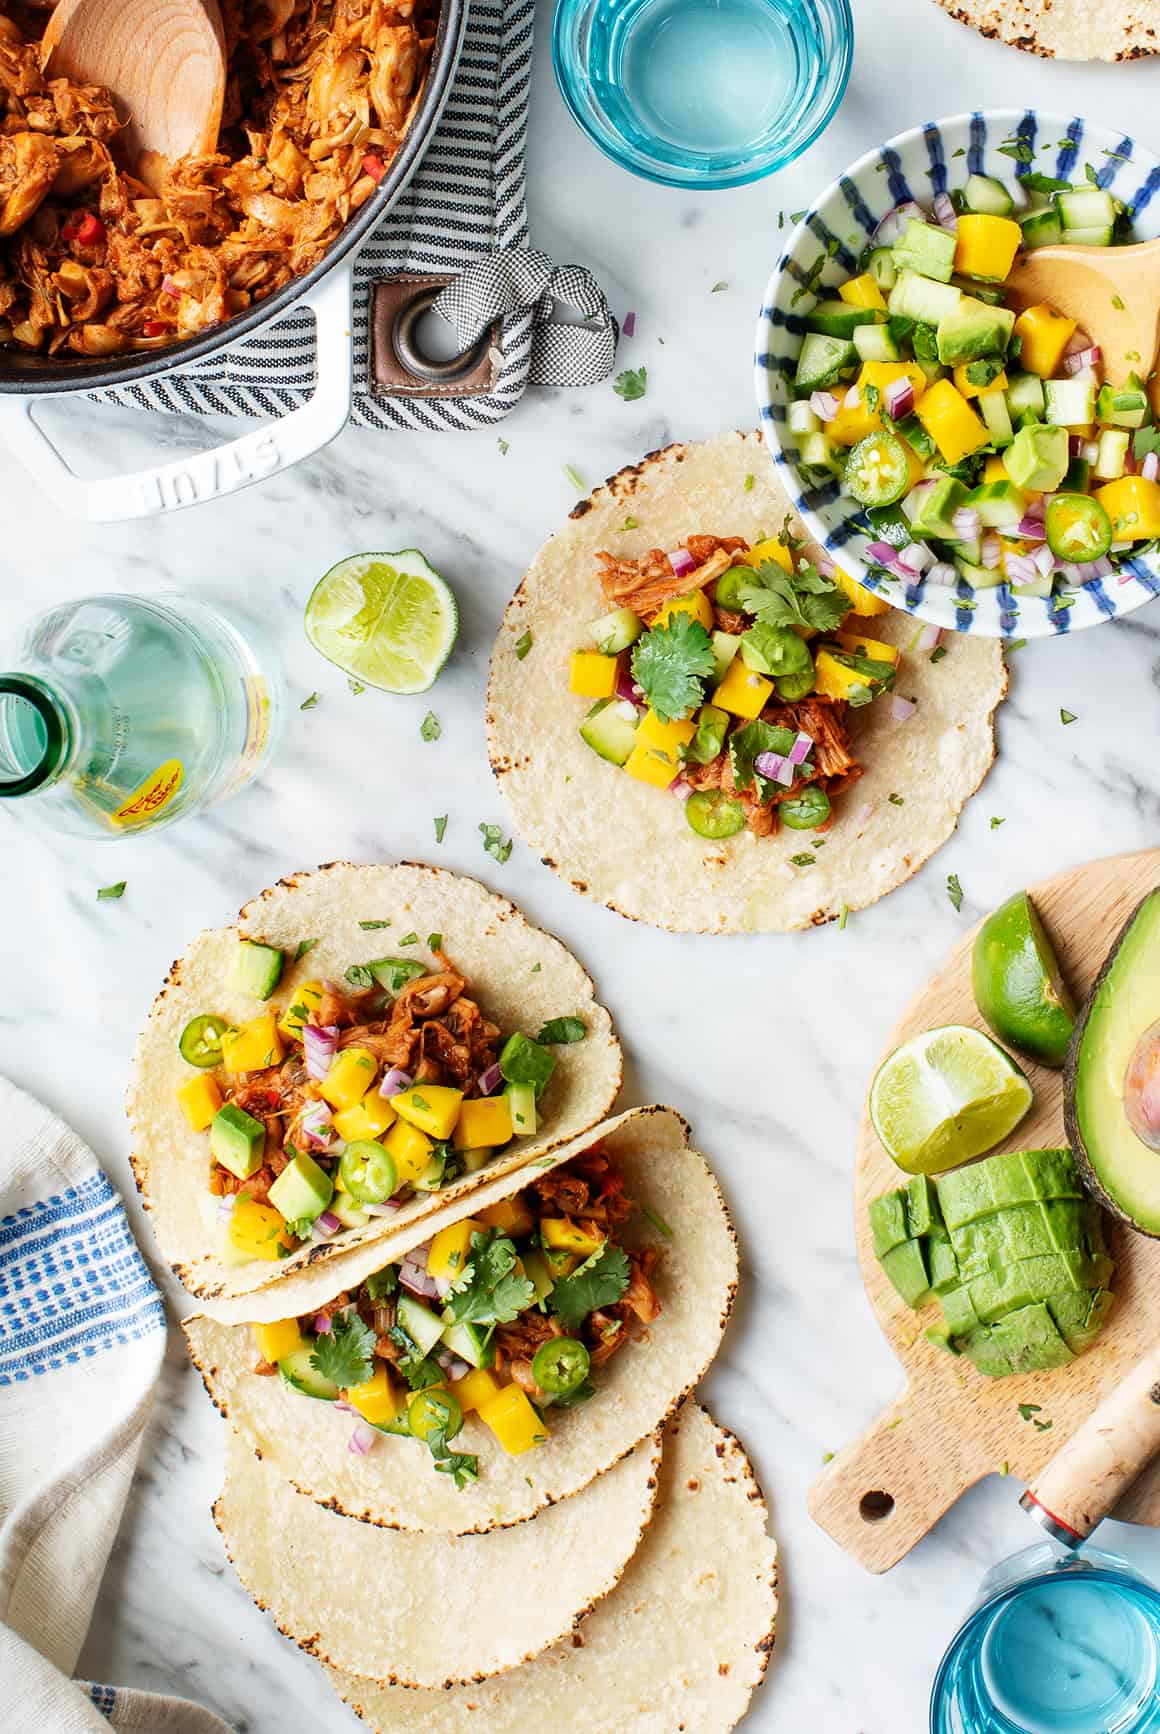
Think roasted veggie tacos with a creamy, zesty sauce. Imagine luxurious baked feta and a comforting pasta ready in under 30 minutes. You’ll find all that and more among the easy dinner ideas below. I hope you enjoy looking through them! And the next time you’re craving something healthy, delicious, and quick, and I hope you try one. Fingers crossed it makes it into your regular rotation. 🙂
This classic soup is one of the most popular recipes on Love & Lemons, and for good reason! Filled with pasta, beans, and flavorful veggies, it’s a meal in a bowl.
Shakshuka is a traditional breakfast throughout North Africa and the Middle East, but it’s just as good for dinner. Serve it with pita or crusty bread for scooping up the flavorful tomato and red pepper sauce.
Of all the easy dinner ideas out there, a frittata might be the one I rely on most. It’s simple, fast, and amazingly flexible. Try one of the 5 variations in my recipe, or toss in whatever veggies you have on hand.
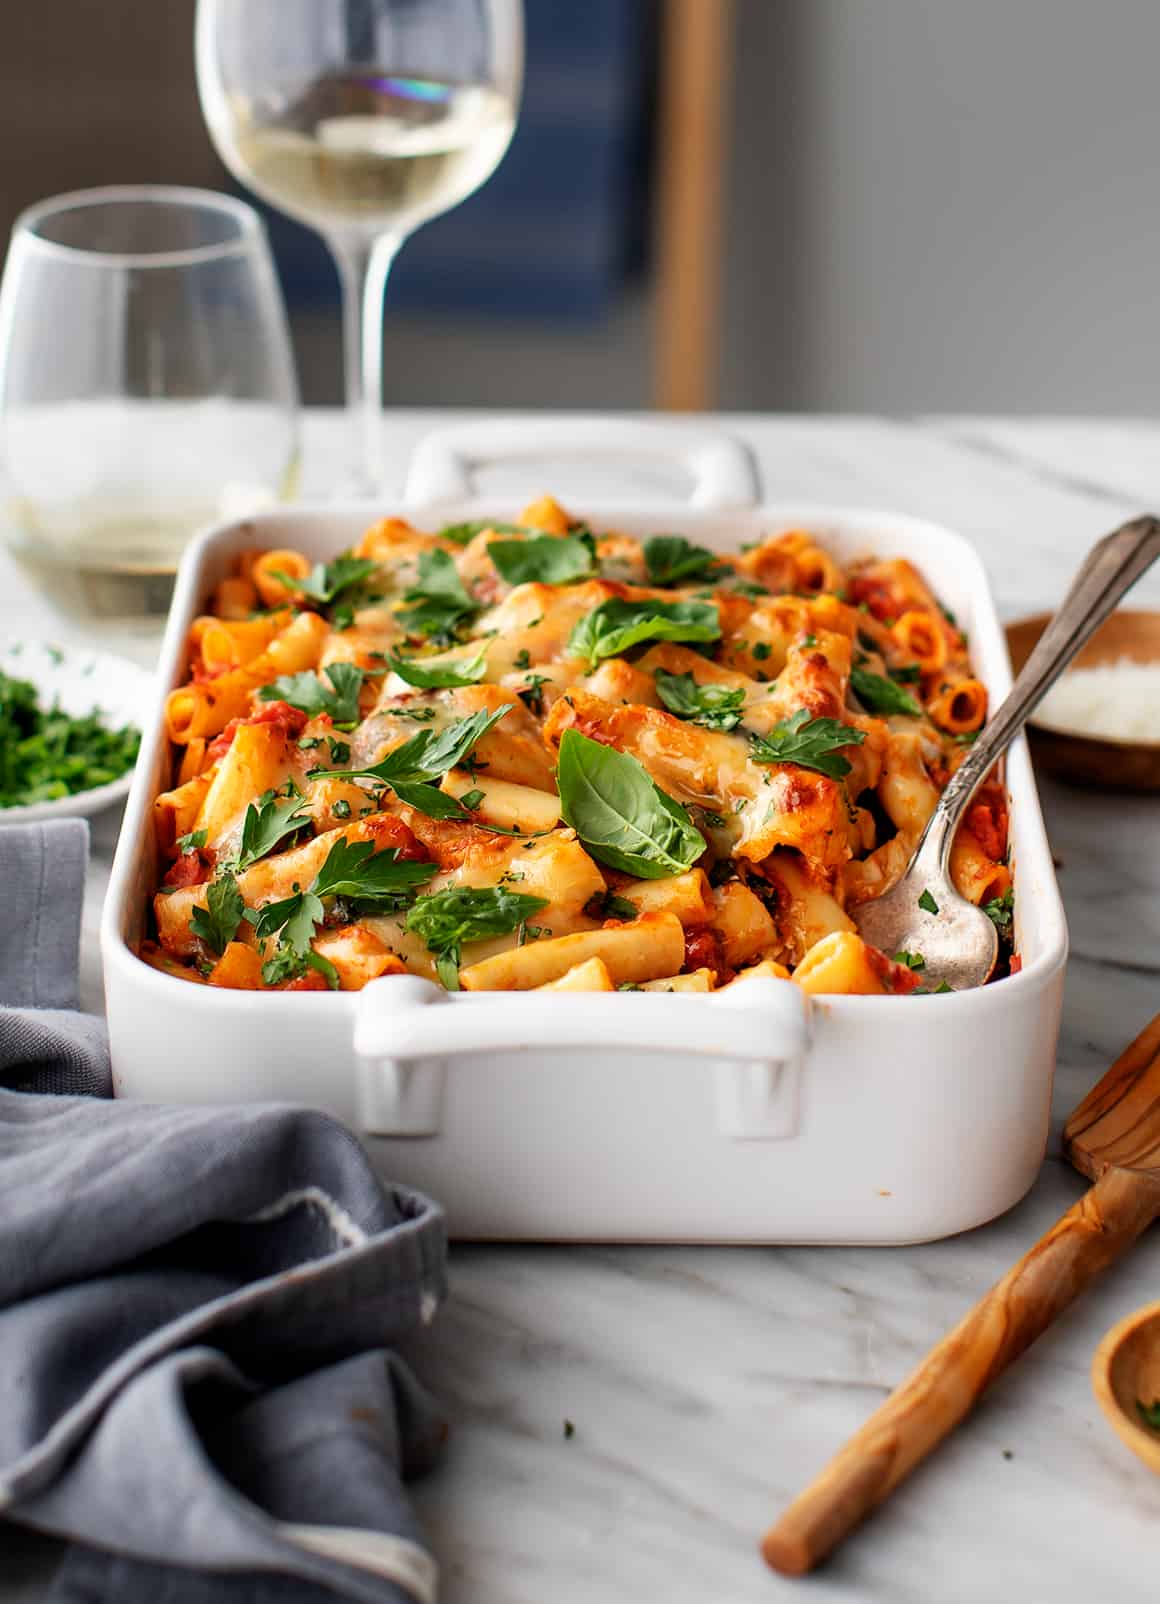
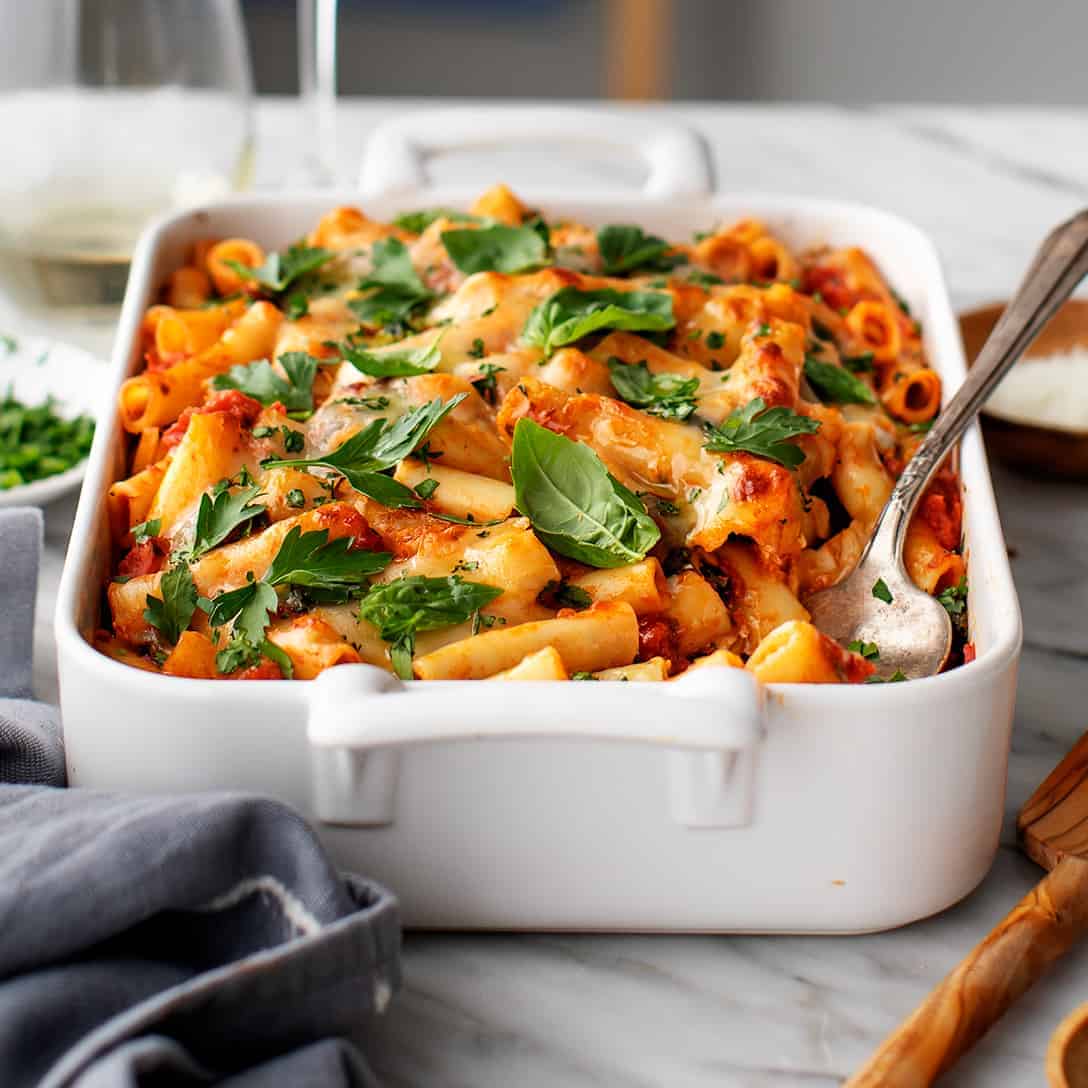
With layers of tender noodles, tangy marinara sauce, creamy ricotta, and roasted veggies, this lasagna is the ultimate comfort food. Assemble it ahead of time for an easy weeknight dinner!
This sheet pan dinner is the best recipe for busy weeknights. The gnocchi roasts alongside fresh veggies and tangy feta cheese. No boiling required! It’s ready in 30 minutes, and cleanup is a breeze.
This easy veggie curry is one of my favorite healthy dinner ideas! It tastes even better on the second day than it does on the first, so it’s a great recipe to prep ahead for quick meals throughout the week.
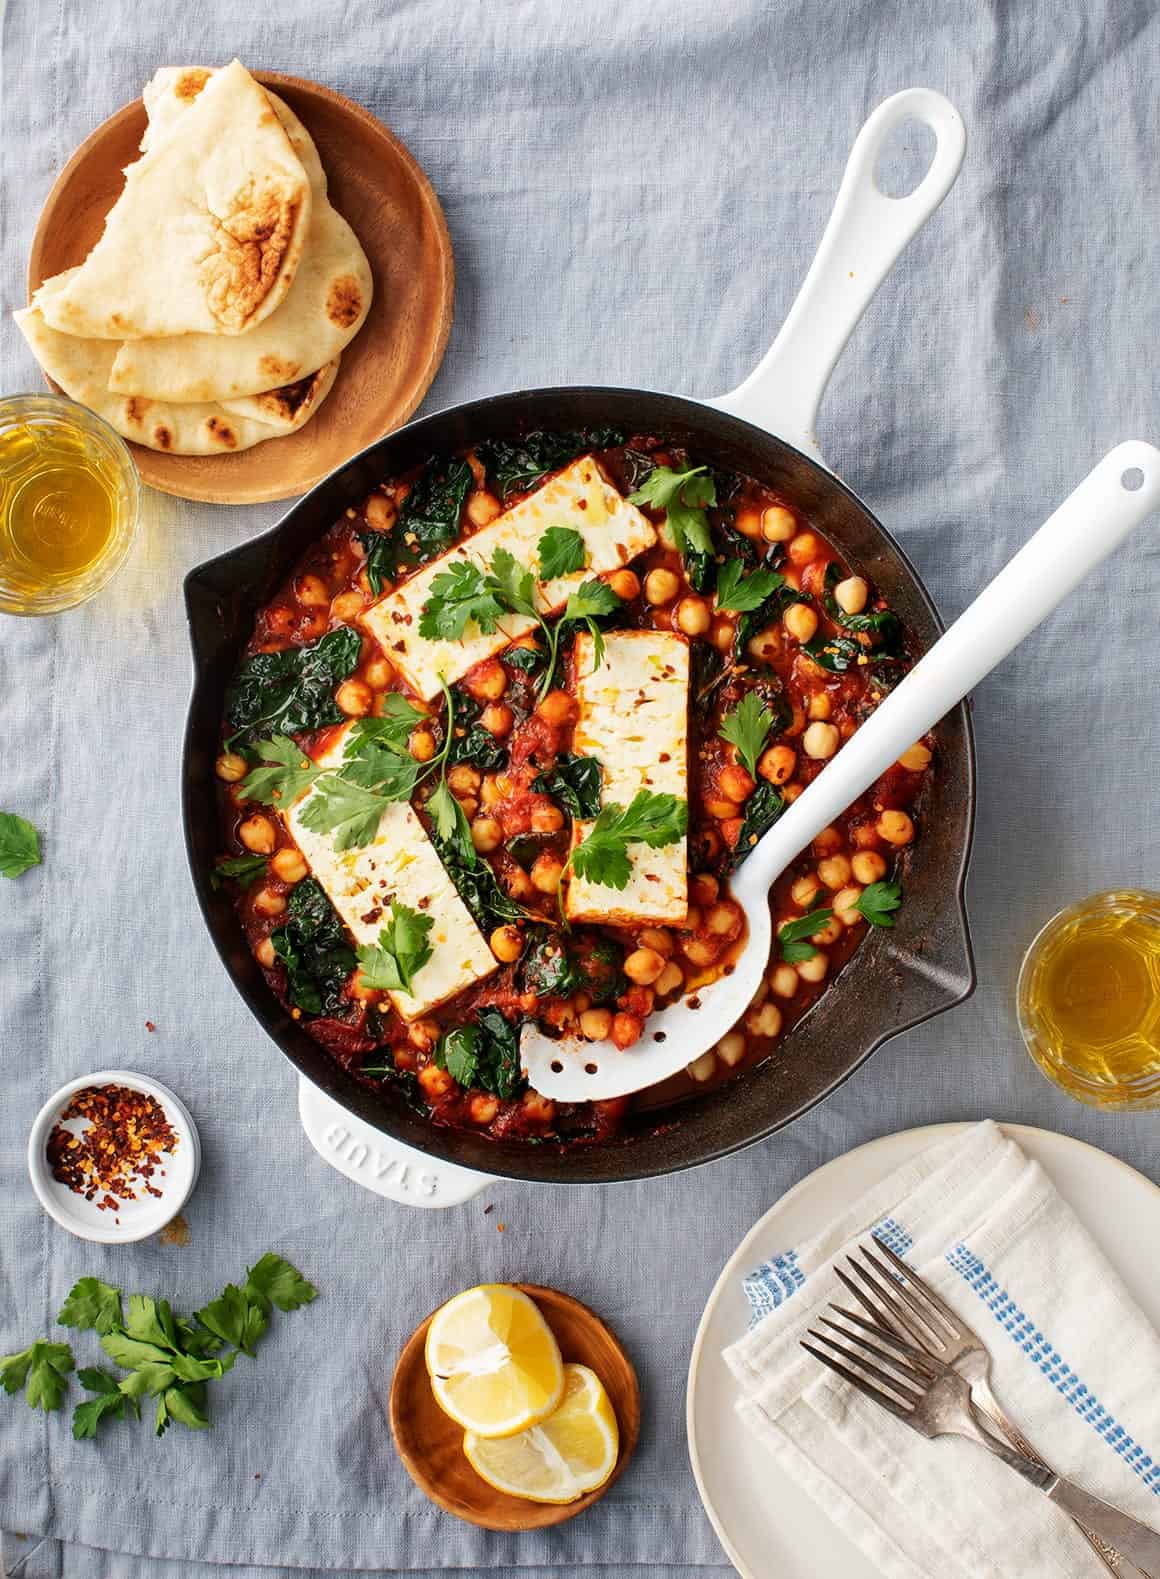
Don’t expect to have leftovers of this hearty one-pot meal. The combination of melty feta, saucy chickpeas, and tender kale is SO delicious. In our house, it disappears in minutes!
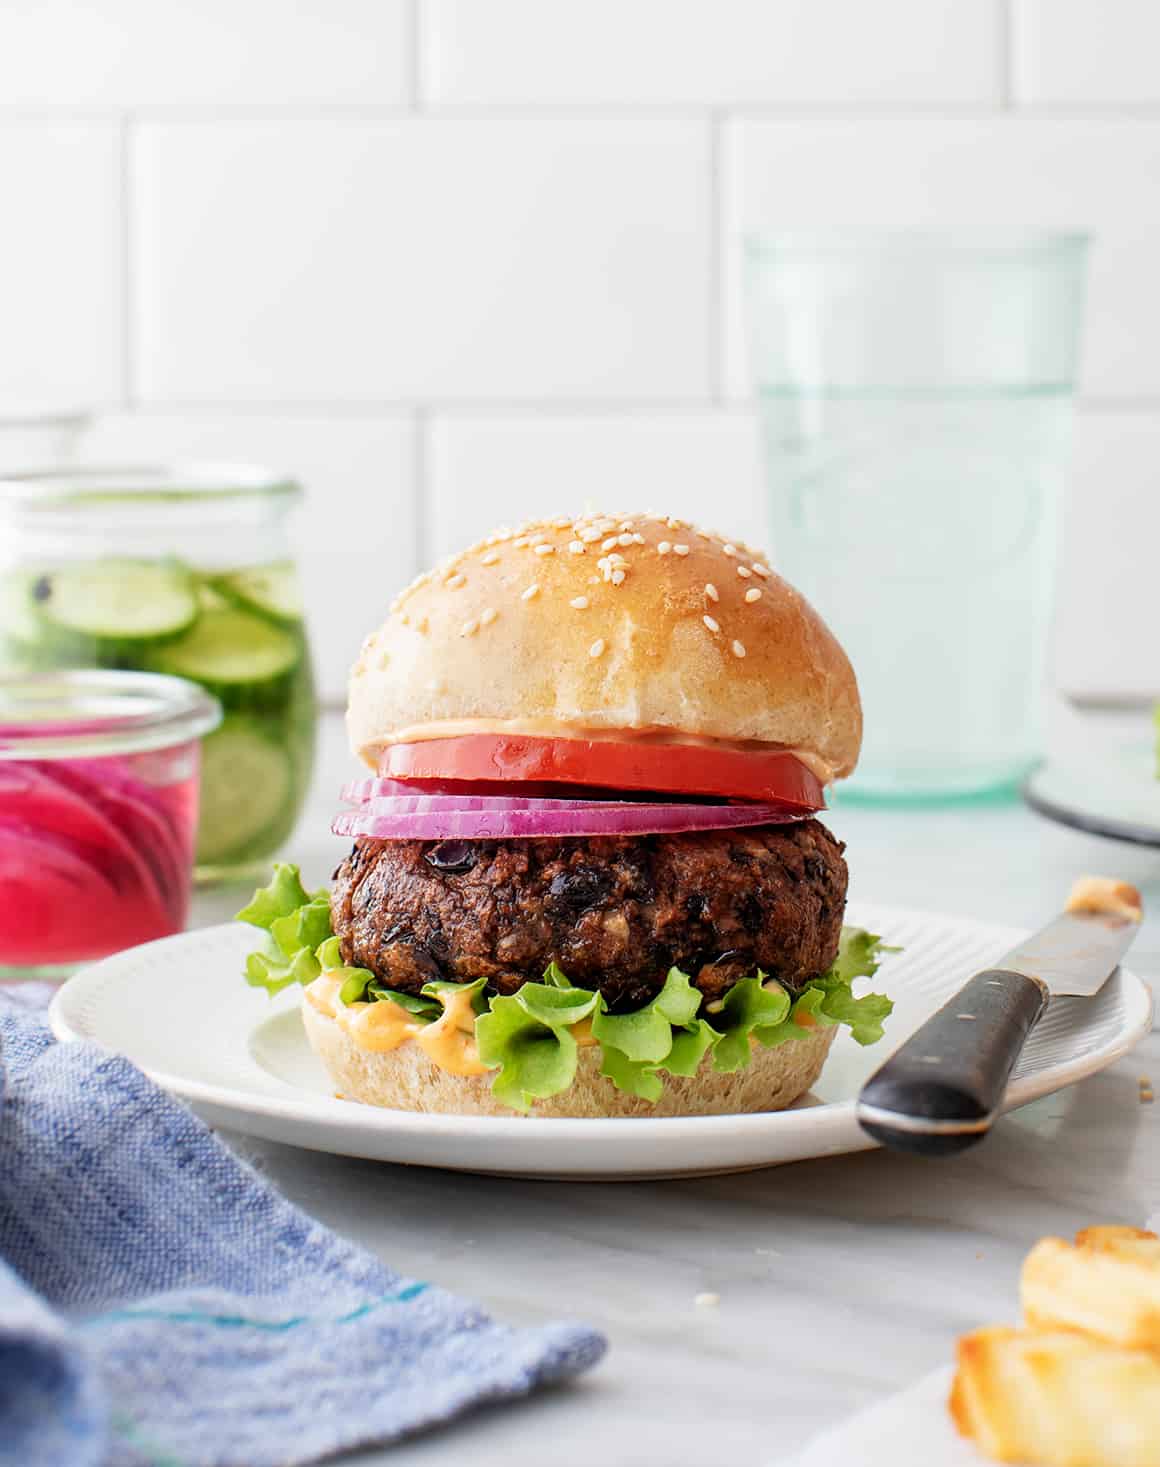
Roasted sweet potatoes, black beans, and a zesty yogurt sauce fill these weeknight-friendly tacos. Add a flourish of pickled onions to take them over the top!
Keep a bag of frozen potstickers on hand so that you can make this quick and easy soup on weeknights. It’s super flavorful, fresh, and fun—the best homemade solution for a takeout craving.
My plant-based spin on white chicken chili! Blended white beans give it a wonderful creamy texture, and fresh lime juice and diced green chiles add zingy, zesty flavor.
This set-it-and-forget-it recipe is a lifesaver on a busy weeknight. You just have to sauté the onions and bell pepper—the Instant Pot takes care of the rest!
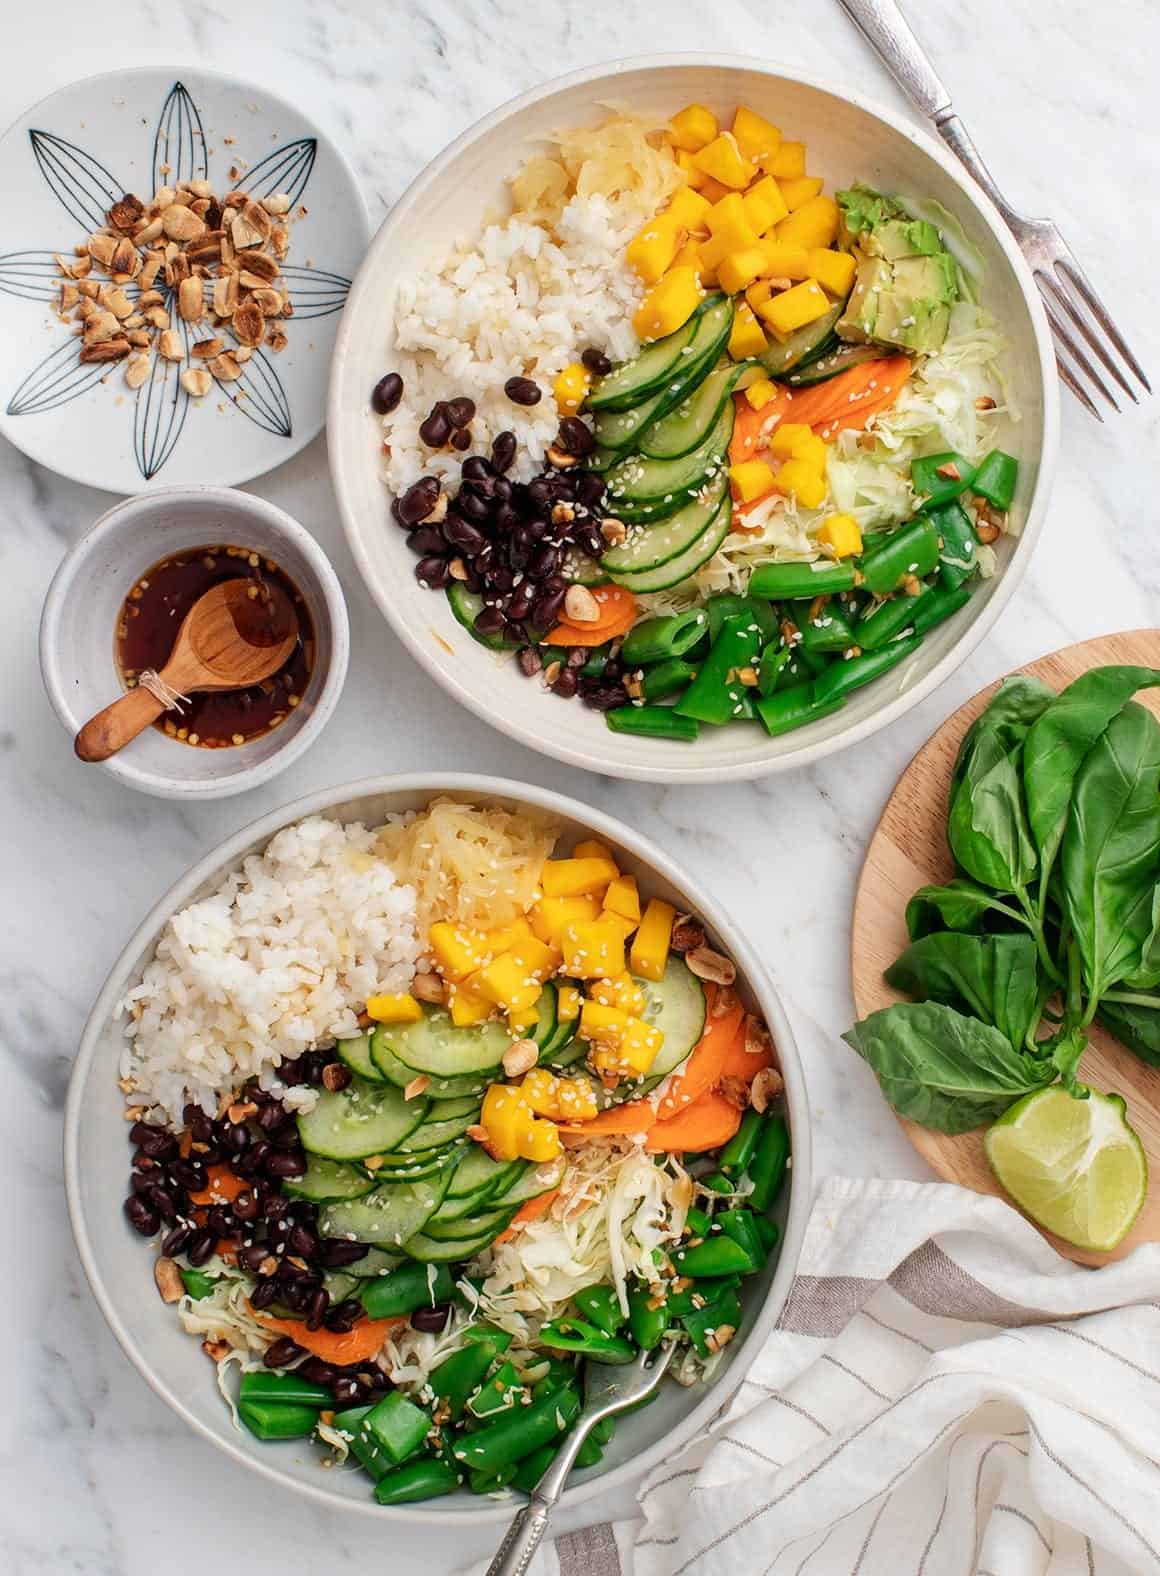
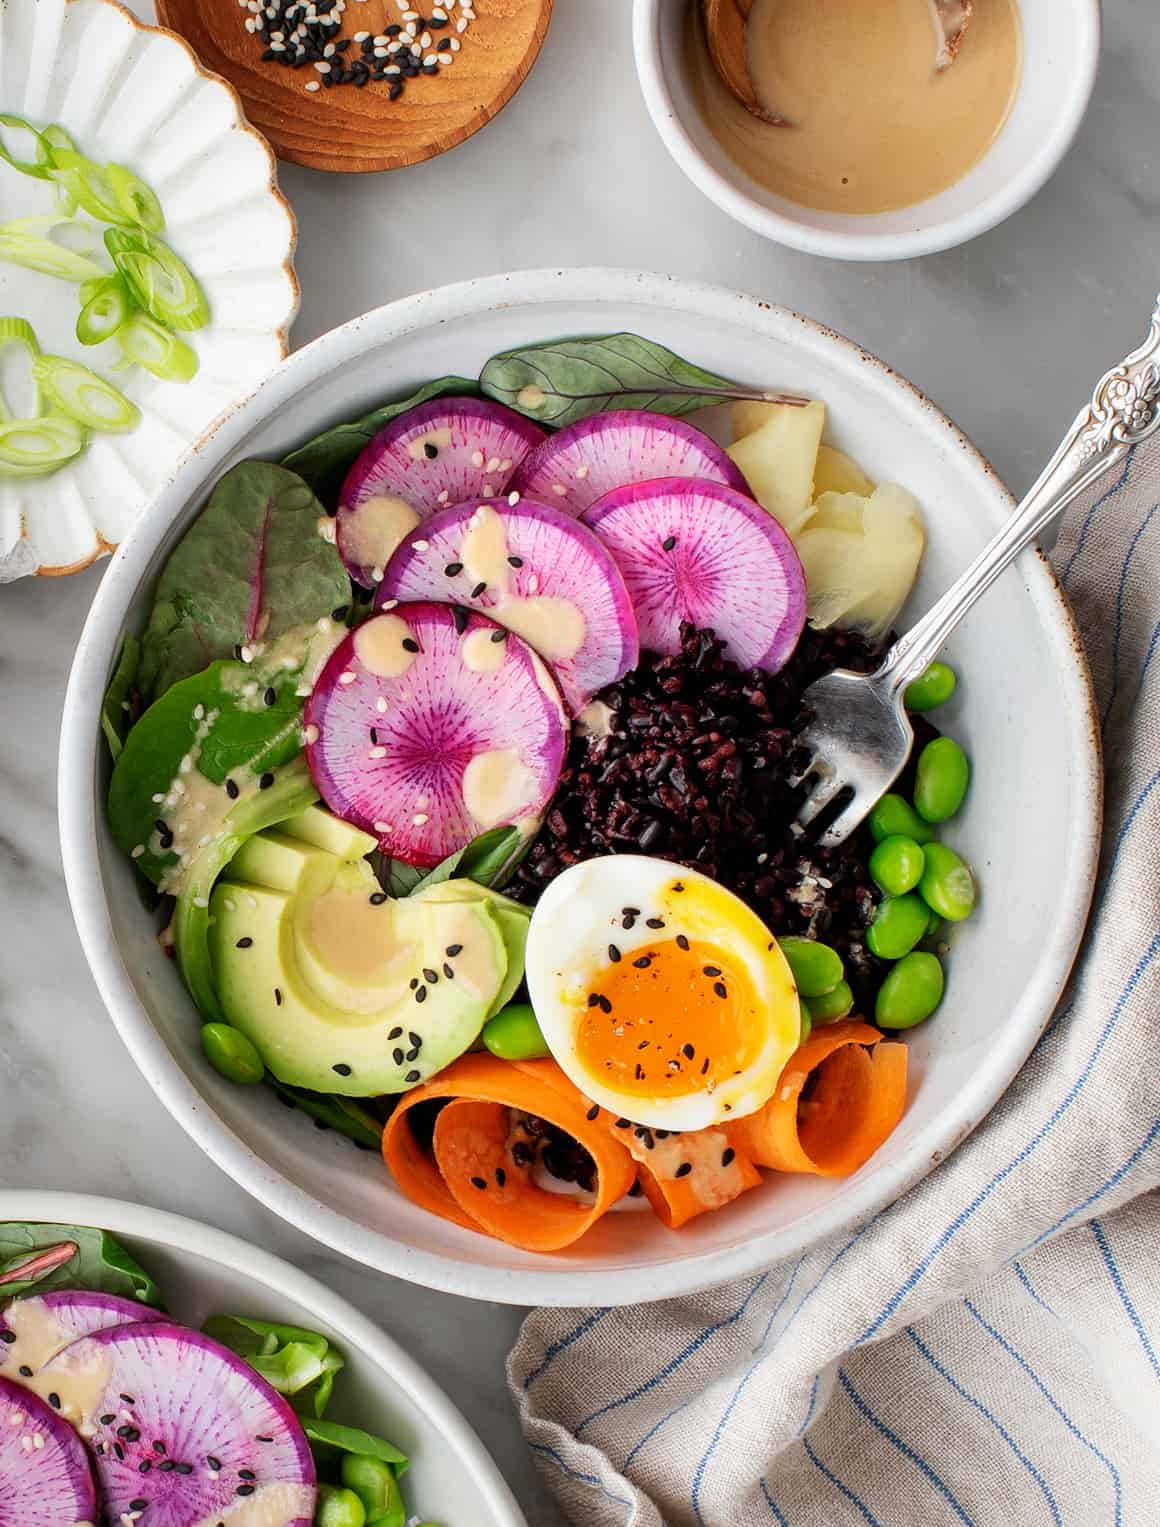
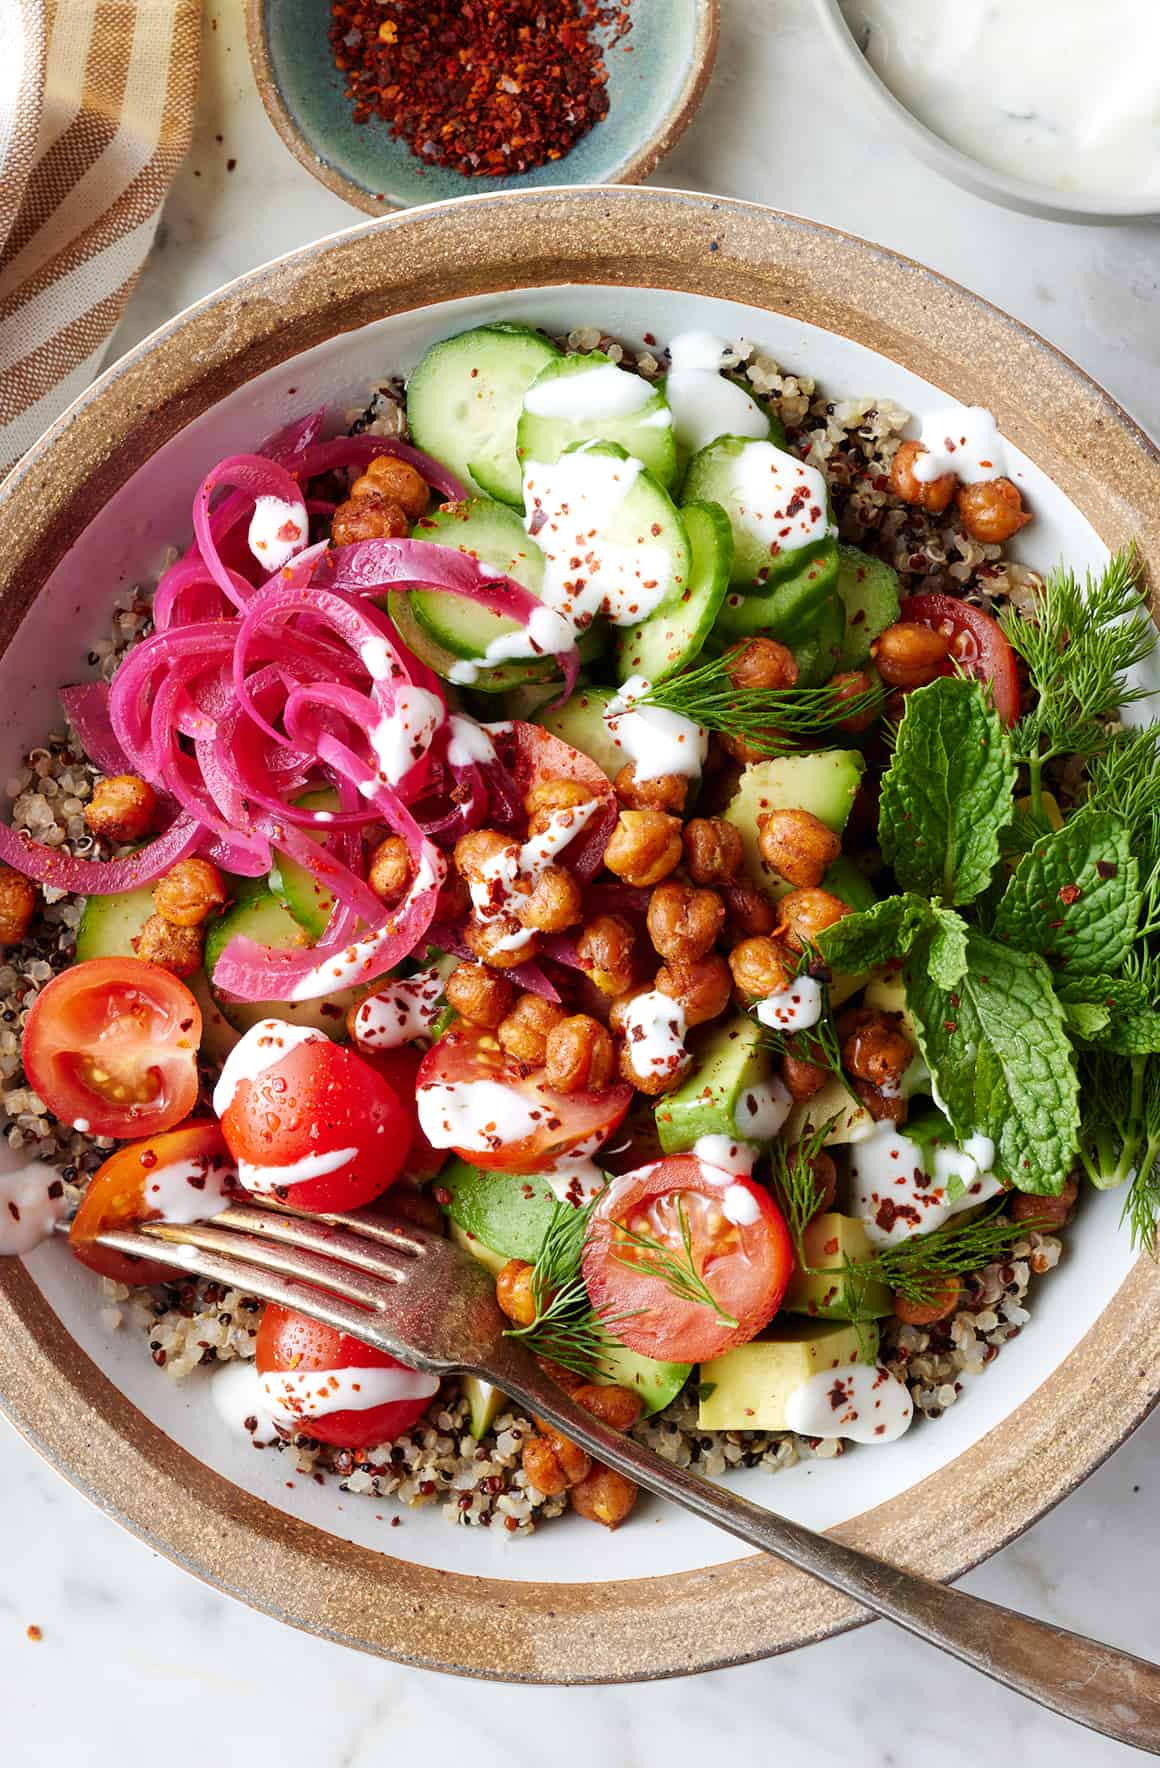
This no-fuss dinner is light and refreshing. Tomatoes, cucumbers, roasted chickpeas, and avocado top a bed of hearty quinoa. A tangy yogurt sauce ties it all together!
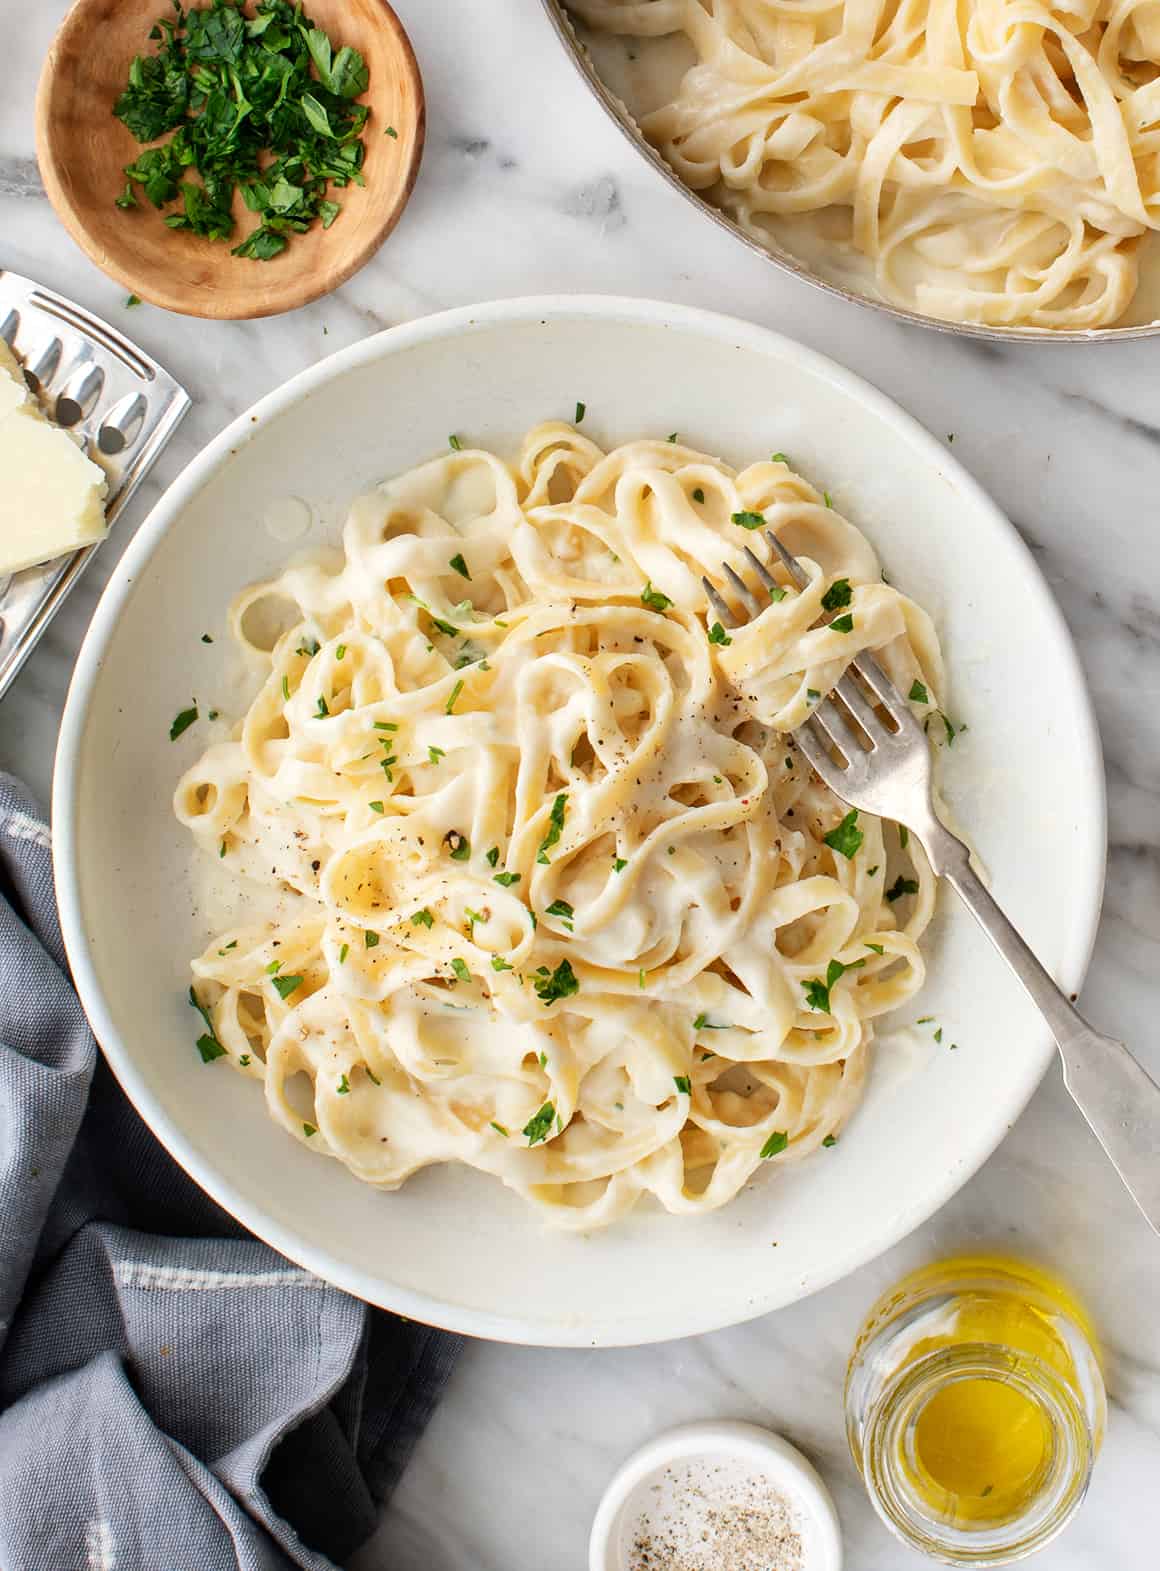
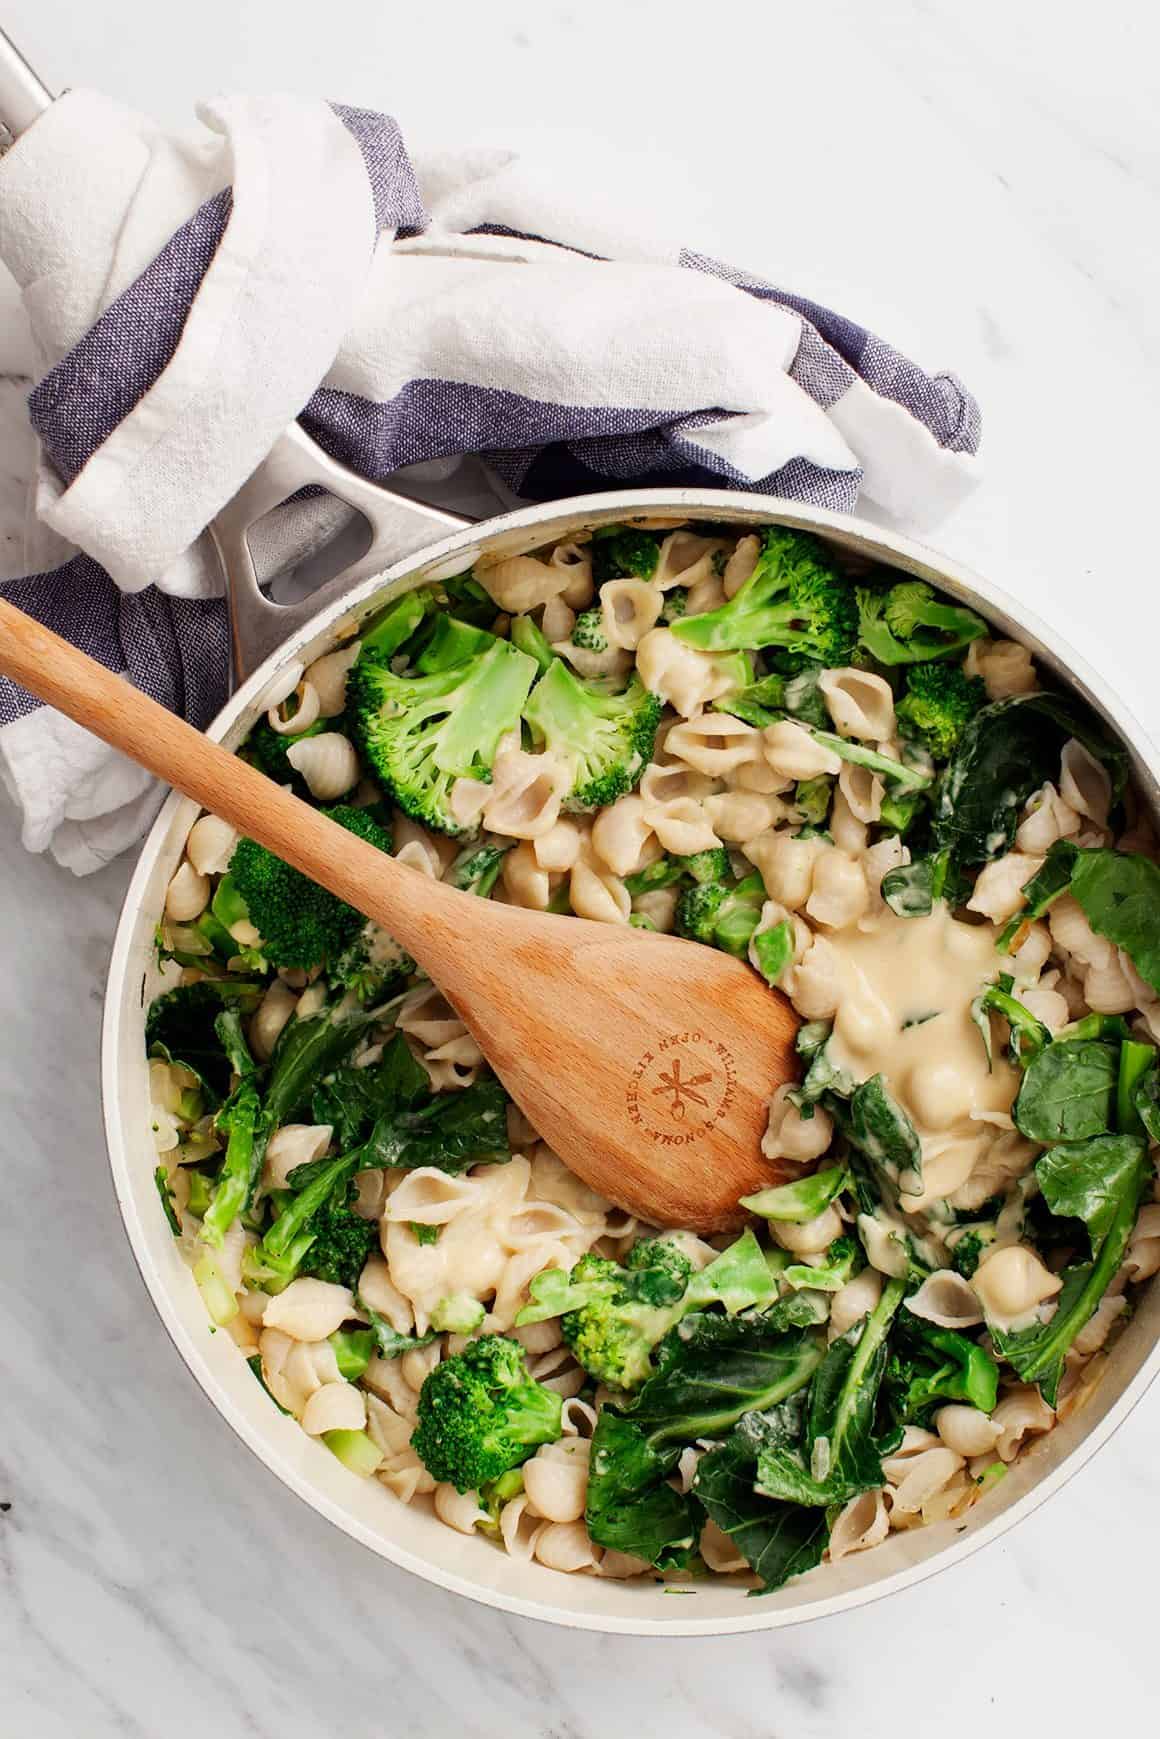
This pasta tastes rich and decadent, but it’s actually lighter than you might guess. I blend cooked cauliflower into the sauce to create a creamy, velvety texture without any cream.
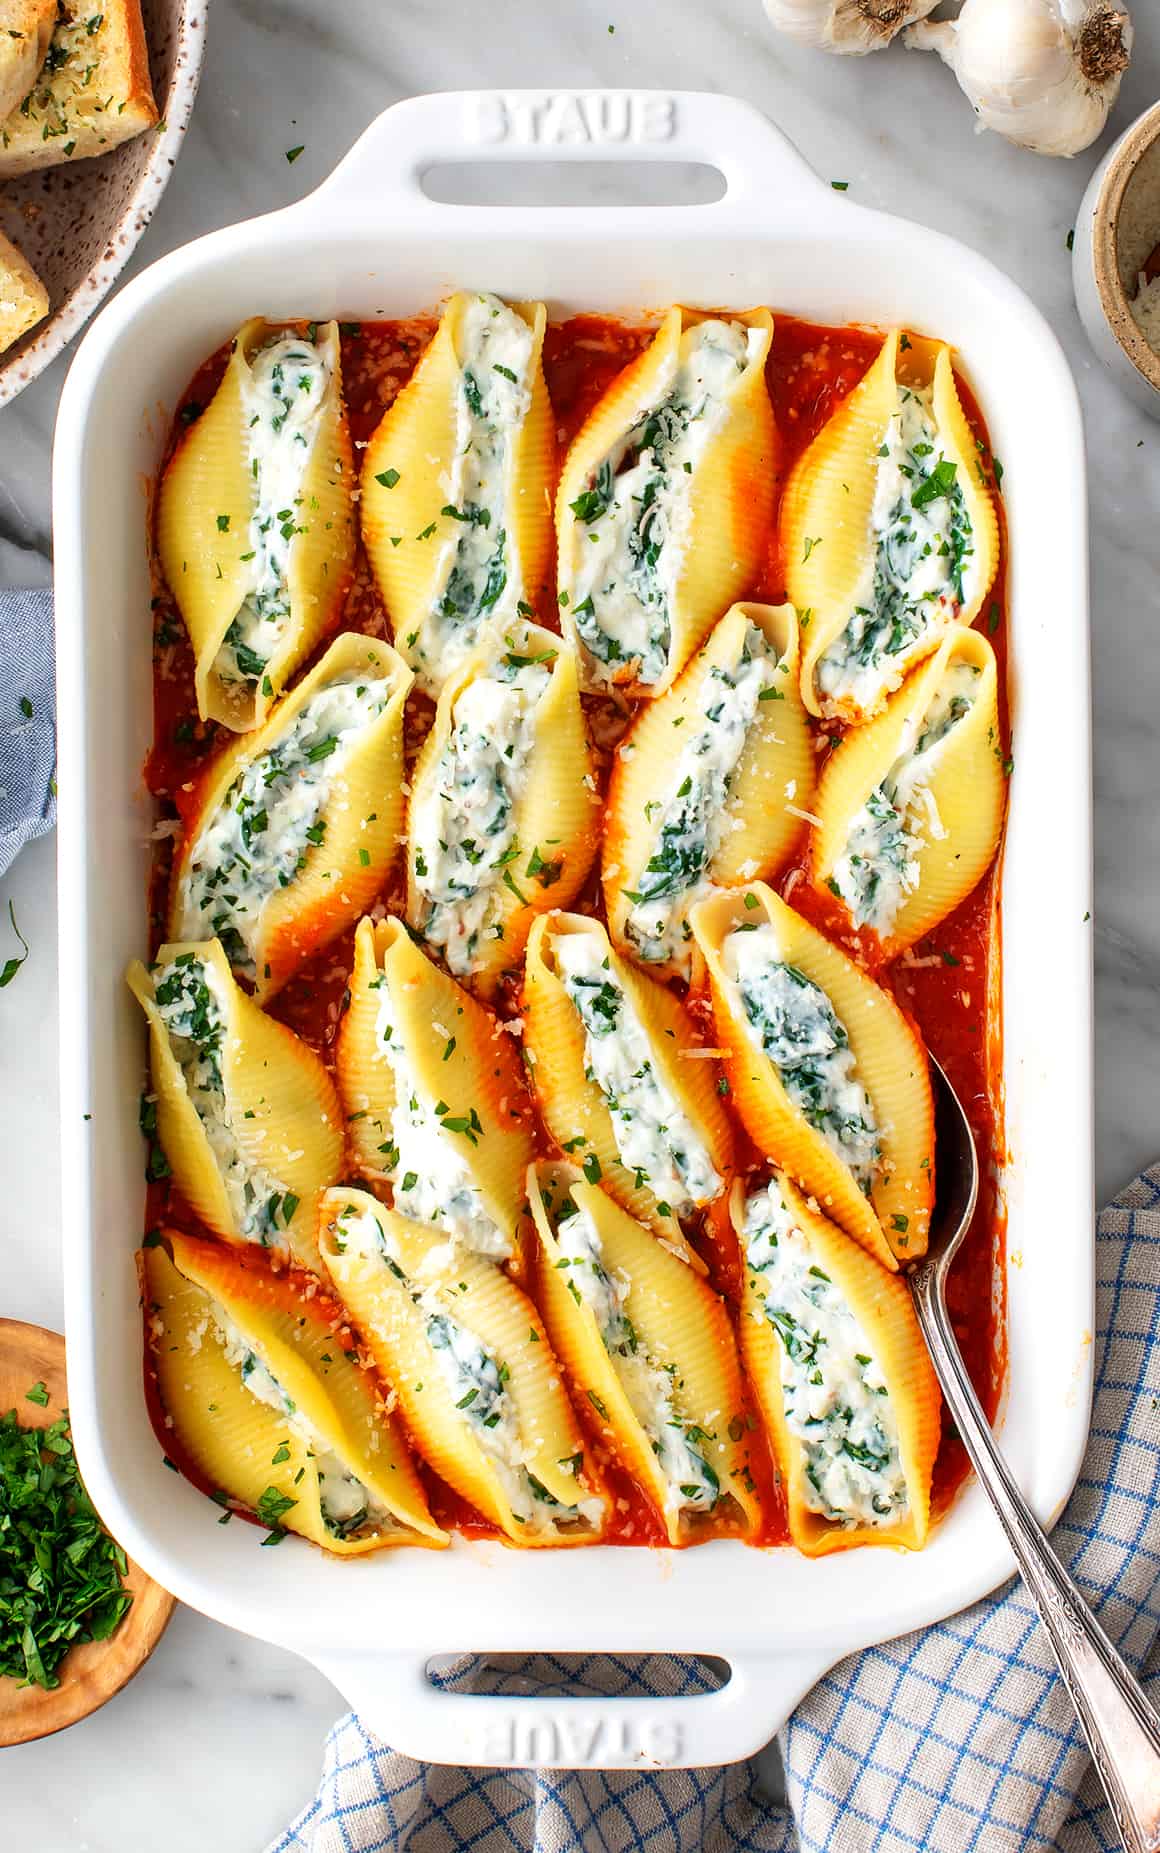
If you want to sneak some extra veggies onto your family’s plates, this recipe is a great way to do it. There’s an entire pound of spinach hiding among the pasta, tomato sauce, and cheese!
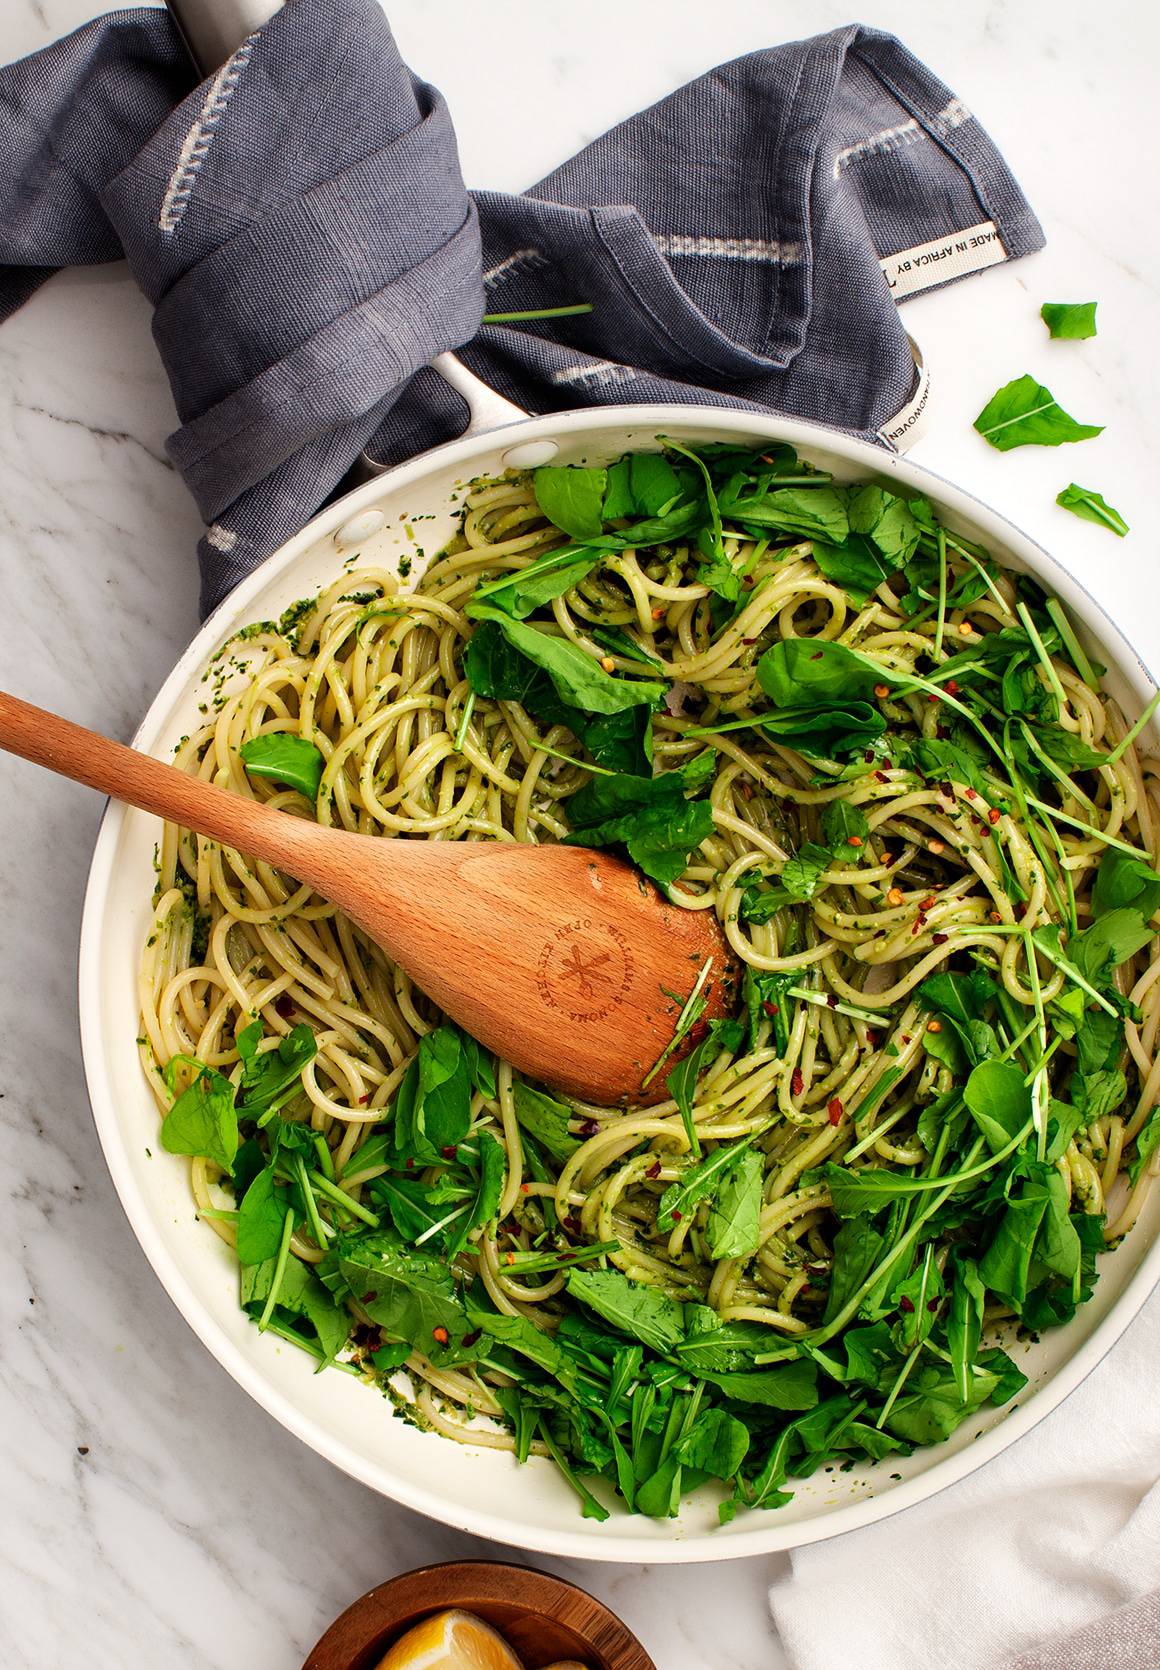
If you ask Jack for his favorite dinner ideas, this mushroom pasta will be near the top of the list. It’s PACKED with meaty mushrooms. White wine, garlic, and Parmesan add rich, savory depth of flavor.
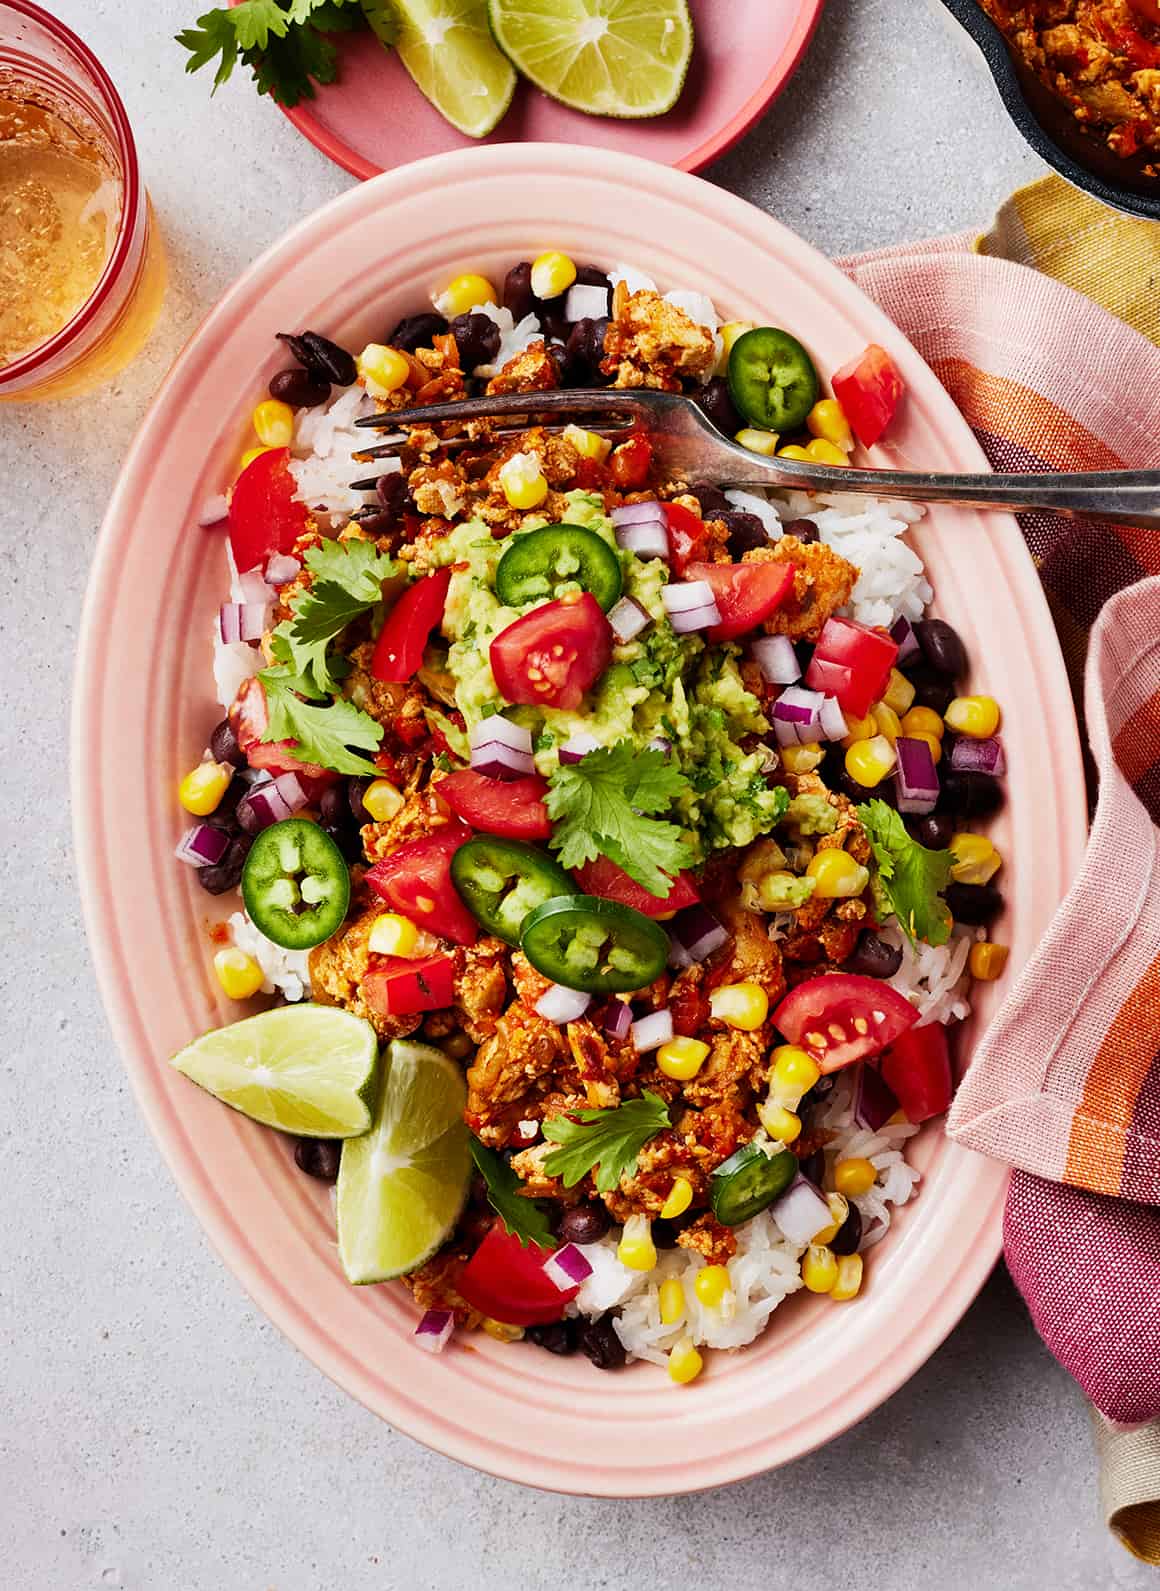
You won’t miss the ground beef in these vegetarian stuffed peppers! Filled with rice, corn, and black beans, they’re hearty and flavorful without any meat.
In my opinion, stuffed sweet potatoes are one of the BEST healthy dinner ideas! They’re cozy, customizable, and easy to make. To streamline the process, prep the filling while the sweet potatoes bake.
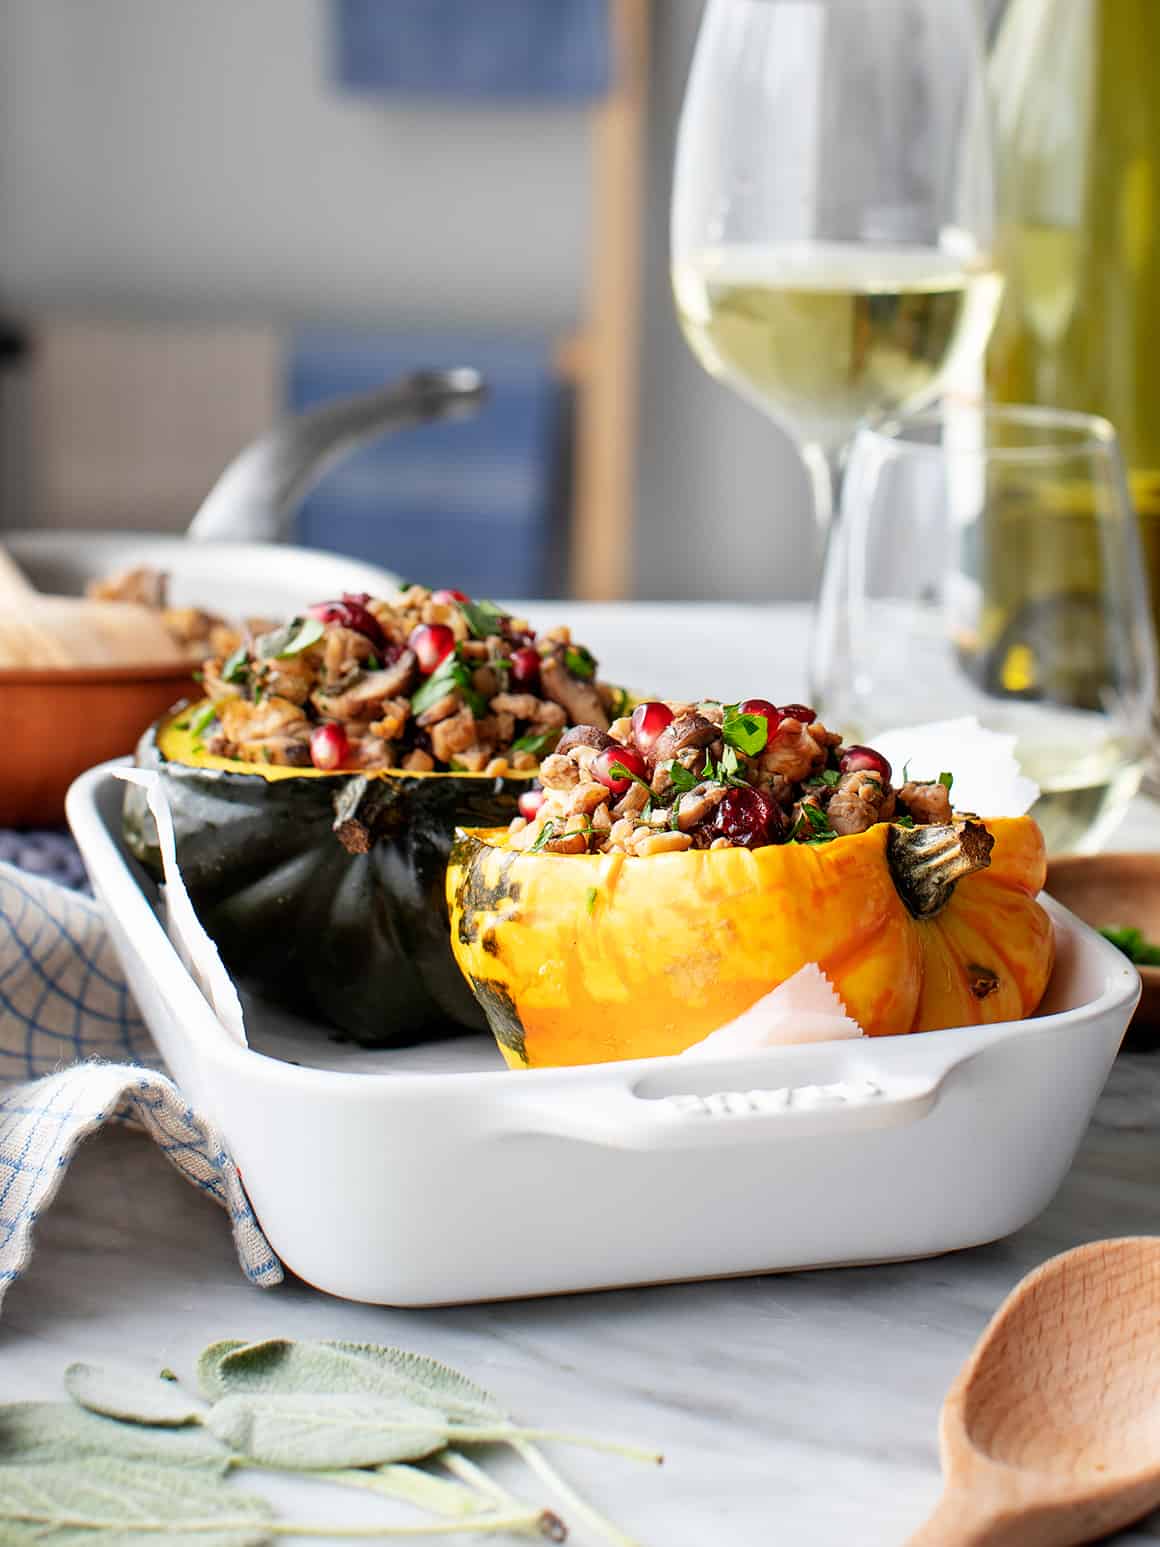
While the squash is in the oven, cook the filling on the stove. It’s a hearty, flavorful blend of sautéed mushrooms, tempeh, walnuts, and fresh herbs that tastes fantastic with the sweet, creamy squash.
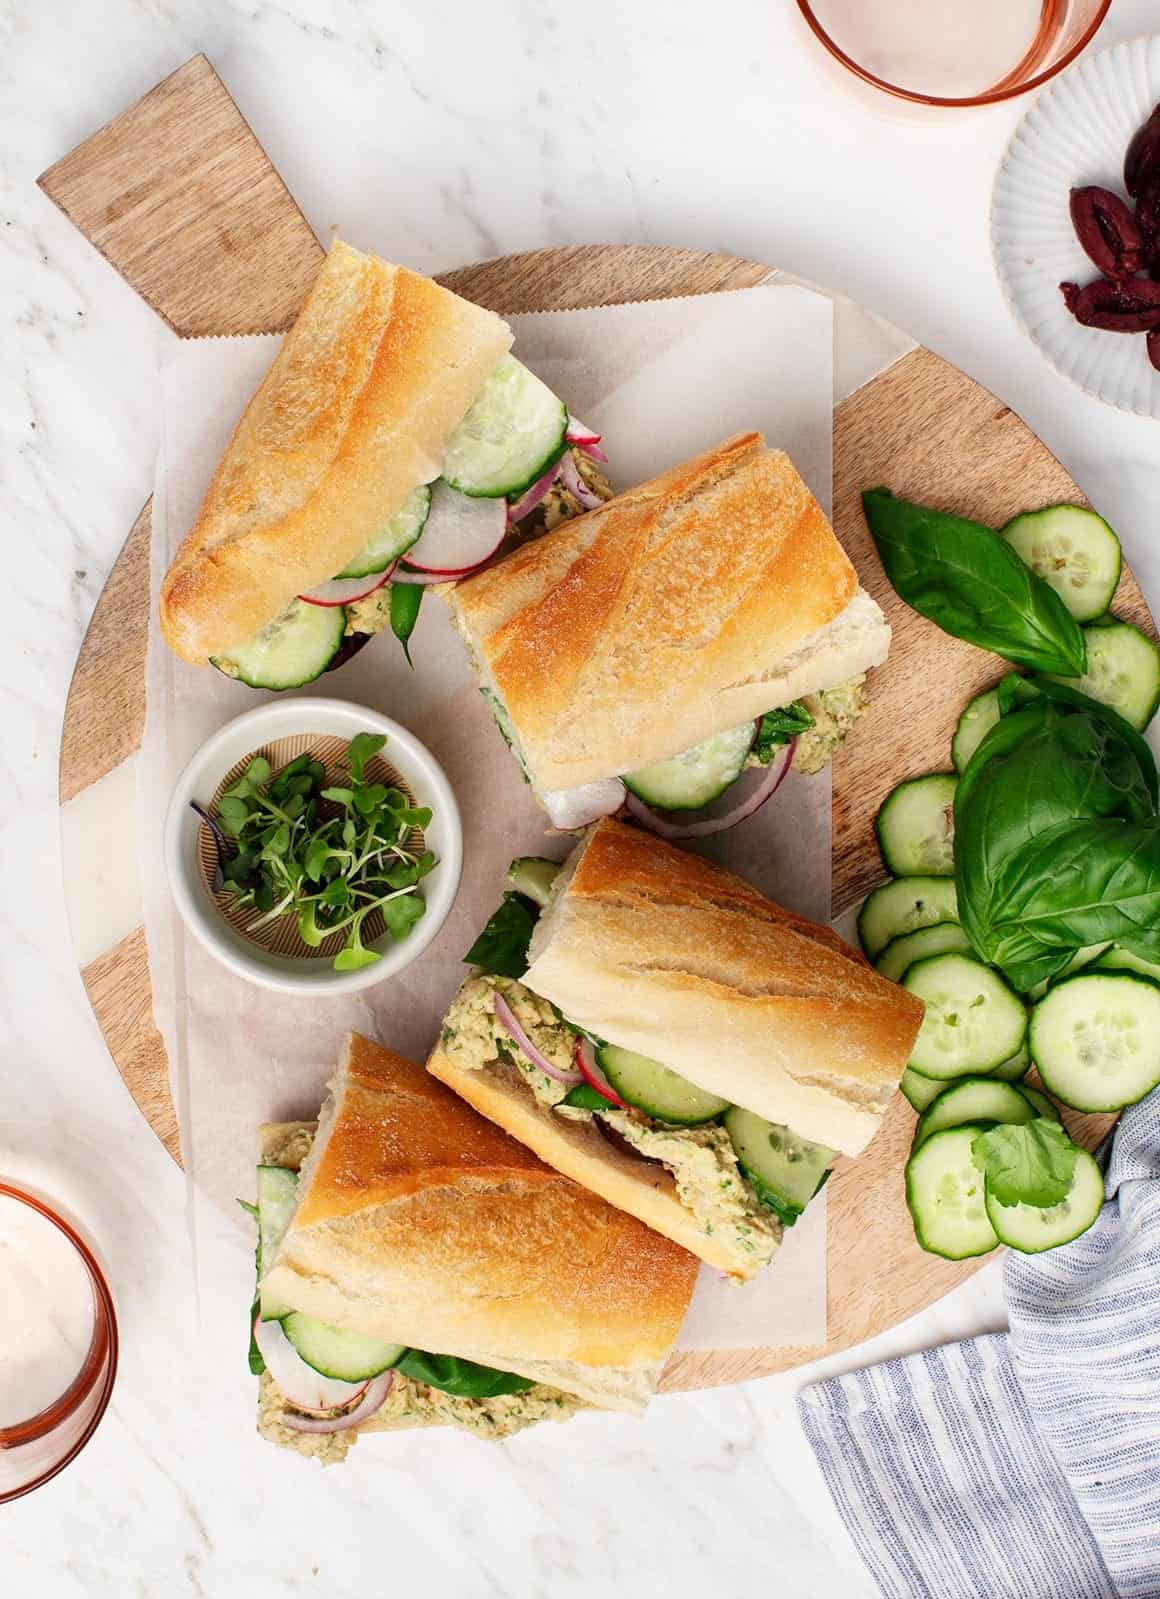
Heads up: you’ll need to make the pickles for this recipe a day or two in advance. Once you make them, though, this delicious tofu sandwich comes together in no time!
This recipe is one of my go-to easy dinner ideas in the spring, when I often have crisp veggies like radishes and cucumbers on hand in the fridge. It’s my vegan version of a pan bagnat, made with a briny chickpea salad, fresh basil, olives, and blanched inexperienced beans.
Skip delivery, and make homemade pizza instead! This classic veggie pizza is one of my favorites. I top it with tomato sauce, mozzarella, peppers, onions, and artichokes.
Who says you need cheese to make a delicious pizza? I top this one with a luscious cashew cream sauce and flavorful veggies like tomatoes, jalapeños, broccoli, and corn.
It’s impossible to talk about easy dinner ideas without mentioning stir fry! This one is heavy on the veggies, made with a colorful medley of broccoli, bok choy, carrots, and shiitake mushrooms.
These savory Japanese pancakes come together with a few basic ingredients: eggs, cabbage, panko, and scallions. Devour them with toppings like mayo, pickled ginger, sesame seeds, and sliced nori!
These savory, sesame-crusted tofu steaks crisp up beautifully in the air fryer or oven. Serve them with steamed veggies and cilantro lime rice for a healthy meal that’s better than takeout!
Preheat the oven to 425°F. Spread ½ cup marinara in the bottom of a 9×13-inch baking dish.
In a medium bowl, combine the ricotta cheese, garlic, lemon zest, oregano, red pepper flakes, ½ teaspoon salt, and several grinds of fresh pepper.
In a large pot of salted boiling water, cook the pasta according to package directions until al dente. Drain.
Return the pot back to the stove. Over low heat, drizzle the bottom of the pot with a little olive oil and add the spinach. Toss and sauté 1 to 2 minutes until just wilted, working in batches if necessary. Turn off the heat, remove the spinach from the pot, and gently squeeze out some of the excess water. Coarsely chop it and set aside.
Add the pasta back to the pot along with the remaining marinara, most of the chopped spinach, ¼ teaspoon sea salt, and more fresh pepper and toss until combined.
Add half the pasta to the baking dish, top with dollops of the ricotta, the remaining spinach, and scoop the remaining pasta on top. Top with the mozzarella and pecorino cheese. Drizzle with olive oil and bake until the cheese is browned, 16 to 22 minutes.
Garnish with fresh basil or parsley and serve hot.
If you hate mayo, you can try plain yogurt instead. However, you might find that you like the dressing with neither; it just ends up thinner and more robust in flavor. You’ll probably have more shallots than you need but I cannot bring myself to make the effort to fry shallots and not have extras for next time.
Assembly
1 to 1 1/2 pounds napa cabbage (often half of a large one)
2 large shallots
Neutral oil for frying
6 to 8 radishes, diced small
2 scallions, thinly sliced
Toasted sesame seeds
Dressing
2 tablespoons white miso
1 medium garlic clove, minced
2 teaspoons fish sauce
2 tablespoons rice wine vinegar, plus extra to drizzle
3 tablespoons toasted sesame oil
2 tablespoons neutral oil
1 teaspoon granulated sugar
2 tablespoons mayonnaise
Salt and freshly ground black pepper
To wash and crisp your cabbage: Cut the cabbage lengthwise into quarters, leaving the end intact. Lower into a large bowl of cold water. Let sit for 10 minutes, but longer is fine too. [I’ve neglected mine for 1 to 2 hours before while preparing other things.] Remove from water, shaking off excess and letting any sand or debris fall to the bottom of the bowl. Place on a thick kitchen towel and pat dry.
To crisp shallots: Peel and thinly slice shallots. A mandoline is ideal for this as it ensures shallots cook evenly, but I sliced mine by hand. Place in a small-to-medium skillet and barely cover with oil. Turn heat to medium-high and cook shallots, watching carefully, until they’re just lightly golden brown, then turn the heat off and let the residual heat of the oil take them a shade darker, to a medium copper brown. [The color will change quickly at this point, and I’ve had to toss burnt shallots many, many times when I didn’t watch closely.] If you’ve sliced your shallots by hand, you’ll find that some pieces are done sooner; you can use thin tongs or a fork to fish them out sooner. Drain in a sieve, reserving the oil for the next time you want to fry shallots. Spread crispy shallots on two layers of paper towel and season immediately with salt, then transfer shallots to a bowl. If you keep them on the towel too long, the oil on the towel will soften them, which will be sad.
Make the dressing: In a medium bowl, whisk miso, garlic, fish sauce, and 2 tablespoons rice wine vinegar to combine and smooth out miso. Whisk in sesame oil, a tablespoon at a time, then neutral oil and sugar. Add mayo and whisk to smoothly combine. Add sriracha or chili oil (I used some from a jar of chili crisp) to taste. Add salt, if needed, but it is unlikely you will. You could also add a bit more miso, instead of salt.
Assemble salad: Cut cabbage quarters into smaller wedges and arrange on a serving plate. It’s not mandatory, but I like to drizzle the cabbage wedges with 1 to 2 teaspoons rice vinegar before adding the dressing for extra brightness. Drizzle dressing over to taste, then scatter the wedges with radishes, scallions, toasted sesame seeds, and crispy shallots. Eat right away.
Do ahead: Extra washed cabbage, dressing, and shallots keep in the fridge for 4 to 5 days. Store separately.