Selfmade Spaghetti Sauce Recipe | Recipesedge

0

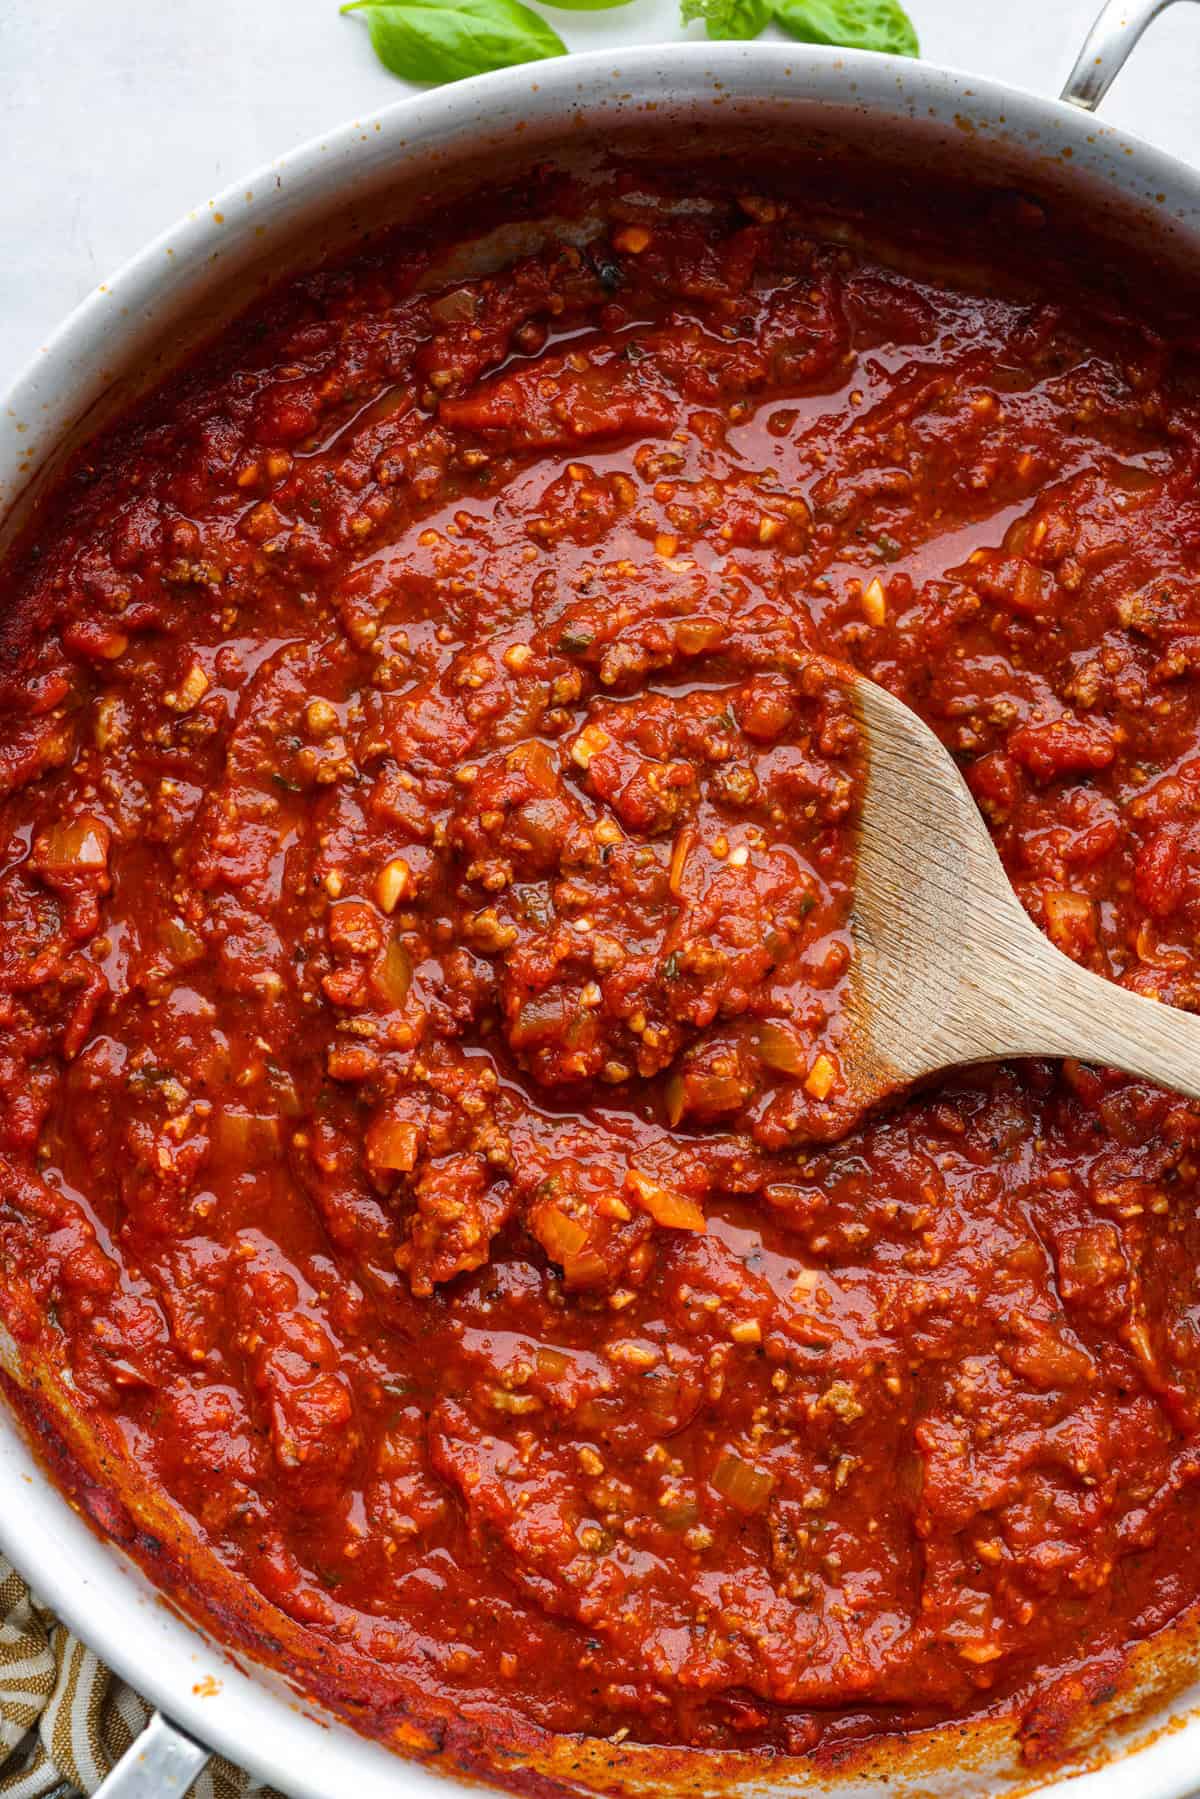
There’s no need to purchase store-bought sauce, with this hearty and flavorful Homemade Spaghetti Sauce. Simple ingredients such as ground beef, onion, garlic, and spices of oregano and basil bring a bold flavor to this simple sauce.

This recipe is extremely simple. If you like easy Italian-inspired sauce that you can make at home then you need to try this Bolognese Sauce or this Alfredo Sauce recipe!

Top close view of homemade spaghetti sauce in a silver pan with a wood spoon.

Reasons to Make Homemade Spaghetti Sauce

  • Affordable: Making spaghetti sauce at home is easy, delicious, and way more affordable than restaurant prices!
  • Quality Ingredients: Fresh ingredients make the best sauce and it tastes way better!
  • Food Storage: You can easily prepare this sauce and have plenty for leftovers or for freezing and using later.

Homemade Spaghetti Sauce

Homemade spaghetti sauce is a classic recipe that can be prepared quickly and one everyone will love. This simple sauce is not only nostalgic but classic for a good reason. You’ll love the flavorful tomato base and the combination of the beef and sausage. And to make it even better, it’s finished off with fresh herbs and parmesan cheese. My family can not get enough of it!

It’s the perfect spaghetti sauce to use in multiple recipes. Make a big batch and use it in recipes like this sheet pan lasagna, rigatoni, or this easy spaghetti pie!

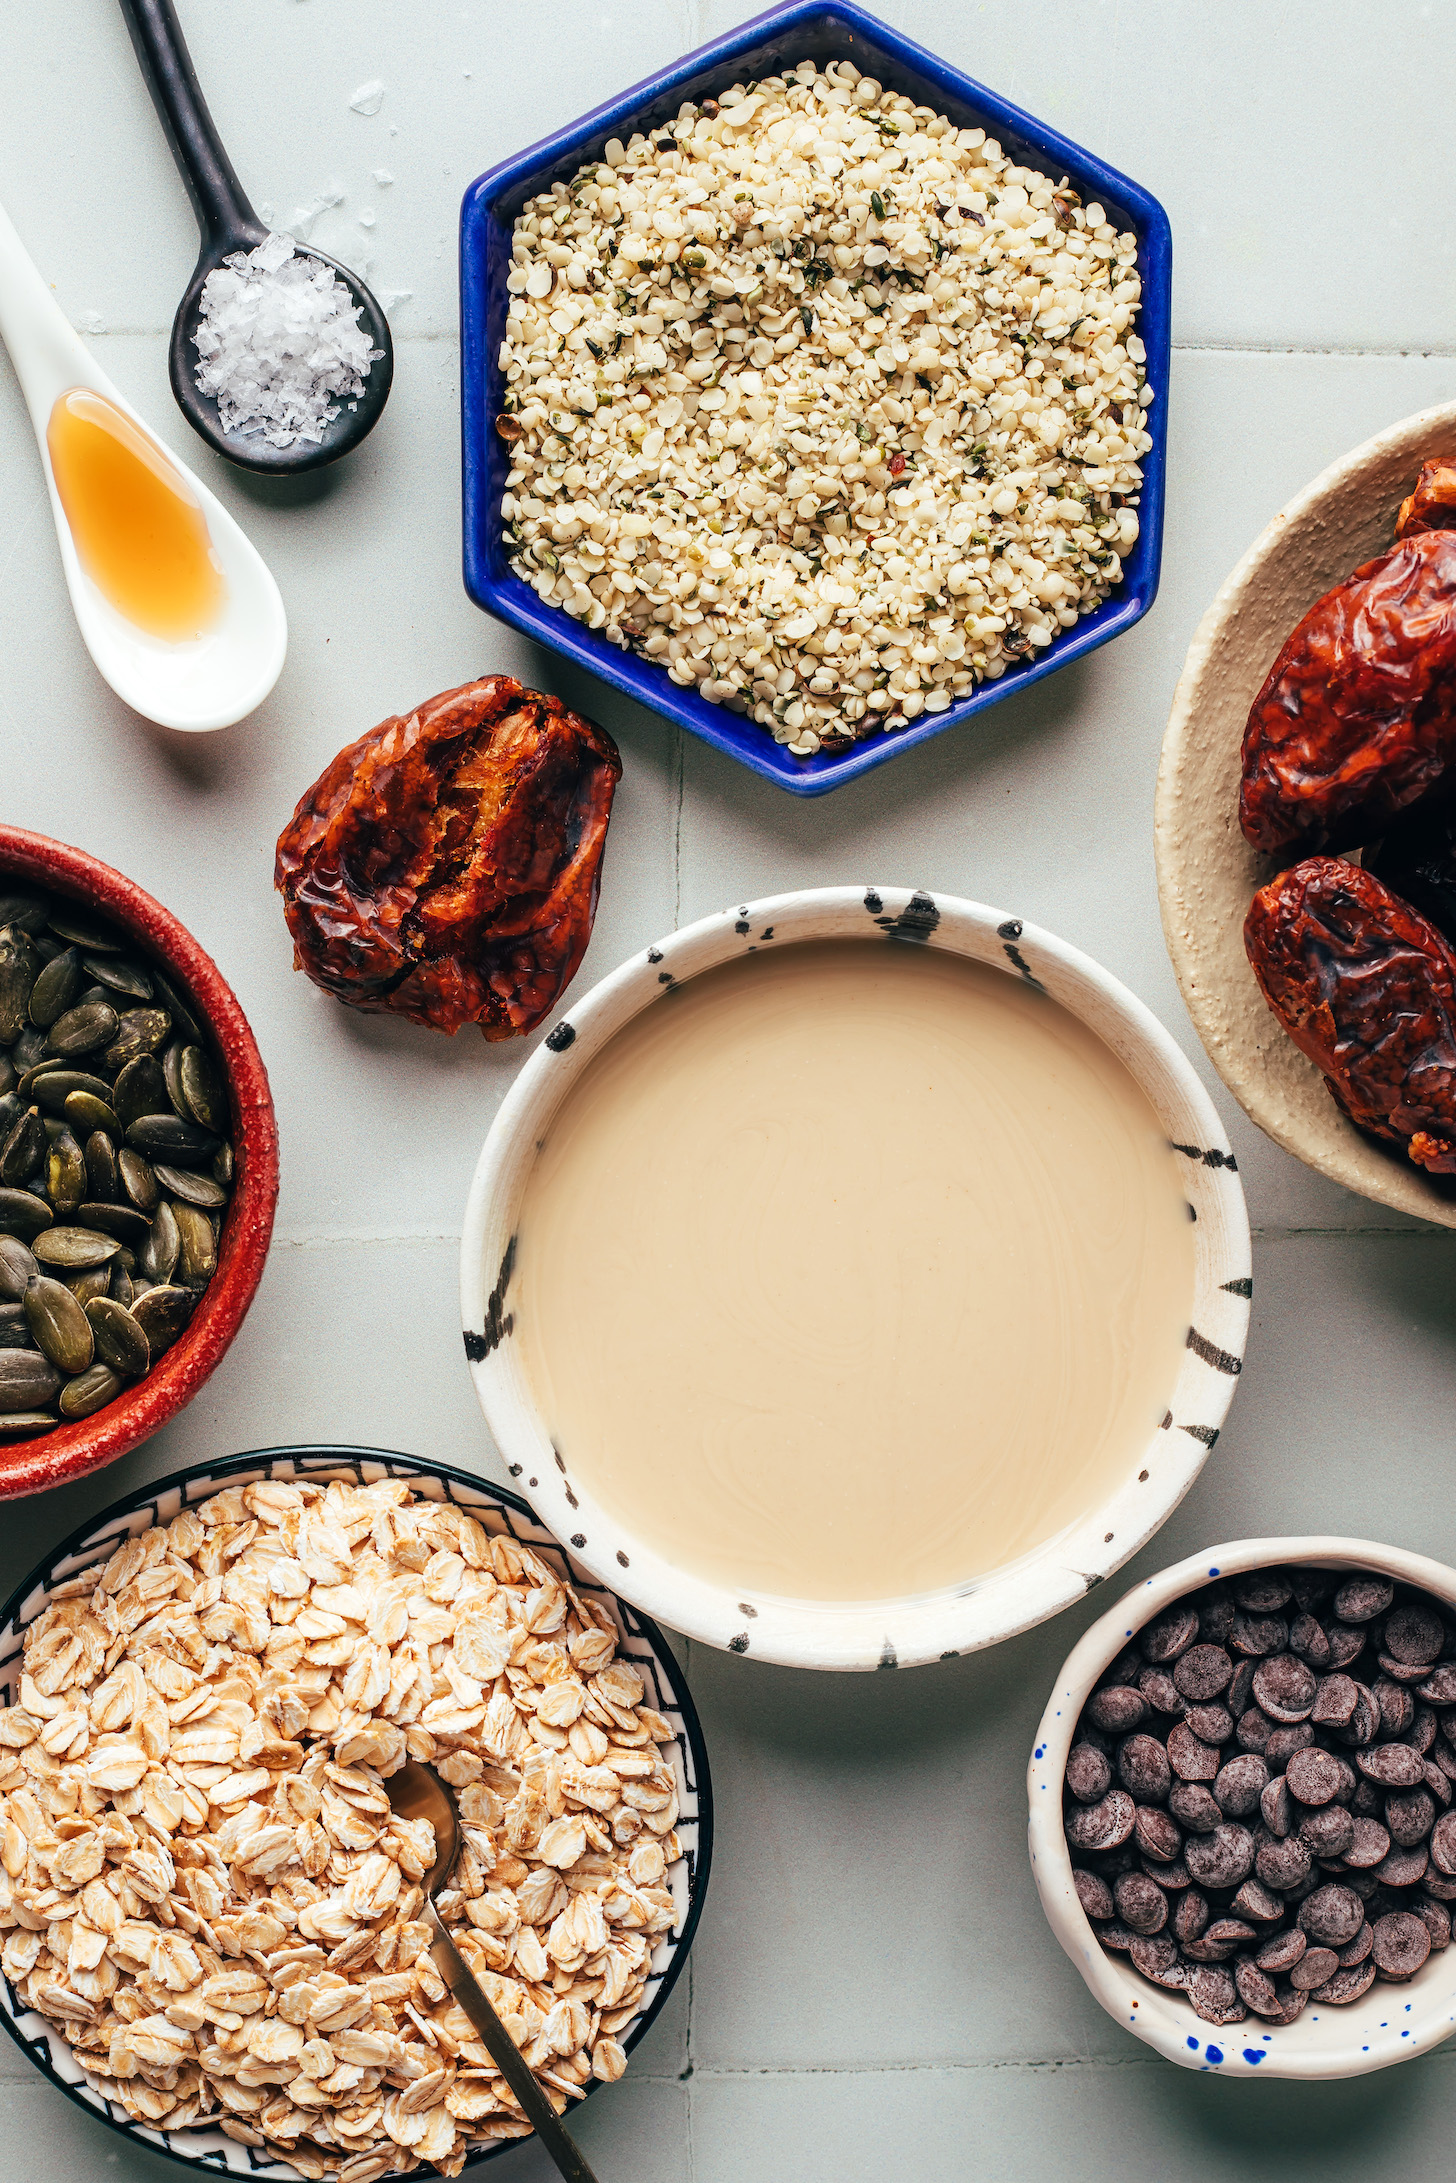
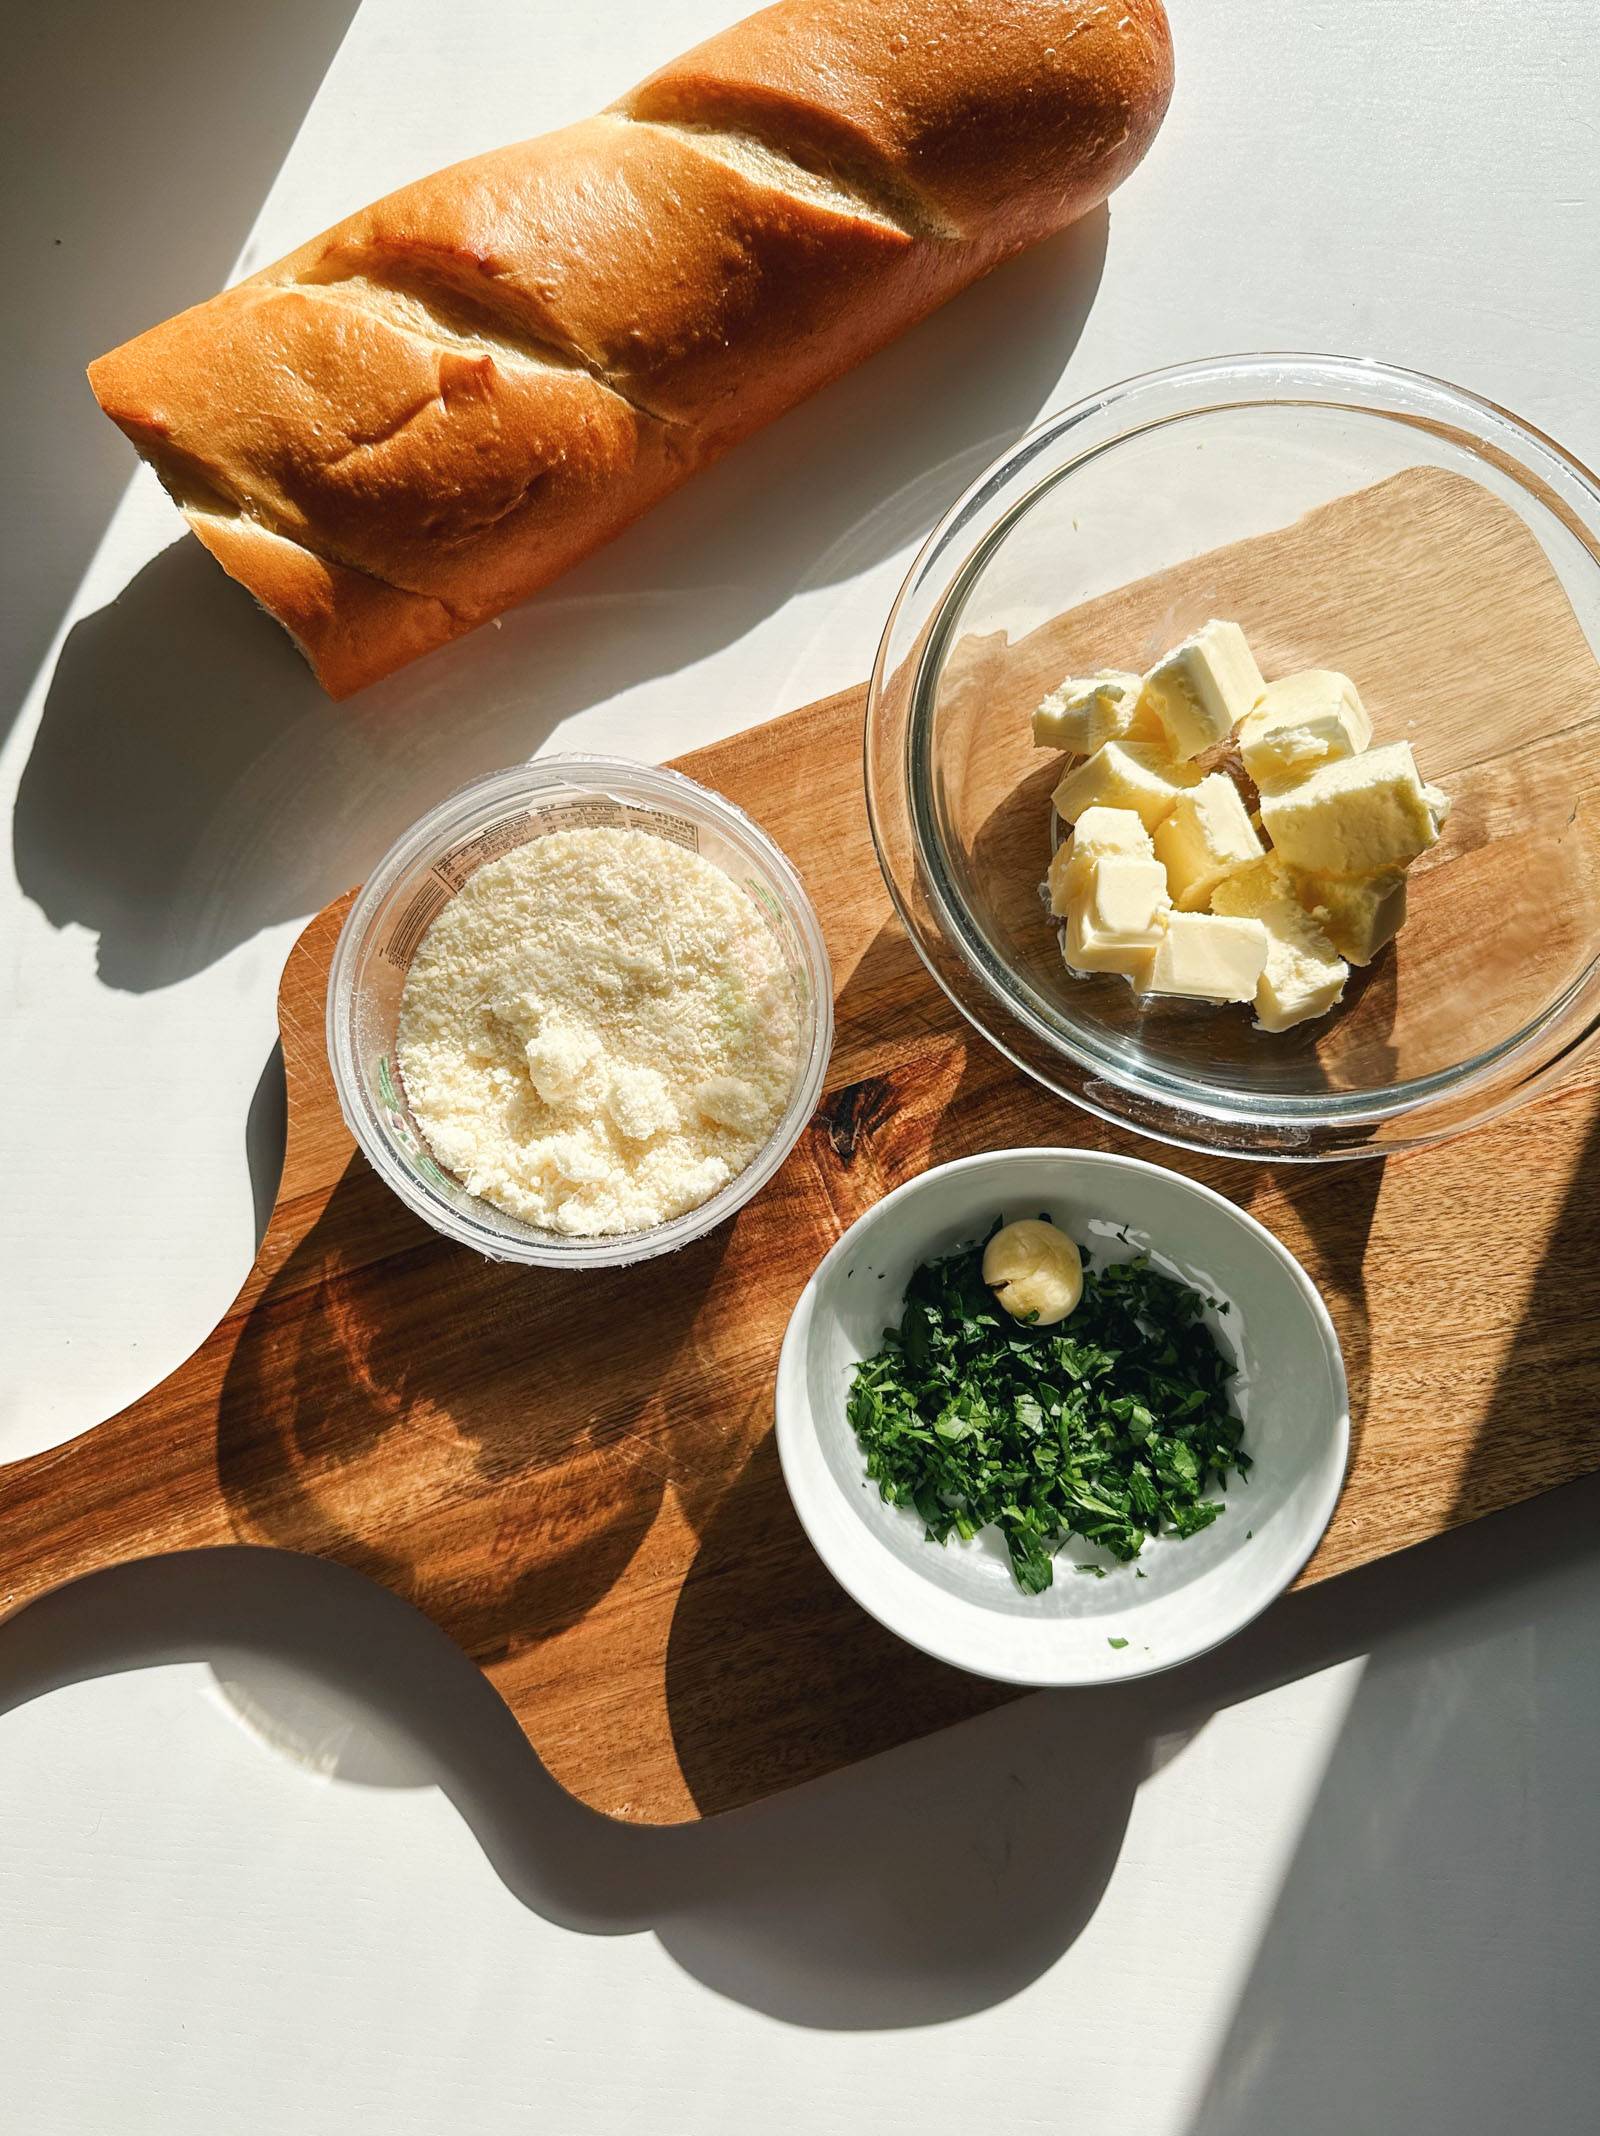
Ingredients in Spaghetti Meat Sauce

Everyone has their favorite recipe, but the best sauces are often the most basic. Use simple ingredients to make this delicious homemade spaghetti sauce.

Ingredients labeled to make homemade spaghetti sauce. Ingredients labeled to make homemade spaghetti sauce.
  • Olive Oil: choose a high-quality olive oil to brown the meat and sauté the onions and garlic. This will only add to the flavor.
  • Ground Beef: the type of ground beef is entirely up to and you can also switch out the ground beef for ground sausage.
  • Yellow Onion: the onion brings a mild bite to the sauce which is a key flavor in spaghetti sauce.
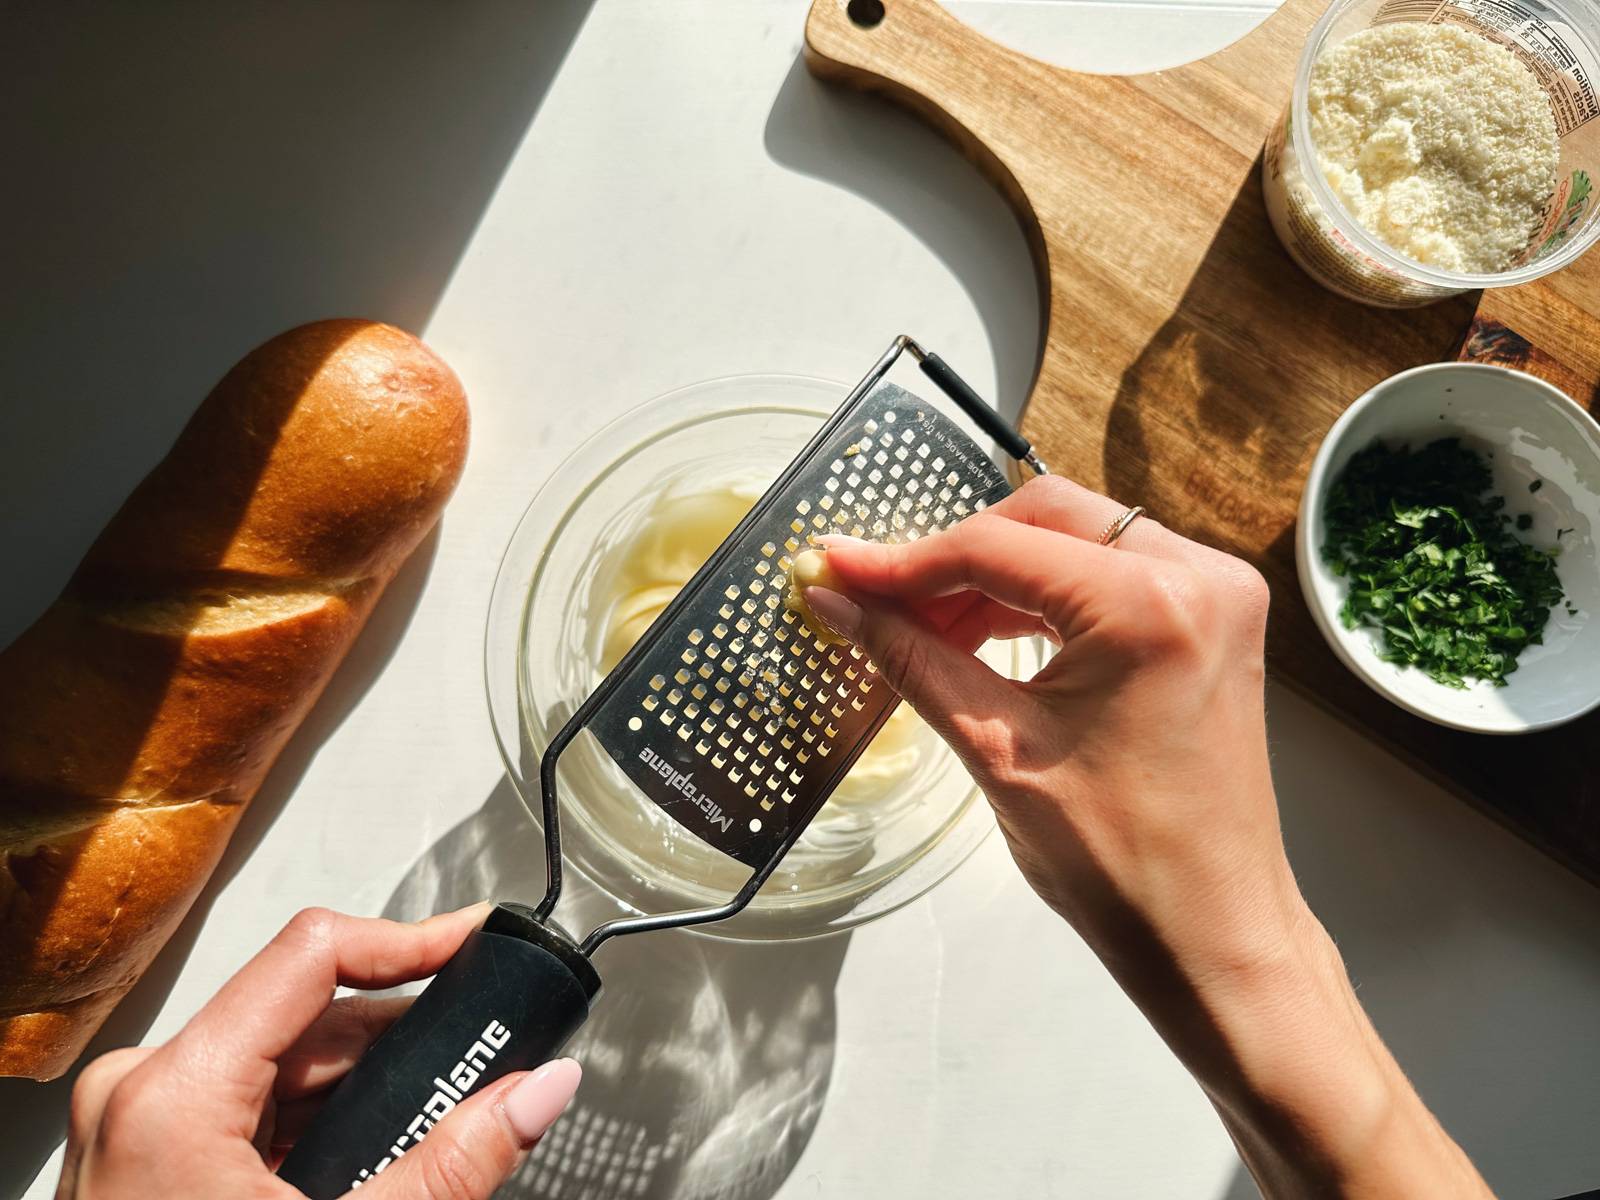
  • Garlic Cloves: these minced cloves bring the most powerful flavor that is so common in Italian recipes. Using freshly minced garlic will also bring about the best flavor.
  • Tomato Paste: adding the tomato paste helps to thicken the sauce, but it also brings a strong flavor that is heightened when stirred in and cooked after the onions and garlic are cooked.
  • Diced Tomatoes or Crushed Tomatoes: for a smoother sauce use crushed tomatoes and for a chunkier sauce go with diced tomatoes. Either one makes a delicious sauce.
  • Water: this helps to bring the sauce together and you may use more or less to thicken or thin it.
  • Sugar: This helps balance the acidity of the tomatoes with a little sweetness.
  • Worcestershire: The umami flavor this brings to the sauce makes the meatiness deeper and more complex.
  • Italian Seasoning: this classic spice adds a peppery flavor to the sauce.
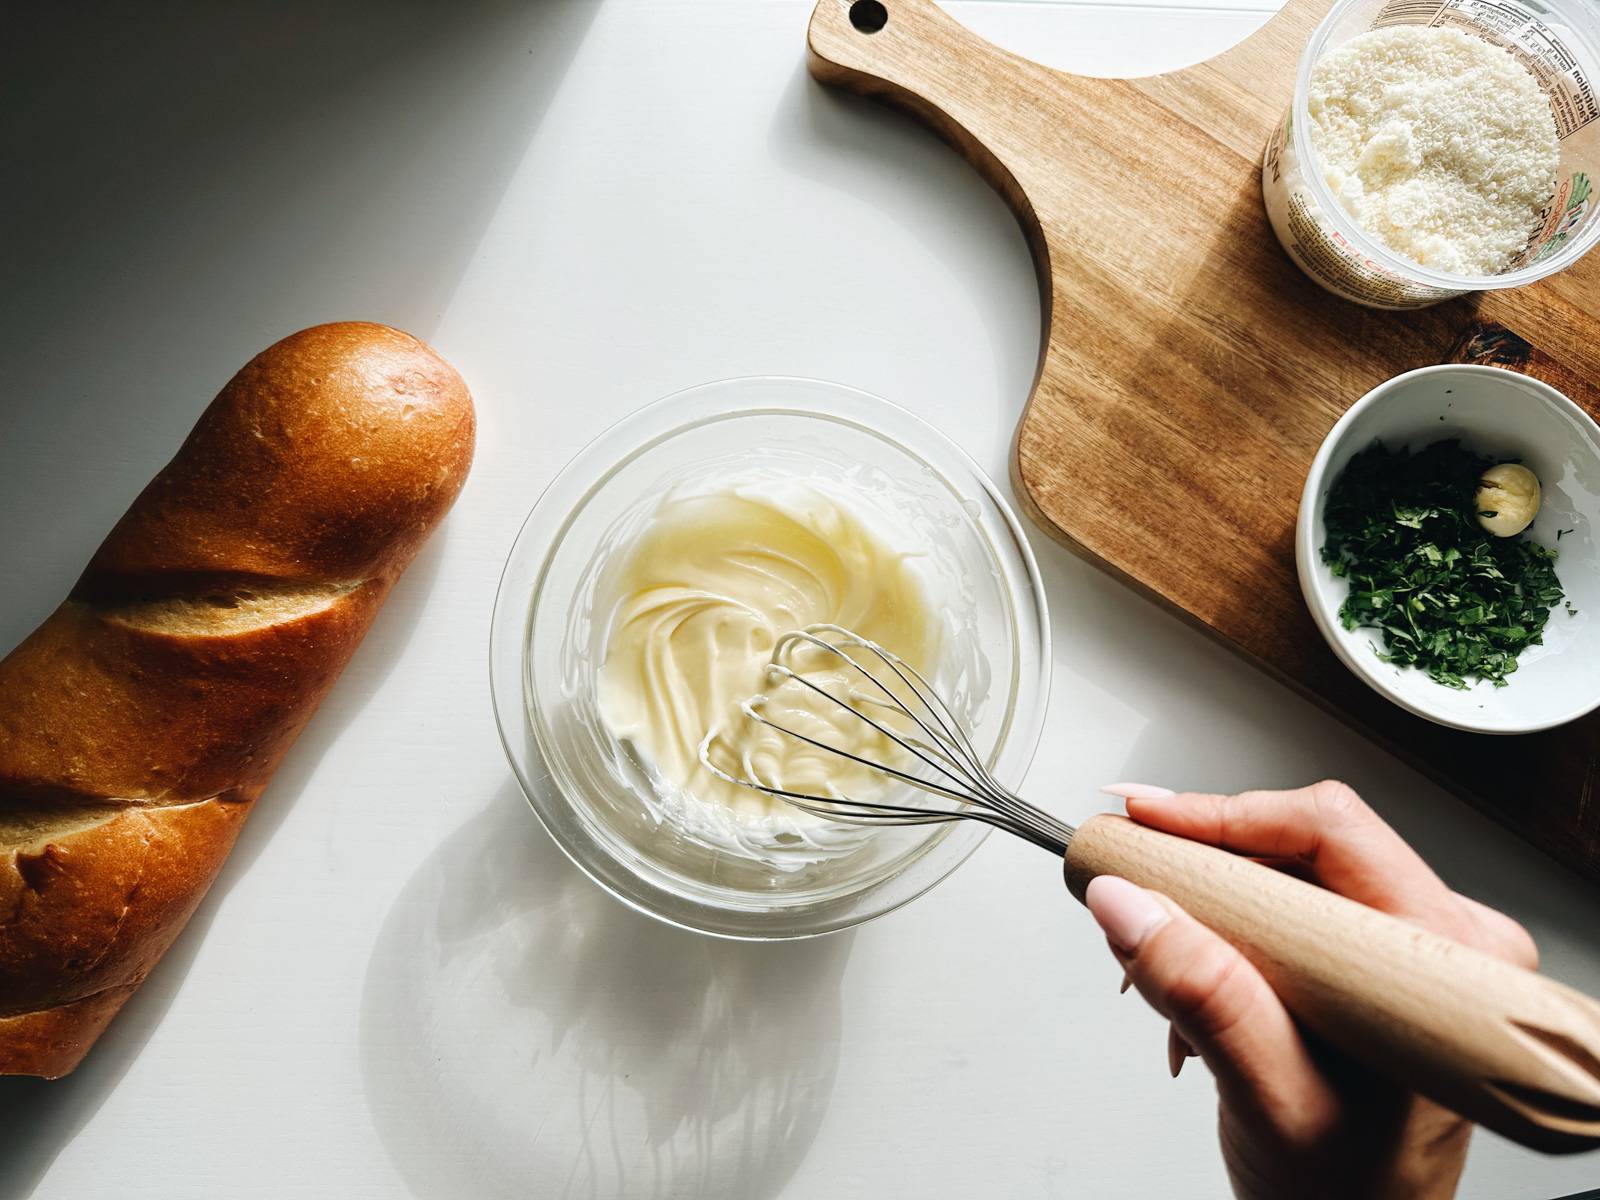
  • Grated Parmesan Cheese: Adding parmesan cheese is optional, but strongly suggested for that delicious cheesy flavor.
  • Fresh Basil: the fresh aroma of this peppery-flavored leaf also adds a small hint of mint.

How to Make Spaghetti Sauce

Follow my easy step-by-step instructions below for making homemade spaghetti sauce. You’re going to love this recipe!

  1. Brown the Meat: Add 1 tablespoon of the olive oil to a large skillet and heat over medium-high heat. Add the ground beef and Italian sausage and cook until no pink remains, breaking up the meat as it cooks. Use a slotted spoon to remove the meat from the pan and drain the fat, except for a couple of tablespoons you may leave in the pan.
  2. Sauté the Onions and Garlic: Add the remaining olive oil and the onions to the pan and cook over medium heat for 3-4 minutes, until the onions turn translucent. Add the garlic and cook for another minute, until the garlic is very fragrant.
  3. Add the Cooked Meat and Simmer the Sauce: Stir in the tomato paste and cook for another minute. Once the tomato paste becomes fragrant, add the meat and the remaining ingredients except the parmesan cheese and basil. Cook until boiling. Reduce the heat and simmer for 20-25 minutes.
  4. Stir in Cheese and Basil: Stir the parmesan and basil into the finished sauce and serve over your choice of noodles.
Close view of a wood spoon lifting up homemade spaghetti sauce.Close view of a wood spoon lifting up homemade spaghetti sauce.

Instant Pot Instructions

It’s easy to make spaghetti sauce in the Instant Pot! Follow these instructions for using the instant pot:

  1. Brown the Meat: Push the “sauté” button to heat the olive oil. Brown the meat and use a slotted spoon to remove it.
  2. Add Onion and Garlic: Add the remaining tablespoon of olive oil and then sauté the onion for 4 minutes and then add the garlic to cook for an additional 1 minute.
  3. Add Remaining Ingredients: Add the remaining ingredients except for the parmesan and basil.
  4. Seal and Cook: Cover and seal the lid. Set the manual/pressure cook button to 10 minutes. When the time is up let the pressure release naturally for 10 minutes and move the valve to vent.
  5. Stir in Cheese and Enjoy: Remove the lid and stir in the grated parmesan.

Tips for Making the Best Homemade Spaghetti Sauce

Make homemade spaghetti sauce just the way you like it! You have the control to choose the consistency, adjust the seasonings, or make it meatless. Here’s how:

  • Thinner Sauce: For a thinner sauce, that is big on tomato chunks use canned diced tomatoes.
  • Thicker Sauce: Use crushed tomatoes for a smoother sauce that has a thicker base to it.
  • Garlic: You can add more than 5 garlic cloves for added flavor. You can also substitute 1 tablespoon of garlic powder if you dislike the fresh garlic pieces’ texture.
  • Sugar: I think sugar is the secret ingredient because it enhances the tomatoes’ sweetness and balances out the acidity. You may omit the sugar if you prefer.
  • Herbs: Italian seasoning has all the wonderful herbs that add flavor to this sauce, but you may add additional oregano and fresh basil if you’d like to intensify the herbs.
  • Meatless: You can easily leave the meat out of this sauce for more of a marinara-type sauce. If you choose to leave out the meat I suggest using a 28-ounce can of crushed tomatoes and a 28-ounce can of diced tomatoes.

How to Store Spaghetti Sauce

Homemade spaghetti sauce is perfect for storing in the fridge and the freezer! I like to make a big batch to have on hand in the freezer for busy days.

  • In the Refrigerator: Place the spaghetti sauce in an airtight container. Store it in the refrigerator for up to 5 days.
  • In the Freezer: This sauce can easily be frozen and saved for later. To freeze the sauce let it come to room temperature before placing it in a ziptop bag or an air-tight storage container. Make sure to include the date. The sauce will last for about 6 months in the freezer.

Close view of homemade spaghetti sauce spooning on top of a bowl of noodles. Close view of homemade spaghetti sauce spooning on top of a bowl of noodles.

More Delicious Pasta Recipes

Pin this now to find it later

Pin It

  • Add 1 tablespoon of the olive oil to a large skillet and heat over medium-high heat. Add the ground beef and Italian sausage and cook until no pink remains, breaking up the meat as it cooks.
  • Use a slotted spoon to remove the meat from the pan and drain the fat, except for a couple of tablespoons you may leave in the pan.
  • Add the remaining olive oil and the onions to the pan and cook over medium heat for 3-4 minutes, until the onions turn translucent. Add the garlic and cook for another minute, until the garlic is very fragrant.
  • Stir in the tomato paste and cook for an additional minute. Once the tomato paste becomes fragrant, add the meat and the remaining ingredients except the parmesan cheese and basil. Cook until boiling. Reduce the heat and simmer for 20-25 minutes.
  • Stir the parmesan and basil into the finished sauce and serve over your choice of noodles.
Updated on August 29, 2024
Originally Posted on May 25, 2020

Calories: 231kcalCarbohydrates: 6gProtein: 10gFat: 19gSaturated Fat: 6gPolyunsaturated Fat: 2gMonounsaturated Fat: 9gTrans Fat: 0.3gCholesterol: 43mgSodium: 637mgPotassium: 286mgFiber: 1gSugar: 3gVitamin A: 181IUVitamin C: 4mgCalcium: 50mgIron: 2mg

Nutrition information is automatically calculated, so should only be used as an approximation.


Kalamata White Bean Dip Recipe

0


Kalamata White Bean Dip Recipe

This Kalamata olive-flavored white bean dip is the recipe you didn’t know you needed. Sure, it’s not the most appetizing-looking appetizer out there, but it’s delicious and easy to make. It’s a nice alternative to hummus and a lovely way to savor Kalamata olive flavor without feeling overwhelmed by the saltiness.

This recipe was inspired by an appetizer we ordered at Lidia’s, a local Kansas City restaurant owned by renowned chef Lidia Bastianich. Some white bean dips are downright unappetizing—they can be gloppy, too salty, or flavorless—but not this one. The Kalamata olives lend welcome richness in both texture and flavor.

Kalamata white bean dip ingredients

To make this recipe, you’ll need just a few basic ingredients—white beans (I used Cannellini, but Great Northern would also work), pitted Kalamata olives (plus a splash of brine), olive oil, salt and pepper, and an optional sprinkle of fresh basil. You’ll find serving suggestions and the full recipe below.

This white bean dip is a great impromptu recipe to whip together when guests are on their way. I’m always scrambling before guests arrive, so I like to have a repertoire of easy recipes that I can pull together in no time. This one is a winner! I hope you’ll bookmark it to make soon.

Kalamata white bean dip in food processor

How to Serve Kalamata White Bean Dip

Make a platter with whatever you have on hand—try crostini or a loaf of crusty bread, pita chips or toasted pita wedges, or crudités like carrots, cucumber and bell pepper.

For a full spread, treat it like a cheese plateadd cheese, nuts and fresh fruit. Add another dip, if you’d like. Here are more Mediterranean-style dips that would be lovely accompaniments:

You could also serve it with a fresh salad, like my Mediterranean Bean SaladEasy Tomato Salad or Fattoush Salad with Mint Dressing.

Watch How to Make White Bean Dip

Kalamata white bean dip recipe

Please let me know how your dip turns out in the comments! I love hearing from you.

white bean dip blended with Kalamata olives

Print

Kalamata White Bean Dip

  • Author: Cookie and Kate
  • Prep Time: 10 minutes
  • Total Time: 10 minutes
  • Yield: 1 ¾ cups 1x
  • Category: Dip
  • Method: Food processor
  • Cuisine: Mediterranean
  • Diet: Vegetarian

5 Stars 4 Stars 3 Stars 2 Stars 1 Star

5 from 12 reviews

Whip up this white bean dip with Kalamata olives! It easy to make with pantry ingredients and tastes delicious. The sprinkle of fresh basil is optional. Recipe yields about 1 ¾ cups of dip.


Scale

Ingredients

  • 1 can (15 ounces) cannellini or Great Northern beans, rinsed and drained, or 1 ½ cups cooked beans
  • 1 tablespoon Kalamata olive brine
  • ⅔ cup pitted Kalamata olives, well-drained
  • 1 clove garlic, roughly chopped
  • Tiny pinch of fine salt
  • 3 tablespoons olive oil, plus more for serving
  • 10 twists of freshly ground black pepper 
  • Optional garnish: A couple of fresh basil leaves, very thinly sliced
  • For serving: Crostini, pita chips, crusty bread, or crudités like carrots, cucumber and bell pepper, for serving

Instructions

  1. Combine all of the ingredients in a food processor. Blend until smooth. 
  2. Taste and add another pinch of salt if the flavor needs a boost. Transfer to a serving bowl and top with a light drizzle of olive oil and a sprinkle of basil, if using. 
  3. Leftovers will keep well in the refrigerator, covered, for up to 4 days.

Notes

Recipe inspired by Lidia’s, a restaurant in Kansas City owned by Lidia Bastianich.

▸ Nutrition Information

The information shown is an estimate provided by an online nutrition calculator. It should not be considered a substitute for a professional nutritionist’s advice. See our full nutrition disclosure here.

Did you make this recipe?

Massive Yummy Italian Salad Recipe

0


This Big Italian Salad Hits Every Time.

Lindsay headshot

I am in a salad ZONE right now. In all seasons, but especially in summer, I love a big Italian salad – salami, cheese, pepperoncini, all the spicy, briny, mouth-loving salady things.

But I do not love having to think about a dressing. I’m lazy. It’s not hard but it feels like a barrier? I don’t know.

So here’s how I’m doing Italian salads right now – and by doing, I mean, like, making every couple of days to sit outside and eat in the sun for some lunchy moments of bliss. It’s giving Olive Garden bottomless salad, but, like, more grown-up, more fun, and all-around incredible.

We’ve got shreds of romaine, chopped salami and cheese (two kinds, if you’re me), pepperoncini, paper-thin pieces of red onion, and a big spoonful of these garlic golden crispy bits that are essentially serving the purpose of a crouton in a more pleasant, less mouth-scratching format. Just a delicate, golden garlic bready crunch amidst all this flavor. Drool.

Italian salad in a bowl.

And the key component! The dressing gets slicked into every crevice of this salad – it’s just in the form of a couple of absolutely mindless, no-recipe splashes and drizzles. I use 3 things:

  • a good olive oil
  • pepperoncini brine
  • Italian seasoning

There’s already so much good stuff here with a ton of flavor, so I guess I just started to realize – why are we making a dressing for this? No need. Splish, splash, shake and done.

I’m using the DeLallo Castelvetrano Extra Virgin Olive Oil for this salad these days and it’s delightful – fruity, pleasantly bitter, with a peppery finish making it awesome for finishing which is basically all applications in this salad. Plus the squeeze bottle! Ooo baby! Love, love! It makes it THE PERFECT oil component in this recipe. I feel personally close to this bottle of olive oil right now. We’ve worked with DeLallo for years and they produce and import the best Italian products around!

To big yummy Italian salads in the sun! Let’s go!

Lindsay signature

Shrimp Po’ Boys – Price range Bytes

0


Shrimp Po’ boys are the perfect sandwich… I said what I said! These easy Po’ Boys are crunchy, creamy, and tangy, with soft, chewy French bread and a subtle ocean flavor from the perfectly cooked fried shrimp. Sigh… they make me think me back to my college days and my first trip to New Orleans. If you don’t have a trip to New Orleans planned, don’t worry! My homemade take on the classic dish means you can whip up a shrimp po’ boy sandwich anytime.

A shrimp po' boy in a basket with potato chipsA shrimp po' boy in a basket with potato chips

To say New Orleans is a magical place is one of the biggest understatements I can think of as a chef, history buff, and appreciator of the arts. The food is outstanding, the people are full of life, and the pride residents have for the city’s culture is unlike anywhere else in the United States.

The most magical NOLA experience I’ve had was about 15 years ago when I was working with a band destined for South by Southwest in Austin, Texas. After our gig in the French Quarter, we were invited to someone’s house for a crawfish boil. I’m not kidding when I tell you it was the most welcoming and delicious hang I’ve ever been a part of. One of their neighbors was practicing with their jazz band within earshot, and there were fireflies around us in the backyard as we shared the messiest flavor bomb of a meal ever, everyone eating with their hands. Like I said… New Orleans is a magical place.

What Is A Shrimp Po’ Boy?

This sandwich is a staple in New Orleans, served up hot by local restaurants, groceries, and street vendors alike. While it may seem like a simple concept – fried shrimp piled onto French bread and ‘dressed’ with lettuce, tomato, and a tangy remoulade (a mayonnaise-based sauce with mustard and spices) – it’s the history that makes them really special. Extra hot sauce for me, please!

During the 1929 streetcar strike in New Orleans, brothers Bennie and Clovis Martin (of the Martin Brothers’ Coffee Stand) offered free sandwiches to the striking workers to show their support. The original sandwiches were likely loaded with fried potatoes, roast beef gravy, and roast beef scraps. It’s said they would call out, “Here comes another poor boy!” when a striking worker approached—which eventually evolved into the term “po’ boy,” as the sandwiches are known today.

Here’s what you’ll need to make this shrimp po’ boy recipe:

  • Shrimp: Use shrimp that have been peeled and deveined, either fresh or frozen. I’ve included instructions on safely thawing frozen shrimp in the recipe card below!
  • Flour: Dip the shrimp in all-purpose flour to help the egg wash and breadcrumb coating stick.
  • Eggs: Helps the seasoned panko breadcrumbs stick to the shrimp.
  • Buttermilk: Adding buttermilk to the egg wash helps to tenderize the shrimp and create a light, crispy texture. I highly recommend using real buttermilk (the flavor is unbeatable!), but you can make buttermilk by using milk and vinegar in a pinch. Mix ⅓ cup of milk with 1 teaspoon of white vinegar and let it sit for 5 minutes before using. 
  • Panko Breadcrumbs: These absorb less oil than other breadcrumbs, giving the shrimp a lighter and crispier texture. Use plain panko breadcrumbs with no added seasonings.
  • Vegetable Oil: For frying the breaded shrimp. Any neutral-flavored oil with a high smoke point will work. Canola and grapeseed oil are good alternatives to vegetable oil for shallow frying.
  • Baguette: Traditional shrimp po’ boys are made with New Orleans-style French bread… but this isn’t always readily available outside of NOLA. I used a fresh baguette, and it was a great substitute!
  • Seasonings: Tony Chachere’s creole seasoning adds an authentic kick to the shrimp. I also add some Tony Chachere’s to the remoulade, along with smoked paprika, cayenne pepper, and fresh parsley. 
  • Remoulade Sauce: I make a quick and easy homemade remoulade sauce using mayonnaise, grainy mustard, garlic, dill pickle relish, horseradish, Worcestershire sauce, seasonings, and hot sauce (I like the Louisiana brand). If you don’t want to buy a full-size bottle, I recently saw the mini bottles of Louisiana brand hot sauce in the $1 sauce display at Walmart!
  • Iceberg Lettuce and Roma Tomatoes: Crisp iceberg lettuce and juicy Roma tomatoes add a refreshing crunch to your fried shrimp po’ boy sandwich.

Are Po’ Boys Always Shrimp?

Nope! Shrimp po’ boys are probably the most popular, but you can have any type of filling you desire. A little walk down the streets of New Orleans, and you’ll find po’ boys stuffed with anything from roast beef and gravy to fried oysters or catfish and even alligator sausage! You could make a killer veggie option, too, using fried green tomatoes or BBQ tofu.

Storage Instructions

The fried shrimp will last for 3 days in the refrigerator, but will not be as crispy as when freshly-made. Let the shrimp cool completely before storing them in an airtight container. To reheat, pop them in the air fryer at 350°F for 2-4 minutes, or in the oven at 350°F for 5-7 minutes, flipping halfway. Store the shrimp po’ boy sauce in an airtight container in the refrigerator for up to a week. Just give it a good stir before serving! It makes a great dip for fresh vegetables, too!

Side view of a shrimp po' boy on a wooden cutting boardSide view of a shrimp po' boy on a wooden cutting board


Shrimp Po’ Boys Recipe

This Shrimp Po’ Boys recipe is creamy and tangy with crispy fried shrimp and a homemade remoulade sauce. Easy to make and full of flavor!

Overhead view of a shrimp po' boy in a basket with potato chipsOverhead view of a shrimp po' boy in a basket with potato chips

Prevent your screen from going dark

Fried Shrimp Ingredients

  • 1 lb large peeled and deveined shrimp ($5.68)
  • cup flour ($0.05)
  • 2 eggs ($0.34)
  • cup buttermilk ($0.11)
  • 3 tsp Tony Chachere’s seasoning, divided ($0.06)
  • 1 tsp freshly cracked black pepper ($0.02)
  • ¼ cups plain panko breadcrumbs ($0.46)
  • 1 cup vegetable oil* ($0.89)

Remoulade Ingredients

  • 1 ½ cups mayonnaise ($1.68)
  • ½ tsp hot sauce ($0.02)
  • 2 Tbsp grainy mustard ($0.12)
  • 2 cloves garlic, minced ($0.05)
  • 3 Tbsp dill pickle relish ($0.24)
  • 1 Tbsp prepared horseradish ($0.14)
  • 1 tsp Worcestershire sauce ($0.01)
  • ½ tsp smoked paprika ($0.08)
  • tsp cayenne ($0.03)
  • 1 Tbsp fresh parsley, minced ($0.05)

Sandwich Fixin’s

  • ¼ head of iceberg lettuce, finely chopped ($0.47)
  • 2-3 roma tomatoes, diced ($0.42)
  • 1 baguette** ($1.97)
  • To prepare your shrimp for frying, thaw them in gently running cold water until soft and pliable, about 15 minutes. You can also thaw them in the refrigerator overnight. Always avoid thawing seafood on the countertop, microwave, or using hot water.

  • While your shrimp is thawing, prepare your remoulade by adding mayonnaise, hot sauce, grainy mustard, garlic, dill pickle relish, horseradish, Worcestershire sauce, 1 tsp Tony’s, smoked paprika and cayenne pepper to a mixing bowl.

  • Whisk to combine and set aside.

  • In 3 separate mixing bowls, prepare your steps for frying; in bowl #1, you will want to have the flour. Then, in bowl #2, you will want to beat together the eggs and buttermilk. In bowl #3, you will want to mix 2 tsp Tony’s, black pepper, and panko.

  • First, toss your shrimp in the #1 bowl of flour.

  • Then, dip the floured shrimp in the #2 bowl of beaten egg and buttermilk.

  • Finally, toss the shrimp in the panko spice mix. (I like to get all of my shrimp ready to fry at the same time so when it comes time to drop them in the oil, I can focus on the frying shrimp without the risk of burning a batch.)

  • In a heavy bottomed skillet, heat up the vegetable on medium heat. The oil should be around 350 to 375 degrees, but hotter than that will burn your oil and result in poor flavor. You can use a meat thermometer to check.

  • Once your oil is ready to fry, use tongs or a fork to place enough shrimp in the oil without overcrowding. Flip after 1-2 minutes with tongs. (Just 1-2 minutes on each side will do!)

  • Place the fried shrimp onto a plate lined with a paper towel to drain excess oil.

  • Once your shrimps are all golden fried, make your shrimp Po’ Boys! I recommend you be generous with that remoulade! Enjoy with shaved iceberg lettuce, extra hot sauce, and chopped tomatoes in a sliced baguette.

See how we calculate recipe costs here.


* Other suitable oils for shallow frying include: avocado, canola, corn, safflower, sunflower, and grapeseed oil. Vegetable oil is a budget-friendly blend of oils with high smoke points of 400–450°F and it’s flavor is neutral.
** Po’ Boys are typically served on a freshly made French bread, but the best we can do here that’s widely available in Nashville is a baguette, so hopefully this works for you, too, wherever you call home!

Serving: 1sandwichCalories: 947kcalCarbohydrates: 33gProtein: 19gFat: 82gSodium: 2425mgFiber: 2g

Read our full nutrition disclaimer here.

A shrimp po' boy with lettuce and tomato in a basketA shrimp po' boy with lettuce and tomato in a basket

how to make Shrimp Po’ Boys – step by step photos

Shrimp defrosting in waterShrimp defrosting in water

To prepare the 1lb of shrimp for frying, thaw them in gently running cold water until soft and pliable, about 15 minutes. You can also thaw them in the refrigerator overnight. Always avoid thawing seafood on the countertop, microwave, or using hot water.

Ingredients for remouladeIngredients for remoulade

While your shrimp is thawing, prepare your remoulade by adding 1 ½ cups mayonnaise, ½ tsp hot sauce, 2 Tbsp grainy mustard, 2 cloves minced garlic, 3 Tbsp dill pickle relish, 1 Tbsp prepared horseradish, 1 tsp Worcestershire sauce, 1 tsp Tony Chachere’s seasoning, ½ tsp smoked paprika and ⅛ tsp cayenne pepper to a mixing bowl.

Remoulade in a bowl for shrimp po' boysRemoulade in a bowl for shrimp po' boys

Whisk to combine and set aside.

a bowl with flour, a bowl with whisked eggs, a bowl with breadcrumbs and shrimp, and a bowl with breaded shrimp for shrimp po' boysa bowl with flour, a bowl with whisked eggs, a bowl with breadcrumbs and shrimp, and a bowl with breaded shrimp for shrimp po' boys

In 3 separate mixing bowls, prepare your steps for frying; in bowl #1, you will want to have ⅓ cup of flour. Then, in bowl #2, you will want to beat together 2 eggs and ⅓ cup buttermilk. In bowl #3, you will want to mix 2 tsp Tony’s, 1 tsp black pepper, and ¼ cups plain panko.

First, toss your shrimp in the #1 bowl of flour. Then, dip the floured shrimp in the #2 bowl of beaten egg and buttermilk. Finally, toss the shrimp in the panko spice mix. (I like to get all of my shrimp ready to fry at the same time so when it comes time to drop them in the oil, I can focus on the frying shrimp without the risk of burning a batch.)

Breaded shrimp deep frying in a skilletBreaded shrimp deep frying in a skillet

In a heavy bottomed skillet, heat up 1 cup vegetable on medium heat. The oil should be around 350 to 375 degrees, but hotter than that will burn your oil and result in poor flavor. You can use a meat thermometer to check. Once your oil is ready to fry, use tongs or a fork to place enough shrimp in the oil without overcrowding.

Golden brown breaded shrimp deep frying in a skilletGolden brown breaded shrimp deep frying in a skillet

Flip after 1-2 minutes with tongs. (Just 1-2 minutes on each side will do!)

Deep fried shrimp on a paper towelDeep fried shrimp on a paper towel

Place the fried shrimp onto a plate lined with a paper towel to drain excess oil.

Sliced baguette, tomatoes, and lettuce for shrimp po' boysSliced baguette, tomatoes, and lettuce for shrimp po' boys

Once your shrimps are all golden fried, make your shrimp Po’ Boys! I recommend you be generous with that remoulade! Enjoy with ¼ head shaved iceberg lettuce, extra hot sauce, and 2-3 chopped roma tomatoes in a sliced baguette.

Shrimp Po’ Boys – Price range BytesShrimp Po’ Boys – Price range Bytes

It’s the perfect sandwich that will have you booking tickets to New Orleans during Carnival season in no time!

Seedy Tahini Snack Bites (Nut-Free!)

0


Picking up a seedy nut-free tahini snack bite from a stack with more bites

Nut-free friends, this one’s for you! We’re no strangers to energy bites (and cake bites… and cookie bites…), but a nut-free version of these snackable treats was long overdue! 

With dates, tahini, pumpkin seeds, and hemp seeds, these tasty snacks are nutrient-packed and SO easy to make! They’re perfect for lunch boxes, party platters, or just grabbing out of the refrigerator when you need a treat. Let us show you how it’s done!

Hemp seeds, dates, tahini, chocolate chips, rolled oats, pumpkin seeds, vanilla extract, and sea salt

These EASY, delicious snack bites have a wholesome base of oats, pumpkin seeds, and hemp seeds. Dates and tahini bind them together — and the dates also add sweetness while the tahini adds richness. The remaining ingredients are vanilla and salt for flavor!

Food processor with blended dates, rolled oats, pumpkin seeds, hemp seeds, tahini, and sea salt

To make these snack bites, start by blending up the dates in a food processor to ensure even distribution of the sweetness. Next, you’ll break up the blended dates and add the remaining ingredients. A few more pulses in the food processor and they’re ready to roll!

Energy bite mixture in a food processor

Enjoy these snack bites as-is, roll them in hemp seeds, or, if you’re craving a little decadence, add a chocolate-tahini topping + flaky salt!

Plate of tahini snack bites with some plain, some rolled in hemp seeds, and some drizzled with chocolate

We think you’ll LOVE these snack bites! They’re:

Chewy
Naturally sweet
Wholesome
Nut-free
Easy to make
& SO snackable!

They’re the perfect snack to pack in lunch boxes, have around for workweek snacking, or add to a party platter for something a little different!

More Energy & Snack Bite Recipes

If you try this recipe, let us know! Leave a comment, rate it, and don’t forget to tag a photo @minimalistbaker on Instagram. Cheers, friends!

Close up photo of a partially eaten nut-free tahini snack bite topped with hemp seeds

Prep Time 45 minutes

Total Time 45 minutes

Servings 12 (~1 Tbsp) snack bites

Course Snack

Cuisine Gluten-Free, Vegan

Freezer Friendly 1 month

Does it keep? 5-7 Days

Prevent your screen from going dark

  • 3/4 cup tightly packed pitted medjool dates (10-12 large dates yield ~3/4 cup or 150 g)
  • 1/3 cup old-fashioned rolled oats (ensure gluten-free as needed)
  • 1/4 cup tahini (creamy, drippy // find our favorite brands here)
  • 1/4 cup pumpkin seeds (also called pepitas)
  • 2 Tbsp hemp seeds (plus more for rolling, if desired)
  • 1/2 tsp vanilla extract*
  • 1/8 tsp sea salt

CHOCOLATE TOPPING optional

  • 2-3 Tbsp semi-sweet chocolate chips or chunks (dairy-free as needed)
  • 1 tsp tahini
  • Flaky sea salt
  • To a food processor, add pitted dates and process until broken down and the dates have formed a “date ball” — about 1 minute. Break up the “date ball” into smaller pieces, then add the remaining ingredients: oats, tahini, pumpkin seeds, hemp seeds, vanilla, and sea salt. Process until well combined, scraping down the sides as needed. The mixture should be a bit loose and “chunky” — and not so wet that it sticks to your fingers. If too wet, add more oats 1 Tbsp at a time. If too dry, add a little more tahini.
  • CHOCOLATE TOPPING (optional): ​​Add the chocolate chips and tahini to a small glass or metal bowl. Carefully place the bowl on top of a saucepan with simmering water. Heat, stirring occasionally with a spatula or spoon, until melted and no lumps remain (~5 minutes). You can also melt the chocolate and tahini in a heat-proof bowl in the microwave in 15-second increments until melted.

  • Place a small plate or dish nearby for your bites and, if desired, add hemp seeds to a small mixing bowl. Then, scoop out 1 Tbsp amounts and form into balls, dropping some of them into the hemp seeds if desired. We drizzled some with chocolate + a sprinkle of sea salt and rolled some in hemp seeds (both toppings optional).

  • Place finished bites on your plate or dish and transfer to the refrigerator to firm up (at least 30 minutes for best texture). Enjoy! Leftover bites keep in a sealed container in the refrigerator for 5 to 7 days or in the freezer for 1 month.

*If not nut-free, almond extract is also super tasty in these!
*Prep time includes chilling.
*Nutrition information is a rough estimate calculated without optional ingredients.

Serving: 1 serving Calories: 96 Carbohydrates: 12.5 g Protein: 2.6 g Fat: 4.9 g Saturated Fat: 0.7 g Polyunsaturated Fat: 2.4 g Monounsaturated Fat: 1.5 g Trans Fat: 0 g Cholesterol: 0 mg Sodium: 30 mg Potassium: 155 mg Fiber: 1.8 g Sugar: 8.5 g Vitamin A: 3 IU Vitamin C: 0 mg Calcium: 33 mg Iron: 1 mg


Watermelon Salad with Feta and Mint Recipe

0


Watermelon Salad with Feta and Mint Recipe

If you enjoy watermelon, this is your new summer salad. This simple watermelon salad recipe features classic Mediterranean flavors like tangy crumbled feta and fresh mint. Roughly chopped pistachios, lightly pickled shallots and a drizzle of olive oil make it taste incredible.

The layering method might make this salad look fancy, but it’s easy to make and yields a stunning display. Grab your largest platter for this recipe so the ingredients can be evenly distributed and scooped without stirring. The composition of this salad helps avoid the watery watermelon, messy-looking feta situation that plagues many watermelon salads.

watermelon salad ingredients

This watermelon salad was inspired by one we tasted in Tampa last summer. I loved the pistachios sprinkled on top. They offered the perfect crunch, and the green color contrasted beautifully with the bright red watermelon.

I’m still obsessed with the vinegar-soaked shallot that I used on this Watermelon Salad with Herbed Yogurt Sauce, and it worked just as well here. The shallots are lightly pickled, so they’re tangy but less pungent, and a drizzle of the leftover vinegar brightens up the whole salad.

Isn’t it lovely? This beautiful salad is sure to be a hit at your summer parties.

shallots on cubed watermelon

How to Choose Your Watermelon

To make the best watermelon salad, start with a great watermelon. It’s a bummer to slice into a watermelon and find pale, flavorless fruit. I’m partial to the Sugar Baby heirloom variety that you see in these photos. Sugar Babies are almost solid, dark green on the outside, often nearly seedless, with a wonderfully sweet flavor.

When you choose a watermelon, look for one that is:

  • Heavy for its size
  • Dull, not shiny
  • Evenly shaped
  • Darker green, with a yellow to orange “field spot” that indicates it sufficiently ripened on the vine (the stronger the yellow-orange color, the better)

Uses for Leftover Watermelon

For this recipe, you’ll need half a small watermelon (3 pounds, or about 4 cups cubed). Our toddler loves watermelon, so she takes care of the leftovers for us.

If you don’t have a watermelon-obsessed tot in your household, here are some more ways to enjoy watermelon:

how to make watermelon salad

Watermelon Salad Serving Suggestions

This refreshing watermelon salad could inspire a full summertime spread. Try serving it with other warm-weather favorites that won’t heat up the house, like Caprese sandwiches or grilled options like pizza or veggie burgers. For complementary flavors, look for recipes using fresh mint, basil or pesto. Here are a few of my top recommendations:

Watch How to Make Watermelon Salad

watermelon salad with feta and mint

More Salads to Make This Summer

These refreshing salads make the best of summer produce like ripe berries, tomatoes and cucumber.

Please let me know how your watermelon salad turns out in the comments! I love hearing from you.

watermelon salad on plate

Print

Watermelon Salad

  • Author: Cookie and Kate
  • Yield: 6 to 8 side servings 1x
  • Category: Salad
  • Method: By hand
  • Cuisine: Mediterranean
  • Diet: Vegetarian

5 Stars 4 Stars 3 Stars 2 Stars 1 Star

5 from 4 reviews

This classic watermelon salad recipe features crumbled feta and fresh mint. Lightly pickled shallots and chopped pistachios make it amazing! Recipe yields 6 to 8 side salads.


Scale

Ingredients

  • 1 medium-to-large shallot or ½ small red onion, sliced very thinly (about ½ cup)
  • 3 tablespoons sherry vinegar or red wine vinegar
  • ¼ teaspoon fine salt
  • 3 pounds ripe seedless watermelon (about ½ small round watermelon or 4 cups cubed), cut into ¾″ cubes
  • ½ cup crumbled feta (about 2 ounces)
  • ⅓ cup roasted and salted pistachios, chopped
  • ¼ cup extra-virgin olive oil
  • Small handful of fresh mint and/or basil leaves, torn if large, for garnish
  • Flaky salt or kosher salt, to taste

Instructions

  1. In a small bowl, combine the sliced shallot with the vinegar and fine salt. Toss to combine, and place in the refrigerator to lightly pickle while you prepare the remaining ingredients (at least 10 minutes).
  2. Spread the cubed watermelon over a large platter or shallow serving bowl. Arrange the pickled shallot on top, and spoon the leftover vinegar over the salad. Sprinkle the feta and pistachios on top. 
  3. Drizzle the olive oil all over. Finish the salad with a sprinkle of fresh herbs and flaky salt. This salad is best enjoyed within an hour or two, but will keep in the refrigerator for up to 4 days.

Notes

Prepare in advance: Since watermelon starts releasing moisture once it comes into contact with salt, your best bet is to arrange the cubed watermelon across a platter and store everything separately until it’s close to serving time. Or, at minimum, wait to sprinkle flaky salt on top until it’s time to serve.

Make it dairy free/vegan: Omit the feta. You might like some roughly chopped, pitted Kalamatas in its place.

▸ Nutrition Information

The information shown is an estimate provided by an online nutrition calculator. It should not be considered a substitute for a professional nutritionist’s advice. See our full nutrition disclosure here.

Did you make this recipe?

Fluffy Pancakes

0


I first posted this pancake recipe in 2006, and figured it was time to elaborate a bit. This is a recipe I use a lot, resulting in a beautiful, classic stack of pancakes with impossibly tender crumb and golden edges. The pancakes have lightness and lift, and good color. That said, the real reason I love this recipe is because it’s endlessly adaptable. I’ve used it as a base pancake recipe and jumping off point for endless pancake adaptations and I heartily encourage you to do the same. You can experiment with a range of flours, liquids, and add-ins, and I list off a number of suggestions below. If you’re looking for classic pancakes to make when camping, your search is over.
Fluffy Pancakes Recipe

Let’s Make a Great Pancake Batter

The best pancakes start with great batter. You don’t want your batter too thick, because pancakes made with really thick batter tend to cook well on the outside, but the inside they can be undercooked. Worse, in my opinion, is too thin pancake batter. Don’t get me wrong, I love a good crepe, but if you’re after the perfect fluffy weekend pancake? You don’t want your batter spreading out all over the pan. This recipe hits that perfect middle mark. And you can use a range of liquids, depending on what is in your refrigerator. 

Buttermilk, Yogurt, or Milk? – use what you’ve got!

You can make these pancakes with just about any liquid you have on hand. I’ve listed them in order of preference. Buttermilk is wonderful, but yogurt works like a dream too. Not everyone keeps buttermilk on hand, but many people have a cup of yogurt. Go for it! Thin Greek yogurt with an equal amount of water, so for this recipe I’d combine 1 cup + 2 tablespoons Greek Yogurt with the same amount of water. If you’re using a standard yogurt don’t bother thinning it.

Both of the above (buttermilk or yogurt) are A-plus choices. Don’t have other of those? Dairy milk, oat milk, and almond milk will all give you good results. When using one of these, allow the batter to sit for 5-10 minutes before cooking, allowing the batter to thicken a bit.

Experiment with Different Flours in Your Pancakes

I’ll start by saying, you can use all-purpose flour in these pancakes. But, by all means, experiment with more nutritious whole-grain flours if you have them (I have suggestions below and in the recipe). White whole wheat flour works wonderfully here. It’s the Trojan horse of whole-grain flours, because for finicky people who won’t eat anything brown or wholesome you can pass it off as white. It is made from a strain of hard white winter wheat berries and the nutritious bran and germ aren’t processed out the way they are in all-purpose white flour. The white whole wheat flour makes for a tender crumb.

Rye Pancakes: Replace about 1/2 of the all-purpose flour with rye flour.

Oatmeal Pancakes: Replace 1/3 cup of the flour with quick-cooking oats or uncooked oats you’ve blitzed in a blender. These pancakes are particularly good with slices of banana cooked in. Sprinkled with a bit of brown sugar in place of syrup.

Tiny Grain Pancakes: Stir 1/2 cup cooked quinoa or millet into your batter.

Blueberry Beet Pancakes (Vegan):  If you’re looking for a colorful vegan pancake variation – hearty, substantial, delicious, and kid-friendly. 

Variations From other Cooks

A number of you have left helpful comments for tweaks and variations to this recipe over the years and I wanted to list off a couple:

Lactose Intolerant: Jenny noted, “I just made these this morning for my lactose-intolerant twins, substituting the 2 1/4 C buttermilk for 1C soy milk. They were absolutely awesome! I ground 2 C wheat berries, which made 4C flour, and doubled the recipe for my large family.”

Lots of Bran: Rachael says, “I would really encourage you to try adding bran to your waffles or pancakes next time. I substitute up to half of my flour with bran (sometimes have to reduce the liquid a bit or add in something thicker, like yogurt, because the bran doesn’t absorb milk)… it lends a wonderfully nutty flavor to things and it lightens the texture substantially, not to mentioned the good-for-you fiber.

Extra Credit Fluffy

I’ve tweaked the recipe here to have you separate your eggs, and beat the whites into fluffy peaks. It’s an annoying step, and requires extra effort, but is arguably worth it. You fold the whites into your batter as a last step before cooking, and it adds a really nice lightness to the pancake batter. That said, if you’re not feeling up to it, no big deal – lightly beat the two eggs and add them to the liquid mixture.
Fluffy Pancakes Recipe

Favorite Toppings for your Pancakes

  • Whole Blueberry Maple Syrup: This is my favorite syrup for these pancakes and worth the bit of extra effort to make. It’s delicious, fragrant and beautiful without being overly sweet. To make blueberry maple syrup put half of a 6-ounce basket of blueberries, 1/4 cup sugar, 1/4 cup maple syrup, and 2 tablespoons of water in a medium saucepan over medium-low heat. Heat and stir until the sugar dissolves. Simmer for 5 or 6 minutes or until the blueberries begin to split. Remove from heat and press the blueberry mixture through a fine strainer into a bowl. Mash the fruit to get all the juiciness extracted. Throw out the solids. Stir the remaining blueberries into the warm syrup and set aside. You can use whatever sugar you like here – white, brown, coconut sugar, etc.
  • Homemade Blackberry Syrup: For blackberry fans who enjoy a bit of feistiness, this is your syrup. It’s slow-burning, sweet and spicy. Inspired by a recipe in the September 2007 issue of Gourmet Magazine, it’s great not only over pancakes and waffles, it’s also aces in oatmeal, and in all sorts of drinks and spritzers.
  • Churro-style Cinnamon Sugar: Combine 2 tablespoons cinnamon with 1/2 cup sugar and stir well. Sprinkle generously across hot buttered pancakes. You can experiment with the sugar blend beyond this as well, adding a pinch of ground cloves or curry powder, and/or crushed rose petals.
  • Roasted Strawberries: These jammy gems are a favorite topping. You can make them ahead of time and refrigerate for up to a week.
  • Compound Butters: One of my favorite pancake toppings for a weekend brunch. Make a compound butter or two and let people choose.

Tasty Pancake Add-Ins

  • Berries: If you’re adding berries to your pancakes, add them to your pancakes after they’re on the griddle. This way your pancake batter retains its color.
  • Bananas: If you’re adding slices of banana to your pancakes, add them after the pancakes are on the griddle.
  • Boosts: Adding a boost of oat bran, wheat germ, chia seeds, nutritional yeast, kale or beet powder, hemp or flax seeds is always an option. I usually start with a tablespoon or two.

Some Cooking Tips

My pan of choice for pancakes is cast iron, but any pan that holds steady heat is fine. The key is getting and maintaining the right temperature. Too much heat and you end up with burned pancakes that are under-cooked in the middle. Too little heat, and they take forever to cook, and they end up with a bit dry with a toughened crumb. I tend to start  at a lower temperature than I think I’ll want, and creep it up from there. 

What Kind of Pan is Best for Pancakes?

Related to the above sentiment, I nearly always use my favorite well-seasoned cast iron pan to make pancakes. That said, I keep a non-stick skillet on hand for omelettes and the like. Both pans cook these pancakes well, but the non-stick pan makes beautiful, golden, perfect-looking pancakes. The cast iron pan pancakes taste very similar, they just aren’t as uniform or golden in color. And maintaining a steady temperature seems easier using cast iron.

How do I Know When to Flip My Pancakes?

For starters, when cooking pancakes, your pan shouldn’t be too hot, or too cool. If the pan is too hot, the pancakes end up overcooked before the insides have time to cook. Alternately, when the pan is too cool, pancakes take too long to cook and it impacts the texture negatively. So, control the temperature of the pan, flip when perfectly golden, and finish the second side. The batter should be set throughout and you’re ready to ladle in your next round of pancakes.  Flip pancakes with a thin spatula when the bottoms are golden. You should also see bubbles coming up. 

Keep Those Pancakes Warm!

Unless you have a griddle, or multiple pans going, you’re going to need make your pancakes in batches. And you don’t want your first round to go cold while you’re making the next. If you have a cooling rack you use for cookies, you can deploy it here. Place pancakes, preferably in a single layer, on the cooling rack after transferring from the skillet, and place them in a 200F oven to keep warm. I like the cooling rack better than a plate because it allows air to circulate around the entire pancake. This way, the bottom sides of the hot pancakes won’t get soggy.

How to Make Pancake Mix Ahead

I often make a pancake mix in a jar and and add the liquid ingredients just before I’m ready to make them. Simply combine the flour, baking powder, baking soda, sugar, and salt in a Mason jar. The morning you want to make pancakes combine the buttermilk, egg yolks, and melted butter (or alternately, olive oil), fold in whipped egg whites, and you’re ready to go.

Can I Freeze these Pancakes?

You can! Allow pancakes to cool completely. Arrange them on a parchment-lined baking sheet in a single layer, and freeze. Transfer to a freezer bag or container. Reheat pancakes by placing them on a baking sheet, cover tightly with foil and place in a 350F until hot, 10 minutes or so. If you don’t want to heat the oven, you can thaw them in the skillet you originally cooked them in. Another choice is to pop them in the toaster for a quick breakfast, you get a bit more crispness, but still good! Freeze for up to two months.

Home Favourite Garlic Bread Recipe

0


My go-to for garlic bread! French bread, butter, fresh garlic, garlic powder, Parmesan, and parsley. It’s so simple and so ridiculously good.

I mean, you can make what you want for dinner, but what gets people excited is the garlic bread.

This is our house favorite garlic bread, the one I make almost weekly at this point – it’s generous with the butter and Parmesan, solidly garlicky, and flecked with herbs to really make it pop. It’s classic, it’s versatile, and it’s so ridiculously good.


House Favorite Garlic Bread


Why I Love This Garlic Bread

Slices of garlic bread on a cutting board.

Garlic bread is something that I’ve spent a stupid amount of time thinking about over the last 2-ish years.

We did a soup series a few years ago, and I was thisclose to posting a garlic bread recipe in the series, but I never quite locked it in. I just could never commit to a certain type of bread, or a particular texture, or just a general look and feel. Do we want it crusty? Chewy? Hearty? Or light and toasty?

A few years and many batches of garlic bread later, and I think I’ve landed. And we are garlic bread happy over here.

This is the house favorite garlic bread at the Ostrom household these days – beautifully springy French bread as the base, generously slathered with butter and Parmesan, appropriately garlicky but not overdone (and important balance, even for garlic bread), and flecked with bits of fresh herb to just elevate the eating experience.

The end result is golden brown, buttery and savory, with a satisfying bite and chew to it while at the same time staying toasty and light. It makes for elite dipping, sopping, and scooping, which is a top quality for me when it comes to garlic bread.

Another important quality: this is fast. In our house, garlic bread is usually a bonus meal item (served with spaghetti, soup, etc.) in which case I’m willing to give it 15 minutes of my life, but no more.

Current favorite way to eat this garlic bread: dunked in a rich tomato soup or scooping up this amazing baked tortellini. I have an exceptionally easy, classically delicious one that I’m going to share soon. Stay tuned.


Ingredients For This Amaze Garlic Bread

There aren’t many! Yay!

Ingredients for garlic bread - a baguette, parmesan cheese, butter, garlic, and parsley.
  • French bread (more on that in a second)
  • Butter
  • Garlic (I use both fresh garlic and a pinch of garlic powder)
  • Parmesan cheese
  • Parsley

Which leads us to the most important decision one can make about garlic bread, I think.

What Type of Bread is Best for Garlic Bread?

This is something that I’ve spent a stupid amount of time thinking about, and all of it comes down to this:

What do you really want from your garlic bread?

We need to anchor its identity. Do you want it to sop up sauces? Do you want it to give you a hearty, crusty chunk that you can sink your teeth into? Do you just want it to be a vehicle for that Parmesan-laced garlic butter flavor? Is it standing on its own or coming alongside something else?

The two main breads that are easiest to think about for garlic bread, I think, are these two, which are labeled in the store as “French bread” and “baguette”.

Two loaves of bread - a baguette and French bread.

I have made multiple rounds of this garlic bread on both types of bread, and they’re both delicious.

But ultimately I’ve found that I prefer French bread because it has a more even crumb with fewer holes, giving you a flatter surface area to spread the butter mixture and therefore a more even golden brown topping to your garlic bread.

French bread is on the lighter and fluffier side, which, to be honest, gave me pause. I generally like a really hearty bread that has some density, crunch, and chew to it. But after many many batches of this, I’ve actually really enjoyed the lightness of the French bread because it can kind of be both – it gets crunchy and chewy with the golden browning of the Parmesan on top, but it’s light enough to sop up whatever sauces and soups you’re eating it with.

I’ve also seen garlic bread made with challah, and sourdough, and ciabatta, and being that it’s garlic bread – I kind of don’t think you can go wrong. But if you’re asking me (and you are on my website!) in the year of our Lord 2023, I’m going with French bread.


How To Make This Garlic Bread

Step 1: Soften your butter.

I do this in the microwave, in short increments, and then whisk it to get it smooth-ish. Cutting it into uniform chunks (like the photo above) will help it soften at an even rate.

Whisking butter in a bowl to spread on bread.

Step 2: Grate that garlic right in there.

My hot take: anything more than one clove is overpowering and generally unpleasant. Stop at one!

It doesn’t seem like it will be enough, but trust me. Even for me – a self-proclaimed garlic lover – one clove is plenty.

Grating garlic into bowl of butter.

Step 3: Add Parmesan and parsley.

Finely grated Parmesan cheese is where it’s at! That savory flavor and golden browning – YUM.

I also like to add a little bit of garlic powder at this point just to slightly extend my garlick-ing of things (but with more subtlety than fresh garlic).

Adding parmesan and parsley to the bowl of butter and garlic.

Step 4: Spread that amazingness on your bread.

I find this amount of butter mixture is good for half of a long loaf of French bread.

Spreading butter mixture onto half a loaf of bread.

Really, really coat it. Layer it on. Be generous.

Butter mixture spread across half a loaf of bread.

Step 5: Bake it!

If you don’t want any browning, first of all, why? It’s delightful. Second of all, you’ll just want go for more like 375 to 400 degrees for 7-10 minutes.

If you like it a little golden brown, like I do, with a bit of texture on top, shoot for 10 minutes at 400 to 425 degrees. Just keep an eye on it and nudge it up as needed.

Baked garlic bread on a sheet pan.

Cut those halves into strips and get straight to the dunking!

Dipping a slice of garlic bread into a bowl of tomato soup.

Print

clock clock iconcutlery cutlery iconflag flag iconfolder folder iconinstagram instagram iconpinterest pinterest iconfacebook facebook iconprint print iconsquares squares iconheart heart iconheart solid heart solid icon

Description

My go-to for garlic bread! French bread, butter, fresh garlic, garlic powder, Parmesan, and parsley. It’s so simple and so ridiculously good.


  1. Preheat the oven to 400 degrees. 
  2. Soften the butter in the microwave in short increments. I like to whisk it to get it smoothed out a bit.
  3. Grate the garlic directly into the butter. Add the garlic powder, Parmesan, and parsley; stir to combine.
  4. Cut the French bread in half and spread with the butter mixture (this amount of butter is good for half of one large French bread loaf – see photos above).
  5. Bake for 9-10 minutes in the middle of the oven, adding an extra 1-2 minutes or bumping to 425 at the end for more browning.
  6. Remove from the oven, cut into slices, and serve. Life is good.

Notes

For the exact amount of bread, see photos above! The photo with the French bread next to the baguette – that shows how much bread I use for this amount of butter. It will all depend on the size of your loaf, but I use half of the (very large) loaf of French bread that I buy at Target.

If you use unsalted butter, be sure to add a pinch of salt to the butter mixture!

  • Prep Time: 5 minutes
  • Cook Time: 10 minutes
  • Category: Sides
  • Method: Bake
  • Cuisine: Italian

Keywords: garlic bread, homemade garlic bread, soup sides, cheesy bread

Frequently Asked Questions For This Garlic Bread

How would you freeze the garlic bread?

Spread the bread with a thick layer of the butter mixture, then put the two halves together so that you don’t have any butter on the outside. Wrap it in foil or plastic wrap and freeze until you’re ready to bake! To bake: thaw, separate the two pieces so they’re butter-side up, and bake as directed.

Could you use another type of bread besides French bread? (baguette, ciabatta, etc.)

Yes! I’ve done them all and they’re all great. I love French bread the most (as discussed above) but I promise nobody is going to turn down any kind of bread with this garlicky buttery Parmesan-laced mixture slathered all over it.

How can I make this vegan?

Use a plant-based butter and skip the cheese!

Could you use garlic powder instead of fresh garlic?

Yes! I prefer the taste of fresh garlic because I think it makes it taste a little more zingy, But for a fast and easy back-up option, yes, absolutely you can use garlic powder. Be aware that garlic powder sometimes burns in the oven if you have it too close to the heating element!

Three Recipes I Actually Can’t Live Without

Tremendous Yummy Hen Salad Recipe

0


This Chicken Salad is so good! Protein-packed with a delicious creamy dressing, and perfect for an on-the-go lunch in a sandwich or wrap.

It’s a Chicken Salad Summer For Me.

Lindsay headshot

Chicken salad is officially the hero of my summer.

As summer activities have picked up for our family, I’ve been riding the highs of having a weekly batch of chicken salad in the fridge. I love a cold, creamy bowl of it straight out of the fridge for an high protein Summer Mom Lunch, and my girls love to eat the components (plain chicken, grapes, celery and cashews) dipped in a bit of dressing for a kid-friendly snack plate.

Reasons I love it:

  • Reason A: The creamy dressing is… weirdly so good. It doesn’t taste like straight Greek yogurt (gross) but there’s enough to be in there so that you aren’t just eating straight gobs of mayo, either. Perfect creaminess achieved! The flavors from the dijon, salt, sugar, onion and garlic powder make it into a luscious little everything sauce that I’m licking off the spoon every single time.
  • Reason B: Lots of protein! It’s a super satisfying mid-day boost!
  • Reason C: Convenience, naturally. I frequently just grab a little wrap, sandwich, or bowl of it for a solidly delicious munch between chaotic mid-afternoon errands and/or kid pick-ups!

SUMMER HERO!

You might notice there are no raw onions in this chicken salad and that is very much on purpose. I prefer a substantial lacing of onion powder in the sauce to give us the good flavor… but in a smooth, creamy way, without the watery, weepy weirdness of diced raw onion. To each their own! Throw the onions in if you want. But I am a strong proponent that onion powder > raw onions when it comes to chicken salad.

The mix-ins that you’ll see here are my favorites (grapes, celery, and cashews) but you might like apples, almonds, pistachios, wild rice (!), walnuts, etc. The beauty is that this protein-rich, ultra-creamy chicken salad dressing as a base can take us to many good places.

Lindsay signature

Welcome To My House! Let’s Have a Chicken Salad Lunch.

1

Make Your Dressing.

Greek yogurt, mayo, and dijon mustard will carry you! Add some salt, sugar, onion powder, and garlic powder, and you’ll be licking this right off the spoon. It’s luxurious and savory-sweet and so weirdly good.

Mixing dressing for chicken salad in a bowl.

2

Cut Everything Up!

I like the chicken to be CUBED, not shredded, so the whole thing doesn’t get too thick and sticky.

For classic chicken salad, you want to have these three elements:

  • Something sweet (apples, grapes, dried cherries)
  • Something crunchy (celery, diced onion)
  • Something nutty (cashews, almonds, or pistachios)

My all-time favorite combo is grapes, celery, and cashews! So classic. Hits every time. But I have more fun ideas in the notes of the recipe based on your suggestions from Instagram!

Chopped chicken, grapes, celery, and cashews for chicken salad.

3

Mix it all up + season it.

After you mix the dressing with everything, you can season it with whatever you like. Salt and pepper, for starters! I typically do freeze-dried chives and white pepper (so it doesn’t make the whole thing turn dark). You do you!

Mixing chicken salad ingredients in a large bowl.

4

You’re Done! Yum!

You can put this on a croissant for a luncheon-style sandwich, or tuck it into a lettuce wrap, or a whole weat wrap, or dip into it with crackers (can recommend Everything Seasoned crackers), or just eat it plain! which I very often do.

Chicken salad in a bowl with a spoon.

Watch How To Make This Chicken Salad

Print

clock clock iconcutlery cutlery iconflag flag iconfolder folder iconinstagram instagram iconpinterest pinterest iconfacebook facebook iconprint print iconsquares squares iconheart heart iconheart solid heart solid icon

Description

This Chicken Salad is so good! Protein-packed with a delicious creamy dressing, and perfect for an on-the-go lunch in a sandwich or wrap.


Chicken Salad Dressing: 

Chicken Salad Base:


  1. Dressing: Whisk the dressing ingredients until smooth. Taste and adjust, keeping in mind that it should taste salty / concentrated as it will distribute amongst all the other ingredients.
  2. Mix: Toss your mix-ins (chicken, grapes, celery, and cashews) with as much of the dressing as you like.
  3. Season: Taste, adjust, and zhuzh to your heart’s content. I usually stir in some freeze-dried chives and white pepper. 
  4. You’re Done! Yum! Eat on a whole wheat wrap, lettuce wrap, sandwich, toast, dipped with crackers or just PLAIN! Delicious, cold, creamy, I love it. Store leftovers in an airtight container the fridge for up to 4 days.

Notes

Dressing Amounts: You may not need all of the dressing depending on how much creaminess you like – I typically have a few tablespoons left over and I save them to toss with the leftovers so they are freshly creamy again!

Herbs: Fresh herbs work, but my complaint with them is that they don’t hold up as well in the fridge / after they get mixed in, which is why I like freeze dried herbs (in my case, I use chives).

White Pepper: Regular freshly ground black pepper works just fine, but it darkens the color a bit with the black flecks and I care about these things so I go for the white pepper!

  • Prep Time: 15 minutes
  • Cook Time: 0 minutes
  • Category: Lunch
  • Method: No-Cook
  • Cuisine: American

Keywords: chicken salad, chicken salad recipe, chicken salad sandwich, easy lunch recipe, high protein lunch

Chicken Salad Variation Ideas

There are so many directions you could take this! The main recipe included here is for a classic, salty-sweet chicken salad, but here are a few other ideas!

Curry Chicken Salad

Recipe is right here! 🙂 It’s so good – packed with sweet curry flavor and golden raisins, pistachios, cilantro and parsley! It’s one of my faves!

Basil Chicken Salad

Use this basil sauce as the base, and mix in chicken, dried cherries, celery, and slivered almonds! SO good!

Buffalo Chicken Salad

My husband loves this one! (And me, too.)

  • Dressing: 1/3 cup mayo, 1/4 cup plan Greek yogurt, 3 tablespoons buffalo hot sauce like Frank’s Red Hot, 1/3 cup blue cheese.
  • Mix-Ins: 1 1/2 cups cubed chicken, 1 cup diced celery, sliced green onions for topping!

Dill Pickle Chicken Salad

Make the same chicken salad dressing base, omitting sugar and salt. Add diced pickles, fresh dill, and a bit of pickle brine. Perfect for summer!

Frequently Asked Questions For This Chicken Salad

What are some other chicken salad mix-in ideas?

I asked on Instagram and you guys had the best ideas! Thank you for sharing!
– salt and vinegar chips (or any chips, let’s be honest)
– apples
– wild rice
– sweet pickled jalapeños
– fried onions
– crushed ramen noodles
– bacon
– sweet corn

Can you omit or replace the celery?

Yes, you can omit the celery! This is your own adventure. I would suggest adding a crunchy diced or sliced vegetable in its place – water chestnuts (polarizing!), radishes, jicama, or bell pepper! Fennel is very similar to celery but it is sometimes tolerated better by celery-haters, so that’s another option! It gives you a similar crunch and flavor.

Could you use your air fryer chicken in this?

Yes! Yummy. I would just cut it into cubes after you cook it in the air fryer! Here’s that recipe. Keep in mind that there’s a lot of seasoning on the exterior of that chicken so it will likely transfer into the sauce, making it more colored than the version here in the pictures.

How can I make this chicken salad dairy-free?

Use a dairy free plain yogurt! Almost all mayo should be naturally dairy free.

What other nut could I use instead of cashews?

SO many options. Walnuts, pistachios, sunflower seeds, and almonds come to mind!

How long does this chicken salad keep in the refrigerator?

I like it best within 3 days! The USDA recommends eating leftover rotisserie chicken (stored in the refrigerator) within 3-4 days.

How do you serve this chicken salad?

In a sandwich (croissants are the bomb), in a wrap (whole wheat wrap or a lettuce wrap! yum), on top of some greens, or as a dip for crackers! Or just plain, straight out of the fridge. 🙂

Can you make this recipe without mayonnaise?

You could use all Greek yogurt but I find that the mayo is really helpful for the overall flavor and texture. It gives a silkiness and a lusciousness that you can’t get from the thick, tangy Greek yogurt. Some people like to make their chicken salad with sour cream, so that’s another option, but I find a base of tangy Greek yogurt + the buttery-ness of a little mayo to be the ideal combo!

Three More High-Protein Salad Recipes

Strawberry Rhubarb Tart

0


There’s a certain ease and simplicity to free-form tarts like this. Sometimes they’re called a crostata, sometimes a galette. You can call it whatever you want, but I call it a fast way to use great fruit when it’s in season, without a lot of fuss.

At the beginning of summer, when rhubarb is still lingering around, and strawberries are elbowing their way forward, it’s a good thing the two go so well together. And I’m happy to help them hook up.

I remember a neighbor had a big rhubarb plant in their backyard and we used to dip the raw stalks in a cup of sugar and eat them. (Somehow, we knew not to eat the leaves, which are toxic.) I still remember, not just the fact that you could get free food from the earth, but that something could have so much flavor. Some kids aren’t fond of things that are tangy but I’ve always loved the contrast of sweet and tart.

Recently I was so excited to find such beautiful berries that I bought three big baskets of them. I made a little batch of Strawberry Rhubarb Jam, and another batch of Strawberry Vodka, both of which I hope will prolong the season…unlike this tart, which lasted not so long around here.

I first learned to make tarts like this from Jacques Pépin, when he came to work with us and began his shift by rolling out dough for fruit tarts. He actually double-doughed his tarts, rolling out two rounds of dough, and sandwiching the fruit between the two.

Being French, he brushed the top with lots of butter and liberally dusted the top with sugar. Today I usually make them open-faced, but do brush the crust with lots of butter and a generous sprinkling of sugar, which makes a crunchy crust, and is a nice contrast to the tender fruit-forward filling.

When I posted a picture of this tart on social media, with a promise to share the recipe, a friend, Ann Mah, asked me how I dealt with all the juice from rhubarb, which can exude a moderate amount. Hothouse rhubarb is generally redder in color and holds its color better than field-grown rhubarb once baked. However, I’ve never found much of a correlation between if it’s grown indoors or out, and how much juice it exudes.

That said, as insurance, I sprinkle the dough with a little bit of almond flour to absorb any errant juices. But I don’t mind things being a little bit messy; a friend’s Norwegian grandmother once told me that if pie doesn’t fall apart when you slice it, it’s not going to be any good. This tart slices nicely but tastes great. So you’re getting the best of both worlds here, in more ways than one.

Strawberry Rhubarb Tart

I often sprinkle a little almond flour on the tart dough, to soak up any extra juices that may come out of the fruit when it’s baking. You can use cracker or bread crumbs, crumbled amaretti cookies, a bit of flour, or leave it out.

For those who want to reduce the sugar, feel free to cut the sugar in the filling down to 1/2 cup (100g). For another variation, you could swap out fresh pitted cherries for the strawberries, or mix a basket or two of raspberries or blackberries with the rhubarb, in place of the strawberries.

This tart is sometimes called a galette or crostata and is baked free-form. It could also be baked in a tart pan as well. Be sure to cover the baking sheet well if using parchment paper, to catch any juices that may run out during baking. I used an unrimmed baking sheet for this one but use a rimmed one if you want to make sure you’re containing any errant juices.

Servings 8 servings

For the tart dough

  • 1 1/2 cups (210g) flour
  • 1 tablespoon sugar
  • 1/2 teaspoon salt
  • 1/2 cup (4oz, 115g) unsalted butter, cubed and chilled
  • 6 tablespoons (90ml) ice water

For the filling

  • 3 cups (13oz, 380g) diced rhubarb, (trimmed and cut into 1/2-inch, 2cm pieces)
  • 2 cups (10oz, 300g) strawberries, hulled and quartered
  • zest of 1 lemon, preferably unsprayed
  • 2/3 cup (130g) sugar
  • 1 1/2 tablespoons corn starch
  • 2 tablespoons almond flour , (optional)
  • 1 – 1 1/2 tablespoons melted butter
  • turbinado or granulated sugar, for finishing the tart

Prevent your screen from going dark

  • To make the tart dough, mix the flour, sugar, and salt in the bowl of a stand mixer fitted with the paddle attachment. (You can also make it in a food processor, or by hand, using a pastry blender.) Add the cold butter and mix until the butter pieces are the size of peas.

  • Add the ice water and continue to mix just until the dough comes together. Gather the dough with your hands, shape it into a disk, wrap it plastic, and refrigerate for at least 30 minutes.

  • Put the rhubarb and strawberries in a medium bowl with the lemon zest. Sprinkle the sugar and corn starch on top, but do not mix the ingredients together yet. (If you do, they’ll start to juice and may be overly juicy by the time you’re ready to use them.)

  • Preheat the oven to 400ºF (200ºF). Line a baking sheet with parchment paper or a silicone baking mat.

  • On a lightly floured surface, roll the dough to a 14-inch (36cm) circle and place it on the baking sheet. Sprinkle the almond flour over the tart dough, if using. Mix the fruit together with the sugar and corn starch and place the fruit into the center of the tart dough, then spread it with your hands, leaving 3-inch (8cm) of space between the fruit and the edge of the dough.

  • Fold the edges of the dough up and over the fruit filling. Brush the crush liberally with melted butter and sprinkle with sugar. Bake the tart until the filling is cooked and bubbling, and the crust is golden brown, 35 to 45 minutes. Remove from the oven and slide the tart off the baking sheet, onto a cooling rack.

Serving: Serve the tart on its own, or with Vanilla Ice Cream, White Chocolate and Fresh Ginger Ice Cream, or Cinnamon Ice Cream, or a dollop of crème fraîche.
Storage: The unrolled dough can be refrigerated for up to three days, or frozen for up to two months. The baked tart is best the same day but can be stored at room temperature for up to two days. (The dough will get softer the longer it sits.)