Greek Kofta Kebabs – RecipeTin Eats

0


This is a Greek lamb kofta kebab made using a special spice blend recipe given to me by the owner of Kalimera Souvlaki Art, a very popular Greek gyros shop in Melbourne, Australia. It’s simple, but unique and really, really good!

Greek lamb kofta kebabs

Greek Kofta Kebabs

Today’s recipe is the result of looking for something a little different to make with a packet of lamb mince. And wow, it is good! It isn’t a strictly authentic version of Greek kofta kebabs, but it comes from a very well respected Greek source. Specifically, a gyros shop in Melbourne called Kalimera Souvlaki Art based in the heart of the Greek community in Oakleigh.

To cut a long story short, I was doing a story on Kalimera for Good Food and managed to cajole the owner, Thomas Deliopoulos, into sharing this gyros marinade recipe with me. He’s Greek, in case you didn’t guess (😅) and he’s a chef by background.

I didn’t realise it at the time, but Kalimera has a cult following, with the likes of Ben Shewry (one of Australia’s most respected fine dining chefs) and New York Times’ Sam Sifton raving about it.

It also has me raving, and one day I will share his gyros recipe here on my website too. Until then, you can find it on Good Food here and today we’re using the the Kalimera secret gryos spice mix to make outrageously delicious lamb kofta kebabs!

Greek lamb kofta kebabs

Ingredients in Greek Kofta Kebabs

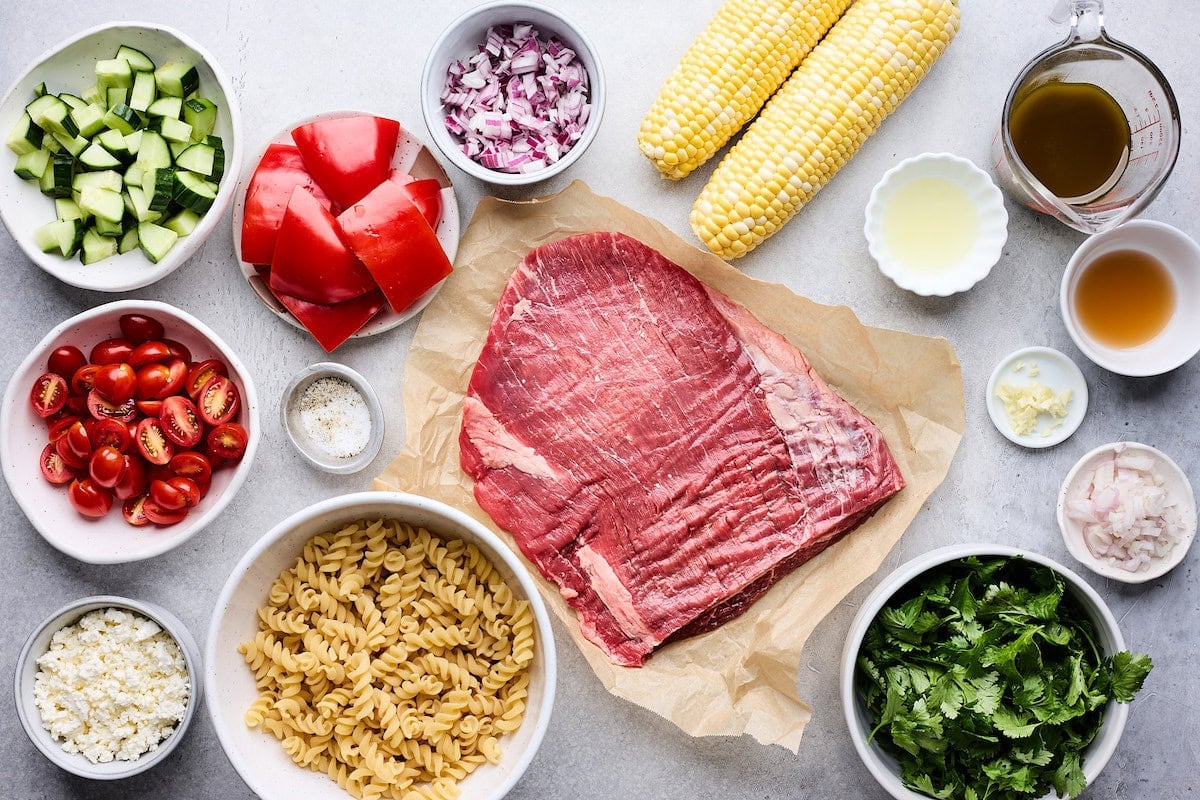
Here’s what you need to make these Greek Kofta Kebabs.

For the kofta kebabs

As noted above, the spice mix used for the Koftas is based on the chicken gyros recipe from Kalimera Souvlaki Art, tweaked to make it more suitable for lamb which has a stronger flavour than chicken. It’s a special blend with a combination of spices I never would have thought to use for a Greek flavoured dish. But wow, it is something special!

Greek lamb kofta kebabs ingredients
  • Skewers – Get shortish ones that will fit in the pan on the stove. I use 18cm / 7″ ones. If you’re planning to cook these on the BBQ, a) I’m free to join; and b) soak the skewers in water for 30 minutes before using (so they don’t burn).

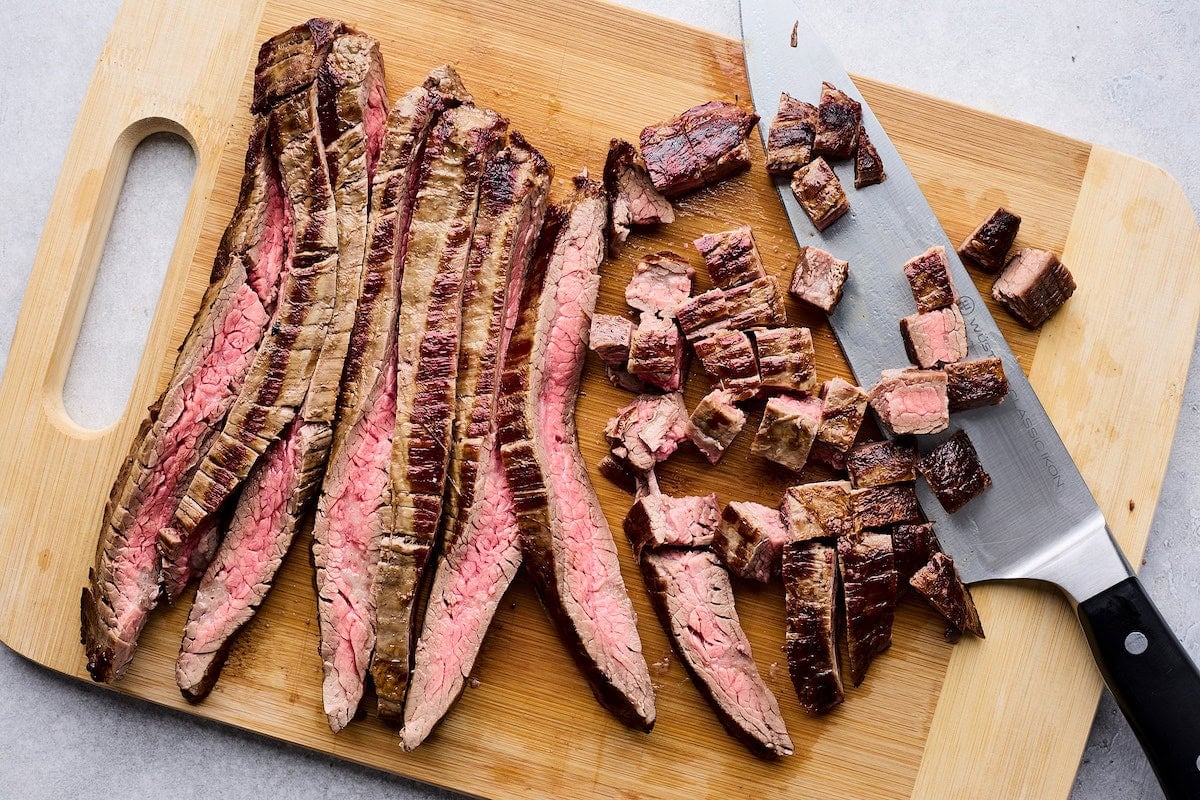
  • Lamb mince – The spice mix is designed to compliment lamb which has a stronger flavour than other proteins. And lamb is on point for Greek food! However, I’ve tried it with beef too and it’s terrific. I think it’s too strong for chicken, turkey and pork.

  • Garlic – 3 big plump cloves. The Greek love garlic – and so do I!

  • Dried oregano – The Greek also love dried oregano, so we’re using quite a lot. 4 1/2 teaspoons, to be exact! The combination of plenty of dried oregano and garlic is a never-fail classic Greek combination.

  • Paprika and mustard powder – These add warmth and earthy flavour. I just use regular paprika (sweet paprika) though smoked paprika would also be lovely, I think.

  • Curry powder – The secret ingredient that adds layers of flavour and a lovely warm colour to the mixture. We only use 1 1/2 teaspoons, just enough to add a hint of flavour but not enough to make it taste like curry. I use mild but feel free to use hot if you want it spicy! Any regular brand of curry powder is fine, I use Keens or Clives of India (common grocery store brands in Australia).

  • Salt and pepper – For seasoning.

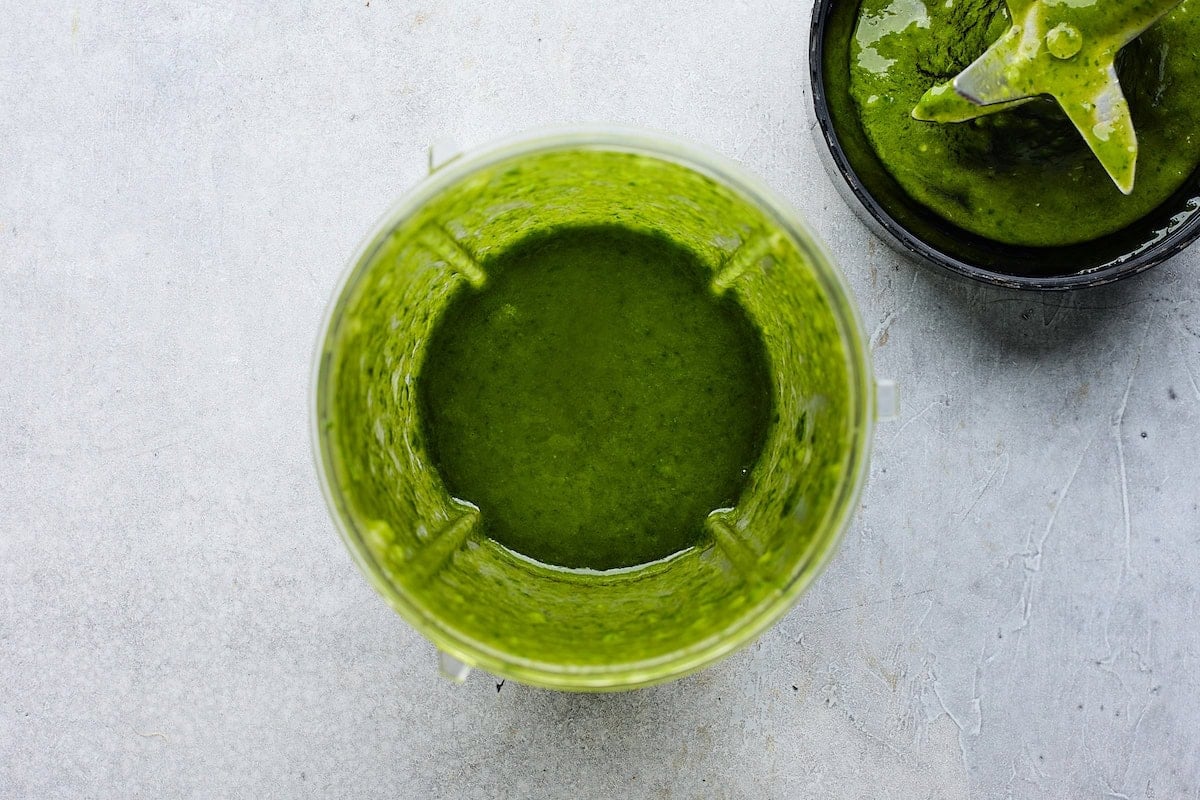
kalimera’s secret sauce

The owner of Kalimera didn’t reveal the exact recipe for his secret sauce. But he did talk through what was in it, so my brother and I came up with a copycat ourselves. I have to say, I think it’s pretty similar! You’ll be rummaging around to find anything to dip into it – veggie sticks, crackers, chips!

Greek lamb kofta kebabs ingredients
  • Greek yogurt or Greek-style yogurt – Plain, unsweetened.

  • Mayonnaise – preferable whole egg, which has a smoother flavour than non-whole-egg mayonnaise.

  • Extra virgin olive oil – For a bit of extra richness and flavour.

  • American yellow mustard – yes, the bright yellow American stuff! Another secret ingredient I never would have thought of and might look out of place in a Greek sauce, but the presence of which is validated knowing that Kalimera uses it. 😃 Totally works here for flavour and adding warm colour to the sauce.

  • Spices – garlic powder, paprika (sweet/regular, not smoked or spicy) and salt


bready greek pita bread

And here’s the pita bread I used to make those big cosy overstuffed wraps you see in this post:

Pita bread for Greek lamb kofta kebabs

Greek pita breads are thicker and breadier than flatbreads which are more pliable so you can make wraps ie you wrap the bread entirely around the filling. I’m using a brand called Golden Top Bakery (picture above) which is popular with Greek food shops and restaurants across Sydney. The packet is labelled “souvlaki bread” and is about 6mm/ 0.25″ thick. Not to be confused with another product they sell labelled as “pitta bread” which is a thinner flatbread that is not as bready (~4mm / 1/6″ thick), though this this would be fine to use too.

Whatever you use, warm it up! It’s so much nicer. Also for pita bread, it’s essential so the bread doesn’t break when you fold it. I’ve popped directions for reheating in the recipe card.
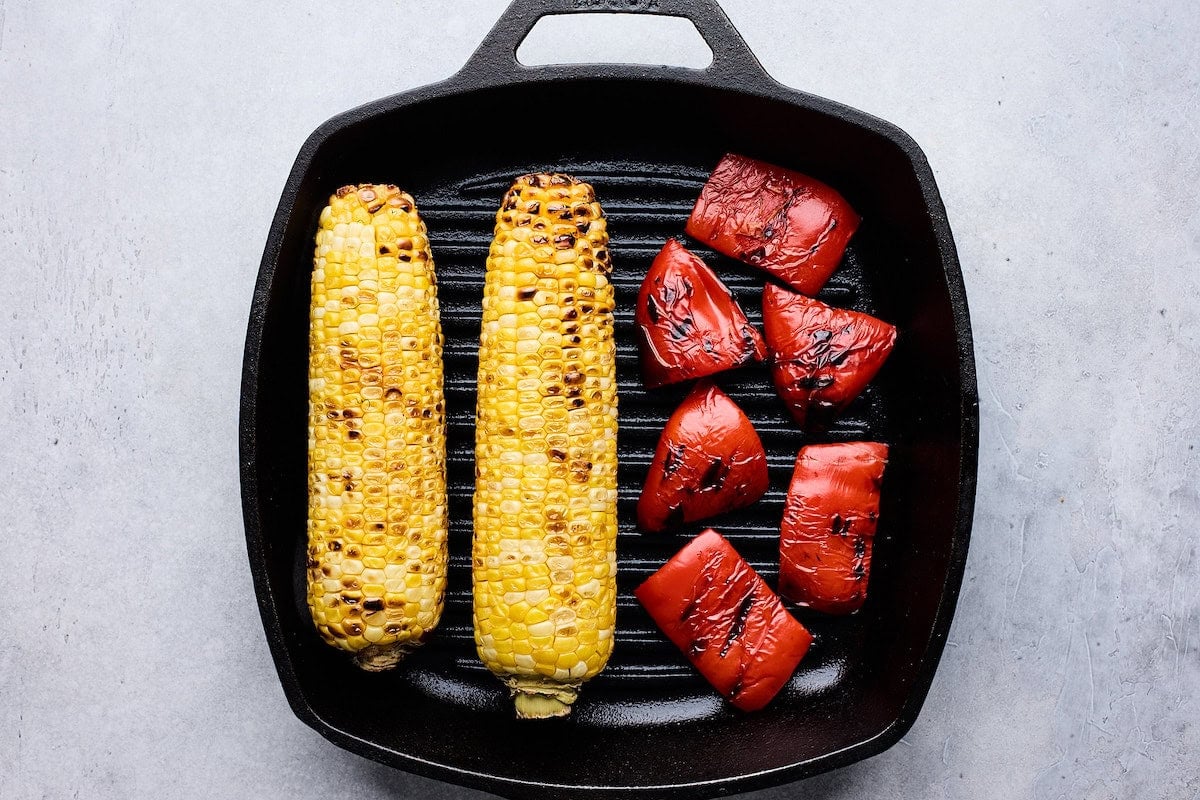

the vegtables

Here’s what I used for the vegetables – tomato, lettuce and red onion. Classic options offered at souvlaki shops in Australia. Though actually, in Greece, it’s common to bypass fresh veg and stuff with hot chips instead! Carb on carb perfection.😊 (But for the sake of making this a sensible dinner option, I’m option for some greens instead).

Greek lamb kofta kebabs vegetables

How to make Greek Kofta Kebabs

You could skip the skewering to save time. But for a little Greek spirit, it’s worth the effort!

1. Sauce first

Make the sauce first, so the flavours have a chance to meld while you make the koftas. Just mix the ingredients up then set aside on the counter.

Making Greek lamb kofta kebabs

2. MAKE THE Kofta kebabs

Good rule of thumb so you don’t over work the meat and make your koftas tough – stop once the spices are mixed through the meat.

How to make Greek lamb kofta kebabs
  1. Mix all the kofta ingredients in a bowl using your hands. Yes, you’ve gotta get in there and get your hands dirty, there’s no other way! Just mix until the spices are evenly dispersed throughout. I use a kind of scrunching motion with my hands, I find that’s the most effective.

  2. The dirty hands in question, hard at work! 🙂

How to make Greek lamb kofta kebabs
  1. Shape – Portion into 8 then squeeze/roll into logs about 13cm/5″ long. Thread onto skewers then flatten to 1.25cm / 0.5″ thick so you have a nice surface area that can be cooked into a gorgeous golden crust more easily than cylindrical logs. They also cook faster and more evenly.

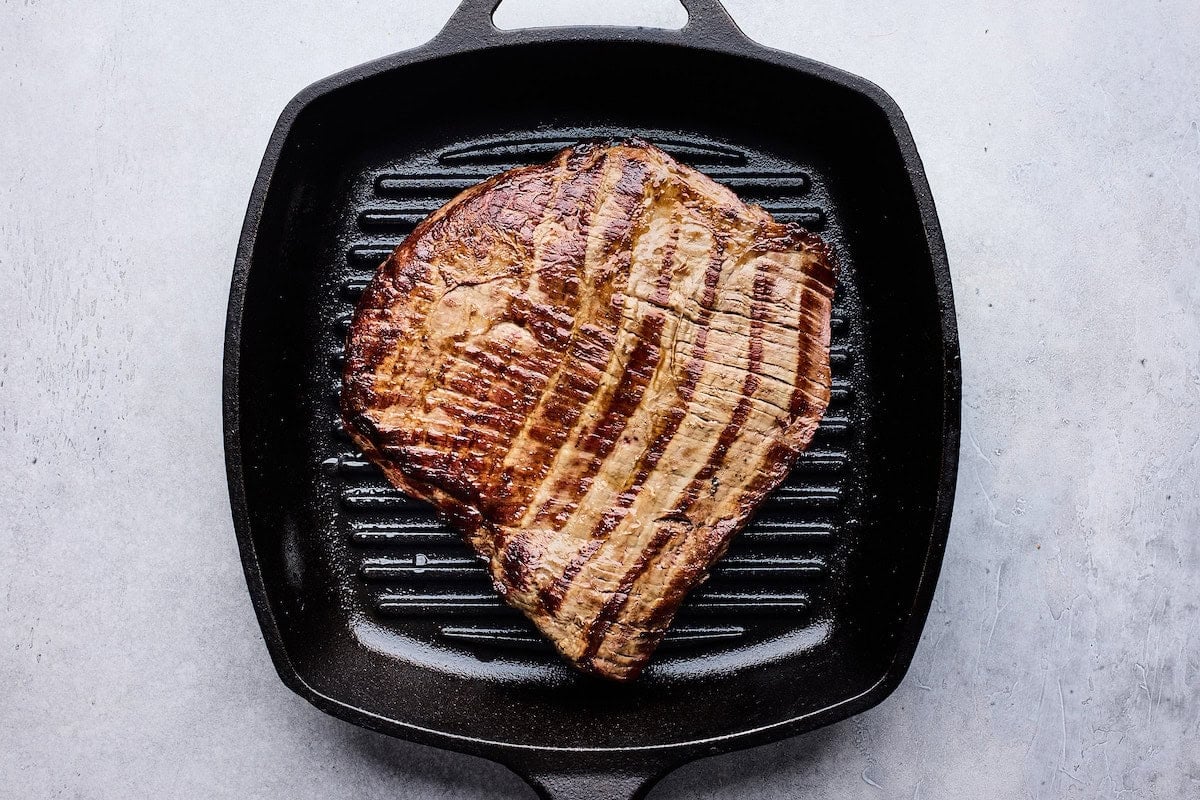
  2. Cook – Heat oil in a non stick pan over medium high heat, or on a BBQ for a more authentic experience. Cook half the koftas for 2 minutes on each side, then just 30 seconds on the thin edges just to get a bit of colour on them. Lower the heat if they are browning too quickly. Because of the spices, they will cook up a beautiful deep golden brown colour if you control the heat properly. If not, they will burn!!

    Remove cooked koftas onto a plate then cook the second batch. You won’t need more oil because you’ll get fat out of the lamb.

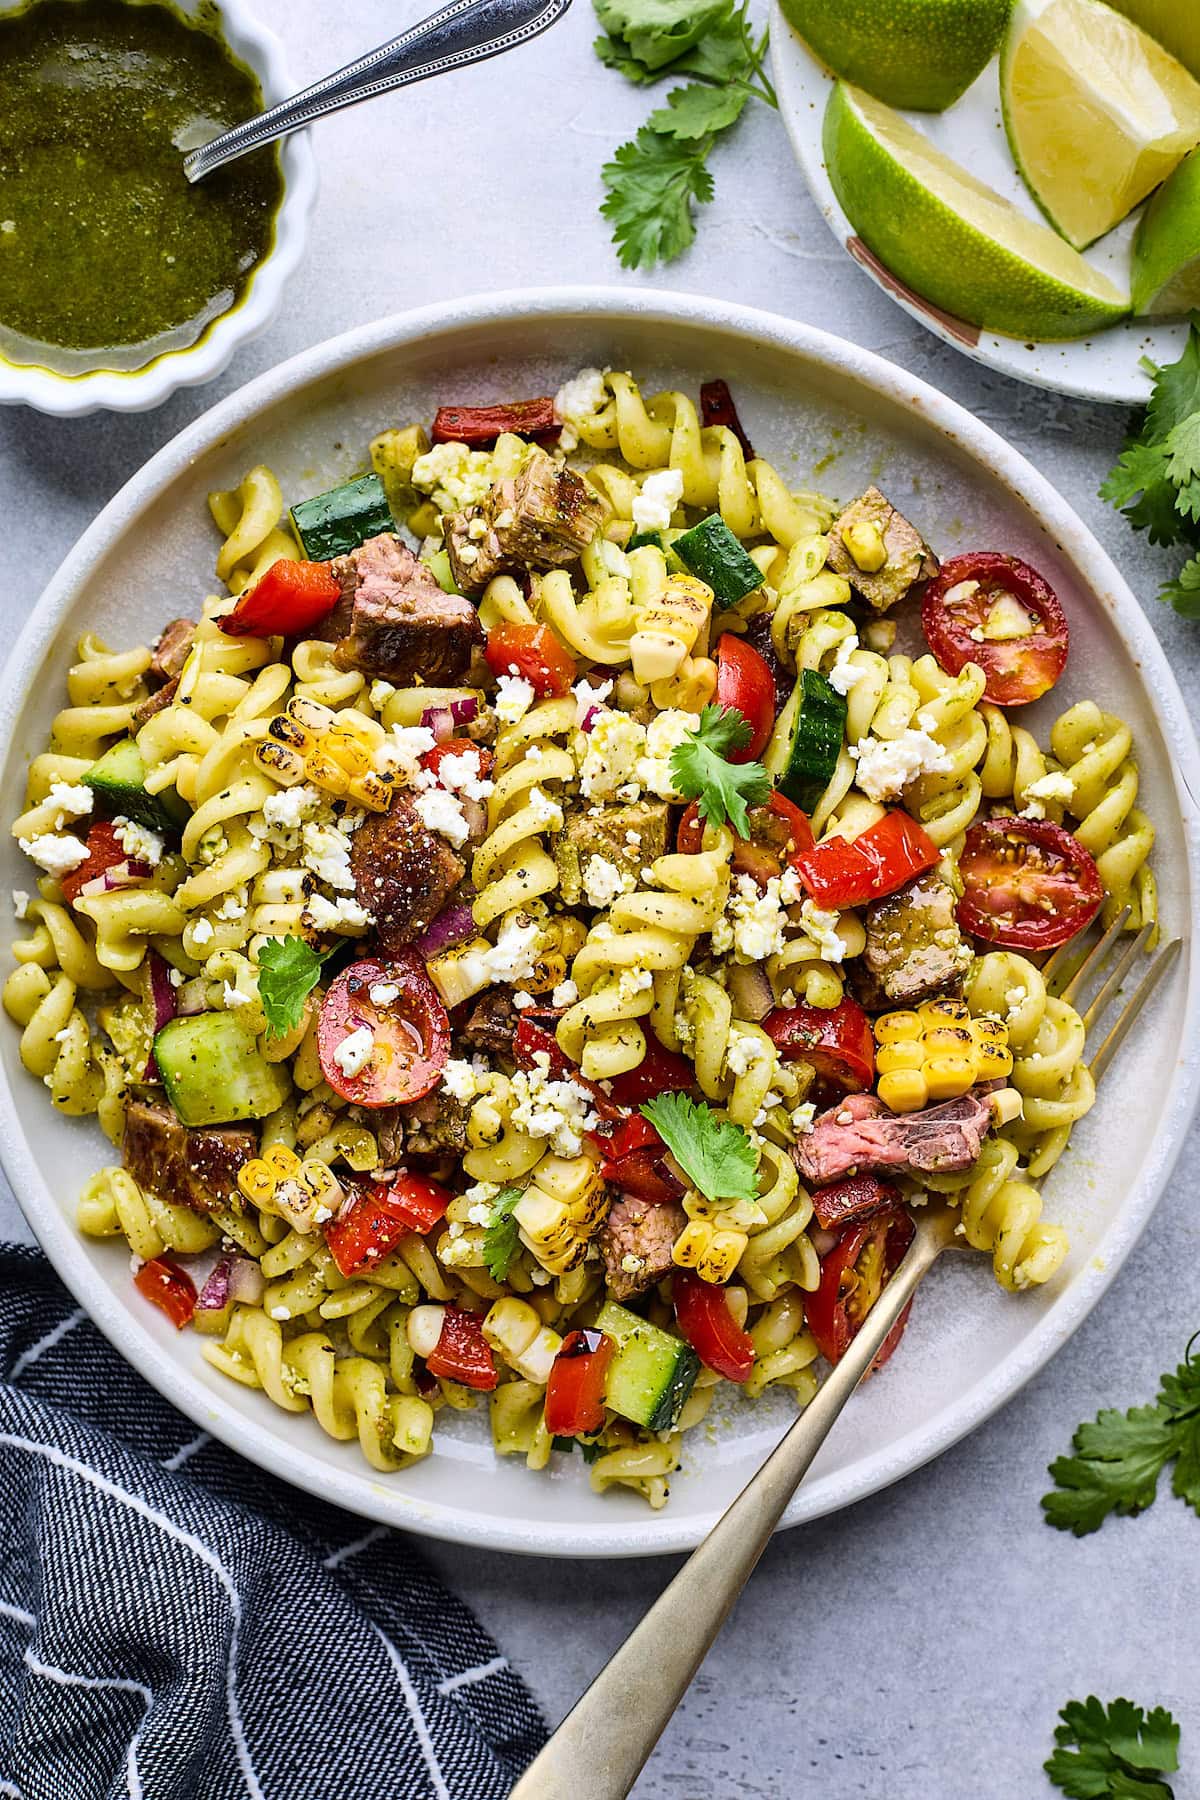
3. SERVING AND ASSEMBLING

How to make Greek lamb kofta kebabs
  1. Serving – To serve, pile the koftas on a platter with the lettuce, tomato, onion, sauce and warmed breads on the side. Let everybody help themselves!

  2. Making kofta kebab wraps – This is how I make the wraps. There’s a very specific order! Firstly, spread sauce down the middle of the pita bread / flatbread. Top with lettuce – the sauce will glue it in place. Then place 2 koftas on top (remove the skewers). Well, I’m greedy so I use 2. If you’re not, you can use 1.

    Place tomato on the side, sprinkle with onion then dollop with more sauce. Fold (or roll to enclose, if using flatbreads). Then bite! It’s so satisfying. 🙂

Greek lamb kofta kebabs

I love meals that are assemble-yourself situations, so this one rates highly in my books. Less work for me! If I have more than 8 people over for a lunch or dinner, I can pretty much guarantee it will be a DIY arrangement rather than à la carte. Who has the time to plate up and serve 8 people? Not me! Put your own meal together! 😂

It’s also appealing that this is excellent cooked on the barbecue, making it ideal for outdoor gatherings during warmer months. And the smell when these koftas are cooking is phenomenal!

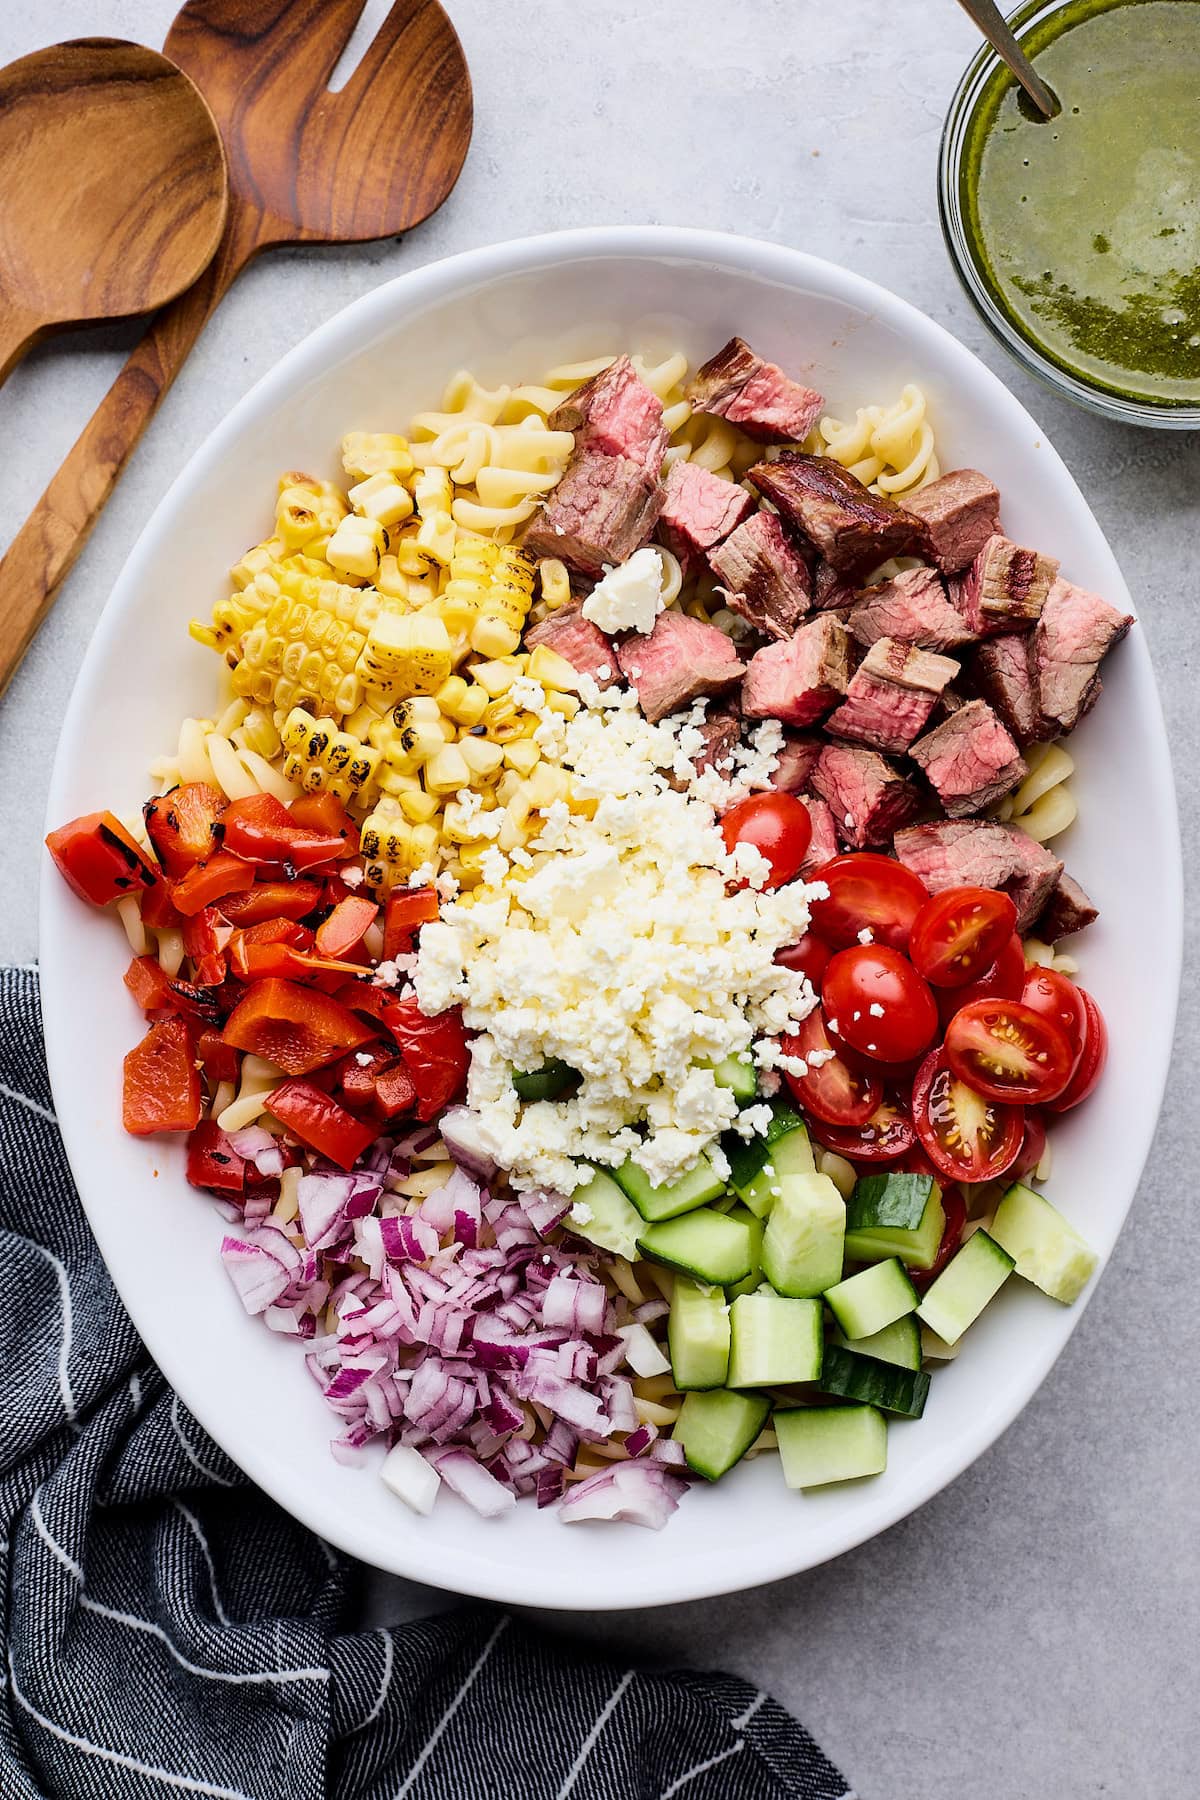
Leftovers keep well, so don’t be afraid to err on the side of caution and scale up. Make bowls for lunch tomorrow, then Greek “tacos” for dinner the night after. Or chop them into bite size pieces, and toss into your morning omelette as I did. – Nagi x

PS If you’re after a traditional Greek lamb mince kofta recipe, I suggest using this one from the website My Greek Dish which is a great resource for authentic Greek recipes. The spicing includes cinnamon so there are similarities to Middle Eastern lamb koftas.


Watch how to make it

Hungry for more? Subscribe to my newsletter and follow along on Facebook, Pinterest and Instagram for all of the latest updates.

Greek lamb kofta kebabs

Greek Kofta Kebabs

Servings4

Tap or hover to scale

Recipe video above. This Greek Kofta kebab features a secret spice mix from a well known Melbourne souvlaki shop called Kalimera Souvlaki Art. The owner gave me his chicken gyros recipe for a story I did for Good Food. I used the same blend for lamb mince koftas – it’s spectacular! The secret ingredient is a hint of curry powder, which adds warmth and depth without a curry taste. Genius!Served with my version of his Secret Souvlaki Sauce, crafted from clues he gave me. It’s so good, I use it to dunk crackers, veggie sticks and hot chips.

Instructions

  • Sauce – Mix the ingredients in a bowl and set aside to let the flavours meld while you make the kofta kebabs.

  • Kofta kebabs – Put all the ingredients in a bowl and mix well with your hands until the spices are mixed through. Divide into 8, shape into 13cm/5″ logs. Thread onto skewers then flatten slightly to about 1.25cm / 0.5″ thick (Note 5).

  • Cook – Heat 1 tbsp oil in a large non stick pan over medium high heat. Cook half the koftas for 2 minutes on each side until golden, then about 30 seconds on each short edge (just for a bit of colour). Reduce the heat if they’re browning too fast. Transfer to a serving plate, loosely cover with foil to keep warm. Cook the remaining koftas. (Scrape out loose burnt bits, if any. You shouldn’t need extra oil.)

  • Serve and assemble! Pile the lettuce, tomato and onion on the plate and put the sauce in a bowl. To assemble, take a warm pita bread and smear some sauce down the middle. Top with lettuce and 1 or 2 koftas (removed from the skewers), tuck tomato down the side and sprinkle with onion. Fold and EAT!

Recipe Notes:

1. Lamb is on point here for a Greek dish, and the spice blend has been tailored for lamb which has a stronger flavour than other proteins. However, it’s also great with beef! Spice mix is a little too strong for chicken, pork and turkey, in my opinion. I’ll do chicken koftas another time!
2. Curry powder – See intro for explanation, it’s the secret ingredient! Use any brand curry powder even from regular grocery stores. I use mild but feel free to use hot if you want it spicy!
3. Sauce – Copycat of Kalimera Souvlaki Art’s signature sauce! It’s used for their gyros and souvlaki as well as a dip for hot chips. The owner was coy about providing the exact recipe but provided clues for what was in it and I think this is pretty close. The colour and flavour from the paprika and mustard are key here!
4. Bread – Pictured pita is 18cm/7″ wide, Golden Top brand which is widely used by the Greek hospitality industry here in Sydney. Thick, bready pita bread needs to be warmed VERY well so they don’t break when folded, and a sprinkle of water helps. Here’s my method: Wet paper towel on plate, brush/spray/sprinkle each pita bread lightly with water (both sides), stack, cover with another wet paper towel. Microwave 1 minute or until middle pitas are hot. Use hot!
Easier option – thinner flatbreads, pita pockets etc. Homemade, store bought (Lebanese bread is great) or even tortillas.
5. Kofta shape – Flattening slightly rather than making them cylindrical makes them a little easier and faster to cook, plus you get a larger surface area that goes golden (= flavour!). Note that they will get fatter and shorter as they cook.
Leftover koftas will keep for 3 – 4 days in the fridge. Sauce will keep for a week at least, you mightn’t use it all. Prep ahead – Uncooked koftas can be shaped and left in the fridge for a couple of days, or even frozen then thawed and cooked on demand.
Nutrition per serving, koftas, veg and sauce only (calories in bread varies so much depending on type).

Nutrition Information:

Calories: 508cal (25%)Carbohydrates: 6g (2%)Protein: 23g (46%)Fat: 44g (68%)Saturated Fat: 15g (94%)Polyunsaturated Fat: 6gMonounsaturated Fat: 20gTrans Fat: 0.01gCholesterol: 97mg (32%)Sodium: 726mg (32%)Potassium: 431mg (12%)Fiber: 2g (8%)Sugar: 2g (2%)Vitamin A: 944IU (19%)Vitamin C: 0.4mgCalcium: 107mg (11%)Iron: 4mg (22%)

More things to make with lamb mince

Lamb is so much more interesting than beef mince! So much more flavourful. Here are some of my favourite lamb mince recipes.


Life of Dozer

No dogs allowed on the couch! Which means – I spend a lot of time on the floor with him. 😂


Oreo Fluff Recipe – The BEST Get together Dessert Ever!

0


This whipped Oreo fluff recipe is one of the best party desserts you will ever try, with just 5 ingredients and no baking required!

Easy Oreo Fluff Salad Recipe
This image has an empty alt attribute; its file name is pin-it-e1441245481357.pngThis image has an empty alt attribute; its file name is pin-it-e1441245481357.png

Easy Oreo fluff dessert dip

Looking for a crowd pleasing dessert that takes just minutes to prepare and leaves everyone asking you for the recipe?

Make this creamy Oreo fluff, and you will not regret it!

Also known as Oreo salad, it is a huge guest favorite, and for good reason.

The popular party dip is a perfect quick and easy recipe to whip up for potlucks, book club, birthday parties, pool parties, holidays, and so much more.

You may also like this Brownie Batter Dip

Oreo Dessert DipOreo Dessert Dip

What makes this the best Oreo fluff recipe?

Unlike many other Oreo fluff recipes, this one uses real cream cheese instead of packaged white chocolate or Oreo pudding mix, resulting in a much better flavor and a creamier texture.

It contains no jarred marshmallow fluff and can be made without Cool Whip.

And it tastes like a slice of classic homemade Oreo cheesecake or the filling of an Oreo cookie, in the form of a thick and fluffy dessert dip!

Still craving Oreos? Make Oreo Cupcakes

Oreo Fluff Dessert IngredientsOreo Fluff Dessert Ingredients

Ingredients for the recipe

To make Oreo fluff at home, you will need cream cheese, frozen whipped topping or yogurt, sweetener of choice, pure vanilla extract, and Oreo cookies.

Cream cheese: Either the block or tub form of cream cheese will work. I have never tried low fat or fat free cream cheese, so be sure to report back if you try.

To prepare a dairy free and vegan Oreo fluff, simply use your favorite brands of vegan cream cheese and plant based yogurt or Whole Foods plant based whipped topping. The dessert is already naturally egg free.

Oreo sandwich cookies: Feel free to buy brand name Oreos, gluten free Oreos, or a similar cream filled chocolate cookie. For a low carb and keto Oreo fluff dip, choose keto chocolate cookies.

Frozen whipped topping: Traditional Oreo salad recipes call for Cool Whip, which will work here as well. Or as a healthy alternative, I often like to substitute Greek yogurt, which adds protein and lowers the sugar.

Sweetener: For the thickest, fluffiest texture, I recommend powdered sugar. You can use powdered erythritol if you need a sugar free option.

Other sweeteners, such as sugar, honey, and pure maple syrup still taste delicious. The results are just not as light and fluffy.

Pure vanilla extract: This ingredient adds depth of flavor and increases the richness of the chocolate in the Oreos. For best results, you want to look for pure vanilla extract, not imitation vanilla flavoring.

Tips to create different flavors

Transform it into a cookies and cream chocolate fluff by whipping in a fourth cup of cocoa powder or by using frozen chocolate whipped topping.

Or if you are one of those people who love spreading peanut butter on your Oreos, whip in a fourth cup of softened peanut butter.

You can also make an Oreo protein fluff by adding a scoop of your favorite plain or flavored protein powder when you add the cream cheese.

For a mint chocolate cookie dip, add half teaspoon of pure peppermint extract along with the vanilla. Stir in crushed Thin Mint cookies instead of Oreos.

Also make this Banana Pudding Dip

No bake Oreo dip recipe video

Watch the step by step recipe video, above.

Cream Cheese Oreo Cookie FluffCream Cheese Oreo Cookie Fluff

How to make Oreo fluff salad

Gather your chocolate sandwich cookies plus the additional four ingredients.

Let the cream cheese come to room temperature so it will be easier to blend. Finely chop the chocolate cookies in a bowl.

Add the cream cheese, frozen whipped topping or yogurt, and powdered sugar to a food processor or stand mixer. Or use a large mixing bowl and hand beaters.

Whip until the mixture is thick and completely smooth, then add the vanilla extract and whip again until evenly mixed.

Stir in the crushed cookies with a spatula or spoon.

To prevent the dip from turning grey, I recommend only adding three cookies. If you prefer to add more, absolutely go ahead.

This dip can be whipped up ahead of time or made the same day you wish to serve it. Refrigerate until ready to serve.

If you somehow find yourself with leftovers, transfer them to an airtight covered container and store in the refrigerator for up to five days.

For the best creamy texture, do not freeze this recipe.

Oreo Fluff Party Dip Serving BowlOreo Fluff Party Dip Serving Bowl

Serving and dipping ideas

Serve the Oreo fluff salad recipe cold, in a large bowl.

I like to place the serving bowl on a tray with Oreo cookies or chocolate graham crackers, whole strawberries, and other fresh fruit.

Banana slices, mini marshmallows, apples, pretzels, Chocolate Truffles, and Golden Oreos are all great additions to the dessert party tray.

Or layer the thick fluff into fancy parfait glasses, with Oreo crumbs or crushed chocolate chip cookies in between layers.

Use the recipe as frosting to top a Chocolate Mug Cake or instead of whipped cream to garnish a chocolate mousse pie.

This is a great appetizer or dessert recipe for game day or Super Bowl Sunday.

Protein Oreo Cookie Fluff SaladProtein Oreo Cookie Fluff Salad

No Bake Party Desserts

Strawberry Pie

The Best Chocolate Mousse Dessert RecipeThe Best Chocolate Mousse Dessert Recipe

Vegan Chocolate Mousse

No Bake Brownie Bites

Chocolate Frosting Shots

Chocolate Chip Cheese Ball

Easy No Bake CheesecakeEasy No Bake Cheesecake

No Bake Cheesecake

Valentines Day Chocolate Covered StrawberriesValentines Day Chocolate Covered Strawberries

Chocolate Covered Strawberries

Coffee Cream TrufflesCoffee Cream Truffles

Coffee Truffles

braised chickpeas with zucchini and pesto – smitten kitchen

0


Last summer, when my younger child joined my older child at sleepaway camp for a month for the first time, leaving us unmoored and a little restless, we made a list of restaurants we’d been meaning to try and friends we don’t see enough and took this task on like it was our job. I barely cooked once. By the end of the third week, everything hurt and we realized our template for a child-free life (going out late, cocktails on weeknights, and generally behaving despicably) was based on our age and energy level when we were last child-free, which (I’m sorry as this fact seems to upset you guys as much as it does his actual parents) was almost 15 years ago.


summer braised chickpeas-01
summer braised chickpeas-02
summer braised chickpeas-03

This year, I vowed to cook at home at least a little more for the sake of our general vitality. Plus, since it’s as hot as the surface of the sun and as humid as a swamp in NYC this July, eating decadent meals and fizzy drinks has lost, well, at least 10% of its usual luster.

But what do you cook when you don’t have your little Statler and Waldorf heckling you at the table with cantankerous opinions on what you have had the audacity to present them for dinner? Chickpeas, it turns out, and lots of zucchini. And we can’t get enough of this one.

summer braised chickpeas-05
summer braised chickpeas-06

Here, the chickpeas are braised in some broth and olive oil, with layers of onion, garlic, and thinly-sliced zucchini/summer squash, salt, and pepper flakes on top. For the first 15 minutes, we simmer it with the lid on, to soften the vegetables. For the next 30 minutes, we have the lid off but we only stir it 15 minutes before the end. At the 30 minute mark, the chickpeas are… nice! good, tasty. At 45 minutes, however, they’re heavenly, plump with all of the flavors in the pan and ready to collapse. To finish it, we stir in basil pesto, nestle torn chunks of burrata throughout, and scatter parmesan or pecorino over the top. Scoop this onto grilled hearty bread and revel, I mean, absolutely revel in the deliciousness before you.

summer braised chickpeas-08

Staub x Smitten Kitchen Braiser This pan, this braiser, the object of my decade-long cookware obsession, is finally back in stock! This spring, I announced that I was partnering with Staub to get them to bring back one of my favorite pans, this squat 4-quart Dutch oven I first bought in 2014 and have since cooked so many things in, it barely leaves my stove (you can see it here too!). Unfortunately, it sold out quickly twice but it’s back in stock again and I hope this means if you missed it in the spring, you get a chance to snag one now. You can watch a forge/factory tour I took last fall in France here. And you can order your own braiser here.

summer braised chickpeas-09

Video


Home made artisan crackers – RecipeTin Eats

0


Homemade crackers! How much do you spend on your favourite artisan crackers? This whole recipe might cost $1 – and they’re so easy. No kneading, no yeast, with flavour you’ll never get in store bought. Use for cheese platters, dips, or snack on them like chips!

Homemade Crackers - sesame and sea salt

Homemade crackers

More than ever, I’ve been making homemade versions of snack-type foods I used to buy due to two reasons. First, the cost. I’ve always thought “gourmet crackers” were overpriced, but inflation has made them virtually impossible to justify buying. 

Second, the flavour. If all you know is store bought, you can live your whole life thinking that’s what something tastes like. But just one experience of homemade, and you realise how much better something can be.

And such is the case with these homemade crackers, with sesame seeds and sea salt flakes. The sesame flavour really stands out, in a way you never get in packets so you’ll be munching on them plain, like chips. Though of course, they are right at home on cheese platters too – imagine the reaction from your friends when you glide into the room with THIS!!! ⬇️⬇️⬇️

Homemade Crackers - sesame and sea salt

What you need to make homemade crackers

You can actually make crackers with just flour, water and salt. ie water crackers! But a little olive oil and sesame seeds gives them extra flavour so you can even snack on them plain. You know I do!

For the cracker dough

  • Flour – Just plain / all-purpose flour. If using wholemeal, you’ll need to add a touch of extra water as it is more absorbent. Don’t use self raising flour, else your crackers will puff up and won’t be as crispy.

  • Sesame seeds – For mixing into the dough. We also sprinkle on top, for visual purposes and to ensure these crackers have unmissable sesame flavour!

  • Extra virgin olive oilTo add flavour. You can actually just make crackers with flour and water, but adding a bit of fat makes them tastier!

  • Salt – Essential, for flavour.

  • Water – The liquid for the dough. Just regular tap water.

FOR SPRINKLING

  • More sesame seeds! It will look like a lot when you sprinkle but they will spread out as you roll the dough out.

  • Salt flakes – I like to use flakes so you get lovely subtle salt pops when you munch on the crackers. But don’t make a special trip to the shops just to get sea salt flakes, see the recipe notes for how to make this with cooking or kosher salt or even table salt.

  • Olive oil spray – This helps the crackers bake up with a lovely golden colour. If you don’t have spray, brush the surface of the rolled out dough with olive oil (do it before cutting, easier and faster).


How to make homemade crackers

This is a very simple dough to make that doesn’t involve yeast, kneading or rising. It’s also a friendly dough to work with, easy to roll out thinly (so the crackers bake up nice and crisp) and pick it up without tearing.

1. Make the cracker dough

  1. Make dough – Mix the dry ingredients (flour, sesame seeds and salt) using a rubber spatula (or wooden spoon). Make a well in the centre then add the water and oil.

  2. Mix using the handle of the spatula until the flour is incorporated. I find using something thin like the handle or a chopstick is easier to bring the mixture together and there’s less surface area the dough mixture gets stuck onto.

  1. Bring together – The dough will be a little sticky and shaggy, not smooth. Scrape it out onto a lightly floured work surface. Then knead it briefly just to bring the dough together into a ball. The dough will look a bit bumpy and splotchy. That’s ok. That’s why our crackers look rustic and artisan! 😊

  2. Cut the dough in half. We will roll and cut each out separately, and bake them on separate trays.

    You can do one giant cracker sheet on one large tray but I find it a little difficult to make all the crackers bake evenly. ie some become overly golden before others crisp up.

2. ROLL AND CUT

  1. Roll out #1 – Cut the dough in half then roll out into a 3mm / 1/8″ thin oval shape. Or whatever shape you end up with. It doesn’t really matter because we cut it, and misshaped offcuts from the edges are rustic and real! Use a little sprinkle of extra flour as needed to stop the dough from sticking to the counter or the rolling pin.

  2. Sesame seed sprinkles – Transfer the dough onto a sheet of baking paper (parchment paper). Sprinkle with sesame seeds and the salt flakes.

  1. Roll out #2 – Then with the dough still on the paper, roll it out even more thinly. Aim for 2mm / 1/12″. Thinner = crispier crackers! In this step, we’re also rolling the sesame seeds and salt into the surface of the dough so it sticks properly. (They fall off if you just sprinkle them after rolling it out. Using water or oil doesn’t glue them on enough either.)

  2. Cut – Use a pizza cutter (or knife) to cut them into 5cm / 2″ (ish) square(ish) or diamond shapes. You will get nice even pieces from the middle and offcuts on the edges (artisanal! rustic! authentic!).

    Notes:
    – You have total creative freedom here with the shapes. I aim for squares and diamonds but darn pizza cutters have a mind of their own, like shopping carts!! So I end up with all sorts of shapes.
    – They shrink about 15% and smaller pieces cook faster.
    – I tried baking the sheet whole and also two large sheets, like the large (expensive!) cracker sheets you see at gourmet stores. But found that the edges got a little too golden before the middle became crisp.

    * If using a knife, cut straight up and down, rather than dragging the knife through the dough which will make the edges untidy.

3. spray and bake

  1. Transfer the cut crackers still on the paper onto baking trays. Don’t re-arrange, they’re too thin to handle.

  2. Bake – Spray the surface of the crackers with the olive oil (or brush lightly with oil, if you don’t have spray). Then bake for 12 minutes at 200°C / 400°F (180°C fan-forced).

  1. Re-arrange – Remove the trays from the oven and re arrange the crackers to move the ones on the outer rim to the centre, so they brown more evenly. Also, thinner and smaller pieces brown faster so move them to the centre of the tray too.

  2. Golden and crisp! Bake for a further 8 to 10 minutes or until the crackers are light golden and they are all crispy. Pale white crackers = not crispy inside!

    Cool on the trays, during which time they will become properly crispy (about 15 minutes). Use this time to assemble your cheese platter or make a dip. Then it’s snack time!

Homemade Crackers - sesame and sea salt

How to serve homemade crackers

As mentioned in the opening, these are flavoured and salted enough to snack on them plain, like you would chips.

However, they are neutral flavoured enough for dipping and spreading. Think – Guacamole, Whipped Feta dip (great quick one), Avocado sauce (peeking out of the left of the above image), cheese and bacon dip, French onion, potted smoked trout or how about a baked brie!! Head over to my Dips recipe collection for more ideas.

Though honestly, for me, I feel like homemade crackers is the sort of thing that needs to be really showed off to your family and friends, to bask in the glory of their praise (because you deserve it).

So the highest and best use for homemade crackers? Cheese platter, definitely! All that colour. All that cheese!

Homemade Crackers - sesame and sea salt

But, don’t reveal how easy they are to make. Let them believe you’re a kitchen-wizard domestic goddess (or god). 😈 – Nagi x

Artisan crackers FAQ


Watch how to make it

Hungry for more? Subscribe to my newsletter and follow along on Facebook, Pinterest and Instagram for all of the latest updates.

Homemade Crackers - sesame and sea salt

Homemade artisan crackers – sesame sea salt flavour

Servings5

Tap or hover to scale

Recipe video above. Homemade crackers! How much do you spend on your favourite artisan crackers? This whole recipe might cost $1 – and they’re so easy, no kneading, no yeast. Use for cheese platters, dips, or snack on them like chips!You can really taste the sesame in this, unlike store bought crackers. Feel free to experiment with your own flavours – try rosemary, cracked pepper, poppyseeds. For fruit & nut, use this Gourmet Crackers recipe.

Instructions

Abbreviated recipe:

  • Mix dry ingredients, make well, stir in wet. Divide in half, roll out 3mm / 1/8″ thick. Transfer to paper, sprinkle with sesame and flakes, roll to 2mm / 1/12″. Cut into 5cm / 2″ pieces, transfer to tray, spray with oil. Bake 12 min, rearrange to colour evenly, bake 8 to 10 min until light golden.

Full recipe:

  • Preheat the oven to 200°C / 400°F (180°C fan-forced).

  • Mix the flour, sesame and salt in a bowl using a rubber spatula or wooden spoon. Make a well in the centre then add the water and oil. Using the handle of the spatula to mix until the flour is incorporated.

  • Roll out #1 Sprinkle the counter lightly with flour. Scrape the dough out then knead a few times to bring it together into a ball. Cut in half. Roll one piece out to 3mm / 1/8″ thin oval shape. (Note 3)

  • Sprinkle – Place a sheet of baking paper (parchment) on a cutting board. Transfer the rolled out dough onto the paper. Sprinkle with half the sesame and half the salt flakes. Roll out even thinner on the paper to 2mm / 1/12″ (thinner = crispier).

  • Cut into 5cm / 2″ squares using a pizza cutter or knife (Note 4). You’ll have smaller pieces on the edge and corners, that’s fine. Leave the pieces as is, don’t try to move them (so thin, it’s too hard!). Slide the paper onto a tray. Repeat with the other piece of dough.

  • Bake – Spray with oil. Bake both trays together for 12 minutes. Remove from the oven. Re-arrange to move the more golden pieces on the outer rim of the tray to the centre (so they cook evenly). Bake for a further 8 to 10 minutes or until all the pieces are light golden (white = not crispy!).

  • Serving – Remove from the oven and leave the crackers to cool on the tray (~20 minutes). Make dip or prepare cheese platter worthy of your homemade crackers. Then attack!

Recipe Notes:

See FAQ above for more information about substitutions and options.
1. No salt flakes for sprinkling? Use a slightly heaped 1/4 tsp cooking/kosher salt or 1/8 tsp (levelled) table salt (for the whole recipe). Only got table salt? Use half the quantity of cooking salt listed in the ingredients.
2. No olive oil spray? Lightly brush the surface of the dough with extra virgin olive oil before cutting (faster than doing individual pieces).
3. Rolling out – The dough is friendly and easy to roll thinly. It doesn’t matter what shape you end up with, the thinness is what’s important as this affects crispiness. I aim for oval shape but rarely succeed! Use extra flour for sprinkling as needed to prevent from sticking to the counter or rolling pin.
4. Cutting – If using a knife, cut up and down, don’t drag the knife through the dough.
5. Baking tips – Smaller and thinner pieces will colour faster, remove earlier if needed. Pieces on outer rim will colour first so move them into the middle. Keep an eye on them for the last few minutes as they go from pale to golden quickly!
6. Storage – Best on day made for maximum flavour but stays crispy for 3 to 4 days in an airtight container (and always still tastier than store bought!). If they soften a bit or are a bit stale, pop the back in the oven to crisp up again.
Nutrition per serving.

Nutrition Information:

Calories: 160cal (8%)Carbohydrates: 20g (7%)Protein: 3g (6%)Fat: 8g (12%)Saturated Fat: 1g (6%)Polyunsaturated Fat: 1gMonounsaturated Fat: 5gSodium: 234mg (10%)Potassium: 42mg (1%)Fiber: 1g (4%)Sugar: 0.1gVitamin A: 0.3IUCalcium: 36mg (4%)Iron: 2mg (11%)

Life of Dozer

Fun little video of Dozer behind the scenes today, in his self-appointed role as Shoot Director!

And just because I have them – some photos of Dozer helping me shoot today’s crackers! My former shoot assistant, apparently now my boss.


Scorching buttered corn rice – Recipesedge

0

Hot Buttered Corn Rice is a simple yet delicious upgrade from plain steamed rice. Serve with any cuisine, any dish – it goes with everything. Make lots – everyone will go in for seconds!

Scorching buttered corn rice – Recipesedge

I have no idea what you’re planning to make for dinner tonight. But whatever it is, a big steamy mound of garlicky, buttery rice with sweet pops of corn is going to work with it, and it will make your meal even better than you already envisage it to be!!

And such is the beauty of today’s recipe. It is one of those unicorns that just works with any cuisine and any food that can do with a starchy side. A stir fry? Definitely! Lemony Chicken Francese? Oh yes. Firecracker Beef? Oh course! Coq au vin? Try to stop me!

It’s tasty enough to eat by the spoonful, straight out of the pot but neutral enough to work with full flavoured, saucy mains, like the Mexican Chipotle Pork & Beans pictured below. I also see myself topping it with canned tuna, a squiggle of kewpie mayo and dollop of chilli. Hot Buttered Corn Tuna Rice Bowl! Sounds so much more interesting than tuna and rice. 😂

Hot Buttered Corn Rice with Chipotle Pulled Pork and Beans

Ingredients for Hot Buttered Corn Rice

Here’s what you need to make this buttery, garlicky rice! Green onion is not critical.

  • Corn – I use frozen corn for convenience so imagine how great it is with fresh corn! Canned corn will work too but it’s not my first pick as it’s a little softer so once cooked, it is a little too soft for my taste.
  • White rice – I like to use long grain white rice for this dish as the rice stays fluffier because the rice itself is less sticky than short grain rice (like sushi rice).

    Substitutes: Basmati rice (works just as well, with a little extra perfume of flavour), medium grain rice (next best), sushi rice (works but the rice is a little stickier).

    Do not use: Jasmine rice (too soft, requires different cooking treatment), brown rice, risotto rice, paella rice, wild rice, quinoa, or any faux rice (eg cauliflower rice), any par-cooked rice (those microwave packets). The recipe is not designed for this, it would require tweaking.

  • Butter – For buttery goodness! Some is used to cook the corn and rice, then we stir some through at the end for a good hit of buttery flavour.
  • Garlic – 3 whole cloves! Garlic + butter + corn = home run.
  • Green onion – For a little hit of fresh and lovely green colour. Not the end of the world if you don’t have it. You could also just sauté a little onion or eschalots (US: shallots) with the corn.
  • Chicken or vegetable stock/broth – The cooking liquid. Because it’s tastier than water and we’re making a quick recipe here, so we need the extra helping hand. If we were going to the effort of making a homemade corn stock, we could get away with using water. But we’re not! Not today. 🙂 (But if you want to make something using a homemade corn stock, make this Cold Corn Soup! It’s amazing – but it does require more effort than this recipe.)
  • Salt – Just a little bit (1/4 teaspoon), so the rice has enough flavour to eat it by the spoonful straight out of the pot. Just lightly salted is best else your overall meal will be too salty when you add a properly seasoned main onto the plate, like the pictured Shredded Chipotle Mexican Pork and Beans.

How to make Hot Buttered Corn Rice

Use a small pot or large saucepan (20 – 22 cm/8 – 9″+). If your saucepan is too small, the depth of the rice will be too deep so the rice will cook unevenly, with mushy rice on the base and raw rice on the surface. If you use a pot that’s too large, then the depth of the rice will be too shallow so the liquid will evaporate too fast, leaving your rice undercooked, and likely with some burnt patches.

The pictured pot is 24cm / 9.4″ and it is a wee bit on the large side, but OK for experienced rice makers!

  1. Sauté – Melt the butter over high heat. Add the garlic and stir for 15 seconds until it smells amazing, but don’t let it go golden. Add the corn (still frozen is fine) and stir for 2 minutes. It will thaw and coat the surface in the tasty garlic butter.

    If using fresh corn, it won’t cook through in this time which is fine because it will steam cook with the rice.

  2. Coat rice – Add the rice and stir to coat it in the tasty garlic butter flavour.
  1. Bring to simmer properly – Add the stock and salt. Stir then let the stock come to a simmer.

    ⚠️ Make sure the whole surface is bubbling or rippling, not just around the edges, before you lower the heat and put the lid on. We want to make sure the stock gets enough heat in it to make sure the rice actually cooks, rather than sitting in hot water just bloating.

  2. Cook the rice for 12 minutes with the lid on. No peeking (this lets steam escape) and no stirring (express path to mushy rice!). At the end of this time, the water should be absorbed by the rice. Tilt the pot and peek quickly to check.
  1. Rest 10 minutes – Remove the pot from the the stove and leave it to rest for 10 minutes with the lid still on. This step is so important anytime you cook rice, whether plain or fully-loaded! The rice will finish cooking and the residual water on the surface of the grains gets absorbed, leaving the rice beautifully fluffy. See FAQ for more information about this and for more rice-making rantings, see my How to cook White Rice post. Writing that was so therapeutic!😂
  2. Butter & fluff – Remove the lid and add the butter. Gently fluff the rice. Once the butter is mostly melted, toss the green onion through. By the time you’ve finished, the butter should be fully melted. Time to serve, while it’s hot and fresh! After all, it’s called HOT Buttered Corn Rice, not Lukewarm Corn Rice (well there’s an average recipe name for you!).
Bowl of Hot Buttered Corn Rice

Hot Buttered Corn Rice will last for 3 days in the fridge or 3 months in the freezer. And it will reheat really well, so this is a good one to add to your menu planning for a big gathering because you can make it well in advance then just reheat until steamy!

I’m also thinking this might be a good one to add to the RecipeTin Meals rotation! (This is my food bank where we make and donate meals to the vulnerable). Though possibly my team will make a version with more vegetables in it so it will be a complete two-in-one side dish (ie starch plus vegetables). Then we can just add a piece of protein and we’ll have a complete, nutritious meal that’s efficient to make on a large scale! Must run this past them. 🙂 – Nagi x

Hot Buttered Corn Rice FAQ


Watch how to make it

Bowl of Hot Buttered Corn Rice

Hot buttered corn rice


Servings4 – 5 as a side

Tap or hover to scale

Recipe video above. Hot Buttered Corn Rice – a simple yet delicious upgrade from plain steamed rice. Serve with any cuisine, any dish – goes with everything. Make lots – everyone will go in for seconds!

Instructions

  • Pot size – Use a small pot or large saucepan about 20-22 cm/8-9″. (Note 3)
  • Sauté – Melt half the butter in a pot over high heat. Add the garlic and stir for 15 seconds. Add the corn and half the salt. Stir for 2 minutes.
  • Bring to simmer – Add the rice and stir for 30 seconds. Add the stock and remaining salt, and pepper. Stir, bring to a simmer (make sure the whole surface is bubbling/ripplling), then put the lid on and turn the heat down to medium low (or low, if your stove is strong). (Note 4)
  • Cook for 12 minutes (no peeking, no stirring!). The liquid should be absorbed by now – tilt the pot and take a quick peek to check.
  • Rest 10 minutes – Remove the pot from the stove and let it rest for 10 minutes with the lid on. This step is key, do not skip it! (Note 5)
  • Toss – Lift the lid, add the remaining butter, fluff the rice to melt the butter through. Add green onion and toss through.
  • Tumble into serving bowl. Serve hot!

Recipe Notes:

1. Frozen corn – Delicious with frozen corn so imagine how great it is with fresh! The same cooking times applies to either. Recipe will work with canned corn too but it’s not quite as good (it’s wetter, so doesn’t sauté as well and gets overly soft when cooked, I find). Use one 400g/14oz can, drained.
2. Rice – Long grain best (this is what I use), also basmati works just as well. Next best is medium grain. Short grain (sushi rice) will also work but the rice is a bit stickier.
 No need to rinse rice unless you’re concerned about cleanliness. Don’t worry, the rice is fluffy (see video proof) because we’re using the right water to rice ratio of 1.5:1. If you can’t shake the habit, go ahead and rinse but reduce the stock by 2 tablespoons (to account for waterlogged rice).
Do not use: jasmine rice, brown rice, risotto rice, paella rice, wild rice, black rice, quinoa, or any faux rice (eg cauliflower rice), any par-cooked rice (those microwave packets). 
3. Pot size matters for cooking rice well on the stove! Too small = cooks unevenly. Too large = liquid evaporates too quickly = undercooked rice. If doubling or tripling, use a very large pot or stock pot. See in post for more information.
4. Bubbling stock – Make sure the whole surface of your liquid is bubbling / rippling, not just around the edge, to make sure the stock is hot enough before lowering the heat and starting the timer.
5. Resting rice is key to allow the rice to finish cooking and become fluffy. Read in post for more rantings about why this is so important! (In the How To Make section).
Keeps for 3 days in the fridge or 3 months in the freezer. Reheats extremely well. Excellent one to make ahead for gatherings!

Life of Dozer

Me: He failed.

Dozer: Winning!

Steak Pasta Salad – Two Peas & Their Pod

0


Quick Summary

Steak Pasta Salad made with juicy grilled steak, charred corn, red pepper, tomatoes, crispy cucumbers, salty cotija cheese, and a zesty cilantro lime vinaigrette. Serve as a main dish or take as a side dish to any party or potluck! This pasta salad is always a crowd pleaser!

steak pasta salad in white serving bowl. Steak Pasta Salad – Two Peas & Their Pod

Pin this now to find it later

Pin It

I love making pasta salads, especially during the summer months. A few favorite pasta salad recipes include: Italian pasta salad, easy orzo salad, caprese pasta salad, and BLT pasta salad.

Grilled steak is also perfect for summertime. Everyone loves steak salad, steak tacos, and steak kabobs. They are summer staples.

Well, I decided to make a Steak Pasta Salad that combines the richness of steak with the freshness of pasta and vegetables. This pasta salad is made with grilled steak, charred corn, grilled red peppers, cucumber, tomatoes, red onion, salty cotija cheese, and a vibrant cilantro lime vinaigrette. The flavors are phenomenal!

Feel free to customize with your favorite vegetables or add other ingredients like avocado or black beans.

This pasta salad can be served as a main dish for lunch or dinner, and it is also a great recipe to take to parties and potlucks. It’s always a crowd-pleasing dish, your friends and family will LOVE it!

It is also a good recipe for meal prepping because the salad holds up well. Store in the fridge and enjoy leftovers!

ingredients to make steak pasta salad. ingredients to make steak pasta salad.

Ingredients

  • Steak– I recommend using flank steak, but sirloin, tri-tip, hanger, and skirt steak will also work.
  • Sweet corn– use corn on the cob. This is a great recipe for summertime when corn is in season.
  • Red bell pepper– seeds and stem removed.
  • Fusilli pasta– or pasta of your choic!
  • Grape tomatoes– halved.
  • Cucumber– I like to use English cucumber.
  • Red onion– diced.
  • Cotija cheese– don’t skip the cheese, it adds SO much flavor! Queso fresco will also work!
  • Cilantro Lime Vinaigrette– the dressing is light and flavorful! If you prefer a creamy dressing, you can use Jalapeño Ranch or Creamy Cilantro Lime Dressing.
  • Cilantro– for garnish!
steak grilling on grill pan. steak grilling on grill pan.

How to Make Steak Pasta Salad

  • Preheat a grill or heat a stovetop grill pan over medium-high heat. If using a grill, lightly oil the grate.
  • Season the steak generously with salt and pepper. Place the steak on the grill and cook undisturbed for 6 minutes. Flip it once and continue cooking until it reaches your desired level of doneness. For medium-rare, cook the steak until it reaches an internal temperature of 130 degrees F.
  • Transfer the steak to a cutting board and let rest while you prepare the rest of the salad.
sweet corn and red bell peppers grilling on grill pan. sweet corn and red bell peppers grilling on grill pan.
  • Place the corn and red pepper pieces on the hot grill. Grill for 2 to 3 minutes per side, or until char marks form. Remove from grill and set aside to cool to room temperature.
pasta draining in colander. pasta draining in colander.
  • Cook the pasta to al dente, according to package instructions. Drain and rinse with cold water. Place the pasta in a large bowl.
steak being cut into cubes with knife on wood cutting board. steak being cut into cubes with knife on wood cutting board.
  • Use a sharp knife to cut the steak into small cubes. Cut the charred corn off the cobs and chop up the grilled pepper pieces.
steak pasta salad ingredients in large white bowl. steak pasta salad ingredients in large white bowl.
  • Add the steak, corn, pepper, tomatoes, cucumber, red onion, and cotija cheese to the pasta. Season with salt and black pepper, to taste.
cilantro lime vinaigrette in blender jar. cilantro lime vinaigrette in blender jar.
cilantro lime vinaigrette being spooned over steak pasta salad. cilantro lime vinaigrette being spooned over steak pasta salad.
  • Pour the vinaigrette over the pasta salad. Toss well until the salad is well coated. Taste and add more salt and pepper, if necessary.
  • Garnish with cilantro and serve.

How to Store

  • Store leftover pasta salad in an airtight container in the refrigerator for up to 3 days. To freshen the salad up, toss in a little more dressing or drizzle with a little olive oil or avocado oil.
  • You can make the cilantro lime vinaigrette in advance. Store in a jar or container in the fridge for up to one week. Whisk well before using.
steak pasta salad on plate with fork. steak pasta salad on plate with fork.

More Pasta Salad Recipes

Steak Pasta Salad

Steak Pasta Salad made with juicy grilled steak, charred corn, red pepper, tomatoes, crispy cucumbers, salty cotija cheese, and a zesty cilantro lime vinaigrette. Serve as a main dish or take as a side dish to any party or potluck! This pasta salad is always a crowd pleaser!

Prevent your screen from going dark

  • 1 lb flank steak
  • 2 ears sweet corn
  • 1 large red bell pepper, seeds and stem removed, cut into 3-inch-wide pieces
  • 8 oz fusilli pasta, or pasta of your choice
  • 1 cup halved grape tomatoes
  • 1 cup diced cucumber
  • 1/2 cup diced red onion
  • 1/2 cup crumbled cotija cheese
  • Kosher salt and black pepper, to taste
  • Cilantro Lime Vinaigrette
  • Cilantro, for garnish
  • Preheat a grill or heat a stovetop grill pan over medium-high heat. If using a grill, lightly oil the grate.

  • Season the steak generously with salt and pepper. Place the steak on the grill and cook undisturbed for 6 minutes. Flip it once and continue cooking until it reaches your desired level of doneness. For medium-rare, cook the steak until it reaches an internal temperature of 130 degrees F.

  • Transfer the steak to a cutting board and let rest while you prepare the rest of the salad.

  • Place the corn and red pepper pieces on the hot grill. Grill for 2 to 3 minutes per side, or until char marks form. Remove from grill and set aside to cool to room temperature.

  • Cook the pasta to al dente, according to package instructions. Drain and rinse with cold water. Place the pasta in a large bowl.

  • Use a sharp knife to cut the steak into small cubes. Cut the charred corn off the cobs and chop up the grilled pepper pieces.

  • Add the steak, corn, pepper, tomatoes, cucumber, red onion, and cotija cheese to the pasta. Season with salt and black pepper, to taste.

  • Make the cilantro lime vinaigrette and pour desired amount over the pasta salad. Toss well until the salad is well coated. Taste and add more salt and pepper, if necessary. Garnish with cilantro and serve.

Store leftovers in the fridge for up to 3 days. 

Calories: 320kcal, Carbohydrates: 38g, Protein: 25g, Fat: 8g, Saturated Fat: 3g, Polyunsaturated Fat: 1g, Monounsaturated Fat: 2g, Cholesterol: 56mg, Sodium: 192mg, Potassium: 581mg, Fiber: 3g, Sugar: 5g, Vitamin A: 953IU, Vitamin C: 33mg, Calcium: 96mg, Iron: 2mg

Keywords pasta, pasta salad, steak

Have you tried this recipe?

Leave a comment below and share a photo on Instagram. Tag @twopeasandpod and hashtag it with #twopeasandtheirpod


Breakfast Monkey Bread | Recipesedge

0

Rise and shine to Breakfast Monkey Bread with delicious savory flavors! It’s made with Grands biscuits, eggs, sausage, bacon, and cheese, all baked in a bundt pan. The result is a crowd-pleasing, pull-apart bread that everyone will devour!

Overhead shot of savory breakfast monkey bread with piece pulled out.

Reasons You’ll Love This Recipe

  • Delicious Flavor: This breakfast monkey bread has a wonderful savory, cheesy flavor combined with soft, tender bread! It’s so good you won’t be able to stop eating it!
  • Easy to Make: With simple ingredients, one pan baking, and easy-to-follow instructions, you will love whipping this up for any brunch or quick reheat breakfast option for your kids!
  • Crowd Pleaser: This breakfast is sure to be a hit with everyone—kids and adults alike!
  • Great for Holidays: I love holiday brunches, such as Christmas morning, Mother’s Day, and Easter. This monkey bread recipe is the perfect addition to your brunch spread!

What is Savory Breakfast Monkey Bread?

If you love classic Monkey Bread with its cinnamon-sugar goodness, you’re in for a treat! This breakfast version keeps the fun pull-apart style but adds a savory spin with eggs, cheese, and breakfast meats. This breakfast monkey bread is one of my family’s all-time favorite brunch items.

Ingredients You’ll Need

This breakfast monkey bread recipe might use Grands biscuits, but it tastes homemade! Only eight simple ingredients are needed, but once it’s baked, it looks so impressive. Perfect for holiday brunches! Check out the recipe card below for exact measurements.

  • Grands Biscuits: I love making pull-apart bread recipes with these canned biscuits! They are so versatile!
  • Large Eggs: This recipe uses six large eggs that are lightly scrambled and added to the breakfast bread.
  • Heavy Cream: A small amount of heavy cream added to the eggs makes them fluffy and light.
  • Seasoning: Everything bagel seasoning for extra flavor.
  • Butter: Makes the eggs taste rich and SO delicious.
  • Meat: Precooked breakfast sausage and bacon are added to the mixture of ingredients for the most amazing savory flavor.
  • Cheese: I really like shredded cheddar cheese in this recipe, but feel free to add whichever cheese you prefer! Gruyère, white cheddar cheese, pepper jack, Monterey Jack, provolone, and Swiss are all great options.
Overhead shot of labeled ingredients. Overhead shot of labeled ingredients.

How to Make Breakfast Monkey Bread

I love how wonderfully simple this recipe is. With nearly everything ready-made, you can just toss it all into a pan and let the oven handle the rest! Just follow my step-by-step instructions below for a breakfast that’s bound to become a favorite!

  1. Prep: Preheat the oven to 350 degrees Fahrenheit and spray a large bundt pan with pan spray. Cut all the biscuits into quarters and set them aside in a large bowl.
  2. Whisk Eggs: Add the eggs to a small bowl and whisk with the cream and everything bagel seasoning.
  3. Cook Eggs: Heat the butter in a large skillet over medium heat until melted, and then scramble the egg mixture until slightly undercooked.
  4. Combine Ingredients: Remove the eggs from the heat and transfer them to the bowl with the biscuits. Add the scrambled eggs, sausage, bacon, and cheese.
  5. Stir Together: Toss everything together until evenly combined.
  6. Bake: Carefully fill the prepared bundt pan with the biscuit mixture until it’s full. Then, bake for 30-35 minutes, until golden brown. Once baked, allow the Monkey Bread to cool slightly before turning it out onto a serving plate. Finally, serve it warm and enjoy!

Breakfast Monkey Bread Tips and Variations

Here are some simple tips and ideas for making savory monkey bread! There are many ways to switch up the ingredients and make it your own. Have fun with it!

  • Seasoning Options: The Everything bagel seasoning can be substituted for other seasonings or just salt and pepper. Use 1/2 teaspoon salt and a pinch or two of black pepper.
  • Different Cooking Options: You can use a 6-cup bundt pan by cutting the recipe in half and baking it for 20-25 minutes. Alternatively, you can spray a muffin pan with non-stick spray, divide the mixture into 12 portions, and bake for 13-18 minutes to make mini Monkey Bread muffins.
  • Other Canned Biscuits: If you use regular-sized canned biscuits instead of the Grands, use the same number of cans, but cut the biscuits in half instead of in quarters.
  • Add Onion and Peppers: Sauté 1/2-1 cup of onions or peppers and stir them in with everything to add a little more variety of flavor.
  • Add Chives: Try adding 1-2 tablespoons of chopped chives with the eggs or stirring them into the biscuit mixture.

Side shot of someone pulling a piece of the savory breakfast monkey bread from the whole. Side shot of someone pulling a piece of the savory breakfast monkey bread from the whole.

How to Store Leftover Breakfast Monkey Bread

This breakfast monkey bread is great because it keeps fresh for many days! Follow my tips below for storing and reheating leftovers.

  • In the Refrigerator: Store in an airtight container or wrapped in plastic wrap for about five days.
  • In the Freezer: Store in a freezer bag or wrapped in 2 -3 layers of plastic wrap followed by a layer of foil for up to 3 months. Thaw overnight in the fridge before reheating. Reheat in the oven at 350 degrees Fahrenheit for 20 minutes or until the internal temperature reaches 165 degrees Fahrenheit.

Close up shot of the breakfast monkey bread with piece taken out. Close up shot of the breakfast monkey bread with piece taken out.

More Breakfast Recipes

Breakfast is my favorite because there are so many wonderful sweet and savory options! I love a good brunch, where I can make all sorts of recipes and enjoy them at the same time! Here are a few ideas for you to try that your whole family will love! Like this breakfast monkey bread, they would all be great as part of a holiday brunch spread!

Pin this now to find it later

Pin It

  • Preheat the oven to 350 degrees Fahrenheit and spray a large bundt pan with pan spray.
  • Cut all the biscuits into quarters and set them aside in a large bowl.
  • Add the eggs to a small bowl and whisk with the cream and bagel seasoning. Heat the butter in a large skillet over medium heat until melted, then scramble the egg mixture until slightly undercooked. Remove the eggs from the heat and transfer them to the bowl with the biscuits.
  • Add the sausage, bacon, and cheese. Toss everything together until evenly combined.
  • Carefully fill the prepared bundt pan with the biscuit mixture until the pan is full.
  • Bake for 30-35 minutes, until golden brown. Let the monkey bread cool slightly before turning it out onto a serving plate. Serve warm.

Calories: 836kcalCarbohydrates: 57gProtein: 24gFat: 57gSaturated Fat: 20gPolyunsaturated Fat: 11gMonounsaturated Fat: 21gTrans Fat: 0.4gCholesterol: 209mgSodium: 1733mgPotassium: 452mgFiber: 2gSugar: 4gVitamin A: 725IUVitamin C: 0.2mgCalcium: 235mgIron: 5mg

Nutrition information is automatically calculated, so should only be used as an approximation.


In a single day Oats (Base Recipe plus Variations)

0


Overnight Oats are the ultimate introduction to budget-friendly meal prep! With the busy lives we all lead, it’s hard to fit in time for breakfast before rushing out the door, but this no-cook recipe is the magical solution, trust me! My overnight oats base recipe is absolutely delicious as-is but is also the perfect vessel for your favorite toppings. And don’t worry if you’re not feeling particularly creative; I’ve shared 3 of my favorite flavor variations below.

Overhead view of overnight oats with various toppingsOverhead view of overnight oats with various toppings

I must confess: I almost always skip breakfast if I don’t plan ahead! Then, noon rolls around, and I am hangry. It’s not a good look—just ask my husband! That’s why having this overnight oatmeal in the fridge at all times is a MUST. Oats are full of fiber, which keeps me full until lunchtime, and I love the blank canvas to turn them into a unique treat, depending on my craving that day.

What Are Overnight Oats?

Think of overnight oats as the cooler, more convenient cousin of traditional oatmeal. Instead of cooking the oats on a stovetop or in a microwave, they soak overnight in liquid (usually milk) and soften to the perfect texture without heat. I also add brown sugar, chia seeds, and cinnamon to my base recipe to create a delicious, well-rounded breakfast. Mix it all in a mason jar and let it sit in the fridge overnight for a grab-and-go breakfast in the morning!

Here’s what you’ll need to make my easy overnight oats recipe:

  • Oats: I use old-fashioned oats (also known as rolled oats) for my overnight oatmeal. Quick-cook oats and steel-cut oats don’t work as well, as they absorb liquid differently.
  • Milk: I like to make mine with dairy-free milk, but I whipped these oats up a few times with whole milk, 2% milk, and almond milk, so I can tell you this recipe works no matter your preference!
  • Brown Sugar: Adds just the right amount of sweetness.
  • Cinnamon: You can also use a different spice depending on the toppings you’ll add—pumpkin pie spice, nutmeg, or whatever you like!
  • Chia Seeds: At its core, overnight oats only require two ingredients: oats and milk. But I highly recommend adding chia seeds! They soak up liquid like crazy and create a chia oatmeal pudding-like texture. They’re also nutrient-dense, providing fiber, iron, and omega-3s.
  • Salt: Just a pinch will enhance the other flavors.
  • Toppings: Add any toppings you love to your jar! I’ve listed some of my favorites below, but you really can’t go wrong with any combination.

Are Overnight Oats Healthy?

Oats are a great source of fiber, protein, vitamins, and minerals! They’ll keep you full and satisfied for longer, making them a great breakfast option. Adding milk, chia seeds, fresh fruit, and nuts only adds to their nutritional value. You can leave out the brown sugar if you want to reduce the added sugar, but overall, overnight oats with chia seeds can definitely be considered a healthy choice!

  • The perfect ratio for oats to milk is 1:1, in my opinion. I use ½ cup of oats and ½ cup of milk to make one serving. You don’t need to reduce the milk if you omit the chia seeds.
  • Add fresh fruit just before eating to stop them from getting mushy. The same goes for granola or anything else you want to stay crunchy.
  • Let the oats sit overnight (about 8 hours) for the best texture, but 15 minutes or so is okay if you’re in a hurry. This is enough time for the chia seeds to absorb some liquid and for the oats to soften slightly.
  • Overnight oats are meant to be enjoyed cold, but you can absolutely heat them up if you prefer a warm breakfast. 60-90 seconds in a microwave-safe container should do the trick!

how long do overnight oats last?

These oats can last in the fridge for 4-5 days, making them great for meal-prepping. I prefer enjoying them within 12 hours for the best texture, but they’ll still taste good after a few days—maybe just a bit softer. Store them in an airtight container to keep them fresh, and don’t add any toppings until you’re ready to eat them.

Overnight Oats Variations

I am super picky when it comes to my oatmeal: 1. I want a lot of varied textures, 2. I want it to be nutrient-dense and have healthy components, and 3. It has to come together FAST! These flavor variations check everything off my list:

Peanut BUTTER and Jelly

Your childhood favorite gets an upgrade with my peanut butter and jelly overnight oat recipe. I layer blueberry jam with crunchy peanut butter AND peanuts for extra crunch. Add a few fresh blueberries and you’re good to go!

Chocolate Raspberry

Will chocolate and fresh berries ever not be a match made in heaven? I don’t think so. You only need some raspberry jam, dark chocolate chips, and fresh raspberries to make a breakfast that tastes just like dessert.

Banana Walnut

Banana bread is my go-to coffee shop snack, so I always have an overnight oat version in the fridge. Simply mix in some walnuts and add sliced bananas on top for a delicious and satisfying breakfast that’ll keep you feeling full all morning!

Side view of overnight oats in mason jarsSide view of overnight oats in mason jars


Overnight Oats (Base Recipe plus Variations)

These easy Overnight Oats are the ultimate introduction to budget-friendly meal prep. They’re no-cook, ideal for on-the-go, and customizable!

Overhead view of overnight oats with various toppingsOverhead view of overnight oats with various toppings

Prevent your screen from going dark

Overnight Oats Base Recipe

  • ½ cup old fashioned oats ($0.82)
  • ½ cup milk ($0.09)
  • ½ Tbsp brown sugar* ($0.04)
  • tsp cinnamon ($0.01)
  • ½ Tbsp chia seeds ($0.07)
  • pinch of salt ($0.01)

Peanut Butter and Jelly Variation (total: $1.93 per serving)

  • base recipe ($1.04)
  • 1 tsp blueberry jam ($0.04)
  • 1 Tbsp peanuts ($0.10)
  • 1 Tbsp crunchy peanut butter ($0.49)
  • a few blueberries, if desired ($0.23)

Chocolate Raspberry Variation (total: $1.56 per serving)

  • base recipe ($1.04)
  • 1 tsp red raspberry jam ($0.04)
  • 1 Tbsp dark chocolate chips ($0.11)
  • a few raspberries, if desired ($0.34)

Banana Walnut Variation (total: $1.42 per serving)

  • base recipe ($1.04)
  • 1 Tbsp walnuts ($0.29)
  • of a banana, diced ($0.09)
  • Combine old fashioned oats, brown sugar, cinnamon, chia seeds, and salt in an 8 oz. Mason Jar.

  • Pour in milk.

  • Stir or shake to combine, making sure all ingredients are mixed in evenly to avoid clumps of chia or brown sugar.

  • Put the lid onto your mason jar and place it in the fridge.

  • Refrigerate for 15 minutes or up to 12 hours before enjoying.

See how we calculate recipe costs here.


*If you don’t want added sugar, skip it! The ratios in this recipe come out great with or without the brown sugar.

Serving: 18 oz jar (base recipe only)Calories: 302kcalCarbohydrates: 48gProtein: 10gFat: 8gSodium: 344mgFiber: 6g

Read our full nutrition disclaimer here.

Side view of 4 jars of overnight oats with a wooden spoon taking some from one of the jarsSide view of 4 jars of overnight oats with a wooden spoon taking some from one of the jars

how to make Overnight Oats – step by step photos

Ingredients for overnight oatsIngredients for overnight oats

Combine ½ cup old fashioned oats, 1/2 Tbsp brown sugar, ⅛ tsp cinnamon, ½ Tbsp chia seeds, and a pinch of salt in an 8 oz. Mason Jar.

Ingredients for overnight oats in a mason jar with milk being poured inIngredients for overnight oats in a mason jar with milk being poured in

Pour in ½ cup milk.

A spoon mixing the ingredients for overnight oats in a mason jarA spoon mixing the ingredients for overnight oats in a mason jar

Stir or shake to combine, making sure all ingredients are mixed in evenly to avoid clumps of chia or brown sugar.

Overnight oats in a mason jar before being refrigeratedOvernight oats in a mason jar before being refrigerated

Put the lid onto your mason jar and place it in the fridge.

Overnight oats in a mason jar after being refrigeratedOvernight oats in a mason jar after being refrigerated

Refrigerate for 15 minutes or up to 12 hours before enjoying.

Overhead view of 4 mason jars filled with overnight oatsOverhead view of 4 mason jars filled with overnight oats

Never skip breakfast again with this easy and satisfying recipe for overnight oats!

Do-it-yourself Eclairs with Pastry Cream

0


Learn how to make homemade eclairs from scratch with this step-by-step guide. Filled with rich pastry cream and topped with decadent chocolate ganache, no one will believe these eclairs didn’t come from a bakery—maybe not even you! If you follow my clear instructions—including plenty of step photos!—you CAN make these impressive pastries in your home kitchen.

I originally published this recipe in 2018 and have since added new photos and a few more success tips.

eclairs with chocolate on top and filled with pastry cream.

If eclairs have been on your baking bucket list, now’s the time, because today I’m showing you how to make homemade eclairs. This oblong pastry is traditionally made from choux pastry dough, filled with pastry cream, and topped with chocolate icing. This delicious preparation is called eclair au chocolat in French and it’s likely the way you’ve eaten eclairs from a bakery or patisserie.

Today’s homemade eclairs have 3 components:

  1. Choux pastry
  2. Pastry cream
  3. Chocolate ganache

Let’s start with the…

close-up of pastry cream (crème pâtissière).

Pastry Cream Filling

Pastry cream is the classic choice for filling eclairs, though there are plenty of other options (and I list some below). I recommend you make this first, because it needs at least 3 hours of chilling time in the refrigerator before you can use it. You can also make it up to 24 hours in advance, if you want to make it the day before.

I have a full tutorial on how to make pastry cream, but here’s an overview of the steps so you know what to expect:

  1. In a heatproof bowl with a pour spout, whisk together egg yolks and cornstarch.
  2. In a saucepan over medium heat, simmer milk and sugar.
  3. Slowly pour the hot milk mixture into the egg yolks mixture, whisking the entire time to temper.
  4. Place a fine-mesh sieve over the saucepan, and pour the mixture through the sieve back into the saucepan. The sieve will strain out any solids that may have formed during tempering.
  5. Return saucepan to heat, and whisk as it thickens.
  6. Once big bubbles are popping on the surface, remove from heat and stir in butter, vanilla, and salt.
  7. Cool briefly, then transfer to a heatproof bowl, place a piece of plastic wrap on the surface of the pastry cream, and chill for 3 hours.

While the pastry cream is chilling, move on to making the choux pastry dough.


Choux Pastry Dough

Many readers have tried this recipe for choux pastry and reported back that it’s worlds easier than they ever imagined! So don’t be nervous about this French pastry!

One reader, Tiffany, commented: “I love this recipe! We watched the video and followed the recipe exactly. They turned out just like the photos! Very light and delicious. ★★★★★

One reader, Greg, commented: “Great recipe! Enabled me to successfully make eclairs for the first time. The images of the finished dough were very helpful, as well as the hint about not needing to use all the egg… ★★★★★”

You’re making the choux pastry the exact same way as you do for profiteroles or cream puffs, but the only difference is that you’re piping the pastry into oblong, or log, shapes instead of mound shapes.

Choux pastry comes together in about 10–15 minutes with just 7 ingredients. Most of the ingredients are cooked together on the stove; this initial cooking causes the starch in the flour to gelatinize, which will help the pastry hold onto steam and puff up. The Spruce Eats has an interesting article explaining the science of choux pastry.


How to Shape Eclairs

To shape the homemade eclairs, use a piping bag (reusable or disposable) fitted with any large round tip. I like using Ateco #809 piping tip. You could also use a zip-top bag and snip off 1 corner. Pipe 4-inch logs onto a baking sheet lined with parchment paper that’s been brushed with water. Using a water-moistened finger, smooth down any peaks/ends.

Lightly brush each log with egg wash before baking, so your eclair shells develop that gorgeous golden sheen.

piping eclairs onto a parchment lined baking sheet

In the photo above, notice how the parchment paper is wet? That’s a very important step. Why? Think of cheesecake. We bake cheesecakes in a water bath. Cheesecake, like choux pastry, is egg-heavy. Eggs need a humid environment in the oven to (1) properly rise and (2) avoid drying out and burning.

Water-moistened parchment paper = perfectly puffed pastries with a deliciously light, practically hollow center (that’s why they’re called shells). AKA pastry perfection. Let them cool completely.

choux pastry shells on cooling rack.choux pastry shells on cooling rack.

Now turn your attention to the…

2-Ingredient Chocolate Ganache Topping

You can top these eclairs with any kind of icing you prefer (try one of these easy donut frostings), or just give them a simple dusting of confectioners’ sugar, but my favorite way to top eclairs is with chocolate ganache.

You only need 2 ingredients to make this rich, decadent topping: warm heavy cream and chopped chocolate. Let it cool for 15 minutes to come to a consistency that’s just right for dipping.


How to Assemble Homemade Eclairs

Eclair assembly line, let’s go!

Pastry cream is quite thick after chilling, so you usually need to give it a stir to smooth it out again.

Transfer the chilled pastry cream to a piping bag (reusable or disposable) fitted with a small-ish round or open star piping tip. I suggest Wilton piping round tip 12, which is wide enough for the cream to pipe through, but still small enough you can nudge it inside the end of an eclair.

  • Don’t have a piping tip for this? Don’t worry about it. Slice the eclair in half horizontally and spread the cream filling inside.

Using a toothpick, prick a hole in 1 end of the eclair shell. Insert the piping tip and gently squeeze the piping bag to fill the eclair with pastry cream.

piping pastry cream into eclair shell and shown again with many of them filled.piping pastry cream into eclair shell and shown again with many of them filled.
chocolate ganache-topped eclairs on cooling rack.chocolate ganache-topped eclairs on cooling rack.

Finally, give each filled eclair a generous dip in the chocolate ganache topping. The topping will set at room temperature in about an hour, or you can refrigerate the eclairs to speed it up.

two eclairs on plate with one bitten into.two eclairs on plate with one bitten into.

If eclairs have been on your baking bucket list, what are you waiting for? Give them a try!

Alternate Eclair Flavors

Mix and match fillings and toppings to find your favorite eclair flavor. Which will you try first?!

eclairs stacked on a white plateeclairs stacked on a white plate

Print

clock icon cutlery icon flag icon folder icon instagram icon pinterest icon facebook icon print icon squares icon heart icon heart solid icon

eclairs with chocolate on top and filled with pastry cream.eclairs with chocolate on top and filled with pastry cream.

Homemade Eclairs

5 Stars 4 Stars 3 Stars 2 Stars 1 Star
5 from 26 reviews


  • Author:
    Sally


  • Prep Time:
    30 minutes


  • Cook Time:
    35 minutes


  • Total Time:
    1 hour, 45 minutes


  • Yield:
    16 eclairs


  • Category:
    Dessert


  • Method:
    Baking


  • Cuisine:
    French


Description

Using a few from-scratch components, you can create homemade eclairs, just like the kinds you enjoy from a pastry shop. These French pastries take a little time to prepare and assemble, so I encourage you to read through the recipe before beginning. You have many options for the filling, including traditional pastry cream, or any of the suggestions in the Notes or above the recipe.


Pastry Cream Filling

Choux Pastry

Chocolate Ganache Topping


Instructions

  1. Make the pastry cream filling first, as it needs at least 3 hours (or up to 24 hours) to chill in the refrigerator before using. In a large heatproof bowl (preferably with a pour spout), whisk the egg yolks and cornstarch together with a fork. It may not look like it will all come together (it will be dry at first), but keep mixing until the mixture is thick and combined. If it’s not coming together at all, add a few drops of the milk you need in step 3 to bring together. Set aside at room temperature. Combine the milk and sugar in a medium saucepan over medium heat. Whisk until the sugar has dissolved, then bring to a gentle simmer. Remove from heat. Pour the warm milk and sugar mixture in a slow and steady stream into the egg yolk and cornstarch mixture, whisking the entire time. Keep those egg yolks moving so they don’t scramble. Pour the mixture back into the saucepan through a sieve, to strain out any egg yolk solids that may have formed during tempering. Return the saucepan to medium heat, and whisk constantly. The mixture will be frothy on the surface at first, and then it will begin to thicken quickly and large bubbles will begin to burst on the surface. This usually takes about 1–2 minutes. Stand back and use caution. Let the bubbles burst for about 20 seconds, or until the mixture has thickened into a custard- or pudding-like consistency. (For a more accurate test, the custard is done when the temperature reaches 185–190°F (85–88°C).) Remove from heat. Whisk in butter, vanilla extract, vanilla bean seeds, and a pinch of salt. Refrigerate for at least 3 hours, and up to 24 hours. Makes 2–2.5 cups, or about 580–610g.
  2. Meanwhile, prepare the dough: Prepare the choux pastry dough recipe through step 4. You can use the choux pastry dough immediately for the eclairs or cover and refrigerate for up to 3 days.
  3. Preheat oven to 400°F (204°C). Line two baking sheets with parchment paper. Lightly brush the parchment with water, which creates a humid environment for the pastry shells, allowing them to puff up without drying out or burning.
  4. Transfer choux pastry dough to a piping bag (reusable or disposable) fitted with a large piping tip (I use Ateco #809 piping tip). Pipe 4-inch logs 3 inches apart on the prepared baking sheets. You can also use a zip-top bag and cut off the corner for easy piping. Using a water-moistened finger, smooth down any peaks or ends. Lightly brush each log with egg wash.
  5. Bake for 20 minutes, and then, keeping the pastries in the oven, reduce oven temperature to 350°F (177°C) and continue to bake for 8–12 more minutes until golden brown. Do not open the oven as the pastries cook, as cool air will prevent them from properly puffing up. Remove from the oven and transfer to a cooling rack. Allow to cool completely before filling.
  6. Make the chocolate ganache: Place chopped chocolate in a bowl. Heat the cream in a small saucepan until it begins to gently simmer. (Do not let it come to a rapid boil—that’s too hot!) Pour over chocolate and let it sit for 2–3 minutes to soften the chocolate. Slowly stir until chocolate has melted and combined completely with the cream. Cool for 15 minutes, so it reaches the perfect consistency for dipping/coating. Chocolate ganache will be thin at first, but will thicken up as it cools.
  7. Fill the eclairs: Transfer chilled pastry cream to a piping bag (reusable or disposable) fitted with a small-ish round or open star piping tip. I suggest Wilton piping round tip 12, which is wide enough for the filling to pipe out, but you can still nudge it inside the eclair. Use a toothpick to prick a hole in 1 end of each eclair shell. Gently nudge the piping tip into the hole. Carefully pipe pastry cream into each eclair shell, stopping when it feels full. Pipe the cream from both ends of the eclair if you notice it’s not reaching the other end. (Don’t have a piping tip for this? Slice the eclair in half horizontally, then sandwich filling inside.)
  8. Top the eclairs: Dip the top of each eclair into chocolate ganache and place on a serving plate or cooling rack until ready to serve. Chocolate ganache topping sets in about an hour at room temperature or in about 30 minutes in the refrigerator.
  9. Cover and store leftover filled pastries in the refrigerator for up to 3 days. Cover and store unfilled pastry shells at room temperature for 1 day, in the refrigerator for 5 days, or freeze for up to 3 months. Thaw in the refrigerator before filling and serving.

Notes

  1. Make Ahead Instructions: See choux pastry recipe for how to prepare the dough ahead of time. Pastry cream can be prepared, covered, and refrigerated up to 1 day ahead of time.
  2. Special Tools (affiliate links): Saucepan | Wooden Spoon | Electric Mixer (Handheld or Stand) | Baking Sheets | Parchment Paper | Pastry Brush | Piping Bag (Reusable or Disposable) | Wilton #12 Piping TipAteco #809 Piping Tip
  3. Other Filling Options: Instead of pastry cream, you can use the peanut butter mousse filling detailed below; whipped cream for an extra light and barely sweetened filling; lightly sweetened whipped frosting; the no-bake cheesecake filling from these cheesecake jars; lemon curd; or the chocolate mousse filling from this dark chocolate mousse cake. See more suggestions above the recipe.
  4. Peanut Butter Mousse Filling: Using a handheld or stand mixer fitted with a whisk attachment, beat 1 cup (240ml) cold heavy cream on medium-high speed until soft peaks form, about 3 minutes. Temporarily transfer to another mixing bowl. Using a handheld or stand mixer fitted with a whisk attachment, beat 8 ounces (226g) softened full-fat brick cream cheese on medium-high speed until creamy and smooth. Add 1 cup (120g) confectioners’ sugar, 1 teaspoon vanilla extract, and 1/2 cup (130g) creamy peanut butter, then beat on medium-high speed until combined and creamy. Using a rubber spatula, fold in the whipped cream until combined. Taste. Stir in a pinch of salt, if desired. (Note: I don’t suggest using a natural-style peanut butter for the mousse as it would separate.)

Cherry Compote – David Lebovitz

0


I think I have something wrong with me. I seem to be afflicted with a particular malady that forces me to buy way too many summer fruits when they’re in season. It gets particularly dire when faced with apricots and cherries, two fruits whose seasons are much shorter than the others. The first fresh apricots I saw were back in upstate New York, around the 1980s, and I’d never seen them before. Someone brought us a basket of the tender, squishy little orange fruits to the restaurant that I worked at, and I remember being completely taken off guard, as the only apricots I’d ever seen were the dried ones. And while I loved the crinkly dried specimens, those fresh beauties with a red blush were a whole other taste entirely.

Fresh Cherry Compote recipe

Then, when I moved to California, I discovered how abundant fresh apricots are (or can be), as they are in France. But no matter how abundant – or not – cherries are when the season is in full swing, I always consider them extra-special fruits and give a prominent place in my kitchen. At the beginning of the season, they’re incredibly expensive and rarely good. Then, as the season moves along, they start showing up in larger mounds at the market, and the prices get gentler, coaxing me to buy as many as I can heft.

Fresh Cherry Compote recipeFresh Cherry Compote recipe

Fresh Cherry Compote recipe-3Fresh Cherry Compote recipe-3

This week, I was helpless when faced with an overload of summer fruits at the market. And in addition to a giant bag of apricots, two bulging sacks of tomatoes, and eight white nectarines, I bought 2 kilos (about 4 1/2 pounds, give or take a few cherries) of fresh cherries — and from the looks of the other shoppers, it was more than any normal person would buy. (Although I think I made the vendor’s day.) But I couldn’t help it. They were Burlat cherries and I’d bought a small bag from the same vendor last week at the market, and there he was again, tempting me with more. Once I got home, I got my cherry pitter out, and pitted half of them, saving the others to eat fresh. (Except I almost polished off the fresh ones I was reserving as I was pitting these!)

Fresh cherries are, of course, great fresh. But cooking them can deepen, and even improve their flavor, especially nice if you get home and find yourself with a bag of rather wan ones. Or ones that you might snag at the end of the market, when the vendors are trying to get rid of any extras that might not keep until the next market day.

Fresh Cherry Compote recipe-4Fresh Cherry Compote recipe-4

In addition to being the answer to what the heck you (or I) are going to do with all those cherries, this recipe also deftly answers that age-old question: Can I freeze that? And the answer is a big, resounding, “Heck, yeah!” Once the compote has cooled, it freezes perfectly in zip-top freezer bags or other containers that you prefer to use, and will last up to a year. (You can also freeze pitted fresh cherries on their own as well.)

And let me tell you, it’s great to stumble upon a bag of cherry compote that may have moved to an unfavorable position in your freezer as summer shifted into fall – or winter, when they can become quickly forgotten. Once defrosted, and perhaps rewarmed, they’re terrific served with vanilla ice cream, plain yogurt, or alongside a cake, such as almond cake, gâteau de savoie, or angel food cake.

Fresh Cherry Compote recipe-5Fresh Cherry Compote recipe-5

I like to boost their flavor with a handful of dried sour cherries, added midway during cooking, so they plump up and absorb the cherry juices, which add another dimension of cherry flavor. A shot of kirsch also dials up the flavor nicely.

Cherry Compote

Be sure to use a larger pot that you think. For 2 pounds (1kg) of cherries, I used a 6-quart (6l) pan. Since the cherry juices will foam up as they cook, using a larger pot – and removing the lid from time-to-time – will keep your from having to clean up a sticky mess.

I’ve didn’t use much sugar here, so you can add more to taste, if your cherries aren’t as sweet as mine were. If you can get sour cherries, feel free to add some in place of the sweet cherries. If so, you may need to increase the sugar a little, to taste as well.

  • 2 pounds (1kg) fresh cherries
  • 1/4 cup (50g) sugar
  • cup (40g) optional: 1/3 dried sour cherries
  • 2 teaspoons kirsch, (or another fruit-based liqueur, or eau-de-vie)
  • 1-2 drops pure almond extract

Prevent your screen from going dark

  • Stem and pit the cherries. Put them in a large, nonreactive pot or saucepan and stir in sugar. Turn the heat to medium, cover, and cook for 10 minutes, lifting the lid and stirring them frequently, to encourage juicing and to make sure the liquid the cherries exude doesn’t foam up and overflow.

  • After 10 minutes of cooking, add the sour cherries, if using, and cook for 5 to 10 more minutes, until the cherries are wilted and completely cooked through.

  • Remove from heat and stir in the kirsch and almond extract. Let cool before storing or serving. The juices will thicken as the compote sits.

Storage: The cherry compote can be stored in the refrigerator for up to 5 days. It can be frozen for up to one year.

Related Recipes

No-Recipe Cherry Jam

Cherry Mess

Quick-Candied Cherries

Cherries in Red Wine Syrup

Lemon Yogurt Cake with Apricot-Cherry Compote