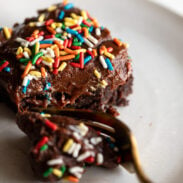
Yes, That’s What I Said. Party Brownies!

My sister Kristin has been making these fudgy, sprinkly, crowd-favorite brownies all summer, and I’ve sent her 100 texts to get all the info on this recipe over the last few weeks because I am obsessed with these babies.
Kids love them, adults love them, they’re easy, they’re fun, and they disappear alarmingly fast. They’re PARTY BROWNIES!
The base: a box of brownie mix. I don’t feel bad about this in the slightest. It makes these perfect “party brownies” because you can throw them together at a moment’s notice with minimal effort.
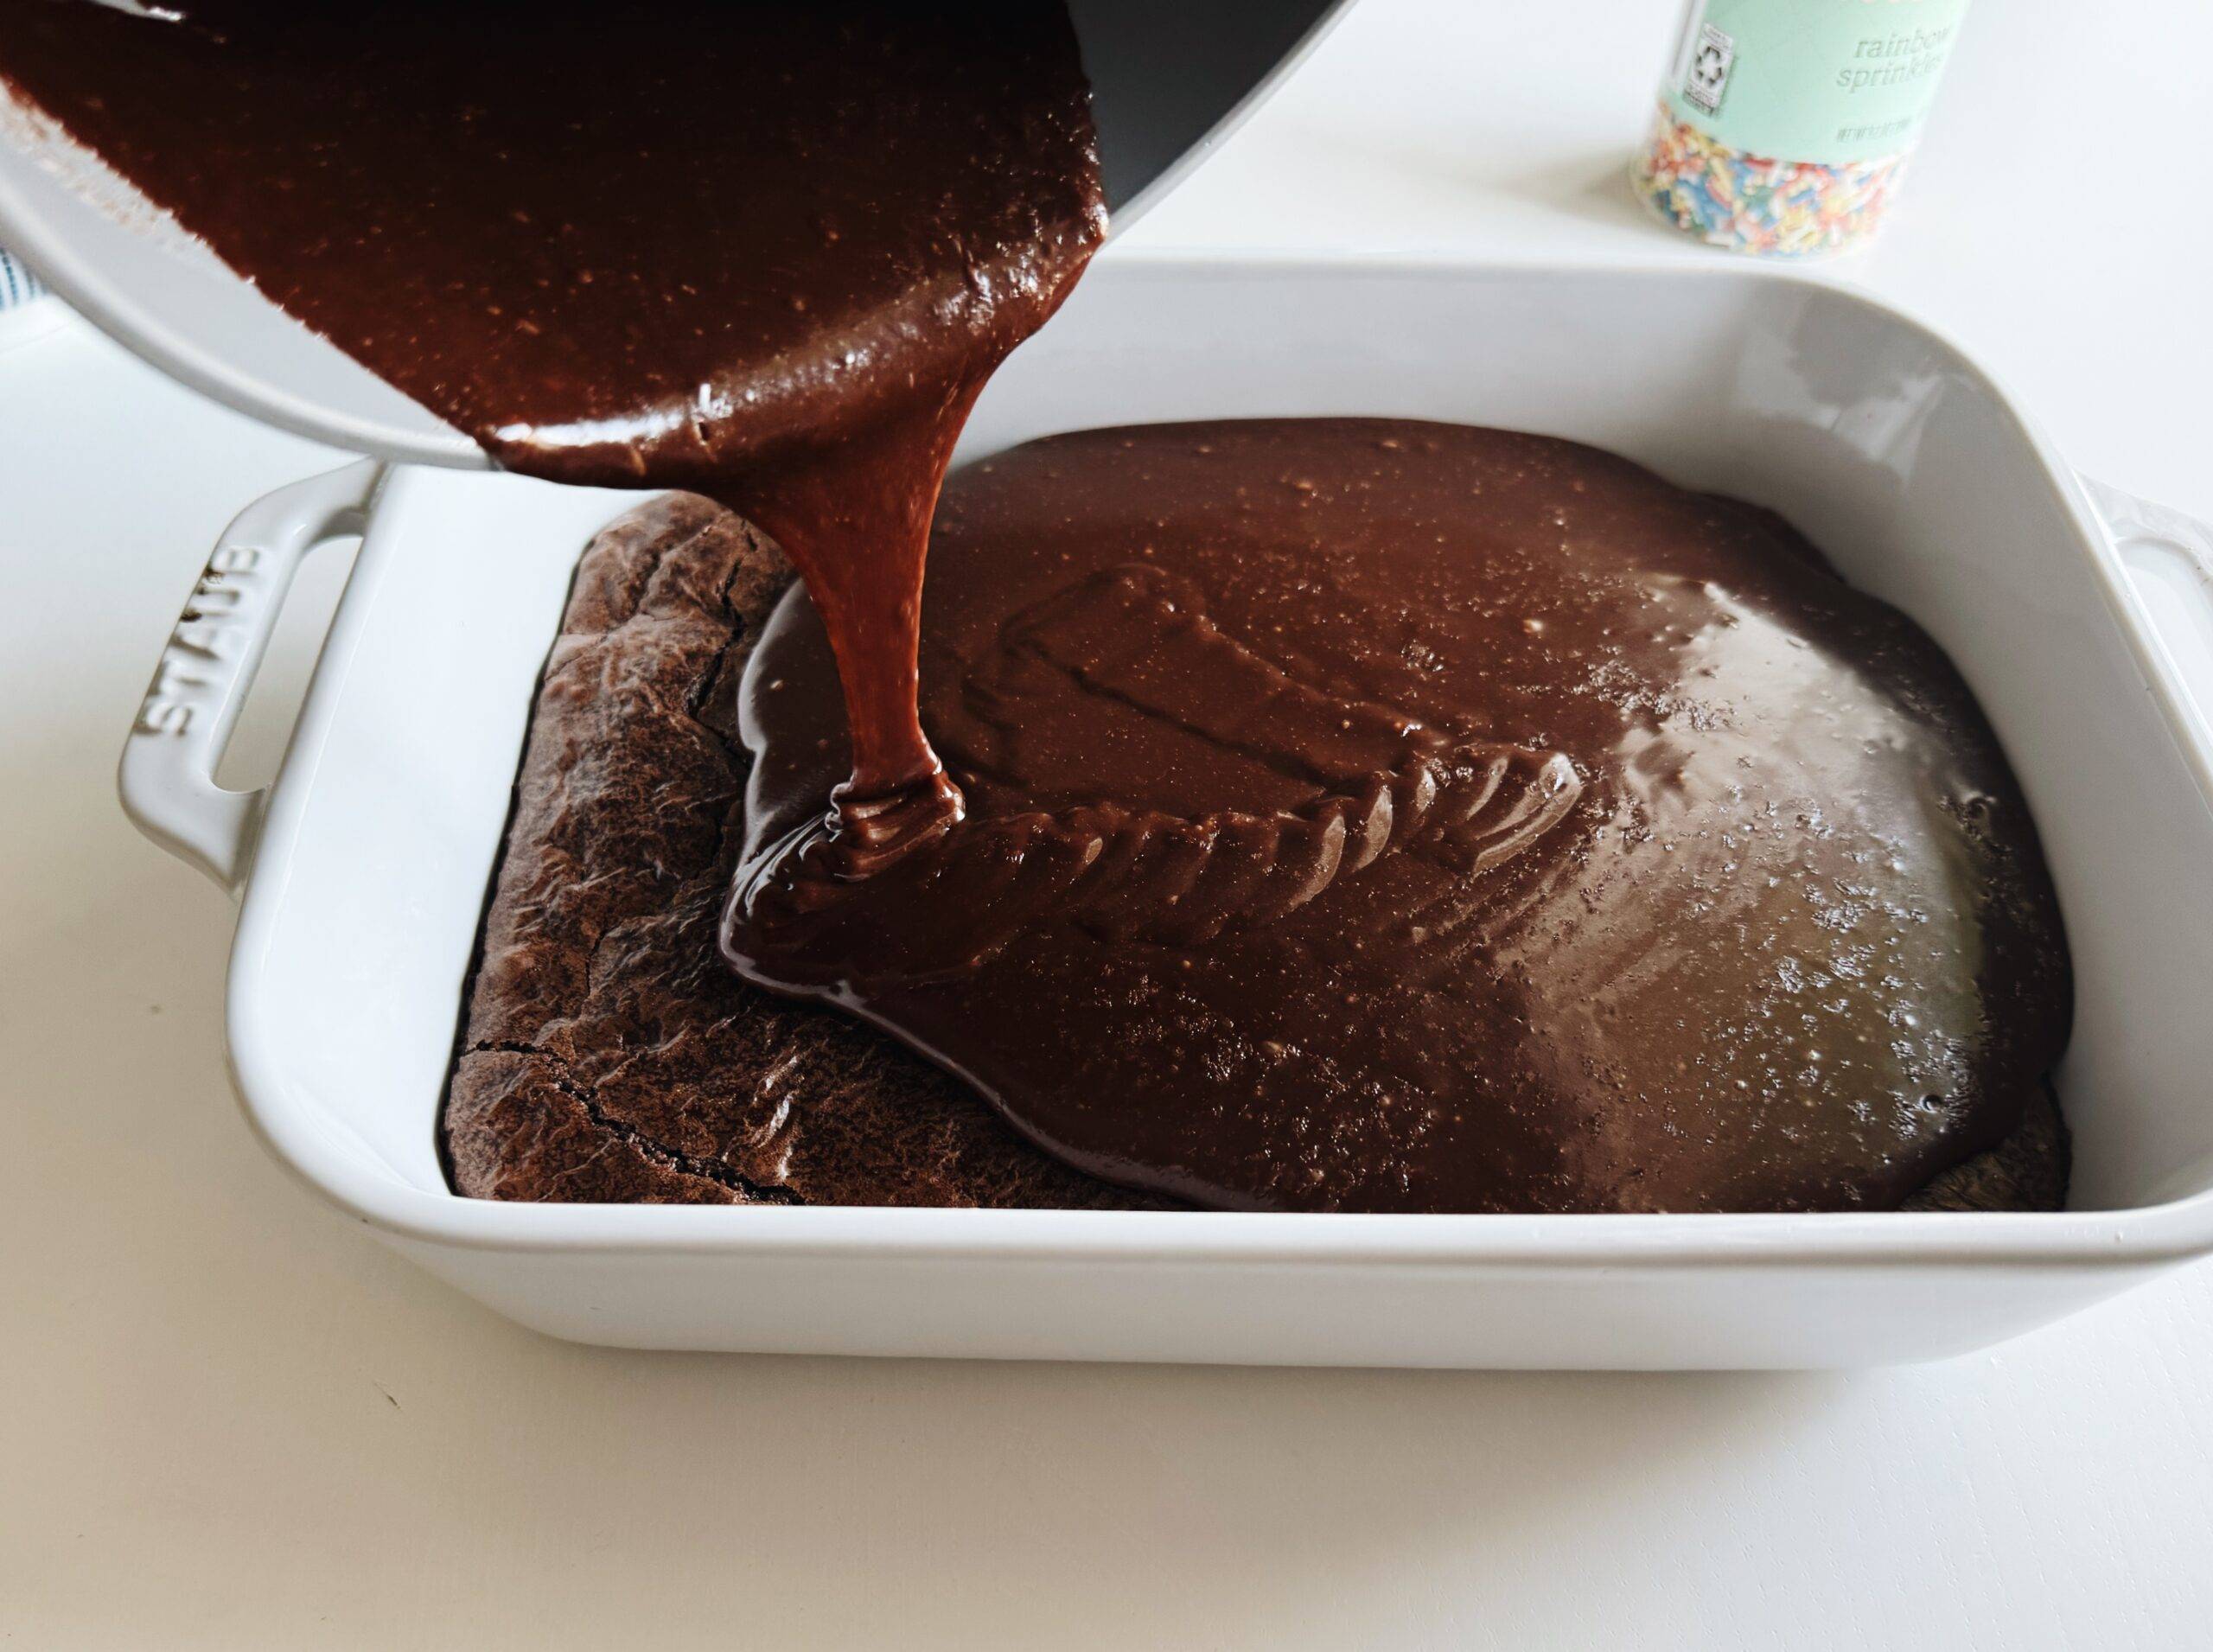
The top layer: an old-fashioned-style chocolate fudge frosting. The kind with the dry, crackly exterior, the kind my mom puts on my dad’s birthday cake every year, the kind that everybody’s grandma has a recipe for somewhere in an old stained church cookbook. It’s so good and it’s the exact top layer I never knew my brownies needed.
I call these party brownies because there is an event to bring them to nearly every weekend.
A pool party at my parents’ house, Bjork’s extended family reunion, an impromptu hangout with friends – the answer to all scenarios is a pan of Party Brownies. ♡

How To Make This Recipe
1
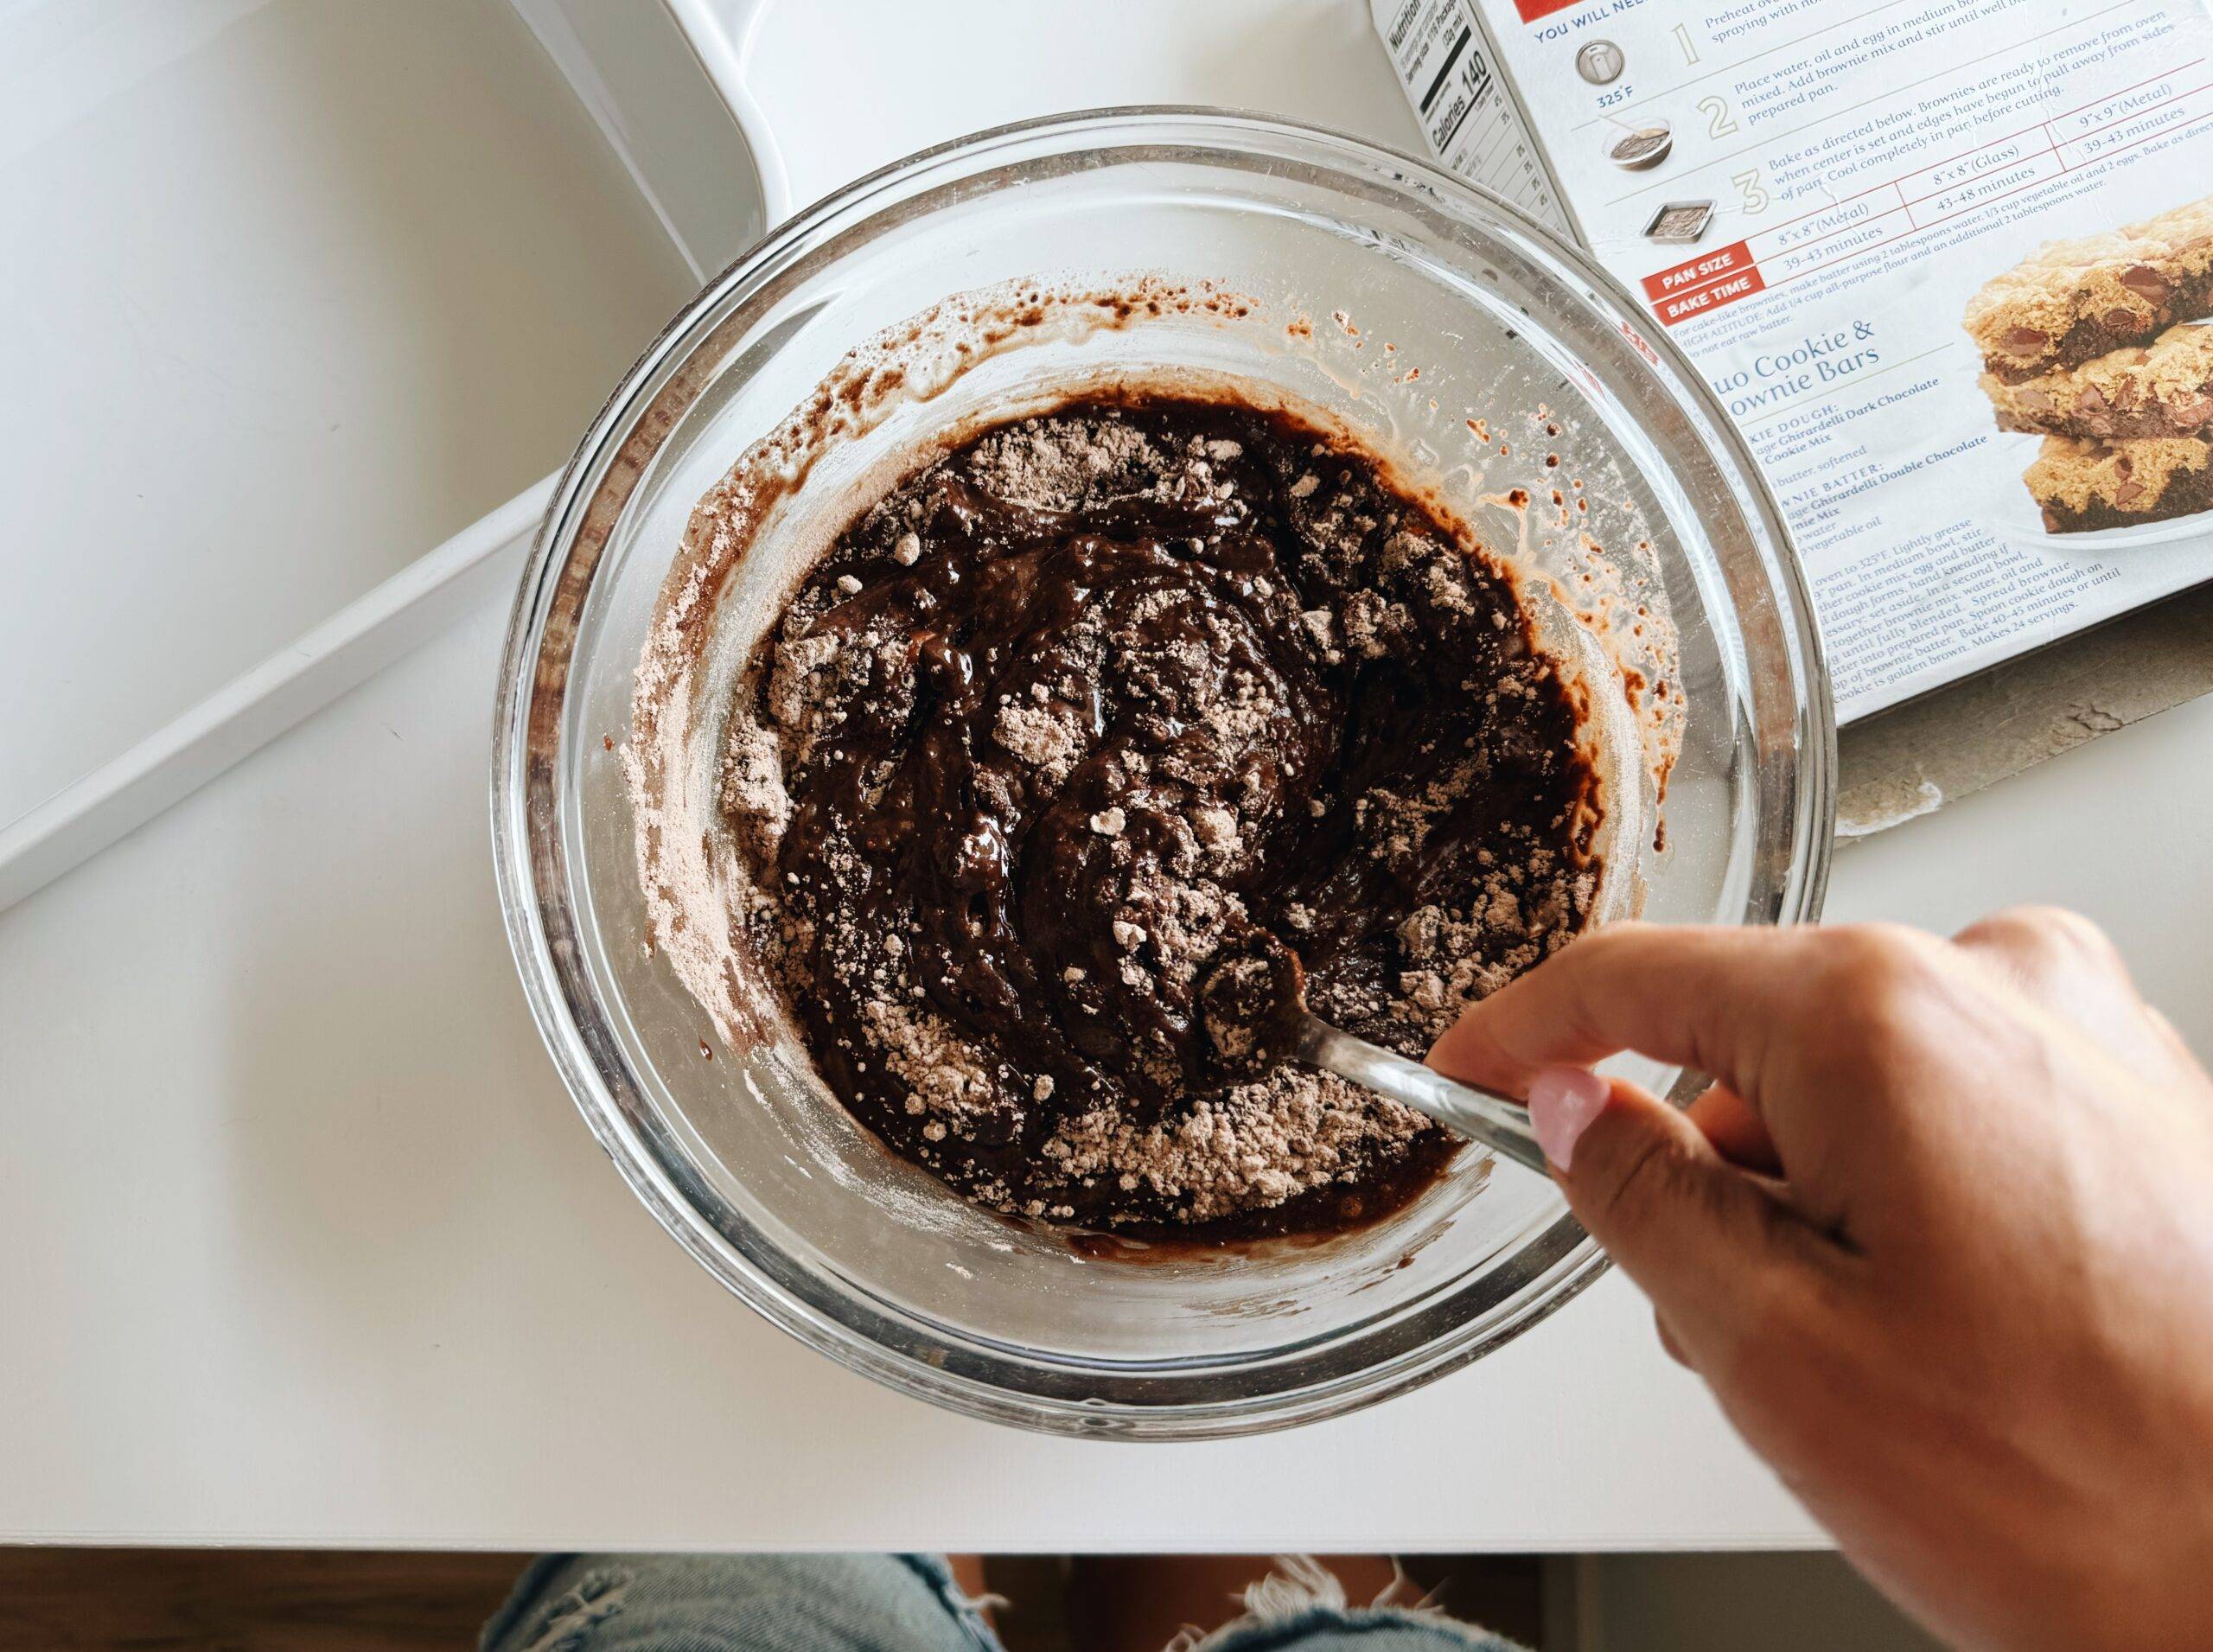
Make Brownie Mix.
I give you permission to use a box of brownie mix. Ghirardelli Double Chocolate is our house favorite. (affiliate link)
2
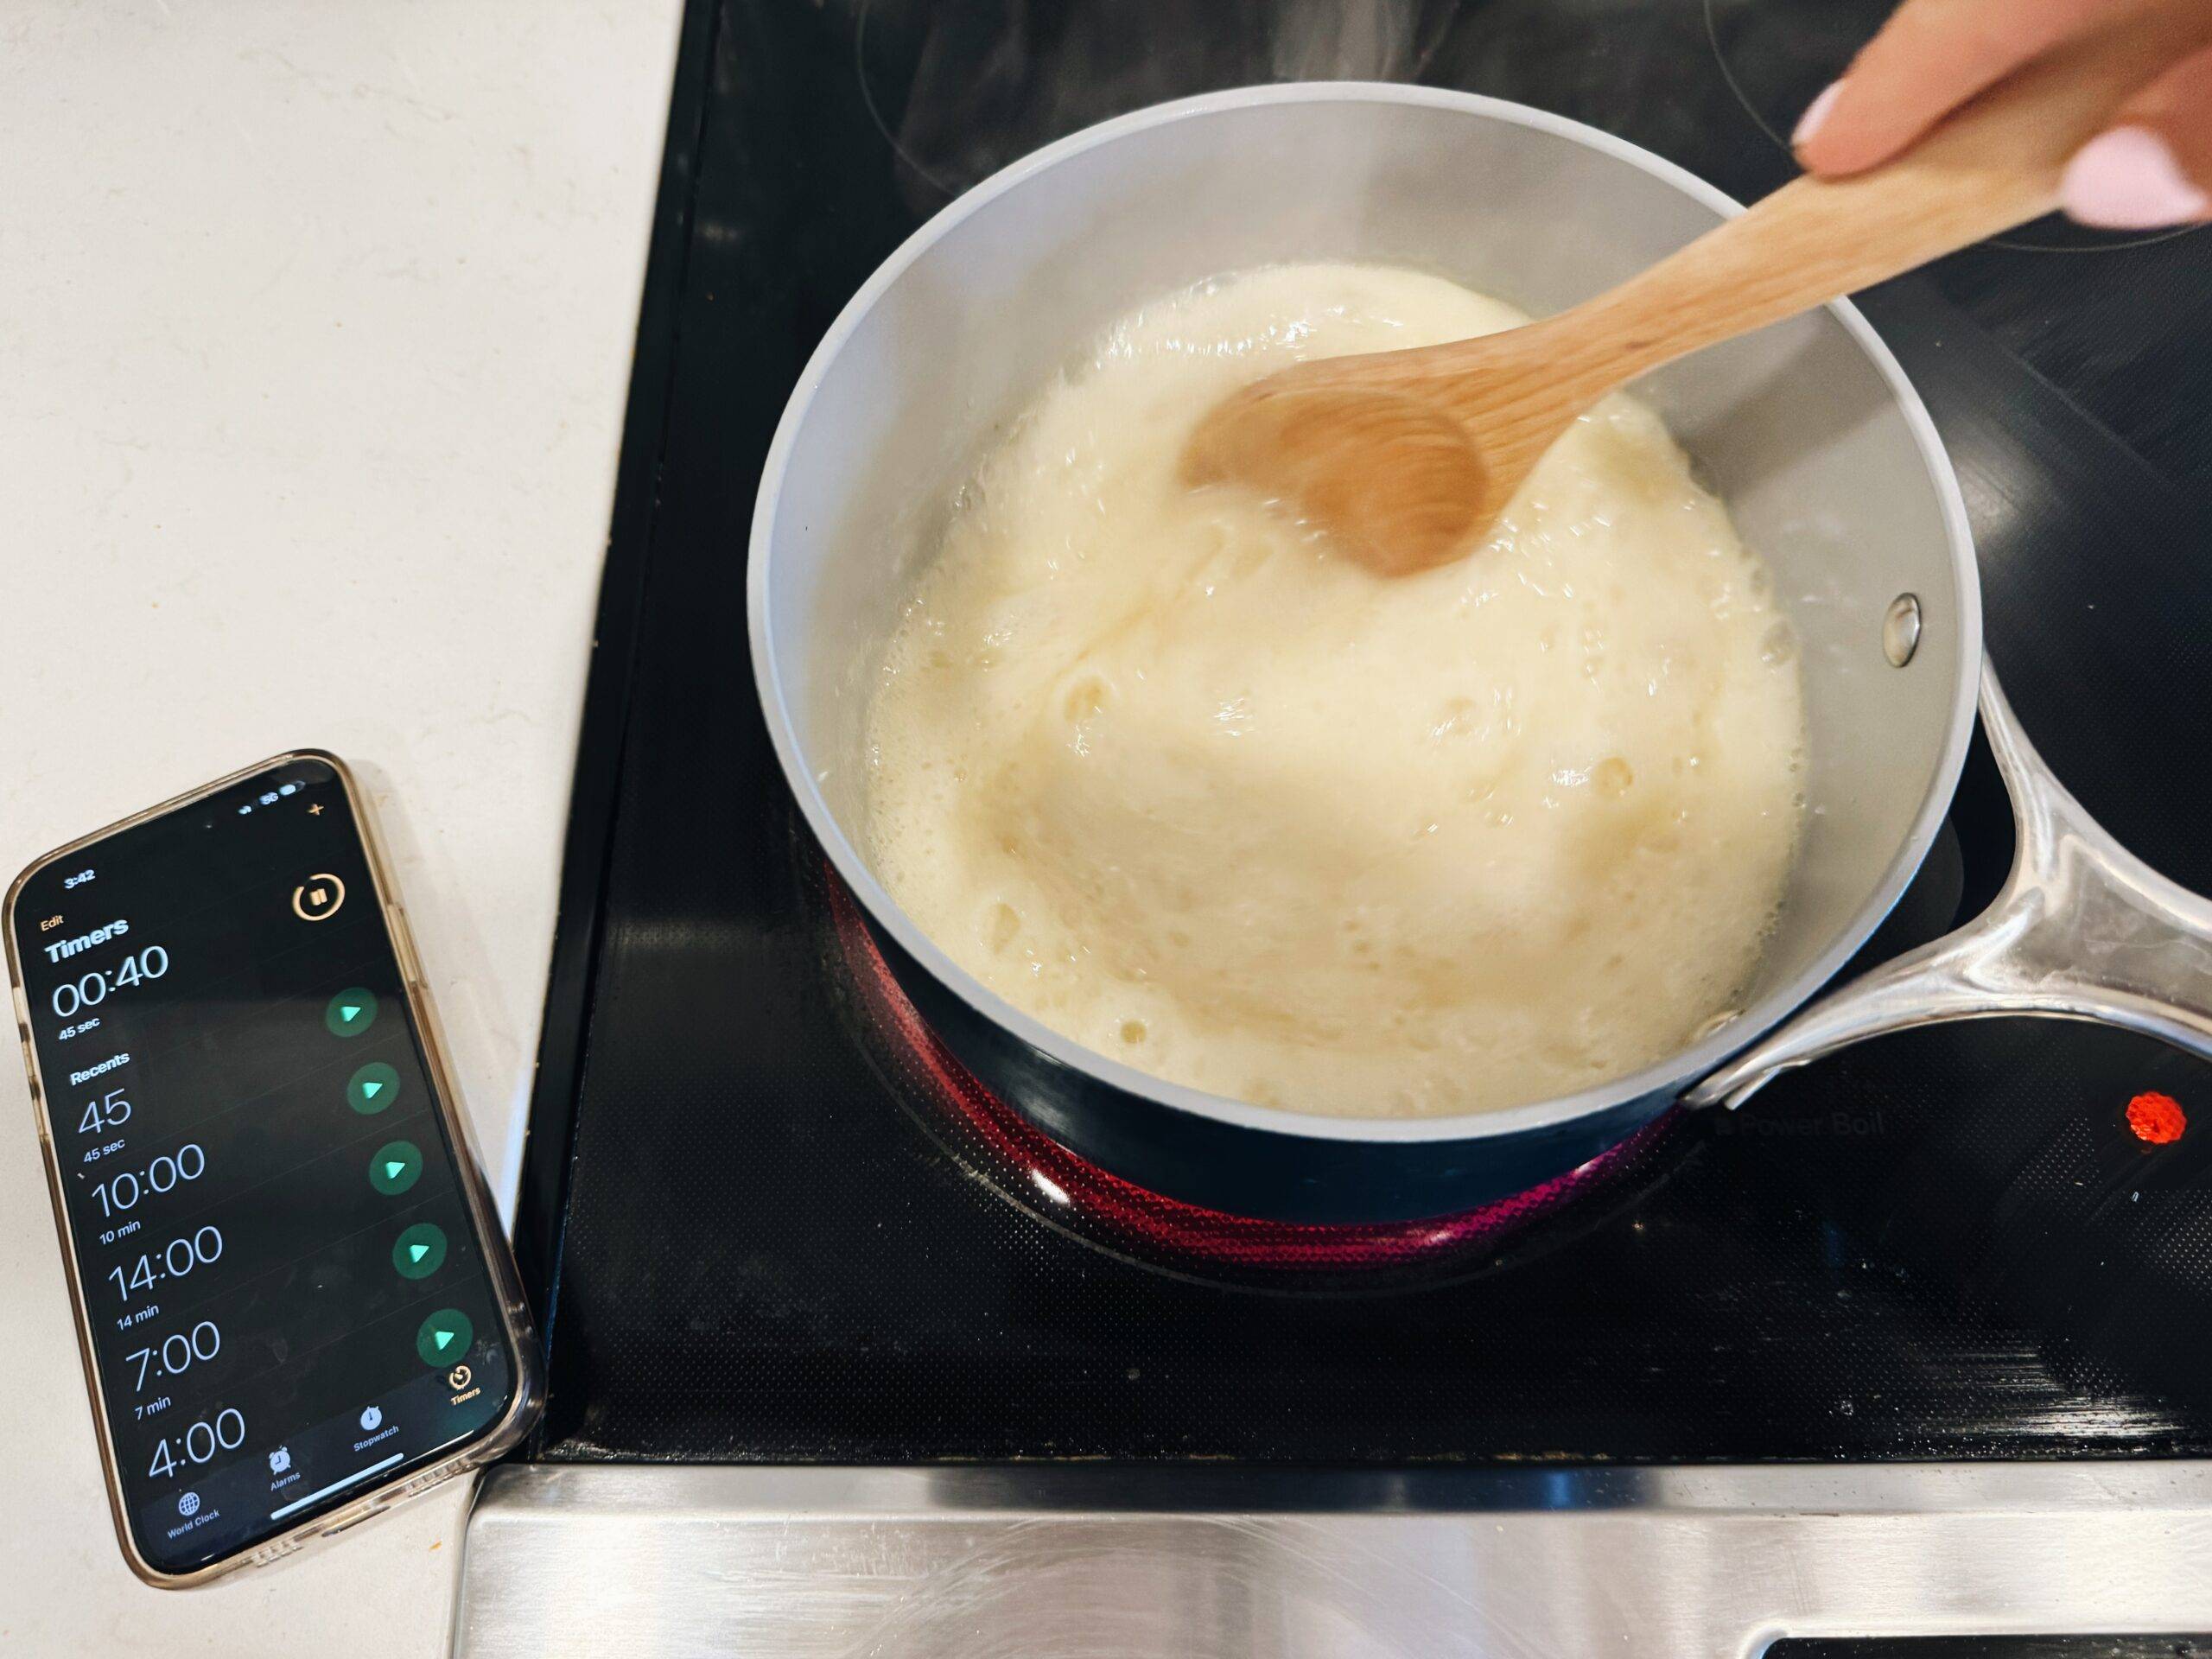
Make The Frosting / Icing / Fudge Top Layer.
Boil your butter, milk, and sugar for a good 45 seconds. SET A TIMER! We don’t want to over (or under) cook this.
3
Pour Frosting On Brownies.
Add chocolate chips to the boiled frosting and pour immediately over the brownies. It’s going to want to set fast, so let’s go, chop chop, no checking Instagram right now!
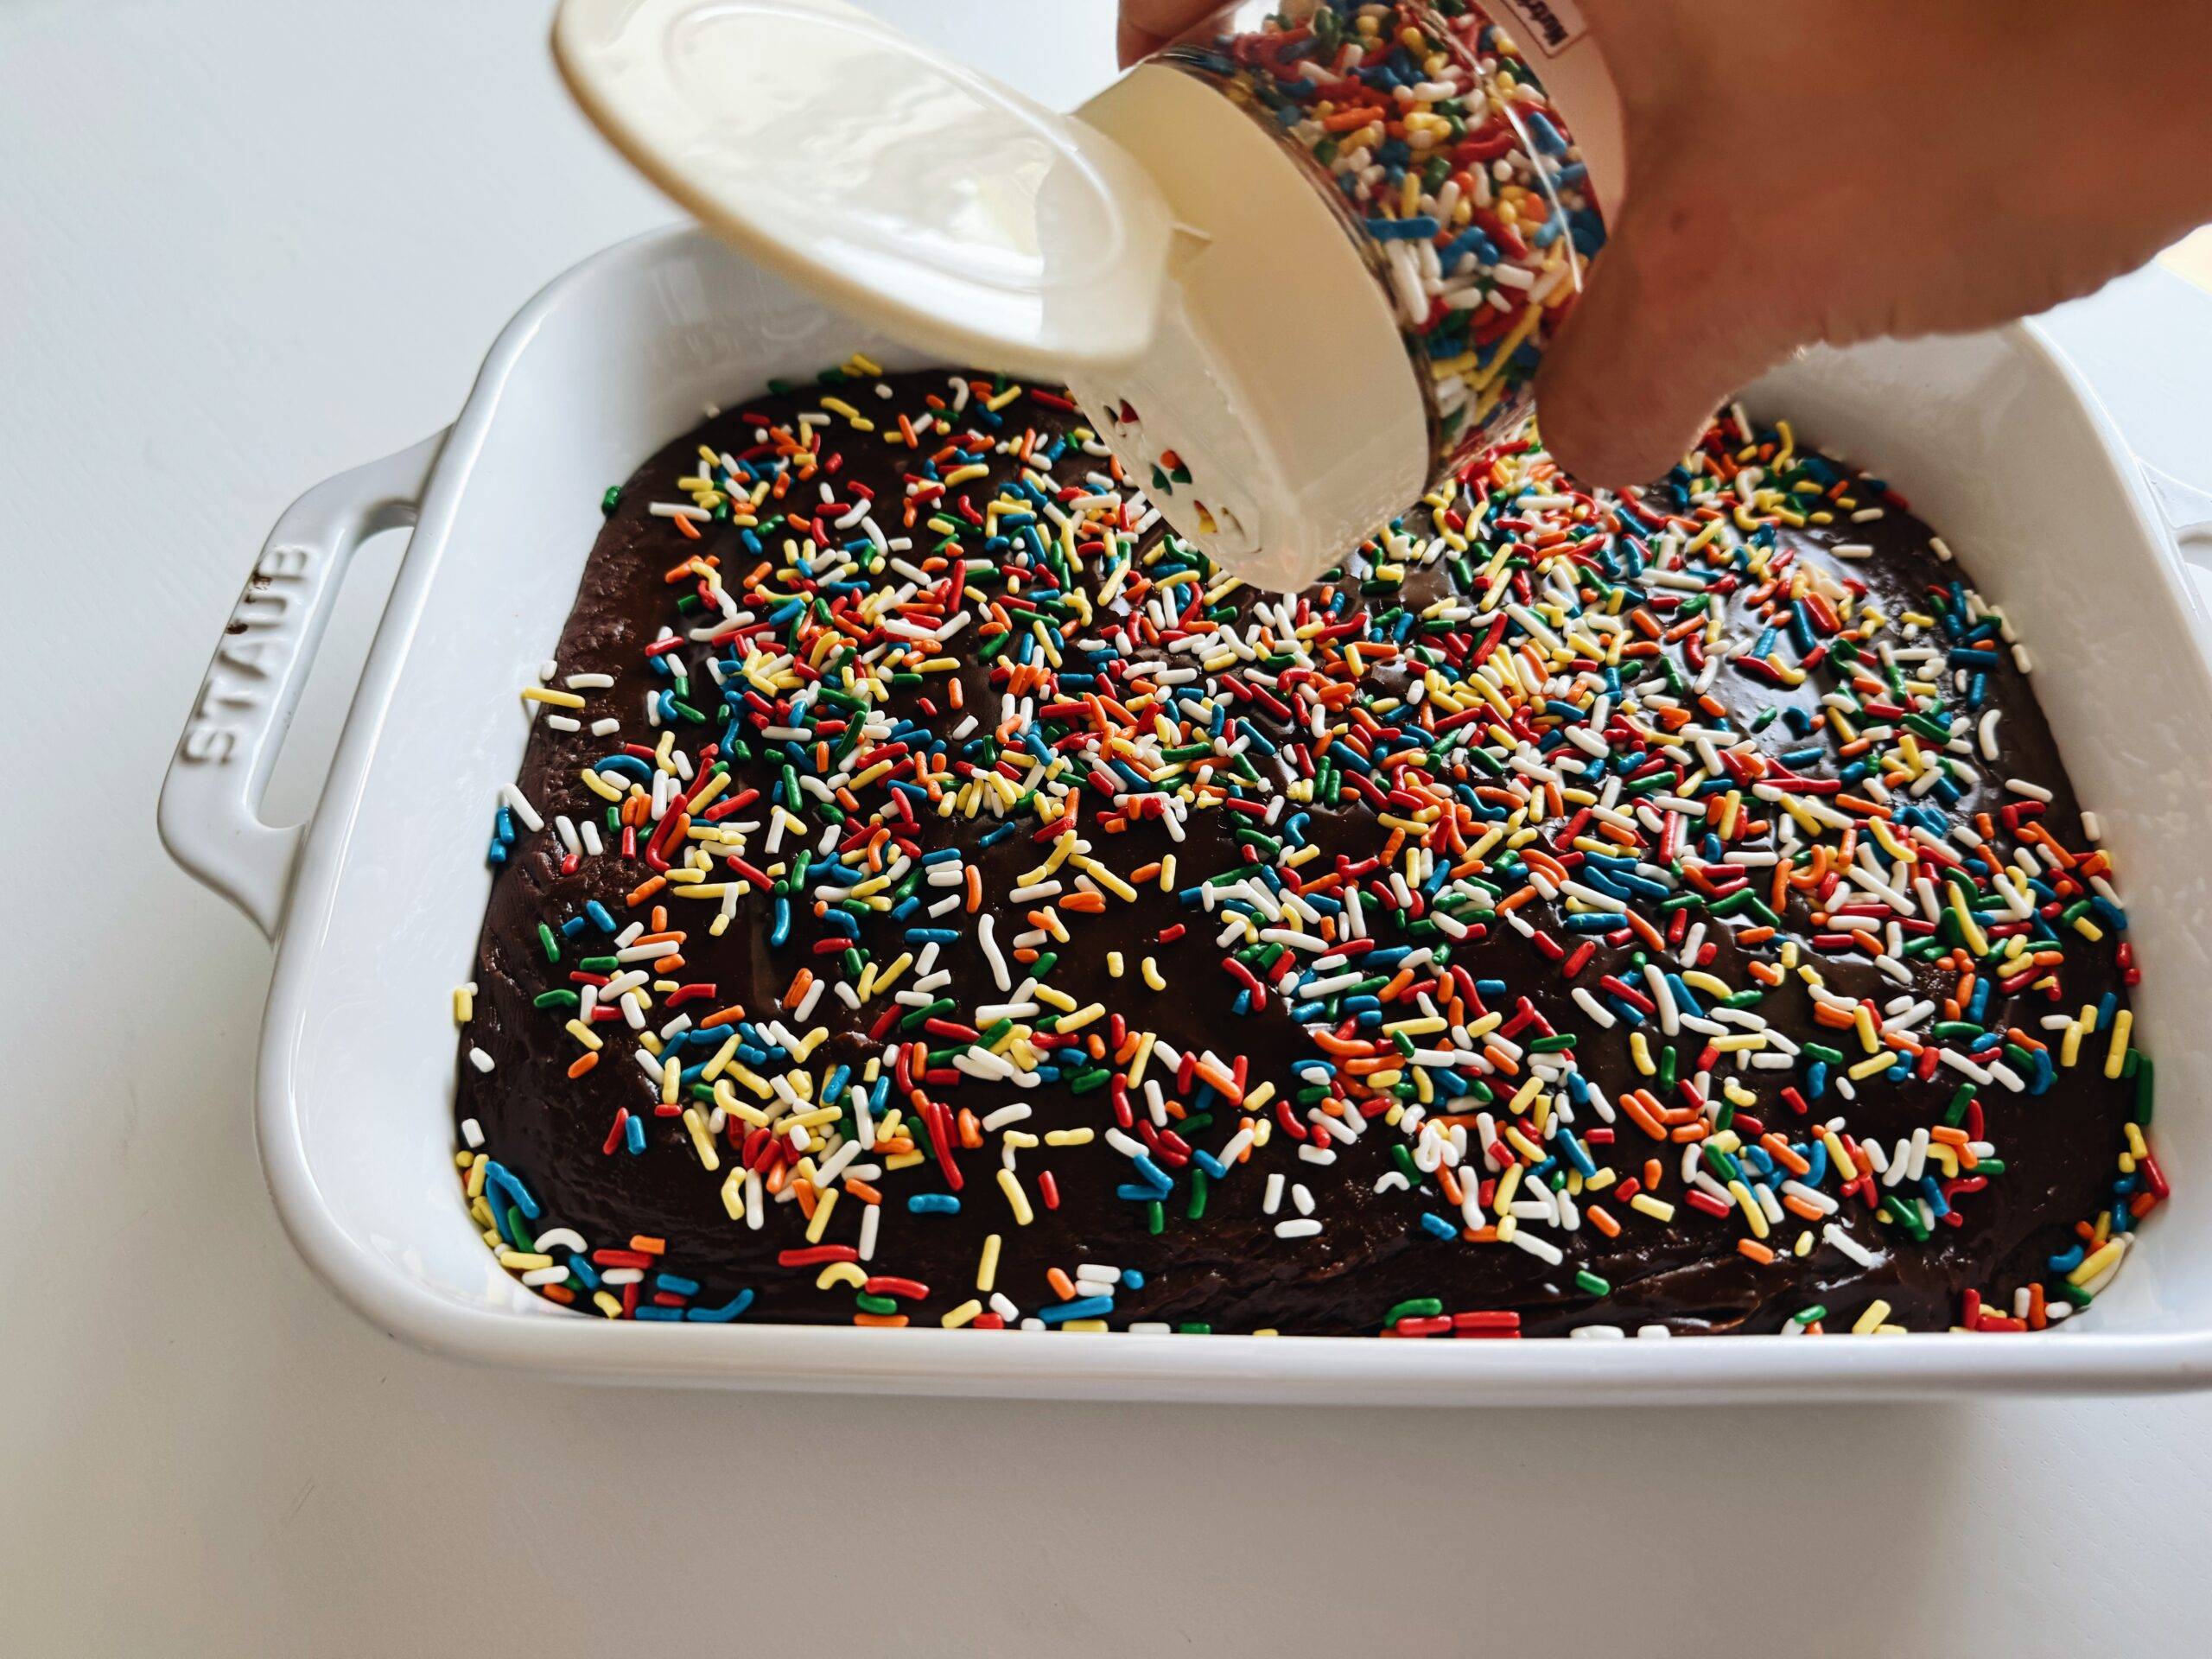
4
Add Sprinkles!
Add them to the frosting immediately before it sets!
5
You’re Done. Yum.
LIKE SERIOUSLY REALLY YUM.

Watch How To Make These Brownies
.tasty-recipes-print-button{background-color:#667;border:none;display:inline-block;padding:.5em 1em;text-decoration:none}body:not(.tasty-recipes-print-view) .tasty-recipes-print-button.tasty-recipes-print-above-card{color:#fff;display:none}body:not(.tasty-recipes-print-view) .tasty-recipes-print-button.tasty-recipes-print-above-card:hover{background-color:#b2b2bb;color:#fff;display:inline-block;padding:.5em 1em;text-decoration:none}.tasty-recipes-image-button-container{display:flex;flex-direction:column;flex-wrap:wrap;float:right;margin-left:10px}body.tasty-recipes-print-view .tasty-recipes-buttons,body.tasty-recipes-print-view .tasty-recipes-cook-mode{display:none}.tasty-recipes-image-button-container .tasty-recipes-buttons{margin-bottom:10px;margin-top:10px}.tasty-recipes-image-button-container .tasty-recipes-button-wrap{box-sizing:border-box;margin-bottom:10px}.tasty-recipes-image-button-container .tasty-recipes-buttons a,.tasty-recipes-quick-links a.button{background-color:#f9f9f9;background-color:var(–tr-button-color,#f9f9f9);border:1px solid #aaa;border-color:var(–tr-button-color,#aaa);border-radius:0;color:#aaa;color:var(–tr-button-text-color,#aaa);cursor:pointer;display:block;font-size:16px;font-weight:700;line-height:16px;margin-top:0;padding:8px;text-align:center;text-decoration:none;text-transform:uppercase}.tasty-recipes-quick-links a.button{display:inline-block;margin-left:.625em;margin-right:.625em}.tasty-recipes-quick-links a.button+span{display:none}.tasty-recipes-entry-content .tasty-recipes-buttons a:hover,.tasty-recipes-image-button-container .tasty-recipes-buttons .button:hover,.tasty-recipes-quick-links a.button:hover{background-color:var(–tr-button-text-color,#aaa);color:var(–tr-button-color,#f9f9f9);text-decoration:none}.tasty-recipes-image-button-container .tasty-recipes-buttons .button:hover{opacity:1}.tasty-recipes-image-button-container .tasty-recipes-buttons a:hover{background-color:#979599;text-decoration:none}.tasty-recipes-image-button-container .tasty-recipes-buttons svg{display:none}.tasty-recipes-yield-scale{border:1px solid #979599;border-radius:2px;color:#979599;font-size:.7rem;margin-left:3px;padding:0 4px}.tasty-recipes-units-scale-container{display:flex;flex-wrap:wrap}.tasty-recipes-convert-container{padding:0 1em 1em 0}.tasty-recipes-convert-container .tasty-recipes-convert-label{align-self:center;color:#979599;font-size:.6rem;text-transform:uppercase}.tasty-recipes-convert-container button{background:transparent;border:1px solid #353547;border-radius:2px;color:#353547;letter-spacing:0;margin-left:5px;min-width:34px;padding:2px 4px;text-align:center}.tasty-recipes-convert-container button.tasty-recipes-convert-button-active{background-color:#000;border-color:#000;color:#fff}.tasty-recipes-convert-container button:focus{outline:none}.tasty-recipes-scale-container{display:flex;padding:0 0 1em}.tasty-recipes-scale-container .tasty-recipes-scale-label{align-self:center;color:#979599;font-size:.6rem;text-transform:uppercase}.tasty-recipes-scale-container button{background:transparent;border:1px solid #353547;border-radius:2px;color:#353547;cursor:pointer;letter-spacing:0;margin-left:5px;min-width:34px;padding:2px 4px}.tasty-recipes-scale-container button.tasty-recipes-scale-button-active{background-color:#000;border-color:#000;color:#fff}.tasty-recipes-scale-container button:focus{outline:none}.tasty-recipes-ingredients-header{margin:1em 0}@media only screen and (min-width:520px){.tasty-recipes-ingredients-header{align-items:center;display:flex;flex-wrap:wrap;justify-content:space-between}}.tasty-recipes-ingredients-header .tasty-recipes-ingredients-clipboard-container{align-items:baseline;display:inline-flex}.tasty-recipes-ingredients-header h3{margin:0 10px 10px 0}.tasty-recipes-ingredients-clipboard-container .tasty-recipes-copy-button{background:transparent;border:none;color:#353547;height:24px;padding:0;position:relative;width:24px}.tasty-recipes-ingredients-clipboard-container .tasty-recipes-copy-button:hover{opacity:.5}.tasty-recipes-instructions-header{align-items:baseline;display:flex;flex-wrap:wrap;justify-content:space-between;margin:1em 0}.tasty-recipes-entry-content .tasty-recipes-instructions h3{margin:0 0 1rem}@media only screen and (min-width:520px){.tasty-recipes-entry-content .tasty-recipes-instructions h3{margin:0}}button[name=tasty-recipes-video-toggle]{background:#979599;border:#979599;border-radius:2px;display:inline-block;font-size:14px;height:30px;line-height:20px;margin:0;padding:0;text-align:center;vertical-align:middle;width:86px}button[name=tasty-recipes-video-toggle] span{padding:0 4px;pointer-events:none}button[name=tasty-recipes-video-toggle][aria-checked=false] :last-child,button[name=tasty-recipes-video-toggle][aria-checked=true] :first-child{background:#fff;border-radius:2px;color:#979599;padding:2px 4px}button[name=tasty-recipes-video-toggle][aria-checked=false] :first-child,button[name=tasty-recipes-video-toggle][aria-checked=true] :last-child{color:#fff}label[for=tasty-recipes-video-toggle]{color:#979599;font-size:.6rem;line-height:30px;padding-right:8px;text-transform:uppercase;user-select:none;-moz-user-select:none;-ms-user-select:none;-webkit-user-select:none;-o-user-select:none;vertical-align:middle}.tasty-recipe-responsive-iframe-container{margin:10px 0}.tasty-recipes-equipment{display:flex;flex-wrap:wrap;justify-content:space-evenly}.tasty-recipes-equipment>h3{flex:0 0 100%}.tasty-recipes-equipment .tasty-link-card{flex:0 0 50%;padding:1.5rem 1rem;text-align:center}@media screen and (min-width:500px){.tasty-recipes-equipment .tasty-link-card{flex:0 0 33%}}.tasty-recipes-equipment .tasty-link-card p{font-size:1em;font-weight:700;margin-bottom:0}.tasty-recipes-equipment .tasty-link-card p a{color:initial}.tasty-recipes-equipment .tasty-link-card span{font-size:.9em}.tasty-recipes .tasty-recipes-nutrition ul{list-style-type:none;margin:0;padding:0}.tasty-recipes .tasty-recipes-nutrition ul:after{clear:both;content:” “;display:block}.tasty-recipes .tasty-recipes-nutrition li{float:left;list-style-type:none;margin-bottom:0;margin-left:0;margin-right:16px}.tasty-recipes-plug{align-items:center;display:flex;flex-wrap:wrap;justify-content:center;margin-bottom:1em;text-align:center}.tasty-recipes-plug a{box-shadow:none;text-decoration:none}.tasty-recipes-plug a img{background:transparent;box-shadow:none;display:inline-block;height:auto;margin:5px 0 0 8px;padding:0;width:150px}.tasty-recipes-footer-content{padding:1.5em;text-align:center}.tasty-recipes-footer-content .tasty-recipes-footer-copy{margin-left:0}.tasty-recipes-footer-content img,.tasty-recipes-footer-content svg{width:60px}.tasty-recipes-entry-content .tasty-recipes-entry-footer h3{font-size:1.25em;margin:0 0 .25em;padding:0}.tasty-recipes-entry-footer p{font-size:.75em;margin:0}.tasty-recipes-entry-footer p a{border-bottom:none;box-shadow:none;text-decoration:underline}.tasty-recipes-flash-message{background-color:#fff;border-radius:4px;box-shadow:0 .3px .4px 0 rgba(0,0,0,.024),0 .9px 1.5px 0 rgba(0,0,0,.05),0 3.5px 6px 0 rgba(0,0,0,.1);color:#313135;display:inline-block;font-size:13px;letter-spacing:0;line-height:1.2em;margin-left:10px;padding:4px 10px}@media screen and (min-width:500px){.tasty-recipes-flash-message{padding:4px 10px}}.tasty-recipes-flash-message p{margin:0;padding:0;text-transform:none}@media screen and (min-width:500px){.tasty-recipes-footer-content{align-items:center;display:flex;justify-content:center;padding:1.5em 0;text-align:left}.tasty-recipes-footer-content .tasty-recipes-footer-copy{margin-left:.8em}}@media print{.tasty-recipes-no-print,.tasty-recipes-no-print *{display:none!important}}[data-tr-ingredient-checkbox]{cursor:pointer;list-style-position:outside;list-style-type:none!important;margin-left:0!important}[data-tr-ingredient-checkbox] .tr-ingredient-checkbox-container{position:relative}[data-tr-ingredient-checkbox] .tr-ingredient-checkbox-container input[type=checkbox]+label{display:inline-block;position:relative;vertical-align:middle}[data-tr-ingredient-checkbox] .tr-ingredient-checkbox-container input[type=checkbox]{clip:rect(1px 1px 1px 1px);clip:rect(1px,1px,1px,1px);height:1px;overflow:hidden;position:absolute!important;width:1px}[data-tr-ingredient-checkbox] .tr-ingredient-checkbox-container input[type=checkbox]+label:before{border:1px solid;border-radius:2px;content:””;display:inline-block;height:20px;margin-right:10px;position:relative;width:20px}[data-tr-ingredient-checkbox] .tr-ingredient-checkbox-container input[type=checkbox]:checked+label:after{border-bottom:2px solid;border-left:2px solid;content:””;display:inline-block;height:6px;left:4px;position:absolute;top:4px;transform:rotate(-45deg);width:12px}[data-tr-ingredient-checkbox] .tr-ingredient-checkbox-container input[type=checkbox]:focus+label:before{box-shadow:0 0 8px #5e9ed6;outline:1px solid #5d9dd5}[data-tr-ingredient-checkbox=checked]{opacity:.8;text-decoration:line-through}.tasty-recipes-cook-mode__container{align-items:center;display:flex;line-height:100%}.tasty-recipes-cook-mode__container label{font-size:inherit}.tasty-recipes-cook-mode__switch{display:inline-block;height:17px;margin-right:10px;position:relative;width:30px}.tasty-recipes-cook-mode__switch-slider{background-color:#737373;bottom:0;cursor:pointer;display:block;left:0;opacity:.4;position:absolute;right:0;top:0;transition:.4s}.tasty-recipes-cook-mode__switch-slider:before{background-color:#fff;bottom:2px;content:””;height:13px;left:2px;position:absolute;transition:.4s;width:13px}.tasty-recipes-cook-mode__switch input{display:none}.tasty-recipes-cook-mode__switch input:checked+span{opacity:1}.tasty-recipes-cook-mode__switch input:checked+span:before{transform:translateX(13px)}.tasty-recipes-cook-mode__switch-round{border-radius:34px}.tasty-recipes-cook-mode__switch-round:before{border-radius:50%}.tasty-recipes-cook-mode__label{font-weight:700}@media only screen and (max-width:767px){#shop-with-instacart-v1{transform:scale(.75);transform-origin:top left}}/* Bold recipe card styles. */ .tasty-recipes{border:5px solid #667;margin-top:6em;margin-bottom:4em}.tasty-recipes.tasty-recipes-has-plug{margin-bottom:1em}.tasty-recipes-plug{margin-bottom:4em}.tasty-recipes-print-button{display:none}.tasty-recipes-image-shim{height:69.5px;clear:both}.tasty-recipes-entry-header{background-color:#667;color:#fff;text-align:center;padding-top:35px;padding-bottom:1.5em;padding-left:2.5em;padding-right:2.5em}.tasty-recipes-entry-header.tasty-recipes-has-image{padding-top:0px}.tasty-recipes-entry-header .tasty-recipes-image{float:none;text-align:center;transform:translateY(-115px);margin-bottom:1em;/* Decide if we need this */}.tasty-recipes-entry-header .tasty-recipes-image img{-webkit-border-radius:50%;-moz-border-radius:50%;border-radius:50%;border:5px solid #667;height:150px;width:150px;display:inline-block;object-fit:cover}.tasty-recipes-entry-header h2{font-size:2em;font-weight:400;text-transform:lowercase;margin-bottom:0;text-align:center;color:#fff;margin-top:0;padding-top:0;padding-bottom:0}.tasty-recipes-has-image .tasty-recipes-entry-header h2{margin-top:-115px}.tasty-recipes-entry-header hr{border:1px solid #b7bbc6;background-color:#b7bbc6;margin-bottom:1em;margin-top:1em}.tasty-recipes-entry-header div.tasty-recipes-rating{text-decoration:none;border:none;display:block;font-size:1.375em}.tasty-recipes-entry-header .tasty-recipes-rating:hover{text-decoration:none}.tasty-recipes-entry-header .tasty-recipes-rating p{margin-bottom:0}.tasty-recipes-no-ratings-buttons .unchecked,.tasty-recipes-no-ratings-buttons .checked,.tasty-recipes-entry-header span.tasty-recipes-rating{color:#fff;color:var(–tr-star-color,#fff)}.tasty-recipes-entry-header .rating-label{font-style:italic;color:#b7bbc6;font-size:0.6875em;display:block}.tasty-recipes,.tasty-recipes-ratings{–tr-star-size:0.97em!important;–tr-star-margin:0.5em!important}.tasty-recipes-entry-header .tasty-recipes-details{margin-top:1em}.tasty-recipes-entry-header .tasty-recipes-details ul{list-style-type:none;margin:0}.tasty-recipes-entry-header .tasty-recipes-details ul li{display:inline-block;margin-left:0.5em;margin-right:0.5em;font-size:1em;line-height:2.5em;color:#fff}@media only screen and (max-width:520px){.tasty-recipes-entry-header .tasty-recipes-details .detail-icon{height:0.8em;margin-top:0.4em}.tasty-recipes-entry-header .tasty-recipes-details ul li{font-size:0.875em;line-height:1.75em}}@media only screen and (min-width:520px){.tasty-recipes-entry-header .tasty-recipes-details .detail-icon{height:1em;margin-top:0.6em}.tasty-recipes-entry-header .tasty-recipes-details ul li{font-size:1em;line-height:2.5em}}.tasty-recipes-entry-header .tasty-recipes-details .tasty-recipes-label{font-style:italic;color:#b7bbc6;margin-right:0.125em}.tasty-recipes-entry-header .tasty-recipes-details .detail-icon{vertical-align:top;margin-right:0.2em;display:inline-block;color:#FFF}.tasty-recipes-entry-header .tasty-recipes-details .author a{color:inherit;text-decoration:underline}.tasty-recipes-entry-content{padding-top:1.25em}.tasty-recipes-entry-content .tasty-recipes-buttons{margin-bottom:1.25em;margin-left:1.25em;margin-right:1.25em}.tasty-recipes-entry-content .tasty-recipes-buttons:after{content:’ ‘;display:block;clear:both}.tasty-recipes-entry-content .tasty-recipes-button-wrap{width:50%;display:inline-block;float:left;box-sizing:border-box}.tasty-recipes-quick-links a.button,.tasty-recipes-entry-content .tasty-recipes-buttons a{text-transform:uppercase;text-align:center;display:block;color:#fff;color:var(–tr-button-text-color,#fff);background-color:#667;background-color:var(–tr-button-color,#666677);font-size:1em;line-height:1.375em;padding:1em;font-weight:bold;margin-top:0;border:none;border-radius:0;text-decoration:none}.tasty-recipes-quick-links a.button{display:inline-block}.tasty-recipes-entry-content a img{box-shadow:none;-webkit-box-shadow:none}.tasty-recipes-quick-links a.button:hover,.tasty-recipes-entry-content .tasty-recipes-buttons a:hover{border:none}.tasty-recipes-entry-content .tasty-recipes-buttons img{vertical-align:top}.tasty-recipes-entry-content .tasty-recipes-buttons .svg-print,.tasty-recipes-entry-content .tasty-recipes-buttons .svg-pinterest,.tasty-recipes-entry-content .tasty-recipes-buttons .svg-heart-regular,.tasty-recipes-entry-content .tasty-recipes-buttons .svg-heart-solid{height:1.25em;margin-right:0.375em;margin-bottom:0;background:none;display:inline-block;vertical-align:middle}@media only screen and (min-width:520px){.tasty-recipes-entry-content .tasty-recipes-button-wrap:first-child{padding-right:0.625em}.tasty-recipes-entry-content .tasty-recipes-button-wrap:last-child{padding-left:0.625em}}@media only screen and (max-width:520px){.tasty-recipes-entry-content .tasty-recipes-button-wrap{width:100%}.tasty-recipes-entry-content .tasty-recipes-button-wrap:nth-child(2){padding-top:1em}}.tasty-recipes-entry-content h3{text-transform:uppercase;font-size:0.75em;color:#979599;margin:1.5em 0}.tasty-recipes-ingredients-header,.tasty-recipes-instructions-header{margin:1.5em 0}.tasty-recipes-entry-content h4{font-size:1em;padding-top:0;margin-bottom:1.5em;margin-top:1.5em}.tasty-recipes-entry-content hr{background-color:#eae9eb;border:1px solid #eae9eb;margin-top:1em;margin-bottom:1em}.tasty-recipes-entry-content .tasty-recipes-description,.tasty-recipes-entry-content .tasty-recipes-ingredients,.tasty-recipes-entry-content .tasty-recipes-instructions,.tasty-recipes-entry-content .tasty-recipes-keywords{padding-left:1.25em;padding-right:1.25em}.tasty-recipes-entry-content .tasty-recipes-description h3{display:none}.tasty-recipes-entry-content .tasty-recipes-description p{margin-bottom:1em}.tasty-recipes-entry-content .tasty-recipes-ingredients ul,.tasty-recipes-entry-content .tasty-recipes-instructions ul{list-style-type:none;margin-left:0;margin-bottom:1.5em;padding:0}.tasty-recipes-entry-content .tasty-recipes-ingredients ul li,.tasty-recipes-entry-content .tasty-recipes-instructions ul li{margin-bottom:0.625em;list-style-type:none;position:relative;margin-left:1.5em;line-height:1.46}.tasty-recipes-entry-content .tasty-recipes-ingredients ul li:before,.tasty-recipes-entry-content .tasty-recipes-instructions ul li:before{background-color:#667;-webkit-border-radius:50%;-moz-border-radius:50%;border-radius:50%;height:0.5em;width:0.5em;display:block;content:’ ‘;left:-1.25em;top:0.375em;position:absolute}.tasty-recipes-entry-content .tasty-recipes-ingredients ol,.tasty-recipes-entry-content .tasty-recipes-instructions ol{counter-reset:li;margin-left:0;padding:0}.tasty-recipes-entry-content .tasty-recipes-ingredients ol>li,.tasty-recipes-entry-content .tasty-recipes-instructions ol>li{list-style-type:none;position:relative;margin-bottom:1em;margin-left:1.5em;line-height:1.46}.tasty-recipes-entry-content .tasty-recipes-ingredients ol>li:before,.tasty-recipes-entry-content .tasty-recipes-instructions ol>li:before{content:counter(li);counter-increment:li;position:absolute;background-color:#667;-webkit-border-radius:50%;-moz-border-radius:50%;border-radius:50%;height:1.45em;width:1.45em;color:#fff;left:-1.25em;transform:translateX(-50%);line-height:1.5em;font-size:0.6875em;text-align:center;top:0.1875em}.tasty-recipes-entry-content .tasty-recipes-ingredients li li,.tasty-recipes-entry-content .tasty-recipes-instructions li li{margin-top:0.625em}.tasty-recipes-entry-content .tasty-recipes-ingredients li ul,.tasty-recipes-entry-content .tasty-recipes-ingredients li ol,.tasty-recipes-entry-content .tasty-recipes-instructions li ul,.tasty-recipes-entry-content .tasty-recipes-instructions li ol{margin-bottom:0}.tasty-recipes-entry-content .tasty-recipes-equipment{padding-left:1.25em;padding-right:1.25em}.tasty-recipes-entry-content .tasty-recipe-video-embed~.tasty-recipes-equipment{padding-top:1em}.tasty-recipes-entry-content .tasty-recipes-notes{padding:1.25em;background-color:#edf0f2}.tasty-recipes-entry-content .tasty-recipes-notes ol{counter-reset:li;margin-left:0;padding:0}.tasty-recipes-entry-content .tasty-recipes-notes ul{margin-left:0;padding:0}.tasty-recipes-entry-content .tasty-recipes-notes p,.tasty-recipes-entry-content .tasty-recipes-notes ul,.tasty-recipes-entry-content .tasty-recipes-notes ol{background-color:#fff;padding-bottom:1.25em;margin-bottom:1.5em;position:relative;-webkit-clip-path:polygon(20px 0,100% 0,100% 100%,0 100%,0 20px);clip-path:polygon(20px 0,100% 0,100% 100%,0 100%,0 20px)}@media only screen and (min-width:520px){.tasty-recipes-entry-content .tasty-recipes-notes p,.tasty-recipes-entry-content .tasty-recipes-notes ul,.tasty-recipes-entry-content .tasty-recipes-notes ol{padding-left:1.5625em;padding-right:1.5625em;padding-top:1.25em}.tasty-recipes-entry-content .tasty-recipes-notes ul,.tasty-recipes-entry-content .tasty-recipes-notes ol{margin-left:2em}}.tasty-recipes-entry-content .tasty-recipes-notes p,.tasty-recipes-entry-content .tasty-recipes-notes ul li,.tasty-recipes-entry-content .tasty-recipes-notes ol li{padding-left:2.5em}.tasty-recipes-entry-content .tasty-recipes-notes ul li,.tasty-recipes-entry-content .tasty-recipes-notes ol li{position:relative;list-style:none;padding-top:1em;margin-left:0;margin-bottom:0}.tasty-recipes-entry-content .tasty-recipes-notes p:before,.tasty-recipes-entry-content .tasty-recipes-notes ul li:before{content:’i’;display:block;background-color:#667;-webkit-border-radius:50%;-moz-border-radius:50%;border-radius:50%;height:1.3em;width:1.3em;font-size:0.75em;line-height:1.3em;text-align:center;color:#fff;position:absolute;left:1.167em;top:1.9em}.tasty-recipes-entry-content .tasty-recipes-notes ol>li:before{content:counter(li);counter-increment:li;position:absolute;background-color:#667;-webkit-border-radius:50%;-moz-border-radius:50%;border-radius:50%;height:1.45em;width:1.45em;color:#fff;left:2em;transform:translateX(-50%);line-height:1.5em;font-size:0.6875em;text-align:center;top:2em}.tasty-recipes-entry-content .tasty-recipes-notes p:last-child{margin-bottom:0}.tasty-recipes-entry-content .tasty-recipes-other-details{background-color:#edf0f2;padding:0 1.25em 1.25em}.tasty-recipes-entry-content .tasty-recipes-other-details ul{color:#667;display:flex;flex-wrap:wrap;font-size:0.85rem;list-style:none;margin-bottom:0}.tasty-recipes-entry-content .tasty-recipes-other-details ul li{margin:0 0.5rem;list-style:none}.tasty-recipes-entry-content .tasty-recipes-other-details ul li .tasty-recipes-label{font-style:italic}.tasty-recipes-entry-content .tasty-recipes-other-details .detail-icon{color:#667;vertical-align:top;margin-right:0.2em;display:inline-block}@media only screen and (max-width:520px){.tasty-recipes-entry-content .tasty-recipes-other-details .detail-icon{height:0.8em;margin-top:0.4em}.tasty-recipes-entry-content .tasty-recipes-other-details ul li{font-size:0.875em;line-height:1.75em}}@media only screen and (min-width:520px){.tasty-recipes-entry-content .tasty-recipes-other-details .detail-icon{height:1em;margin-top:0.8em}.tasty-recipes-entry-content .tasty-recipes-other-details ul li{font-size:1em;line-height:2.5em}}.tasty-recipes-entry-content .tasty-recipes-keywords{background-color:#edf0f2;padding-bottom:1em;padding-top:1em}.tasty-recipes-entry-content .tasty-recipes-keywords p{font-size:0.7em;font-style:italic;color:#979599;margin-bottom:0}.tasty-recipes-entry-content .tasty-recipes-keywords p span{font-weight:bold}.tasty-recipes-nutrifox{text-align:center;margin:0}.nutrifox-label{background-color:#edf0f2}.tasty-recipes-nutrifox iframe{width:100%;display:block;margin:0}.tasty-recipes-entry-content .tasty-recipes-nutrition{padding:1.25em;color:#667}.tasty-recipes-nutrition .tasty-recipes-label{font-style:italic;color:#b7bbc6;margin-right:0.125em;font-weight:400}.tasty-recipes-nutrition ul li{float:none;display:inline-block;line-height:2em;margin:0 10px 0 0}.tasty-recipes-entry-footer{background-color:#667}.tasty-recipes-entry-footer img,.tasty-recipes-entry-footer svg{color:#FFF}.tasty-recipes-entry-content .tasty-recipes-entry-footer h3{color:#fff}.tasty-recipes-entry-footer{color:#fff}.tasty-recipes-entry-footer:after{content:’ ‘;display:block;clear:both}/* Print view styles */ .tasty-recipes-print-view .tasty-recipe-video-embed,.tasty-recipes-print-view .tasty-recipes-other-details,.tasty-recipes-print .tasty-recipes-entry-header .tasty-recipes-details .detail-icon,.tasty-recipes-print .tasty-recipes-entry-content .tasty-recipes-notes p:before,.tasty-recipes-print .tasty-recipes-entry-content .tasty-recipes-notes ul li:before,.tasty-recipes-print .tasty-recipes-entry-content .tasty-recipes-ingredients ul li:before,.tasty-recipes-print .tasty-recipes-entry-content .tasty-recipes-ingredients ol li:before,.tasty-recipes-print .tasty-recipes-entry-content .tasty-recipes-instructions ul li:before,.tasty-recipes-print .tasty-recipes-entry-content .tasty-recipes-instructions ol li:before,.tasty-recipes-print .tasty-recipes-entry-content .tasty-recipes-notes ol>li:before,.tasty-recipes-print .tasty-recipes-entry-footer img{display:none}.tasty-recipes-print-view{font-size:11px;background-color:#fff;line-height:1.5em}.tasty-recipes-print{padding:0}.tasty-recipes-print-view .tasty-recipes{margin-top:1em}.tasty-recipes-print-view .tasty-recipes-entry-content h3{font-size:1.2em;letter-spacing:0.1em;margin:0 0 10px 0}.tasty-recipes-print-view .tasty-recipes-ingredients-header,.tasty-recipes-print-view .tasty-recipes-instructions-header{margin:0}.tasty-recipes-print-view .tasty-recipes-ingredients,.tasty-recipes-print-view .tasty-recipes-instructions{padding:1.25em}.tasty-recipes-print .tasty-recipes-entry-header{background-color:inherit;color:inherit;padding:0;text-align:left}.tasty-recipes-print .tasty-recipes-entry-header .tasty-recipes-image{float:right;transform:none}.tasty-recipes-print.tasty-recipes-has-image .tasty-recipes-entry-header h2{margin-top:0;text-align:left}.tasty-recipes-print .tasty-recipes-entry-header h2{color:inherit;margin-bottom:0.5em}.tasty-recipes-print .tasty-recipes-entry-header hr{display:none}.tasty-recipes-print .tasty-recipes-entry-header span.tasty-recipes-rating{color:#000}.tasty-recipes-entry-header div.tasty-recipes-rating a{text-decoration:none}.tasty-recipes-entry-header div.tasty-recipes-rating p{margin-top:4px}.tasty-recipes-print .tasty-recipes-entry-header .tasty-recipes-details ul{padding:0;clear:none}.tasty-recipes-print .tasty-recipes-entry-header .tasty-recipes-details ul li{line-height:1.5em;color:#000;margin:0 10px 0 0}.tasty-recipes-print .tasty-recipes-entry-content img{max-width:50%;height:auto}.tasty-recipes-print .tasty-recipes-entry-content .tasty-recipes-ingredients ol li,.tasty-recipes-print .tasty-recipes-entry-content .tasty-recipes-instructions ol li{margin-bottom:0.5em;list-style:decimal;line-height:1.5em}.tasty-recipes-print .tasty-recipes-entry-content .tasty-recipes-ingredients ul li,.tasty-recipes-print .tasty-recipes-entry-content .tasty-recipes-instructions ul li{margin-bottom:0.5em;line-height:1.1;list-style:disc}.tasty-recipes-print .tasty-recipes-entry-content .tasty-recipes-notes{background:none!important}.tasty-recipes-print .tasty-recipes-entry-content .tasty-recipes-notes ul,.tasty-recipes-print .tasty-recipes-entry-content .tasty-recipes-notes ol{background:none!important}.tasty-recipes-print .tasty-recipes-entry-content .tasty-recipes-notes ol li{padding:0;clip-path:none;background:none;line-height:1.5em;list-style:decimal}.tasty-recipes-print .tasty-recipes-entry-content .tasty-recipes-notes p{padding:0;clip-path:none;background:none;line-height:1.5em}.tasty-recipes-print .tasty-recipes-entry-content .tasty-recipes-notes ul li{padding:0;clip-path:none;background:none;line-height:1.5em;list-style:disc}.tasty-recipes-print .tasty-recipes-source-link{text-align:center}.tasty-recipes-entry-content .tasty-recipes-ingredients ul li[data-tr-ingredient-checkbox]:before{display:none}.tasty-recipes-cook-mode{margin-top:1em}.tasty-recipes-cook-mode__label{font-style:italic;color:#667;font-weight:normal}.tasty-recipes-cook-mode__helper{font-size:1em}.tasty-recipes-cook-mode .tasty-recipes-cook-mode__switch .tasty-recipes-cook-mode__switch-slider{background-color:#667}
body{ –tr-star-color:#F2B955;–tr-button-text-color:#ffffff; }
.tasty-recipes-rating-solid.tasty-recipes-clip-10{-webkit-clip-path:polygon(0 0,10% 0,10% 100%,0 100%);clip-path:polygon(0 0,10% 0,10% 100%,0 100%)}.tasty-recipes-rating-solid.tasty-recipes-clip-20{-webkit-clip-path:polygon(0 0,20% 0,20% 100%,0 100%);clip-path:polygon(0 0,20% 0,20% 100%,0 100%)}.tasty-recipes-rating-solid.tasty-recipes-clip-30{-webkit-clip-path:polygon(0 0,30% 0,30% 100%,0 100%);clip-path:polygon(0 0,30% 0,30% 100%,0 100%)}.tasty-recipes-rating-solid.tasty-recipes-clip-40{-webkit-clip-path:polygon(0 0,40% 0,40% 100%,0 100%);clip-path:polygon(0 0,40% 0,40% 100%,0 100%)}.tasty-recipes-rating-solid.tasty-recipes-clip-50{-webkit-clip-path:polygon(0 0,50% 0,50% 100%,0 100%);clip-path:polygon(0 0,50% 0,50% 100%,0 100%)}.tasty-recipes-rating-solid.tasty-recipes-clip-60{-webkit-clip-path:polygon(0 0,60% 0,60% 100%,0 100%);clip-path:polygon(0 0,60% 0,60% 100%,0 100%)}.tasty-recipes-rating-solid.tasty-recipes-clip-70{-webkit-clip-path:polygon(0 0,70% 0,70% 100%,0 100%);clip-path:polygon(0 0,70% 0,70% 100%,0 100%)}.tasty-recipes-rating-solid.tasty-recipes-clip-80{-webkit-clip-path:polygon(0 0,80% 0,80% 100%,0 100%);clip-path:polygon(0 0,80% 0,80% 100%,0 100%)}.tasty-recipes-rating-solid.tasty-recipes-clip-90{-webkit-clip-path:polygon(0 0,90% 0,90% 100%,0 100%);clip-path:polygon(0 0,90% 0,90% 100%,0 100%)}.tasty-recipes-rating-outline{display:inline-block;height:1em;line-height:1;width:1em}.tasty-recipes-rating-outline.tasty-recipes-clip-0 svg{fill:url(#tasty-recipes-clip-0)}.tasty-recipes-rating-outline.tasty-recipes-clip-10 svg{fill:url(#tasty-recipes-clip-10)}.tasty-recipes-rating-outline.tasty-recipes-clip-20 svg{fill:url(#tasty-recipes-clip-20)}.tasty-recipes-rating-outline.tasty-recipes-clip-30 svg{fill:url(#tasty-recipes-clip-30)}.tasty-recipes-rating-outline.tasty-recipes-clip-40 svg{fill:url(#tasty-recipes-clip-40)}.tasty-recipes-rating-outline.tasty-recipes-clip-50 svg{fill:url(#tasty-recipes-clip-50)}.tasty-recipes-rating-outline.tasty-recipes-clip-60 svg{fill:url(#tasty-recipes-clip-60)}.tasty-recipes-rating-outline.tasty-recipes-clip-70 svg{fill:url(#tasty-recipes-clip-70)}.tasty-recipes-rating-outline.tasty-recipes-clip-80 svg{fill:url(#tasty-recipes-clip-80)}.tasty-recipes-rating-outline.tasty-recipes-clip-90 svg{fill:url(#tasty-recipes-clip-90)}.tasty-recipes-rating-outline.tasty-recipes-clip-100 svg{fill:url(#tasty-recipes-clip-100)}.comment-content .tasty-recipes-rating-outline.tasty-recipes-clip-100 svg{fill:currentColor}.tasty-recipes,.tasty-recipes-ratings{–tr-star-size:18px;–tr-star-margin:0px}.tasty-recipes-rating,.tasty-recipes-ratings-buttons{color:#f2b955;color:var(–tr-star-color,#f2b955)}.tasty-recipes-comment-form{border:none;margin:0;padding:0}.tasty-recipes-entry-header div.tasty-recipes-rating p,.tasty-recipes-rating-stars,.tasty-recipes-ratings,.tasty-recipes-ratings-buttons{display:inline-flex;font-size:1.1em;font-size:var(–tr-star-size);gap:.3em;gap:var(–tr-star-margin)}.tasty-recipes-entry-header div.tasty-recipes-rating p span.tasty-recipes-rating,.tasty-recipes-rating-stars span.tasty-recipes-rating,.tasty-recipes-ratings span.tasty-recipes-rating,.tasty-recipes-ratings-buttons span.tasty-recipes-rating{cursor:pointer;display:inline-block;font-size:1.1em;font-size:var(–tr-star-size);margin:0;width:1.1em;width:var(–tr-star-size)}.tasty-recipes-entry-header div.tasty-recipes-rating p{display:flex;justify-content:center}.tasty-recipes-ratings-buttons{flex-direction:row-reverse}.tasty-recipes-ratings-buttons input[type=radio]{clip:auto;display:inline-block!important;width:1.1em!important;width:var(–tr-star-size)!important}.tasty-recipes-ratings-buttons>span{position:relative}.tasty-recipes-ratings-buttons>span i{font-style:normal}.tasty-recipes-ratings-buttons>span .unchecked{display:inline-block}.tasty-recipes-ratings-buttons>input:checked~span .unchecked,.tasty-recipes-ratings-buttons>span .checked{display:none}.tasty-recipes-ratings-buttons>input:checked~span .checked{display:inline-block}@media only screen and (min-width:1024px){.tasty-recipes-ratings-buttons:not(:hover)>input:checked~span .unchecked,.tasty-recipes-ratings-buttons>:hover .unchecked,.tasty-recipes-ratings-buttons>:hover~span .unchecked{display:none}.tasty-recipes-ratings-buttons:not(:hover)>input:checked~span .checked,.tasty-recipes-ratings-buttons>:hover .checked,.tasty-recipes-ratings-buttons>:hover~span .checked{display:inline-block}}.tasty-recipes-ratings-buttons>input{cursor:pointer;height:100%;margin:0;margin-left:calc((var(–tr-star-size)+var(–tr-star-margin))*-1);opacity:0;position:relative;z-index:2}.tasty-recipes-rating a,.tasty-recipes-rating a:link{background:none;outline:none;text-decoration:none}.tasty-recipes-screen-reader{clip:rect(1px,1px,1px,1px);word-wrap:normal!important;border:0;-webkit-clip-path:inset(50%);clip-path:inset(50%);height:1px;margin:-1px;overflow:hidden;padding:0;position:absolute;width:1px}.tasty-recipes-rating-link{align-items:center;display:inline-flex}.tasty-recipes-rating-link .rating-label{font-size:80%;padding-left:.4em}.tasty-recipes-selected-minimum-rating .comment-form-comment .required{display:none}.tasty-recipes-has-ratings{text-decoration:none!important}
Party Brownies

Total Time: 55 minutes
Yield: 12-16 brownies
const share_pin_buttons = document.getElementsByClassName( ‘share-pin button’ );
if ( share_pin_buttons ) {
for ( let share_key = 0; share_key {
e.stopPropagation();
window.open(e.target.dataset.href,’targetWindow’,’toolbar=no,location=no,status=no,menubar=no,scrollbars=yes,resizable=yes,width=500,height=500′);
return false;
} );
}
}
Description
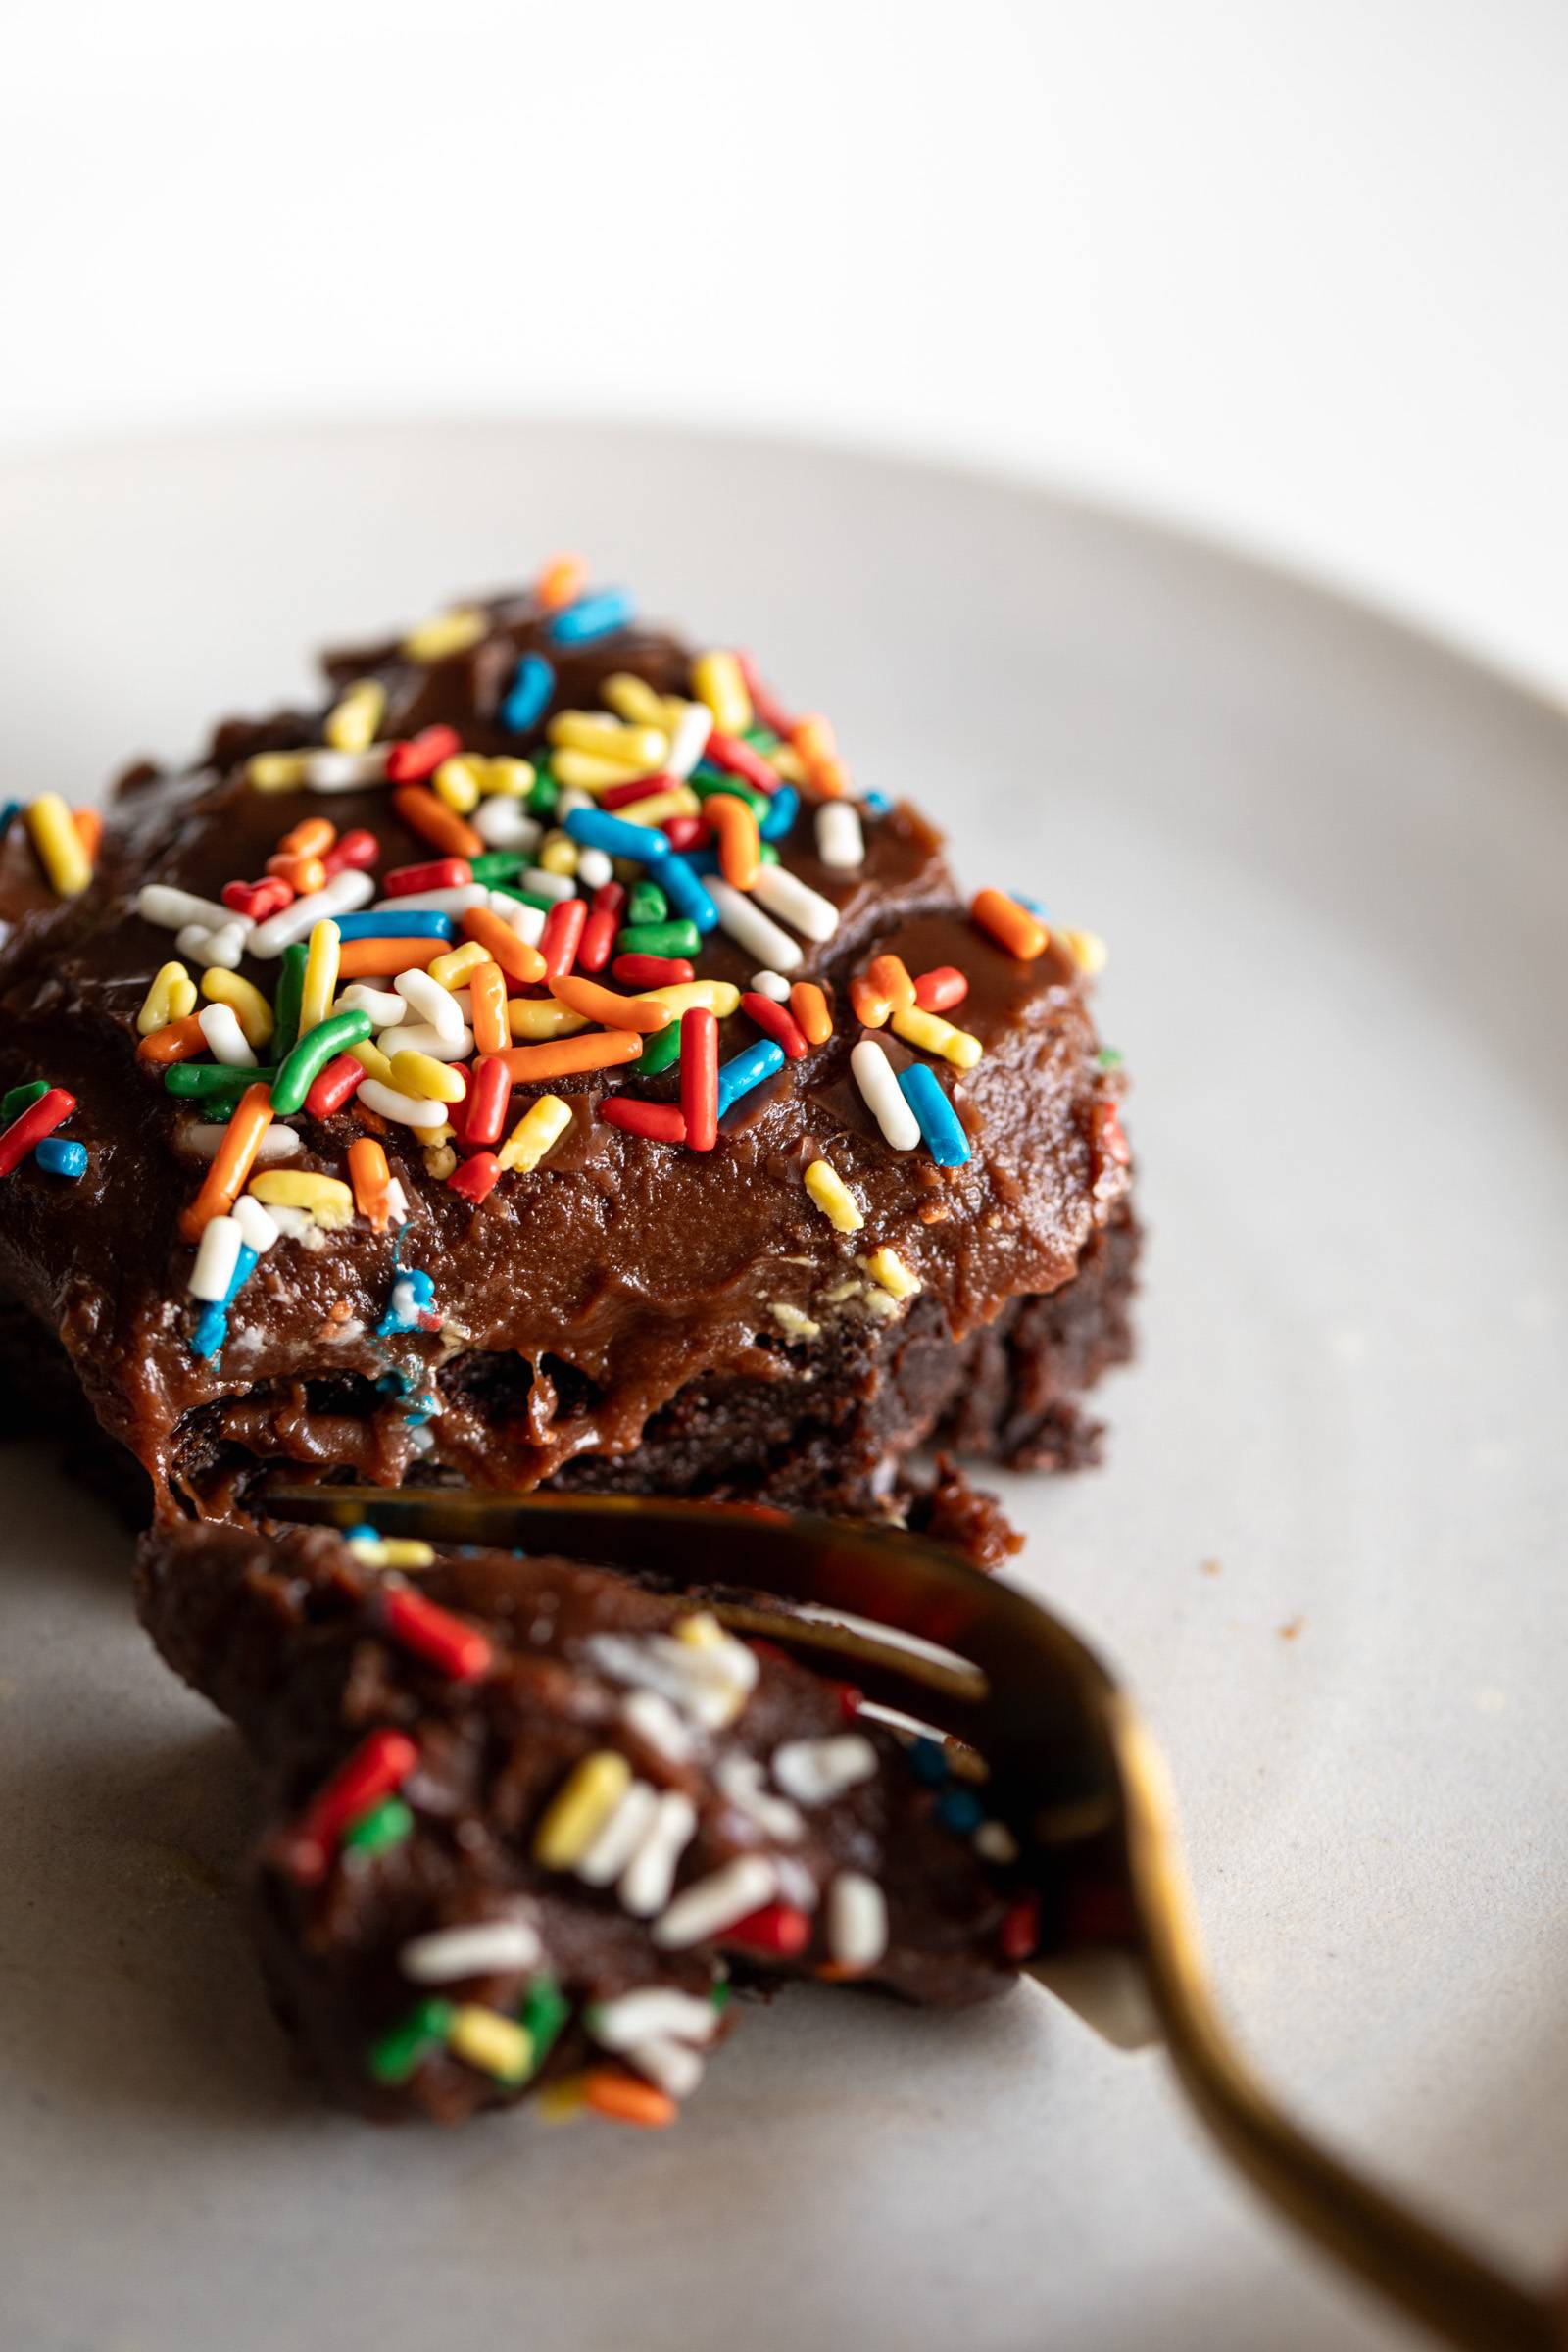
Brownies covered with a thick layer of fudge frosting and rainbow sprinkles. The best way to jazz up a box of brownie mix!
Ingredients
Units
- 1 box brownie mix (usually 16–18 ounces)
- 6 tablespoons butter
- 1/3 cup milk
- 1 1/4 cups granulated sugar
- 1 teaspoon vanilla extract
- 1/2 teaspoon coarse kosher salt
- 1 cup semi-sweet chocolate chips
- rainbow sprinkles
Instructions
- Make the brownies: Bake the brownies according to package directions in a 9×13 pan or slightly smaller rectangular pan (see note 1). I usually try to let them cool for an hour before frosting them.
- Make the frosting: Melt the butter in a small saucepan over medium heat. Add the milk, sugar, vanilla, and salt; bring to a consistent boil over medium heat and cook for 45 seconds (it should be at a rolling boil for the full 45 seconds). Set a timer so you don’t overcook it!
- Mix in the chocolate: Turn off the heat and add chocolate chips and stir to combine (if there are stubborn lumps, just whisk it for a minute).
- Frost the brownies: Working quickly, pour the frosting over the brownies and spread evenly and add sprinkles. The frosting will start to set immediately, so don’t be a slow poke with this part (see note 2)!
- Rest and serve: Let the frosting rest for 15-30 minutes, depending on how clean you want your slices to be! Cut, serve, PARTY TIME!
Notes
1. A 9×13 is what my sister always uses – but I also love to use a smaller rectangular pan if you have one (mine is 10.5 x 7.5) to make the whole thing just slightly thicker. A square pan will make the frosting too thick, so I would not recommend that.
2 – If you are scrambling to find your sprinkles when the frosting starts to set on top (been there), just add the sprinkles to the dry-ish top and use the back of a spoon to gently tap them into the frosting a bit so they will hold in place.
- Prep Time: 10 minutes
- Cook Time: 45 minutes
- Category: Dessert
- Method: Bake
- Cuisine: American
(function(){
window.addEventListener( ‘message’, function( event ){
if ( ( ‘https://nutrifox.com’ !== event.origin && ‘https://nutrifox.test’ !== event.origin ) ||
typeof event.data !== ‘string’ ) {
return;
}
var payload = JSON.parse( event.data );
switch ( payload.event ) {
case ‘setHeight’:
var iframe = document.getElementById( ‘nutrifox-label-‘ + payload.recipeId );
iframe.style.height = payload.height + ‘px’;
break;
}
} );
}());
Keywords: brownies, brownie mix, boxed brownies, easy brownies
window.tasty_recipes_min_rating = 4;
(function(){
var bothEquals = function( d1, d2, D ) {
var ret = 0;
if (d1<=D) {
ret++;
}
if (d2<=D) {
ret++;
}
return ret === 2;
};
var frac =function frac(x,D,mixed){var n1=Math.floor(x),d1=1;var n2=n1+1,d2=1;if(x!==n1)while(bothEquals(d1,d2,D)){var m=(n1+n2)/(d1+d2);if(x===m){if(d1+d2d2)d2=D+1;else d1=D+1;break}else if(xD){d1=d2;n1=n2}if(!mixed)return[0,n1,d1];var q=Math.floor(n1/d1);return[q,n1-q*d1,d1]};frac.cont=function cont(x,D,mixed){var sgn=x<0?-1:1;var B=x*sgn;var P_2=0,P_1=1,P=0;var Q_2=1,Q_1=0,Q=0;var A=Math.floor(B);while(Q_1<D){A=Math.floor(B);P=A*P_1+P_2;Q=A*Q_1+Q_2;if(B-AD){if(Q_1>D){Q=Q_2;P=P_2}else{Q=Q_1;P=P_1}}if(!mixed)return[0,sgn*P,Q];var q=Math.floor(sgn*P/Q);return[q,sgn*P-q*Q,Q]};
window.tastyRecipesVulgarFractions = JSON.parse(decodeURIComponent(“%7B%22%C2%BC%22%3A%221%2F4%22%2C%22%C2%BD%22%3A%221%2F2%22%2C%22%C2%BE%22%3A%223%2F4%22%2C%22%E2%85%93%22%3A%221%2F3%22%2C%22%E2%85%94%22%3A%222%2F3%22%2C%22%E2%85%95%22%3A%221%2F5%22%2C%22%E2%85%96%22%3A%222%2F5%22%2C%22%E2%85%97%22%3A%223%2F5%22%2C%22%E2%85%98%22%3A%224%2F5%22%2C%22%E2%85%99%22%3A%221%2F6%22%2C%22%E2%85%9A%22%3A%225%2F6%22%2C%22%E2%85%9B%22%3A%221%2F8%22%2C%22%E2%85%9C%22%3A%223%2F8%22%2C%22%E2%85%9D%22%3A%225%2F8%22%2C%22%E2%85%9E%22%3A%227%2F8%22%7D”));
window.tastyRecipesFormatAmount = function(amount, el) {
if ( parseFloat( amount ) === parseInt( amount ) ) {
return amount;
}
var roundType=”frac”;
if (typeof el.dataset.amountShouldRound !== ‘undefined’) {
if (‘false’ != el.dataset.amountShouldRound) {
if ( ‘number’ === el.dataset.amountShouldRound ) {
roundType=”number”;
} else if (‘frac’ === el.dataset.amountShouldRound) {
roundType=”frac”
} else if (‘vulgar’ === el.dataset.amountShouldRound) {
roundType=”vulgar”
} else {
roundType=”integer”;
}
}
}
if (‘number’ === roundType) {
amount = Number.parseFloat(amount).toPrecision(2);
} else if (‘integer’ === roundType) {
amount = Math.round(amount);
} else if (‘frac’ === roundType || ‘vulgar’ === roundType) {
var denom = 8;
if (typeof el.dataset.unit !== ‘undefined’) {
var unit = el.dataset.unit;
if ([‘cups’,’cup’,’c’].includes(unit)) {
denom = 4;
if (0.125 === amount) {
denom = 8;
}
if (“0.1667″ === Number.parseFloat( amount ).toPrecision(4)) {
denom = 6;
}
}
if ([‘tablespoons’,’tablespoon’,’tbsp’].includes(unit)) {
denom = 2;
}
if ([‘teaspoons’,’teaspoon’,’tsp’].includes(unit)) {
denom = 8;
}
}
var amountArray = frac.cont( amount, denom, true );
var newAmount=””;
if ( amountArray[1] !== 0 ) {
newAmount = amountArray[1] + ‘/’ + amountArray[2];
if (‘vulgar’ === roundType) {
Object.keys(window.tastyRecipesVulgarFractions).forEach(function(vulgar) {
if (newAmount === window.tastyRecipesVulgarFractions[vulgar]) {
newAmount = vulgar;
}
});
}
}
if ( newAmount ) {
newAmount=” ” + newAmount;
}
if ( amountArray[0] ) {
newAmount = amountArray[0] + newAmount;
}
amount = newAmount;
}
return amount;
};
window.tastyRecipesUpdatePrintLink = () => {
const printLinks = document.querySelectorAll( ‘.tasty-recipes-print-link’ );
const printButtons = document.querySelectorAll( ‘.tasty-recipes-print-button’ );
const printButton = document.querySelector( ‘.tasty-recipes-print-button’ );
if ( ! printButton ) {
return;
}
const printURL = new URL( printButton.href );
const searchParams = new URLSearchParams( printURL.search );
const unitButton = document.querySelector( ‘.tasty-recipes-convert-button-active’ );
const scaleButton = document.querySelector( ‘.tasty-recipes-scale-button-active’ );
let unit=””;
let scale=””;
if ( unitButton ) {
unit = unitButton.dataset.unitType;
searchParams.delete(‘unit’);
searchParams.set( ‘unit’, unit );
}
if ( scaleButton ) {
scale = scaleButton.dataset.amount;
searchParams.set( ‘scale’, scale );
}
const paramString = searchParams.toString();
const newURL = ” === paramString ? printURL.href : printURL.origin + printURL.pathname + ‘?’ + paramString;
printLinks.forEach( ( el ) => {
el.href = newURL;
});
printButtons.forEach( ( el ) => {
el.href = newURL;
});
};
document.addEventListener( ‘DOMContentLoaded’, () => {
if ( ! window.location.href.includes( ‘/print/’ ) ) {
return;
}
const searchParams = new URLSearchParams( window.location.search );
const unit = searchParams.get( ‘unit’ );
const scale = searchParams.get( ‘scale’ );
if ( unit && ( ‘metric’ === unit || ‘usc’ === unit ) ) {
document.querySelector( ‘.tasty-recipes-convert-button[data-unit-type=”‘ + unit + ‘”]’ ).click();
}
if ( scale && Number(scale) > 0 ) {
document.querySelector( ‘.tasty-recipes-scale-button[data-amount=”‘ + Number(scale) + ‘”]’ ).click();
}
});
}());
(function(){
var buttonClass=”tasty-recipes-convert-button”,
buttonActiveClass=”tasty-recipes-convert-button-active”,
buttons = document.querySelectorAll(‘.tasty-recipes-convert-button’);
if ( ! buttons ) {
return;
}
buttons.forEach(function(button){
button.addEventListener(‘click’, function(event){
event.preventDefault();
var recipe = event.target.closest(‘.tasty-recipes’);
if ( ! recipe ) {
return;
}
var otherButtons = recipe.querySelectorAll(‘.’ + buttonClass);
otherButtons.forEach(function(bt){
bt.classList.remove(buttonActiveClass);
});
button.classList.add(buttonActiveClass);
var unitType = button.dataset.unitType;
var dataset=”nf” + unitType.charAt(0).toUpperCase() + unitType.slice(1);
var convertables = recipe.querySelectorAll(‘span[data-nf-original]’);
convertables.forEach(function(convertable){
if (typeof convertable.dataset.amountOriginalType === ‘undefined’
&& ‘usc’ === convertable.dataset.nfOriginal) {
if (-1 !== convertable.innerText.indexOf(‘/’)) {
convertable.dataset.amountOriginalType=”frac”;
}
if (-1 !== convertable.innerText.indexOf(‘.’)) {
convertable.dataset.amountOriginalType=”number”;
}
Object.keys(window.tastyRecipesVulgarFractions).forEach(function(vulgar) {
if (-1 !== convertable.innerText.indexOf(vulgar)) {
convertable.dataset.amountOriginalType=”vulgar”;
}
});
}
convertable.innerText = convertable.dataset[dataset];
if (typeof convertable.dataset.unit !== ‘undefined’) {
convertable.dataset.unit = convertable.dataset[dataset + ‘Unit’];
}
if (typeof convertable.dataset.amount !== ‘undefined’) {
convertable.dataset.amount = convertable.dataset[dataset];
if (‘metric’ === unitType) {
convertable.dataset.amountShouldRound = parseInt(convertable.dataset.amount) >= 10 ? ‘integer’ : ‘number’;
} else if (typeof convertable.dataset.amountOriginalType !== ‘undefined’) {
convertable.dataset.amountShouldRound = convertable.dataset.amountOriginalType;
} else {
convertable.dataset.amountShouldRound = false;
}
convertable.innerText = window.tastyRecipesFormatAmount(convertable.dataset[dataset], convertable);
}
if (convertable.classList.contains(‘nutrifox-unit’)) {
if (‘gram’ === convertable.dataset[dataset]) {
convertable.innerText=”grams”;
}
}
});
document.querySelectorAll(‘.tasty-recipes-scale-button-active’).forEach(function(scaleButton){
scaleButton.click();
});
window.tastyRecipesUpdatePrintLink();
});
});
}());
(function(){
document.querySelectorAll(‘[data-tr-ingredient-checkbox]’).forEach(function(el) {
var input = el.querySelector(‘.tr-ingredient-checkbox-container input[type=”checkbox”]’);
if ( ! input ) {
return;
}
if (input.checked) {
el.dataset[‘trIngredientCheckbox’] = ‘checked’;
}
el.addEventListener(‘click’, function(event) {
if ( ‘A’ === event.target.nodeName
|| ‘INPUT’ === event.target.nodeName
|| ‘LABEL’ === event.target.nodeName ) {
return;
}
input.click();
});
input.addEventListener(‘change’, function() {
el.dataset[‘trIngredientCheckbox’] = input.checked ? ‘checked’ : ”;
});
});
}());
window.TastyRecipes = window.TastyRecipes || {};
window.TastyRecipes.cookMode = {
wakeLockApi: false,
wakeLock: false,
cookModeSelector: ‘.tasty-recipes-cook-mode’,
init() {
if (“wakeLock” in navigator && “request” in navigator.wakeLock) {
this.wakeLockApi = navigator.wakeLock;
}
const cookModes = document.querySelectorAll(this.cookModeSelector);
if (cookModes.length > 0) {
for (const cookMode of cookModes) {
if (this.wakeLockApi) {
cookMode.querySelector(‘input[type=”checkbox”]’).addEventListener(“change”, event => {
this.checkboxChange(event.target);
}, false);
} else {
cookMode.style.display = “none”;
}
}
}
},
checkboxChange(checkbox) {
checkbox.checked ? this.lock() : this.unlock();
},
setCheckboxesState(state) {
const checkboxes = document.querySelectorAll(this.cookModeSelector + ‘ input[type=”checkbox”]’);
for (const checkbox of checkboxes) {
checkbox.checked = state;
}
},
async lock() {
try {
this.wakeLock = await this.wakeLockApi.request(“screen”);
this.wakeLock.addEventListener(“release”, event => {
this.wakeLock = false;
this.setCheckboxesState(false);
});
this.setCheckboxesState(true);
} catch (error) {
this.setCheckboxesState(false);
}
},
unlock() {
if (this.wakeLock) {
this.wakeLock.release();
this.wakeLock = false;
}
this.setCheckboxesState(false);
}
};
(function(callback) {
if (document.readyState !== “loading”) {
callback();
} else {
document.addEventListener(“DOMContentLoaded”, callback);
}
})(() => {
window.TastyRecipes.cookMode.init();
});
window.TastyRecipes = window.TastyRecipes || {};
window.TastyRecipes.ratings = {
init( min_rating ) {
this.min_rating = min_rating;
this.recipeRatingReflectInRespondSection();
this.addBodyClassBasedOnSelectedRating();
this.backwardCompRespondRatingPosition();
},
recipeRatingReflectInRespondSection() {
const ratings = document.querySelectorAll(‘.tasty-recipes-no-ratings-buttons [data-rating]’);
if (ratings.length {
this.fireRatingInRespond( event.target.dataset.rating );
} );
}
},
fireRatingInRespond( rating ) {
const ratingInput = document.querySelector(‘.tasty-recipes-rating[value=”‘ + rating + ‘”]’);
if ( ! ratingInput ) {
return;
}
ratingInput.click();
},
addBodyClassBasedOnSelectedRating() {
const ratingInputs = document.querySelectorAll(‘input.tasty-recipes-rating’);
if ( ratingInputs.length {
let selectedRating = event.target.getAttribute( ‘value’ );
this.handleBodyClassByRating( selectedRating );
this._toggle_comment_textarea_required( selectedRating );
} );
}
},
handleBodyClassByRating( rating ) {
if ( rating = comment_textarea.length ) {
return;
}
if ( rating < this.min_rating ) {
comment_textarea.setAttribute( 'required', '' );
return;
}
comment_textarea.removeAttribute('required');
},
backwardCompRespondRatingPosition() {
const ratings_buttons = document.querySelector( '#respond .tasty-recipes-ratings-buttons' );
if ( !ratings_buttons || ratings_buttons.length {
if ( rating_span === event.target ) {
return;
}
rating_span.previousElementSibling.click();
} );
}
}
};
(function(callback) {
if (document.readyState !== “loading”) {
callback();
} else {
document.addEventListener(“DOMContentLoaded”, callback);
}
})(() => {
window.TastyRecipes.ratings.init( window.tasty_recipes_min_rating );
});
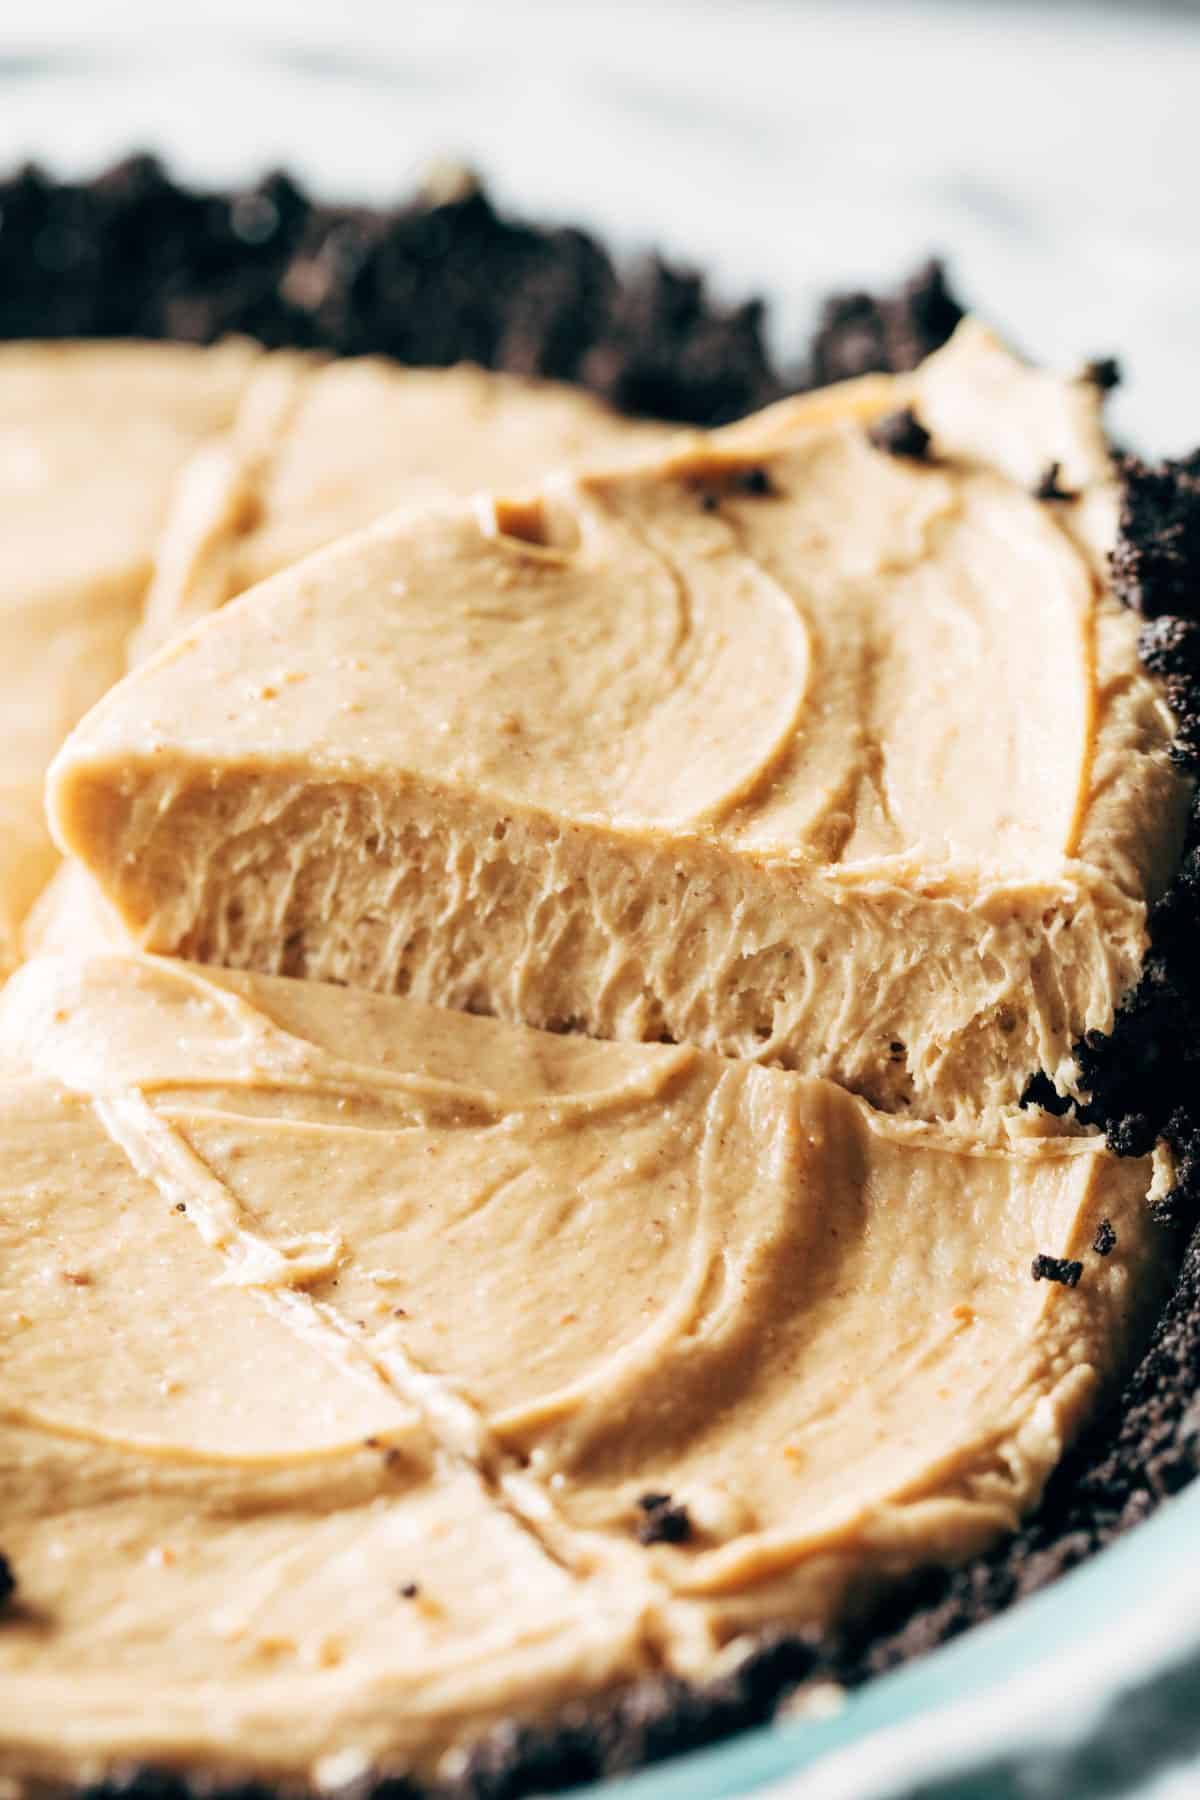
Three More Easy Desserts For A Crowd


The post Party Brownies appeared first on Pinch of Yum.