Quick Summary
Crispy Chicken Croissant Sandwich- crispy chicken on a Parmesan crusted buttery croissant with fresh Romaine lettuce that is tossed in a creamy lemon dressing. Add creamy avocado slices and a drizzle of hot honey to make the sandwich extra special! Everyone loves this gourmet sandwich.

Pin this now to find it later
You can’t go wrong with a GOOD chicken sandwich. I am talking about a fried chicken sandwich, grilled chicken sandwich, classic chicken salad sandwich, and this Crispy Chicken Croissant Sandwich. All are WINNERS, but every time I make this crispy chicken sandwich, it gets RAVE reviews. Let’s break it down.
The sandwich starts with juicy, crispy chicken that is perfectly golden brown and tender. Place the chicken on a buttery, flaky croissant that has a salty Parmesan crust. Next, top the chicken with Romaine lettuce that has been tossed in a creamy lettuce dressing. Add creamy avocado slices and a drizzle of hot honey to finish the sandwich. The sweet and savory flavors and contrasting textures are PERFECTION.
This sandwich is EPIC! It looks and tastes gourmet, but I promise it’s easy to make. Enjoy for lunch or dinner. You can serve with chips, fruit salad, sweet potato fries, or potato wedges.
I guarantee your family and friends will LOVE this chicken sandwich.
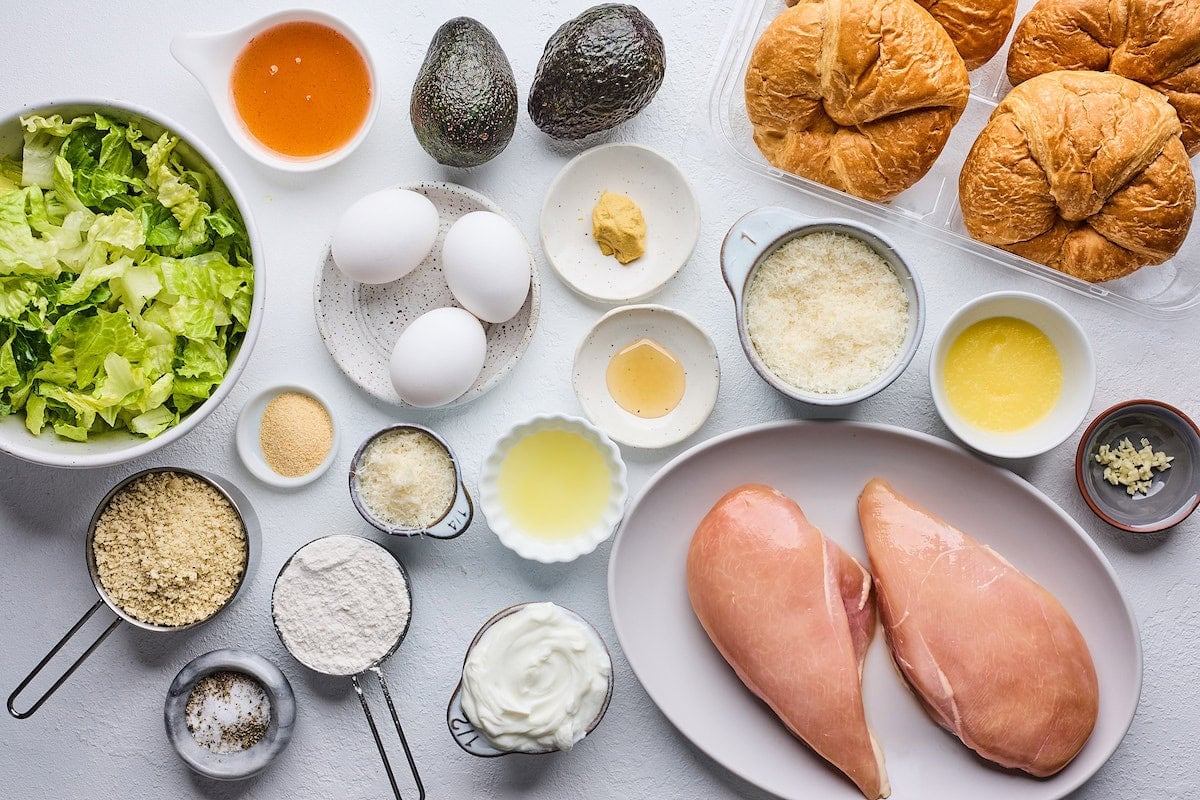
Ingredients
Scroll down to the recipe card for measurements and instructions.
For the chicken:
- Chicken– use boneless skinless chicken breasts, you will need about 1 ½ pounds.
- Flour– for coating the chicken.
- Garlic powder– add a little garlic powder to the flour to season the chicken.
- Eggs– the eggs act as an adhesive, helping the breading stick to the chicken better. It also helps create a golden brown, crispy crust when cooked, adding texture and flavor.
- Panko– panko bread crumbs create a crispy coating.
- Parmesan cheese– the salty Parmesan adds great flavor to the chicken.
For the creamy lemon dressing:
- Greek yogurt– use plain Greek yogurt. Fat-free, 2% or whole milk will work.
- Lemon juice– always use fresh lemon juice.
- Dijon mustard– sharp and tangy!
- Honey– to sweeten the dressing.
- Garlic– minced.
For the sandwiches:
- Croissants– go to your favorite bakery and pick up freshly baked croissants.
- Melted butter– for brushing on the croissants.
- Parmesan cheese– to create Parmesan crusted croissants. They are next level! I also mix Parmesan cheese into the lettuce mixture.
- Romaine lettuce– chopped!
- Avocados– sliced.
- Hot honey– for drizzling! Optional, but SO good!

How to Make Crispy Chicken Croissant Sandwiches
- Place the chicken breasts on a cutting board. Use a sharp knife to slice the chicken breast halves horizontally, butterflying them open. Cut each breast in half, to create 4 equal size pieces.
- In a medium shallow bowl or baking dish, combine the flour, garlic powder, ½ teaspoon salt, and ¼ teaspoon black pepper. Set aside.
- In a separate medium bowl or baking dish, whisk the eggs and set aside.
- In a third medium shallow bowl or baking dish, combine the panko and Parmesan cheese.
- Dredge the chicken breasts in the flour mixture, coating both sides, shaking off excess. Next, dip the chicken into the eggs, letting any excess drain off. Add the chicken to the panko mixture and press until both sides are well coated. Repeat until all pieces are all breaded.

- In a large cast iron skillet, heat the oil over medium high heat. Once the oil is hot, carefully place 1 or 2 pieces of chicken into the pan and cook for 2 to 3 minutes, on each side, or until chicken is cooked through.
- Remove the chicken to a paper towel lined plate and repeat the process with the remaining chicken. Add more oil, if necessary.

- To make the lemon dressing, combine the Greek yogurt, lemon juice, mustard, honey, garlic, salt, and pepper in a small bowl or jar. Whisk until smooth. Set aside.

- Preheat the broiler. Use a serrated knife to cut the croissants in half lengthwise. Place the croissants on a large baking sheet.
- Brush the insides and top exterior with melted butter. Sprinkle ¼ cup of the Parmesan cheese evenly on the tops of the croissants.
- Broil until slightly toasted and Parmesan cheese is melted. This will only take 1 to 2 minutes, so don’t walk away. Remove from the oven.
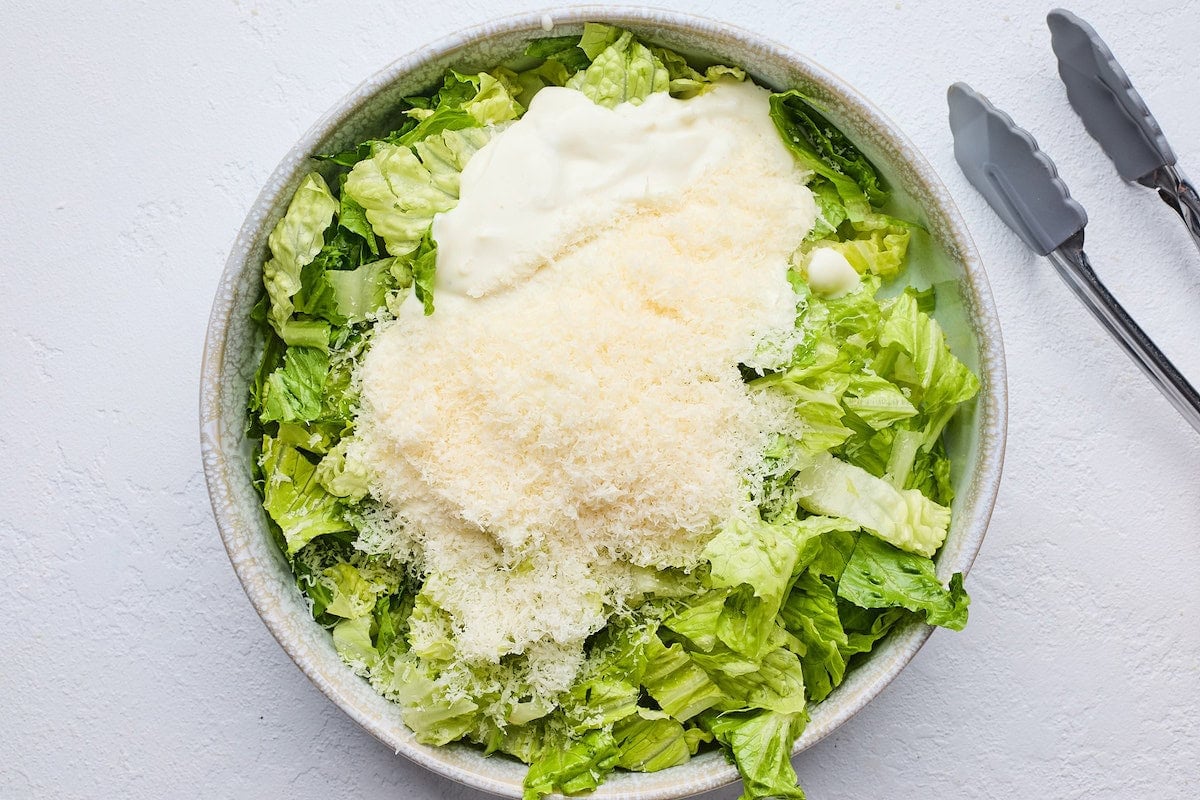
- In a medium bowl, combine the lettuce, remaining Parmesan cheese, and dressing. Use tongs to toss until lettuce is well coated.

- To assemble the sandwiches, place the chicken on the bottom halves of the croissants. You may have to cut the chicken to fit the croissant. It’s ok if some chicken hangs out of the sandwich. Drizzle with hot honey, if using.
- Top with avocado slices, lettuce mixture, and sandwich with the Parmesan crusted croissant half.
- Serve immediately.

Variations
- Instead of using creamy lemon dressing, you can use Caesar dressing and make it a crispy chicken Caesar salad sandwich.
- Add pickled red onions or pickles.
- Add fresh tomato slices to the sandwich.
- Top the chicken with a slice of provolone cheese.
- Add a few slices of bacon. Why not?
- If you don’t want to use a croissant, you can use ciabatta bread, sourdough, or a brioche bun.
What to Serve on the Side
How to Store
- After the sandwiches are assembled, they are best the day they are made.
- You can make the chicken advance and store in an airtight container in the fridge for up to 3 days. Reheat in the air fryer or oven.
- You can also make the creamy lemon dressing in advance, it will keep in a jar in the fridge for up to 1 week.

More Sandwich Recipes

Crispy Chicken Croissant Sandwich
Crispy chicken on a Parmesan crusted croissant with fresh Romaine lettuce that is tossed in a creamy lemon dressing. Add creamy avocado slices and a drizzle of hot honey to make the sandwich extra special! Everyone loves this gourmet sandwich.
Prevent your screen from going dark
For the creamy lemon dressing:
For the sandwiches:
- 4 croissants
- 2 tablespoons melted butter
- 3/4 cup Parmesan cheese, divided
- 4 cups chopped Romaine lettuce
- 2 avocados, sliced
- Hot honey, for drizzling, optional
-
Place the chicken breasts on a cutting board. Use a sharp knife to slice the chicken breast halves horizontally, butterflying them open. Cut each breast in half, to create 4 equal size pieces.
-
In a medium shallow bowl or baking dish, combine the flour, garlic powder, ½ teaspoon salt, and ¼ teaspoon black pepper. Set aside.
-
In a separate medium bowl or baking dish, whisk the eggs and set aside.
-
In a third medium shallow bowl or baking dish, combine the panko and Parmesan cheese.
-
Dredge the chicken breasts in the flour mixture, coating both sides, shaking off excess. Next, dip the chicken into the eggs, letting any excess drain off. Add the chicken to the panko mixture and press until both sides are well coated. Repeat until all pieces are all breaded.
-
In a large cast iron skillet, heat the oil over medium high heat. Once the oil is hot, carefully place 1 or 2 pieces of chicken into the pan and cook for 2 to 3 minutes, on each side, or until chicken is cooked through.
-
Remove the chicken to a paper towel lined plate and repeat the process with the remaining chicken. Add more oil, if necessary.
-
To make the lemon dressing, combine the Greek yogurt, lemon juice, mustard, honey, garlic, salt, and pepper in a small bowl or jar. Whisk until smooth. Set aside.
-
Preheat the broiler. Use a serrated knife to cut the croissants in half lengthwise. Place the croissants on a large baking sheet. Brush the insides and top exterior with melted butter. Sprinkle ¼ cup of the Parmesan cheese evenly on the tops of the croissants. Broil until slightly toasted and Parmesan cheese is melted. This will only take 1 to 2 minutes, so don’t walk away. Remove from the oven.
-
In a medium bowl, combine the lettuce, remaining Parmesan cheese, and dressing. Use tongs to toss until lettuce is well coated.
-
To assemble the sandwiches, place the chicken on the bottom halves of the croissants. You may have to cut the chicken to fit the croissant. It’s ok if some chicken hangs out of the sandwich. Drizzle with hot honey, if using. Top with avocado slices, lettuce mixture, and sandwich with the Parmesan crusted croissant half. Serve immediately.
Serving: 4g, Calories: 675kcal, Carbohydrates: 64g, Protein: 38g, Fat: 38g, Saturated Fat: 15g, Polyunsaturated Fat: 4g, Monounsaturated Fat: 18g, Cholesterol: 232mg, Sodium: 930mg, Potassium: 1060mg, Fiber: 10g, Sugar: 11g, Vitamin A: 5237IU, Vitamin C: 16mg, Calcium: 410mg, Iron: 5mg
Have you tried this recipe?
Leave a comment below and share a photo on Instagram. Tag @twopeasandpod and hashtag it with #twopeasandtheirpod


")